
How to Start Embroidery: Everything You Need to Pick Up a Needle and Thread
I’ll be honest — I never thought I’d be the kind of person who sits down with a hoop and some thread to stitch tiny flowers onto fabric. And yet, here I am, completely hooked. Hand embroidery has a way of doing that to people. It’s meditative, creative, surprisingly portable, and the barrier to entry is almost laughably low. If you’ve been wondering how to start embroidery, too, consider this your friendly nudge to just go for it.
Let me walk you through everything I wish I’d known when I started.
What exactly is embroidery (and why should you care)?
At its most basic, hand embroidery is the art of decorating fabric with needle and thread. That’s it. The finished product can be anything from a simple monogram on a handkerchief to an elaborate wall hanging that will take years to stitch. The stitches themselves range from dead-simple (a straight stitch is literally just in and out) to genuinely complex techniques that take months to master.
But here’s the thing — you don’t need months. You can create something beautiful on your very first attempt. That’s a rare quality in any craft, and it’s a big part of why hand embroidery has seen such a massive revival in recent years.
As for why you should care: hand embroidery checks a lot of boxes. It’s inexpensive to start, requires almost no space, and is hugely versatile. The same skills will serve to make decorative hoop art and for practical applications like visible mending or garment embellishments.
There’s also solid evidence that repetitive hand crafts like embroidery can reduce stress and anxiety — the British Journal of Occupational Therapy published research indicating that knitting (and by extension, similar needle crafts) had significant positive effects on mood and cognitive function for practitioners. Embroidery works through the same basic mechanism: focused, rhythmic movement that pulls your attention away from the noise in your head.
To learn more about the benefits of hand embroidery, read these:
- Benefits of hand embroidery: 10 reasons to learn hand embroidery today
- Embroidery as therapy: 8 ways hand embroidery can boost your mental health and emotional wellbeing

Is hand embroidery a good hobby for you?
Embroidery is genuinely accessible to people of almost any age or skill level. I’ve seen kids as young as six or seven work on simple stitches with blunt-tipped needles and thick thread. I’ve seen retirees who picked it up for the first time at seventy and became obsessed within a week. My middle-aged friend with a diagnosis of multiple sclerosis was advised to start stitching to slow down the progression of neural damage. There’s no minimum age requirement and certainly no maximum one.
It’s also for people across the whole creativity spectrum. You don’t need to be an artist. And you don’t need to be able to draw. A huge part of embroidery involves tracing or transferring patterns onto fabric before you even start stitching, which means even people who swear they have zero artistic ability can produce lovely, precise work. Besides that, some embroidery techniques, like cross-stitch or Blackwork, require mathematical thinking and a lot of counting.
And yes — embroidery is for men too. Historically, embroidery was practiced by men just as much as women. Medieval knights had embroidered surcoats. Sailors stitched elaborate decorative work during long voyages. The gendering of needlework as exclusively feminine is a relatively recent and largely Western cultural assumption, not a historical fact. Today, a growing number of male embroiderers are pushing back on that assumption and producing some genuinely stunning work.
You can read more about prejudice towards hand embroidery in my article “Common Myths About Hand Embroidery: Debunked” on this blog.
Now it is the perfect time to start embroidery
2026 is a year when analog hobbies are taking up space in the lives of modern generations. People got tired of the infinite scroll and fast-paced digital world. Many are turning back to non-digital hobbies that allow them to disconnect and enjoy a slower pace of leisure time. Hand embroidery is one of the popular options to add to the list of analog hobbies to try.
But even beyond the cultural moment, now is a great time practically. The internet has made learning hand embroidery easier than ever. Free tutorials on YouTube, embroidery patterns and guides on Etsy and Pinterest, digital books, online courses, thriving Reddit communities like r/Embroidery — the resources available to a beginner today would have seemed unimaginable to someone who learned the craft thirty years ago. You don’t need to find a local class or inherit knowledge from a grandparent anymore (though both of those are still lovely options if they’re available to you).
To learn more about embroidery communities, read the article “Embroidery Resource Guide: Suppliers, Communities, and Online Platforms”.
Starting now also means you have access to a remarkable variety of materials. Thread manufacturers like DMC and Anchor offer hundreds of colors, and the online marketplace for embroidery supplies — kits, patterns, specialty fabrics, and unusual threads — is vast and competitive, keeping prices accessible.
To learn more about embroidery tools and materials, read these:
- An in-depth guide to hand embroidery fabrics. Discover what the best fabric for hand embroidery is and why
- Hand Embroidery Needles: The Ultimate Guide to Choosing the Right One
- Best Hand Embroidery Hoops for Modern Stitching: Types, Sizes, and How to Choose One
- Choosing the Perfect Embroidery Hoop Stand: Every Stitcher’s Must-Have
- Mini Embroidery Hoops: How to choose the best tiny hoop and how to use them
- Embroidery floss and threads. An in-depth guide to hand embroidery threads, floss, and other types of yarn you can use to embroider
- Hand Embroidery Accessories Every Stitcher Will Love: Cute, Clever & Useful
- Scissors for hand embroidery
- Hand Embroidery With Metallic Thread: Tips & Tricks for Smooth Stitching
- The Ultimate Guide to Water-Soluble Stabilizers for Hand Embroidery
- Embroidery Stabilizers: Fabric Stabilizers for Hand Embroidery You Must Know

If you wish to have a list of embroidery supplies to start stitching on hand, download a PDF checklist of embroidery tools and materials for beginners with pictures.
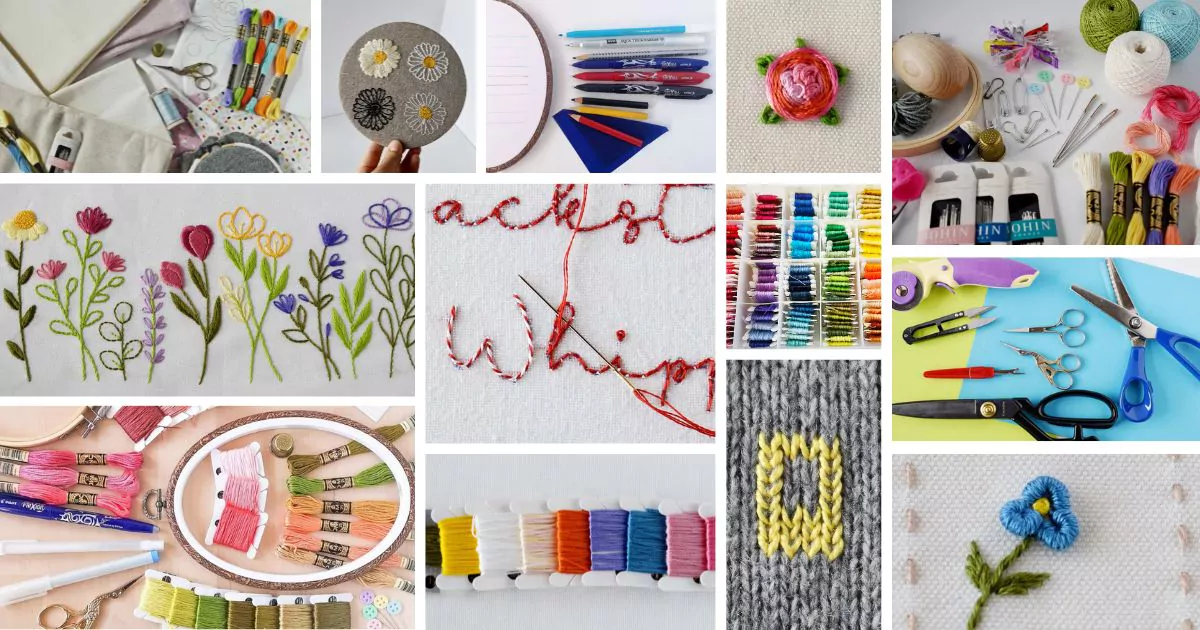
Supplies you will actually need to get started
Crafters often joke, that buying craft supplies is a separate hobby. Don’t fall into this trap! Here’s what you actually need to begin:
An embroidery hoop

These are the circular frames — usually wood or plastic — that hold your fabric taut while you stitch. Start with a 6-inch or 8-inch hoop.
Fabric

Plain, tightly-woven cotton fabric of medium weight works perfectly for beginners. Quilting cotton or even a piece of white cotton from an old pillowcase will do the job. Weave-count matters less than stability — you want something that doesn’t stretch or pucker when pulled through a needle.
Embroidery floss

DMC is the industry standard brand and for good reason — the colors are consistent, the thread is strong, and you can find it almost everywhere. Embroidery floss comes in skeins of six strands twisted together. For most beginner stitches, you’ll separate two or three strands to use at a time.
Needles

Embroidery needles (also called crewel needles) have a slightly larger eye than regular sewing needles, making them easier to thread. A pack of assorted sizes costs almost nothing and will last you a very long time.
Small scissors

Sharp embroidery scissors with pointed tips make a genuine difference. You’ll be cutting thread frequently and getting into tight spaces.
That’s truly it. A basic starter kit covering all of the above can be assembled for under fifteen dollars. Read my article “Embroidery materials for beginners. All you need to start learning hand embroidery” for a full list and brand recommendations.
Also, most craft stores sell beginner embroidery kits that include everything — a hoop, fabric with a pre-printed pattern, floss, and a needle — which is an excellent way to start if you want to skip the decision-making. Here are some beginner-friendly hand embroidery kits you can get online:


The learning curve: Stitches, techniques, patterns, and projects
When I was starting out, I made the mistake of choosing a pattern that was way too ambitious. It was a dense, shaded botanical illustration. I ended up with a tangled mess and frustration. What I actually needed was a simple outline with a handful of basic stitches.
For your first project, look for patterns explicitly labeled for beginners and that involve only a few fundamental stitches.
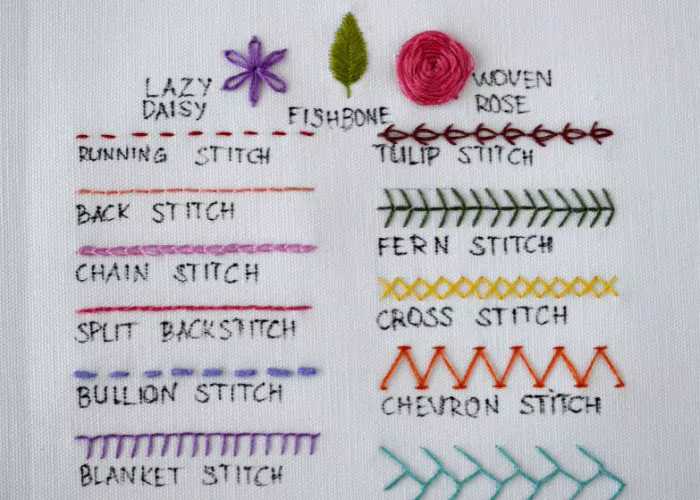
Stitches to learn first

Running Stitch is the simplest possible stitch — needle up, needle down, repeat. It creates a dashed line and serves as the foundation for everything else.

Back Stitch creates a solid, unbroken line and is probably the most versatile beginner stitch.

Satin Stitch fills in solid areas of color and looks impressive despite being straightforward in principle.
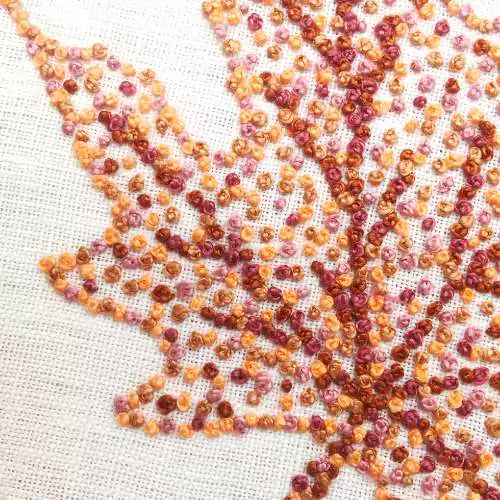
French Knot takes a little practice but creates a small, textured dot — wonderful for flower centers and adding dimension.

Chain Stitch is a decorative stitch for multiple tasks – from outlines to filling, lettering, and decorative borders.
The best way to learn hand embroidery stitches is to practice while stitching a sampler. These projects are created with beginners in mind, so you can choose your favorite way of learning and learn at your own pace.
Five essential hand embroidery stitches for beginners
This free detailed hand embroidery e-book with step-by-step photo instructions will help you make your first stitches.

The top 10 hand embroidery stitches to learn
This free online course teaches the 10 essential stitches you need to start embroidering.

Basic embroidery stitches for beginners
Sampler, video guide and tutorial to learn 18 basic hand embroidery stitches and start stitching like a pro.
Techniques to master
Before you can make your first stitch, there are some preparation steps to take:
Stretch the fabric in the hoop
Well-stretched and secured fabric will help you avoid fabric puckering and distorted stitches. Here’s how to put the fabric in the hoop:
1. Loosen the screw of the hoop and separate the two rings of the hoop.
2. Place the inner hoop on the stable surface and layer the fabric on top, with the design centered.

3. Put the outer hoop on top and push to layer the fabric between the rings.

4. Tighten the screw, then gently pull the fabric from all sides to achieve the tension of the small drum.

5. Be careful not to distort the image – avoid pulling the fabric from the angles (on bias). Result to avoid – look at the image below.

6. When you are happy with the tension, use a screwdriver to tighten the hoop.

You can watch a step-by-step video tutorial that demonstrates the process of hoop preparation.
Transfer the pattern to the fabric
There are various ways to transfer the design to the fabric – from drawing directly on the fabric to water-soluble stabilizers and iron-on pens. In my opinion, the easiest way to trace the pattern onto the fabric is with a light box and a friction pen or a water-soluble marker. It is simple, fast, and inexpensive.
Here’s how to do transfer the pattern:
1. Print or draw the design on the paper. Make sure the lines are clear and bold.

2. Tape a design to a window (or another source of light).

3. Prepare your embroidery fabric. If the pattern is small and fits in the hoop, frame the material before transferring the design. In case your pattern is more significant than the hoop, iron your fabric and tape it over the printed design.
4. Trace all the lines with your favorite tracing tool.

5. Done. Now your pattern is ready for stitching. Frame it in the hoop and make that first stitch!

For more pattern transfer methods, read the guide “How To Trace Pattern on Fabric: Five Methods For Fast And Easy Embroidery Pattern Transfer”.
Thread your needle
Hand embroidery needles have a rather large eye and are easy to thread. In case you have some difficulties, here are some tips:
- Check the needle type and size. It may be the wrong needle or a needle too small for your thread! Hand embroidery needles have a long, wide eye that is typically easy to thread. For all 6 strands of embroidery floss, I recommend using needle sizes 1-3, size 5 for 3-4 strands, size 7 for 2-3 strands, and size 9 for a single strand.
- Do not wet the thread tip! Floss absorbs the moisture and becomes bulkier, making it even harder to put into the needle. Instead, slide the thread through your fingers to flatten it and then cut the tip at the angle with sharp scissors. This will create a sharp tip that is easy to put in the needle.
- Use a needle threader. This small accessory might be a great help if you often struggle to thread your needles. Needle threaders come in various sizes and shapes, but all of them do the same – assist you in threading the needle.

If you wish to have all the information about hand embroidery needles – sizes and types on hand , download this PDF guide.
Make a knot

It might be a controversial opinion, but it’s OK to start stitching with a knot. It will hold the first stitch in place and prevent the entire embroidery from unraveling. Later, after you get some experience, experiment with various methods of starting to stitch. You can learn all of them in my “How to start and end embroidery stitches” guide.
To finish the thread, tie a knot or anchor it to the last stitch on the back side of the fabric.
Embroidery patterns for beginners

A well-written hand embroidery pattern is your trusty companion in the learning process. Always double-check if the thing you are buying is really an embroidery pattern that has been stitched by a real person, or it’s just the image created by AI and labeled as an embroidery pattern.
High-quality embroidery patterns will include a stitch guide, a color guide, and step-by-step instructions.
To start your learning journey, check out my page of free hand embroidery patterns, each with a tutorial on this blog.
Also, take a look at these seasonal collections of hand embroidery patterns. All these embroidery designs are created by real textile artists, and each list has some of the beginner-friendly options:
- Embroidery patterns for beginners. 15 space-inspired colorful modern hand embroidery designs
- Hand embroidery designs with books: 15 fun and charming embroidery patterns for book lovers
- Art of Negative Space in Hand Embroidery: Unique Patterns and Designs
- Botanical Embroidery Patterns: Nature-Inspired Stitching
- Stitch Your Heart Out: Discover Unique Valentine’s Day Embroidery Designs
- Easter Embroidery Designs: Hand Embroidery Patterns and Kits To Inspire All Skill Levels
- Zodiac Embroidery Designs: Astrology Inspired Hand Embroidery Patterns
- Embroidery Ideas for Summer: Hand Embroidery Inspiration And Patterns
- Wednesday Inspired Hand Embroidery: Dark & Delightful Gothic Stitches
- Autumn Embroidery Designs: Fall Hand Embroidery Patterns, Projects and Inspiration
- Halloween hand embroidery patterns – 33 spooky and fun designs to stitch this fall
- Free Printable Christmas Embroidery Patterns: PDF Downloads and Tutorials
- Christmas Embroidery Ideas for Every Skill Level
Beginner-friendly embroidery projects
One of the benefits of hand embroidery is that it’s a highly versatile hobby. You do not need to stitch sampler after sampler or stick to the hoop art forever. There are plenty of practical embroidery projects you can approach as a beginner.
Start with simple home textiles, such as tea towels, fabric napkins, or bed linens. You can embellish home textiles with decorative borders and add monograms or floral motifs, personalizing otherwise bland and boring textiles.


Also, you can try your hand at making hand-embroidered home decor. Think about felt ornaments, Christmas or Easter decorations, embroidered banners, mantel decor, pillow covers, and similar pieces you can embroider for your home.


Another practical take on hand embroidery is hand-stitched gifts. From bookmarks to tote bags to greeting cards, to hair accessories and embellished t-shirts.


Finally, there is visible mending. You can learn the stitches and techniques and use them to repair your clothes. From traditional sashiko mending projects to embroidery on chunky woolen sweaters – anything is possible with embroidery stitches.


Build the habit of stitching
One reason many avoid taking on new hobbies is a lack of time. Trust me, even with limited time available for stitching, you can make impressive progress. One of the things I love most about embroidery is how portable it is. My hoop, floss, and needle fit in a small zippered pouch I can throw in any bag. I’ve stitched on trains, air plains, in waiting rooms, in coffee shops, and on lunch breaks. Any time you have fifteen or twenty minutes of downtime, you can make meaningful progress on a project.
In the article “How to Find Time for Embroidery and Other Creative Endeavors,” you will find more tips on how to find time for your analog hobbies in a busy schedule.
Finding time for stitching is one thing, while developing a stitching habit and building skill is another beast entirely. Many embroiderers set aside a specific window of time each day — often evenings — and find that the ritual itself becomes a form of decompression. You’re telling your brain: this is transition time, work is over, something slow and satisfying is happening now.
Read the article “How to Improve Your Hand Embroidery Skills: Tips and Exercises” If you care to learn some proven methods on how to gradually grow your skills.
Keep learning
Do not stop at learning basic stitches. Be curious, learn new techniques, explore various embroidery styles, and experiment.

Online communities
One of the genuinely lovely things about the embroidery world is how warm and welcoming it tends to be. Online communities are a great place to share your work, ask questions, and get encouragement when a stitch just isn’t behaving.
Reddit’s r/Embroidery community is active and constructive. Instagram remains one of the best places to discover embroiderers whose work inspires you — searching hashtags like #embroidery, #handembroidery, or #modernembroidery will surface a huge range of styles. Many talented embroiderers also run YouTube channels with detailed tutorials.
If you prefer learning in person, local craft stores sometimes offer beginner classes, and community centers or yarn shops occasionally host embroidery groups. The advantage of learning in a group setting is immediate feedback — someone can watch you hold your needle and tell you in 30 seconds why your tension is off, which might take you weeks to figure out on your own.
Books and guides
Books are also worth mentioning. They are not mandatory for getting started, but are worth exploring as your experience grows and learning new skills. Read my article “Best hand embroidery books: For reference, inspiration and skill-building” for the reading list I recommend.
Digital books is another great way of learning the skill. Start with my free e book “Five Essential Hand Embroidery Stitches For Beginners“. This detailed hand embroidery guide with step-by-step photo instructions will help you make your first stitches. Then, look for the books that will teach a new technique of guide you with a project.
If you are looking for guidance in your learning journey, I’ve created a Beginners Roadmap – your virtual assistant that will take you on this journey step-by-step. It’s free and easy to follow.

Why embroidery tends to stick
I started this article saying that embroidery has a way of hooking people, and I want to close by unpacking why I think that’s true.
Part of it is the visibility of progress. Unlike some hobbies where improvement is slow and hard to see, embroidery gives you constant, tangible evidence that you’re getting better. Your second project is noticeably nicer than your first. Your stitches get more even. Your tension improves. You can feel the progress in your hands even when you can’t articulate it.
Part of it is the physicality. We spend so much of our time interacting with screens and producing things that exist only digitally. Embroidery produces an object you can touch, hang on a wall, give to someone, or wear. There’s a deep satisfaction in that kind of making that’s hard to replicate in other ways.
And part of it, honestly, is the community. Embroidery connects people across generations and cultures — it’s one of the oldest textile arts in human history, practiced in some form on every inhabited continent. When you pick up a needle and thread, you’re participating in something ancient and universal, even if what you’re stitching is a tiny flower.
So, if you ask me how to start embroidery, I’ll say: just get a hoop, some floss, a piece of cotton, a needle, and make that first stitch. Sit somewhere comfortable with good light. Start with a running stitch, make it messy, and keep going anyway. That’s genuinely all there is to it.
More embroidery guides for beginners

Five Simple Border Embroidery Designs For Absolute Beginners: Basic Stitches For Decorative Borders
Hand Embroidery Basics: A Beginner’s Guide to Needlework

14 Chain Stitch Variations For Borders, Outlines, and Decoration
