Triangular Turkish Stitch
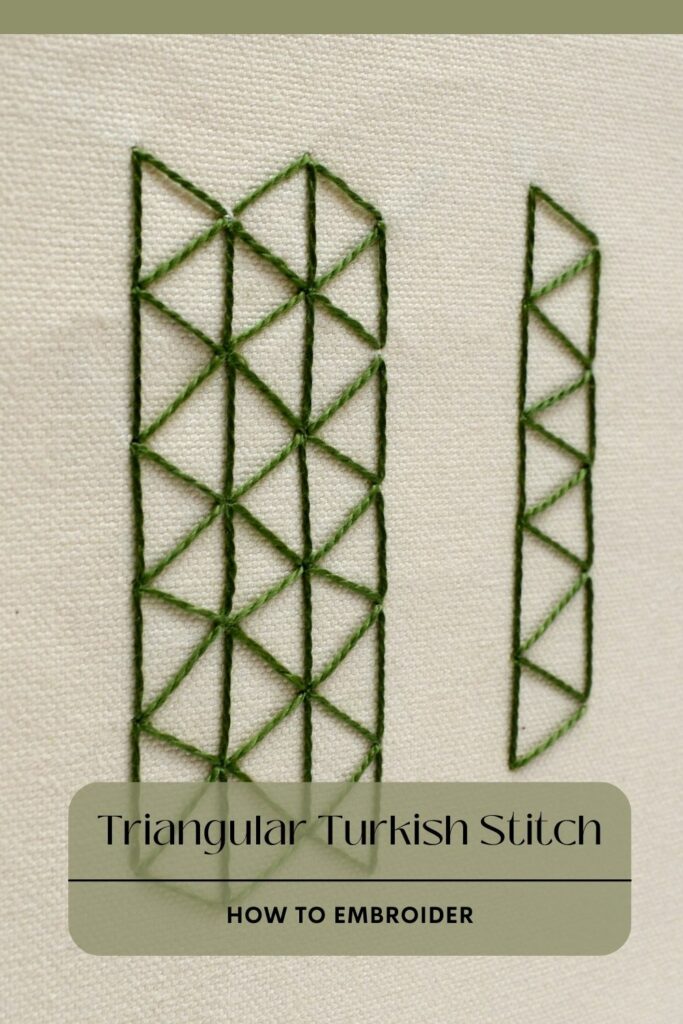
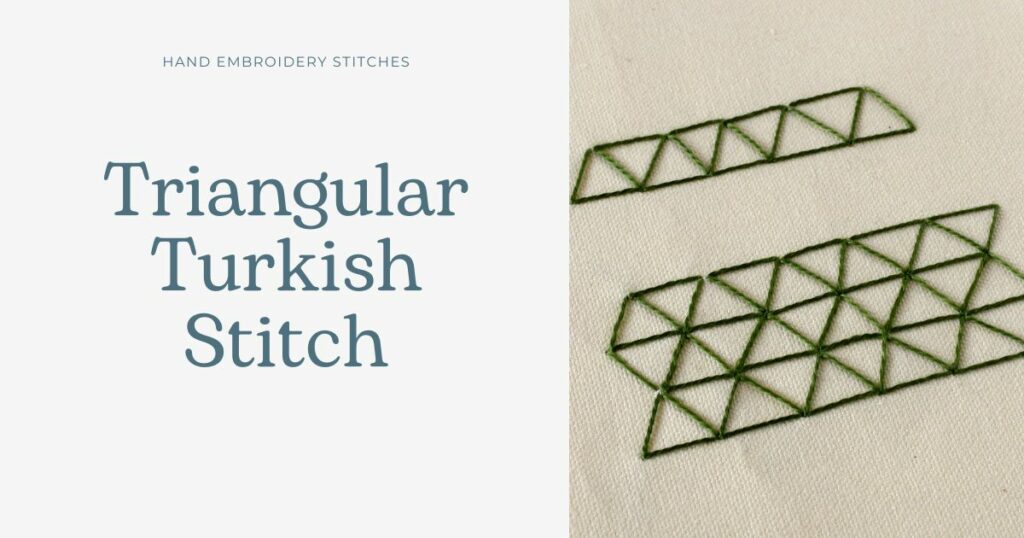
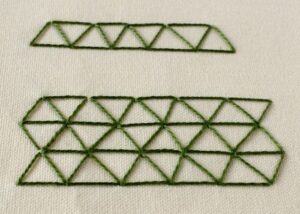
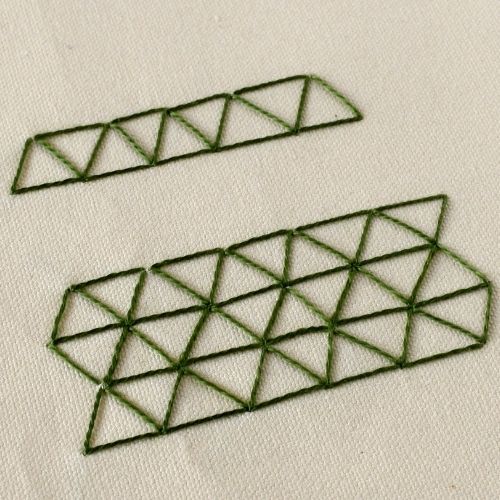
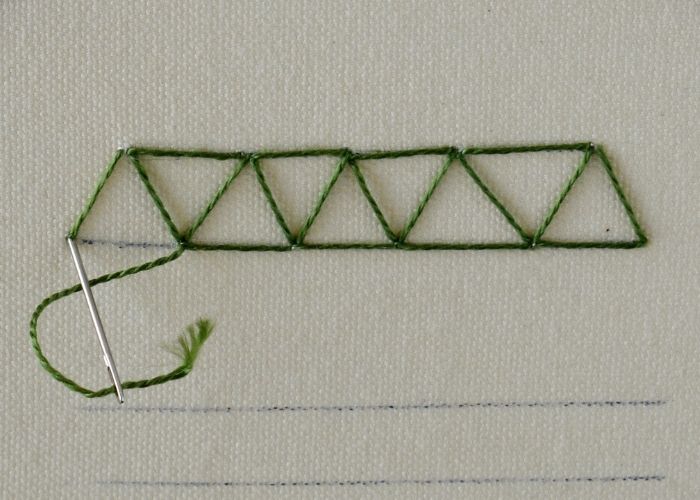
Triangular Turkish Stitch is a hand embroidery technique in which straight stitches are positioned to form triangles. This stitch creates the same triangular pattern on both sides of the fabric, making it particularly useful when the back side of the fabric is visible.
The technique of the Triangular Turkish Stitch is simple. Yet, to achieve the same look on both sides of the fabric, it is fundamental to follow the precise order of the stitches. First, a row of diagonal stitches is embroidered from left to right. Then, moving from right to left, additional straight stitches connect the diagonal stitches and close the triangles.
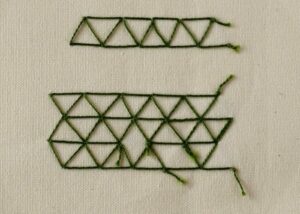
The reverse side of the embroidery is the same as the front. The only stitches missing are the ones where I started a new thread.
Other names of the stitch
This hand embroidery technique is also called Triangular Two-Sided Stitch or simply Turkish Stitch.
Applications of Triangular Turkish Stitch
- Triangular Two-Sided Stitch can be embroidered as a thick decorative line. This row of triangles will look great as an embellishment of the seam, decorative edge, bold outline, or decorative border.
- Triangular Turkish Stitch can be worked as a filling stitch. Rows of triangles, positioned one after another, will create the textural geometric filling. For a precise and uniform look, you can make all the triangles the same size. On the other hand, you can vary the sizes of the triangles and make them slightly irregular to create a more playful pattern.
- Turkish Stitch works great for mending projects. Turkish Triangular Stitch forms an elastic and flexible filling that can hide some stains, reinforce a worn-out fabric, or disguise small mends. At the same time, the garment remains stretchy. Besides that, both sides of the fabric will have the same triangular pattern.

More stitches from the Straight Stitch Family
Learn how to embroider Triangular Turkish Stitch
Follow the step-by-step tutorial with detailed photos below, and you will learn the Triangular Turkish Stitch quickly. If you are a visual learner, watch a video lesson in the tutorial or on the Practical Embroidery YouTube channel to learn this hand embroidery stitch faster.
How to embroider Triangular Turkish Stitch
Step-by-step hand embroidery tutorial
- Start with a diagonal stitch
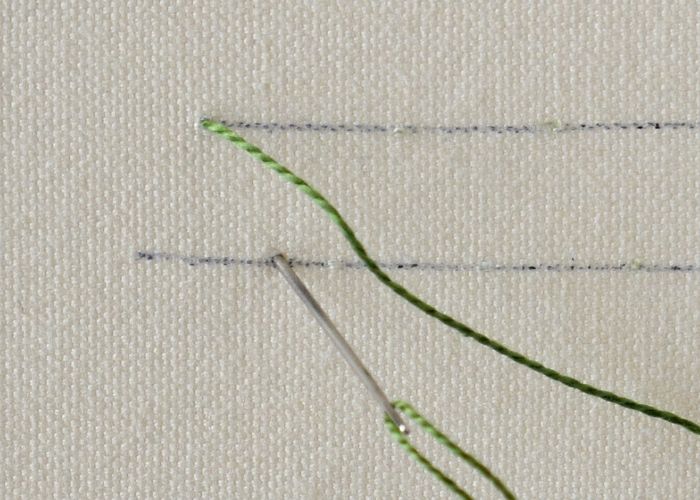
Mark two parallel guidelines. Take the needle up at the top left corner of the marked area and make a diagonal Straight Stitch to the lower marked line.
- Make more diagonal stitches
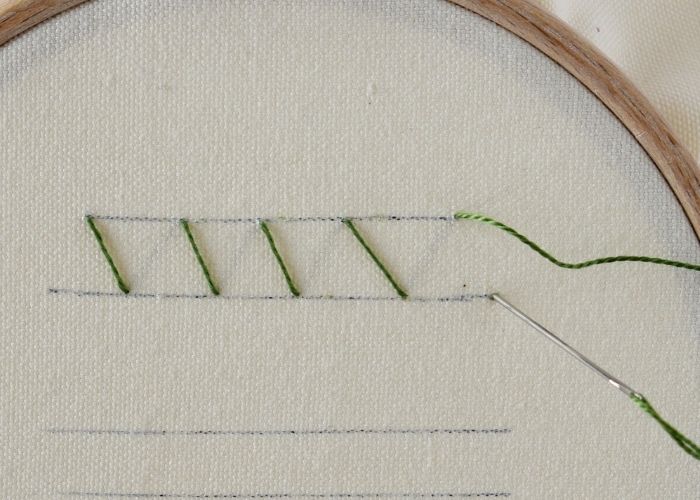
Repeat this stitch until the entire row is filled with parallel diagonal stitches. I made five stitches.
- Start forming the first triangle
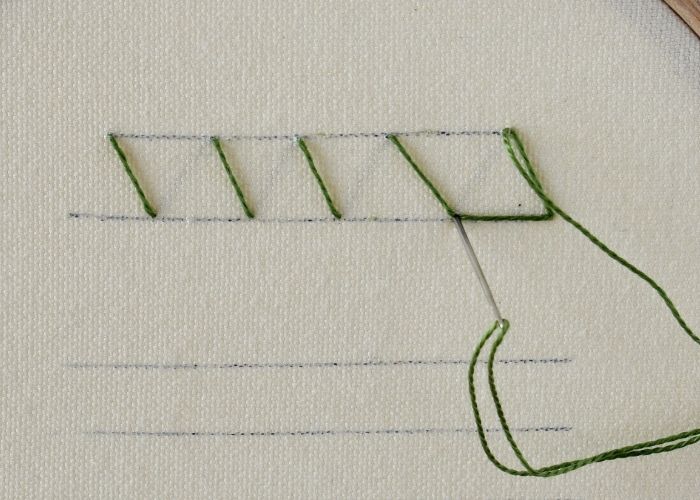
When all the diagonal stitches are done, start forming the first triangle. Take the needle up at the bottom of the second-to-last stitch. Make a horizontal stitch that will connect the second-to-last stitch with the last one and create a base for the triangle.
- Form the triangle
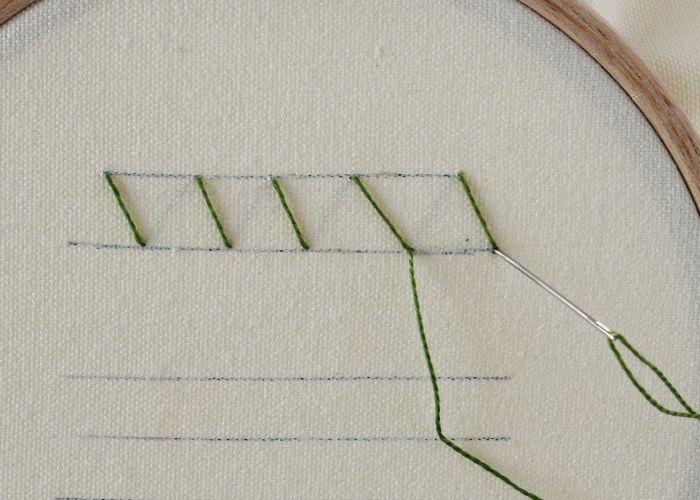
Take the needle up at the top point of the last stitch and make a diagonal stitch to close the shape and form the triangle’s left side.
- Form the second triangle
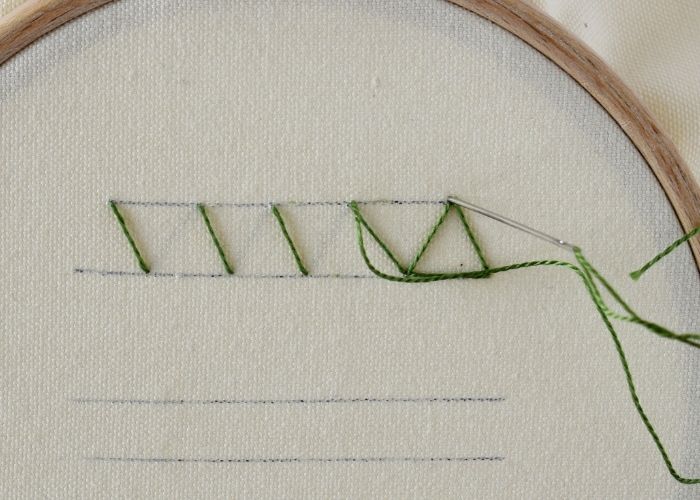
Take the needle up at the top of the second-to-last stitch. Make a horizontal stitch to close the second triangle.
- Start forming the third triangle
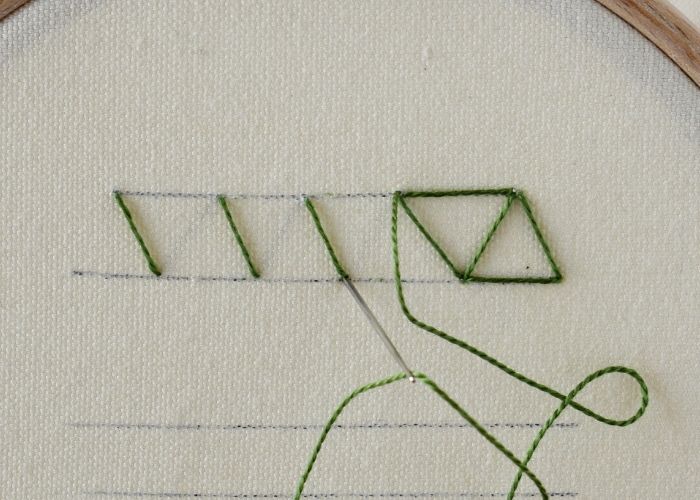
This stitch is the same as the third one. Take the needle up at the top of the second-to-last stitch. This time, make a diagonal stitch towards the bottom point of the stitch before this one.
- Repeat the stitch sequence
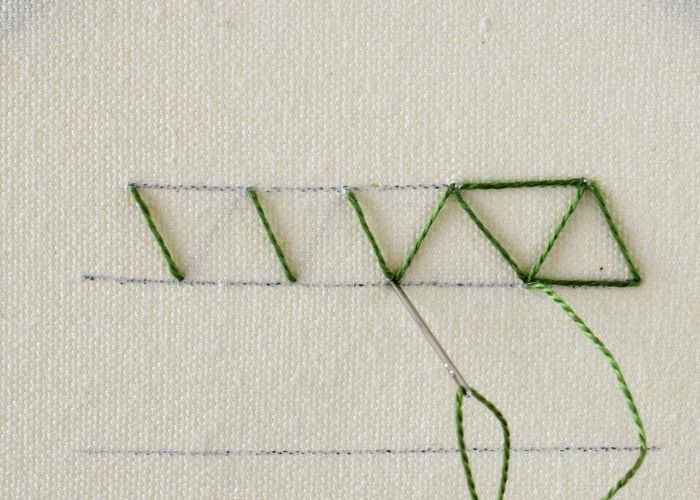
Create the horizontal stitch at the bottom, then at the top, and then add a diagonal stitch. Repeat as many times as needed to close all the triangles in the row.
- Add the final triangle on the left
To finish the row, you can add one more triangle at the beginning of the line.
- Triangular Turkish Stitch filling
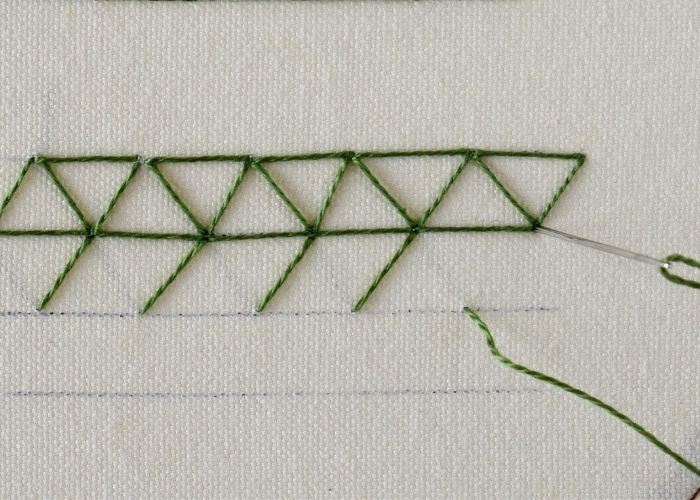
To embroider the filling, add a row of diagonal stitches right under the first row of triangles.
- Form the triangles
At the return way, add diagonal stitches to form the sides of the triangles.
- Close the shapes
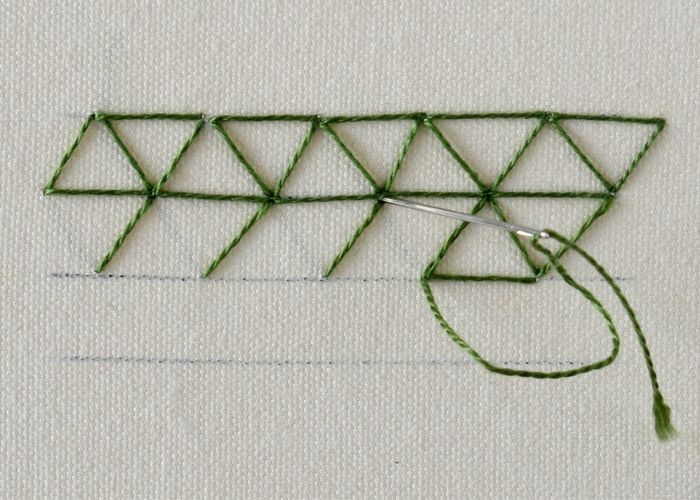
Also, horizontal stitches should be added to the base of the triangles.
Note that you will not make the top horizontal stitches when filling because these stitches were made in the previous row.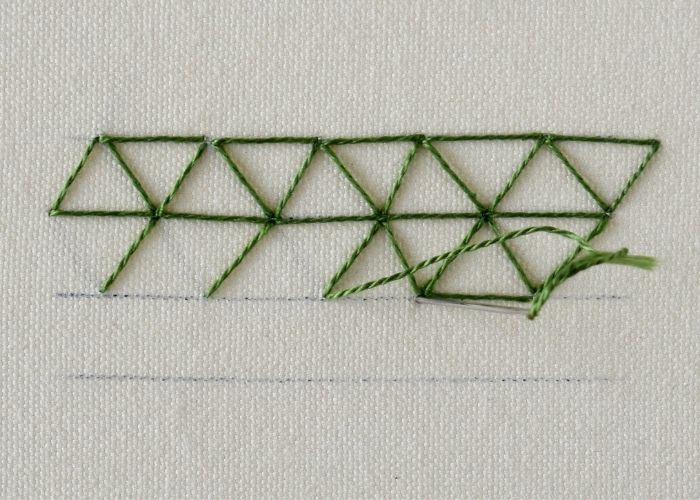
Triangular Turkish Stitch Video tutorial
Tools and materials I used for this sampler
Disclaimer. To cover the cost of creating free embroidery patterns and video tutorials for this blog, I do sometimes link to products. Please assume these links are affiliate links. If you choose to buy through my links then THANK YOU – it will make it possible for me to keep doing this.
What’s next?
If you’re in the mood to explore more hand embroidery stitches, check out the Stitches and Techniques page for the list of other fantastic stitches available on my blog. From timeless classics to modern twists, a whole world of stitches is waiting for you to explore and master. So, grab your hoop and needle, and let’s stitch our way to creative bliss!
Don’t miss a thing!
Follow me on YouTube, Instagram, Facebook, and Pinterest. Or why not subscribe to Practical Embroidery newsletter and get embroidery tips straight to your inbox every few weeks?
Need More Guidance?
The top 10 hand embroidery stitches to learn is a free online course created for beginners.
