Double Herringbone Stitch
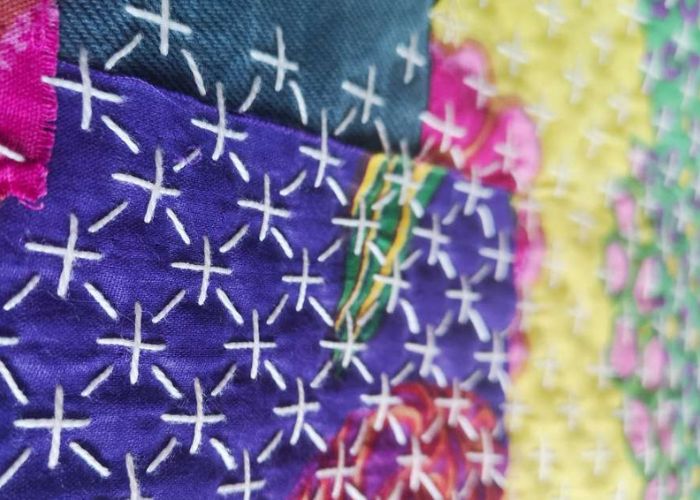
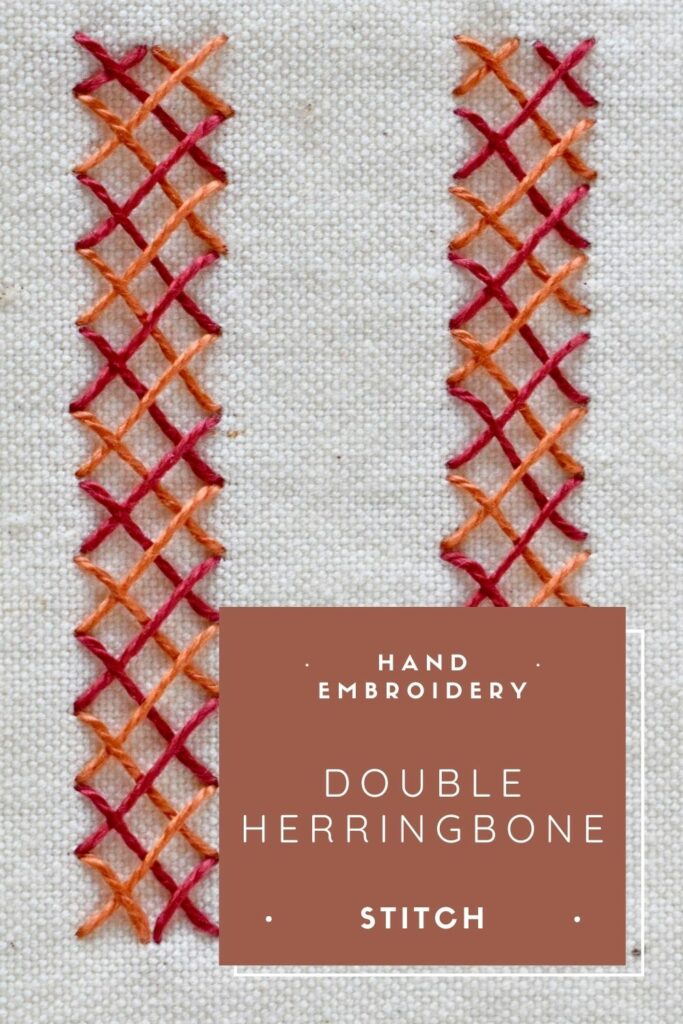
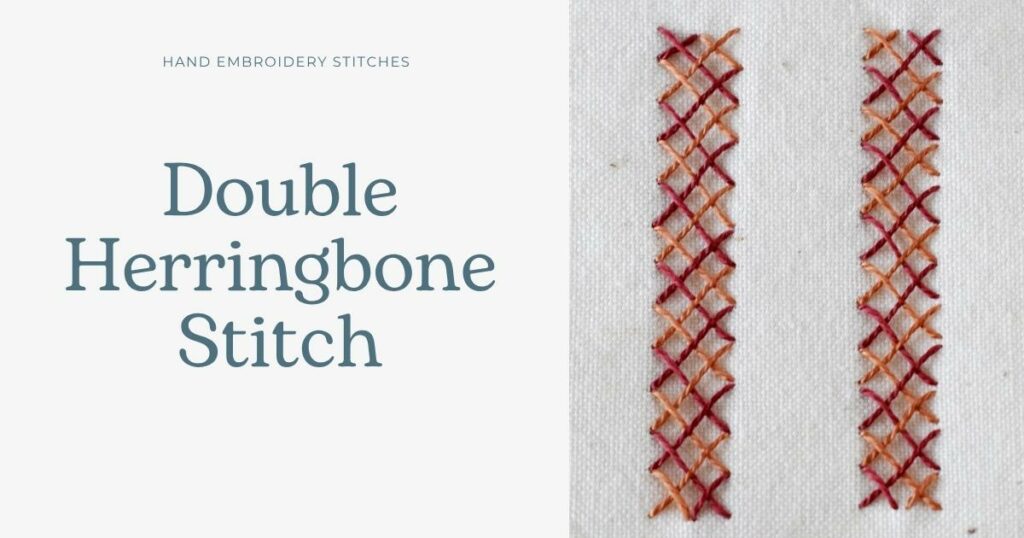
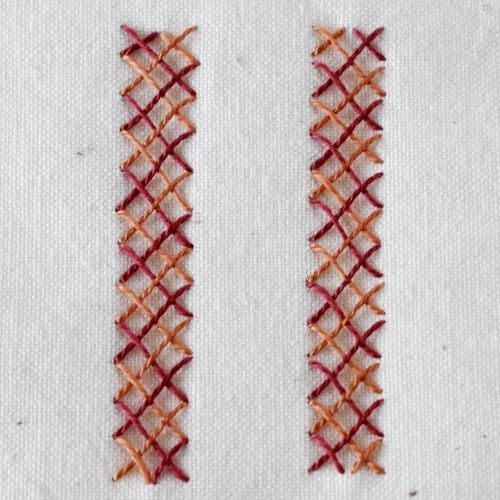
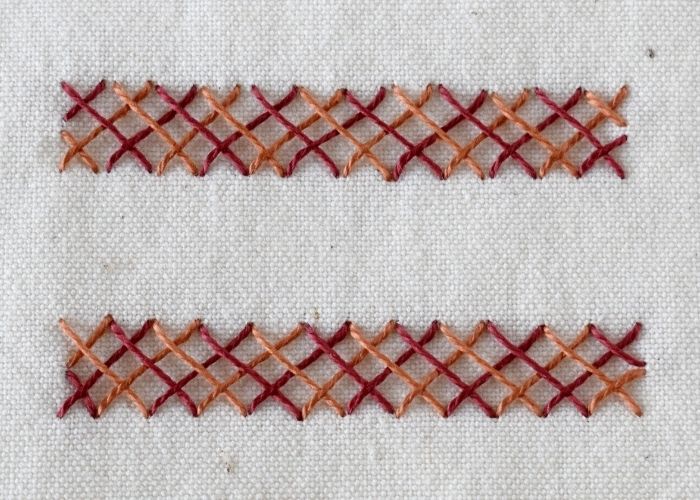
Double Herringbone Stitch is a decorative variation of the traditional Herringbone stitch. To embroider this stitch, you will have to embroider the same band twice. First, the basic Herringbone stitch is made. Then you will add a second layer of stitches that intertwine with the first.
To make a Double Herringbone Stitch, you can use the same thread twice, threads of contrasting colors, variations of the same color, or even use the threads of different thickness or texture. Each option will result in a diverse visual outcome.
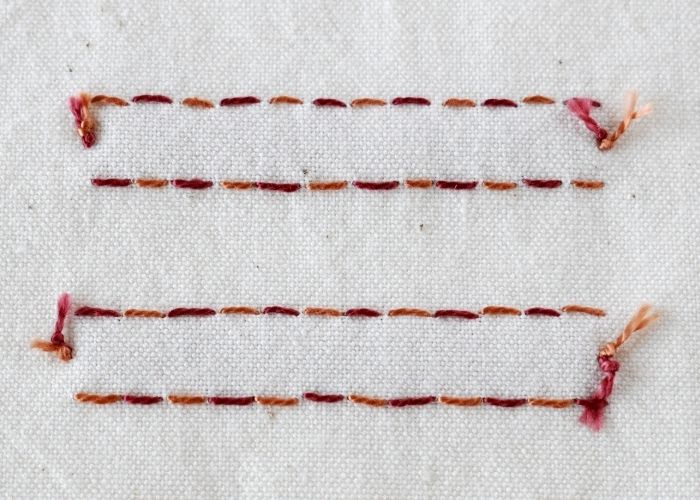
On the reverse side of the fabric, Double Herringbone Stitch creates two parallel lines of short stitches.
Other names of the stitch
The alternative names for the Double Herringbone Stitch are Indian Herringbone Stitch, Double Algerian Cross Stitch, or Double Colored Herringbone Stitch.
Applications of the Double Herringbone Stitch
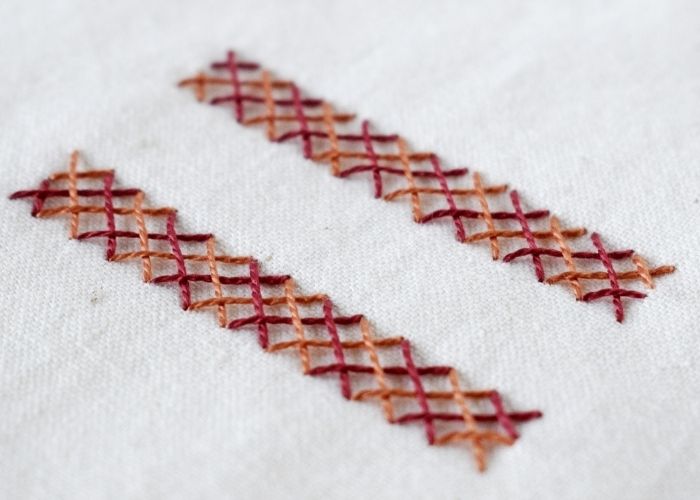
Double Colored Herringbone Stitch works well for decorative outlines, bands, and garment edges.
This technique results in a relatively flexible, elastic stitch; therefore, you can use it on the stretchy parts of the garment, such as necklines.
More stitches from the Herringbone Stitch family

Learn how to embroider Double Herringbone Stitch
Follow the step-by-step tutorial with detailed photos below, and you will learn the Double Herringbone Stitch quickly. If you are a visual learner, watch a video lesson in the tutorial or on the Practical Embroidery YouTube channel to learn this hand embroidery stitch faster.
How to embroider Double Herringbone Stitch
Step-by-step hand embroidery tutorial
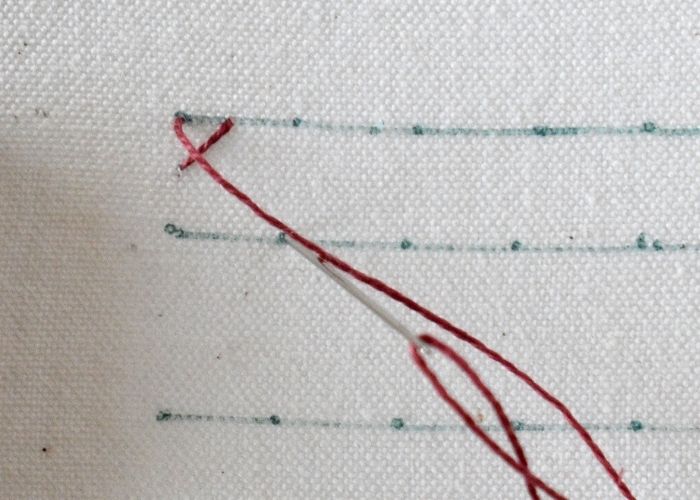
1. Mark two parallel lines for guidance. To achieve a nice edge on the band, start with a half-size stitch. Take the needle up to the surface in the middle between the guiding lines, on the left edge. Make a diagonal stitch to the upper marking line, then return to the surface at the top left corner of the band. Then, start making full-length Herringbone stitches and make a diagonal stitch to the right.
2. Get back to the surface on the left, then make a diagonal stitch to the top right.
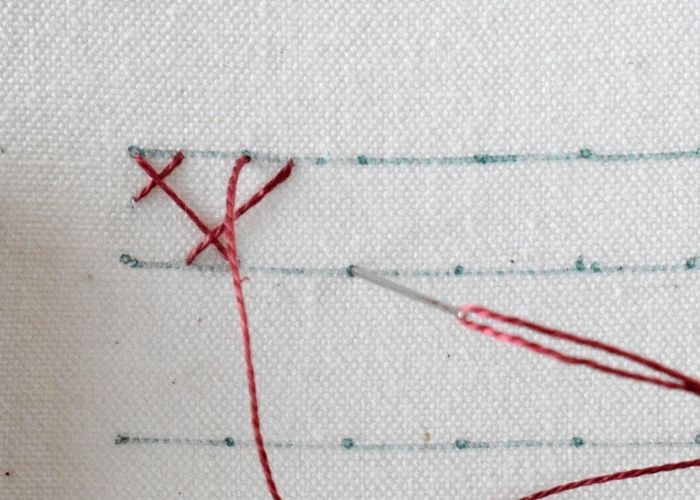
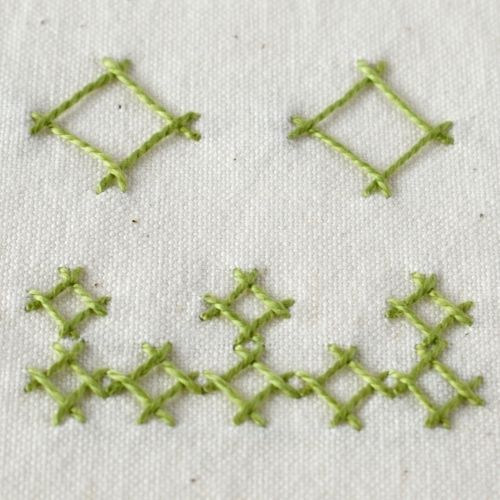
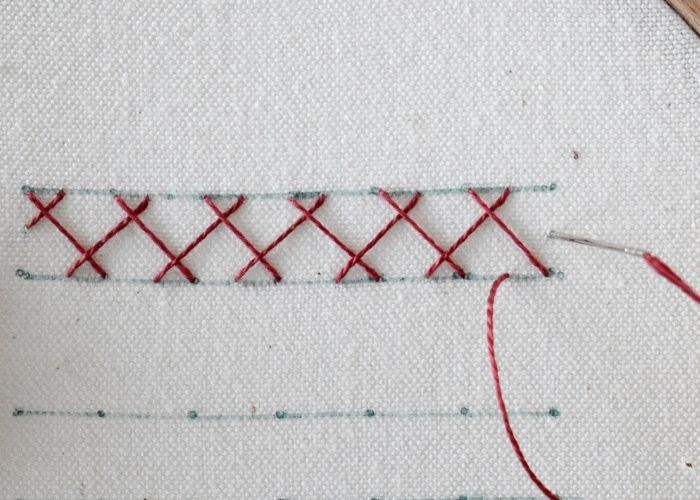
3. Embroider the entire row of Herringbone stitch. The gaps between the stitches should be wide enough to accommodate another row of Herringbone stitch.
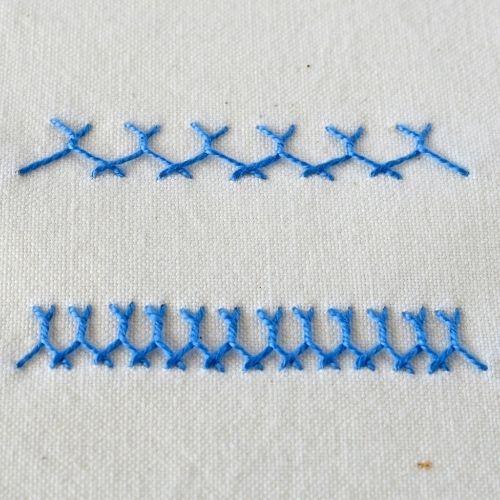
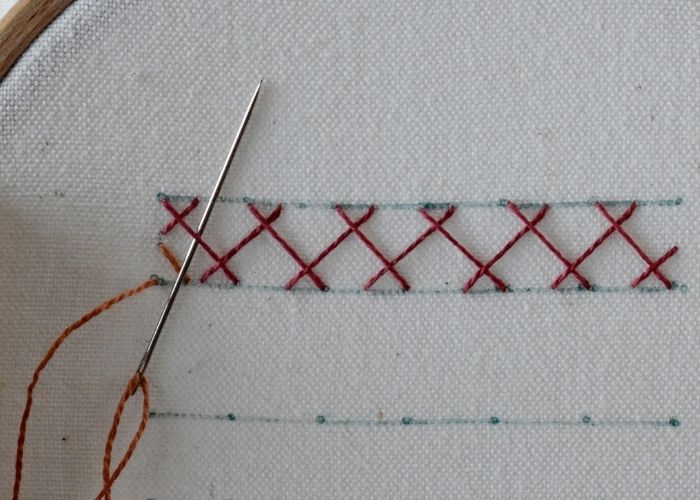
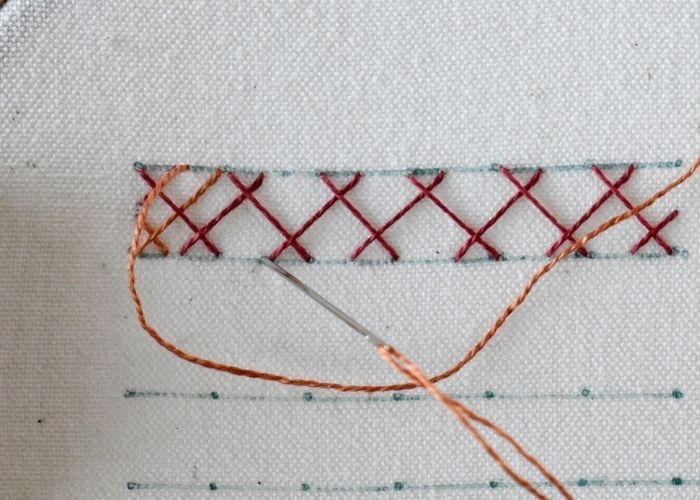
4. After the first layer is done, change the thread and start the second layer of the Double Herringbone Stitch. Make a half-stitch, then make a diagonal stitch to the top right, passing it under the diagonal stitch from the first layer.
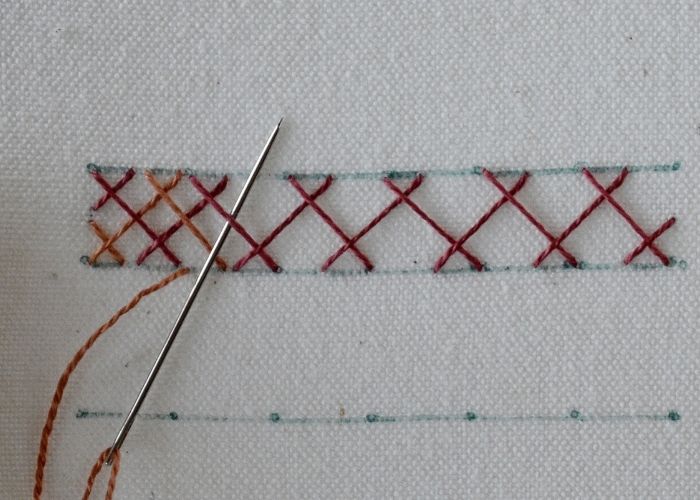
5. The second diagonal stitch, instead, goes over the stitches from the first layer.
6. The third stitch passes under the stitch from the previous layer.
7. And the fourth one goes over the stitches.
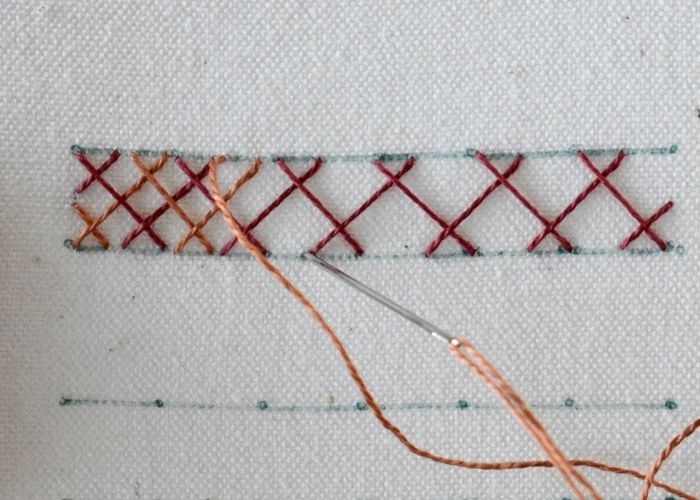
8. Continue adding the second layer of the Herringbone stitch in the same sequence until the entire row is doubled.
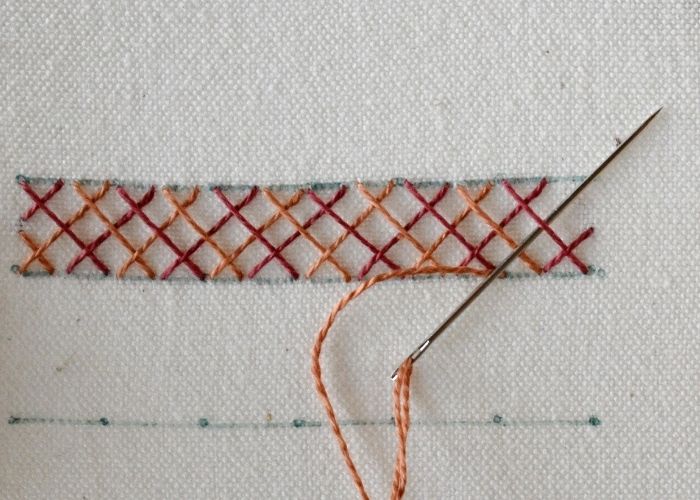
9. End with a half stitch to finish the edge of the bar nicely.
Video tutorial
Tools and materials I used for this sampler
Disclaimer. To cover the cost of creating free embroidery patterns and video tutorials for this blog, I do sometimes link to products. Please assume these links are affiliate links. If you choose to buy through my links then THANK YOU – it will make it possible for me to keep doing this.


What’s next?
If you’re in the mood to explore more hand embroidery stitches, check out the Stitches and Techniques page for the list of other fantastic stitches available on my blog. From basic embroidery stitches to complex and playful variations of classical techniques, a whole world of stitches is waiting for you to explore and master. So, grab your hoop and needle, and let’s stitch together!
Don’t miss a thing!
Follow me on YouTube, Instagram, Facebook, Flipboard, and Pinterest. On the other hand, you can subscribe to the Practical Embroidery newsletter and get embroidery tips straight to your inbox every week!
Need More Guidance?
The top 10 hand embroidery stitches to learn is a free online course created for beginners.