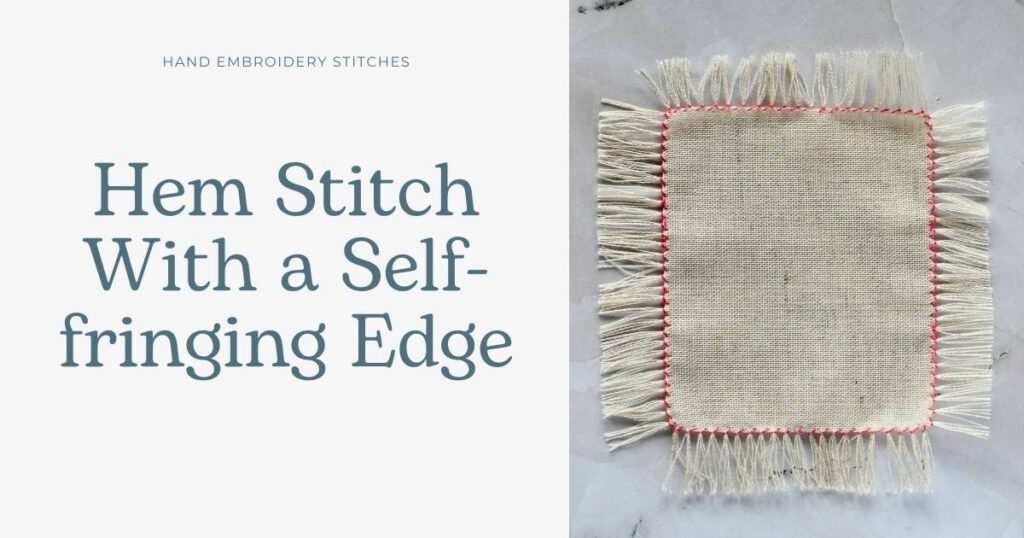
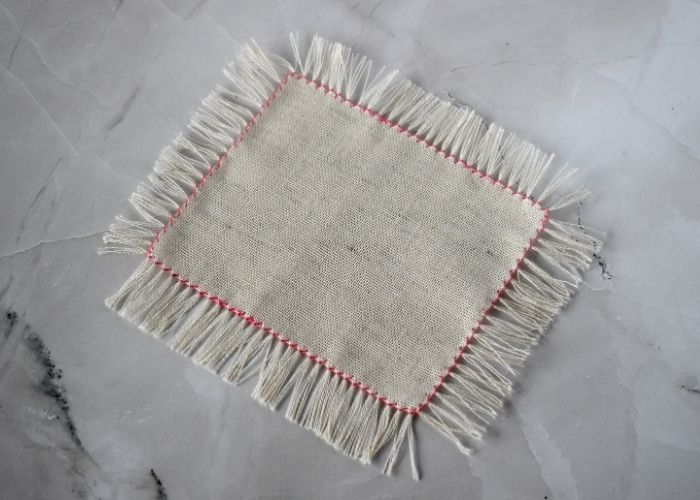
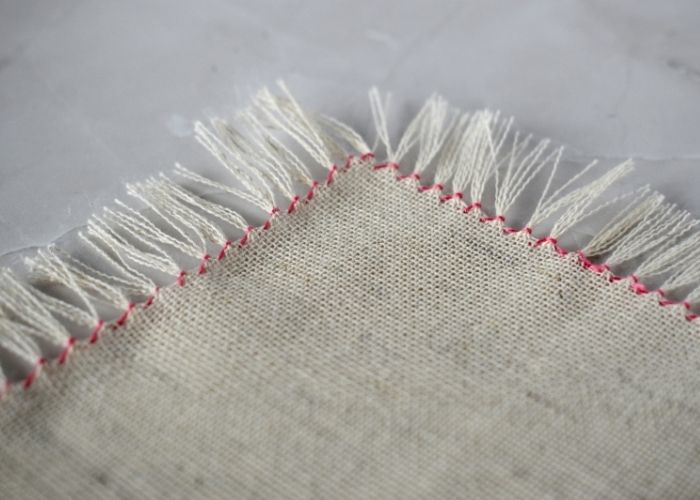
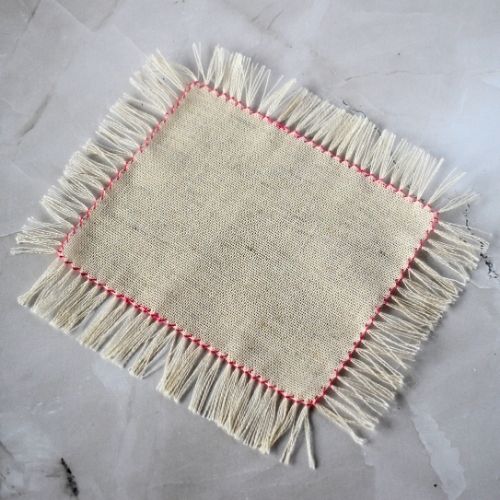
Hem Stitch With a Self-fringing Edge
A Hem Stitch with a self-fringing edge is a decorative method for finishing the fabric edge. This technique is often used for the edges of the napkins, towels, or table runners.
To create this edge with a fringe, you will have to work in two phases. First, we secure the fabric with a hem stitch. This stitching will prevent the fabric from fraying. Then, we remove the threads to create a fringe.
Often, this type of hemming is almost invisible as it is made with a thread of the same color as the fabric. I chose a contrasting pink color to make it easy to follow the steps and the needle movement.
Applications of the Hem Stitch with a fringe
Hem stitch with a self-fringing edge is mostly used to finish linen household textiles, such as decorative or cocktail napkins, table runners, or towels. Besides that, this technique is often used by hand weavers, who finish the edges of hand-woven scarves or table runners with the hem stitch and later spin or braid the fringe.
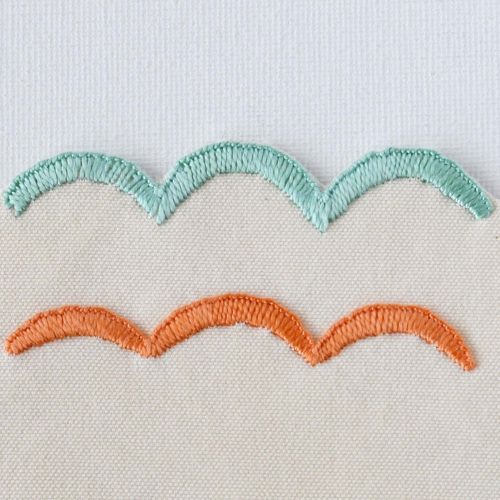
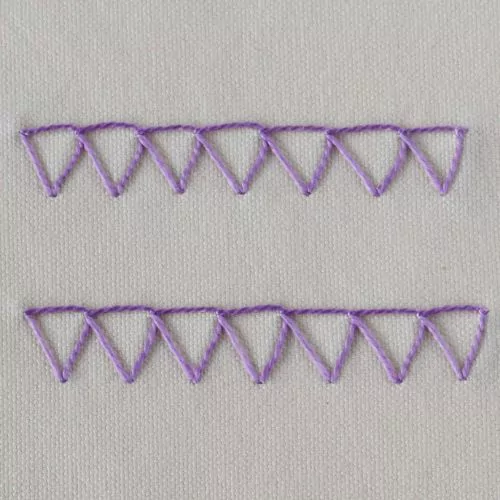
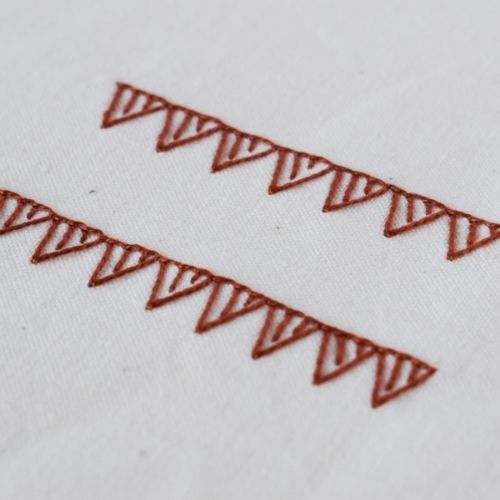
Other stitches to finish the edges of the textiles
Learn how to make a Hem Stitch with a self-fringing edge
Follow the step-by-step tutorial with detailed photos below, and you will learn the Hem Stitch with a self-fringing edge technique quickly. If you are a visual learner, watch a video lesson in the tutorial or on the Practical Embroidery YouTube channel to learn this hand embroidery stitch faster.
How to make Hem Stitch with a self-fringing edge
Step-by-step hand embroidery tutorial
Prepare for stitching the hem
1. Start by preparing the fabric. Measure the length of the fringe on all the sides of the fabric and mark the distance. I used a Friction pen for marking.
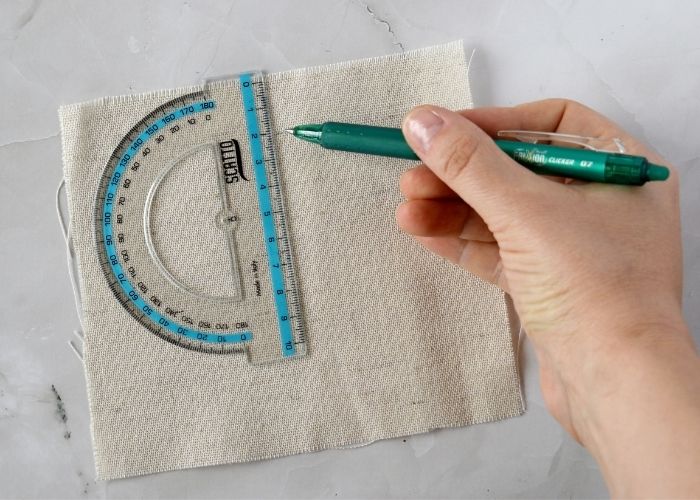
2. Pull the threads to create a space for the hem stitch. I pulled out three threads on each mark on all four sides of the fabric.
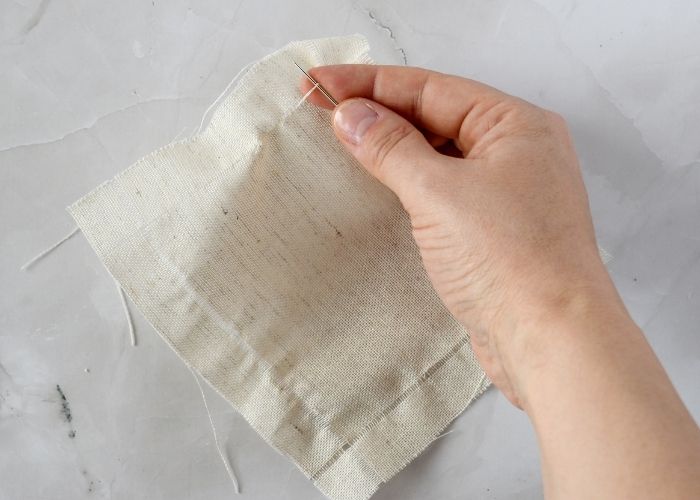
Embroider the Hem Stitch
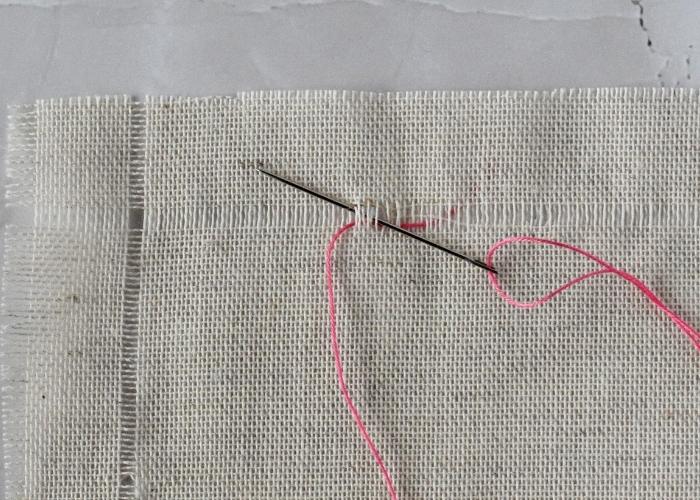
3. Thread your needle, but do not make a knot. Secure the starting thread by lightly weaving it under the first thread in the weave. Leave the end of the thread loose – we will take care of it at the end.
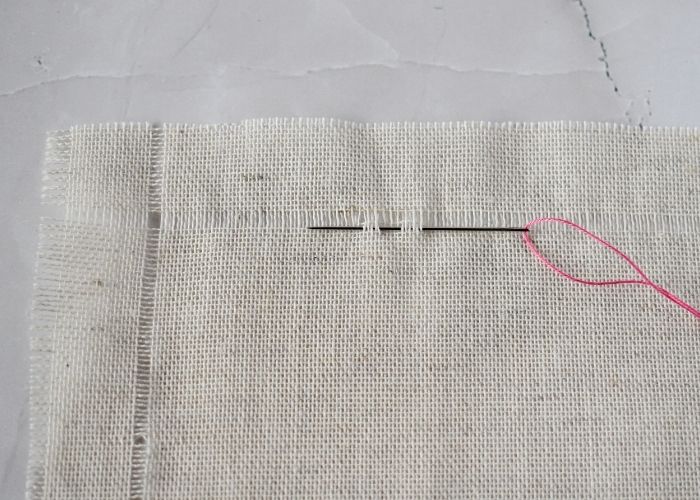
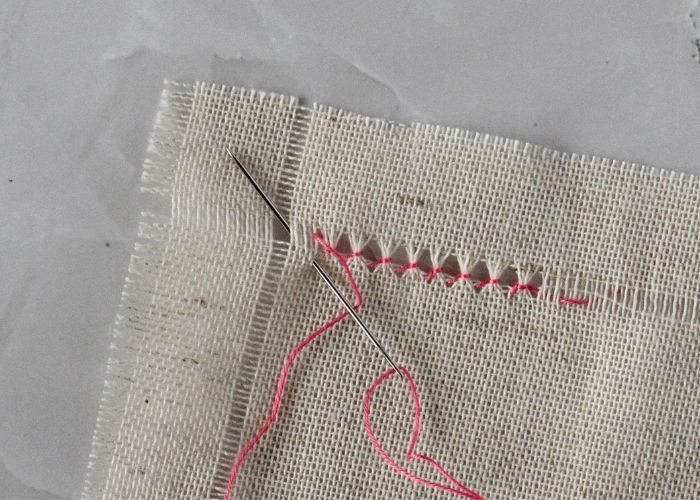
4. Start making a Hem Stitch. Pass the needle under the group of threads. The number of threads you will group with each stitch will define the density of the fringe.
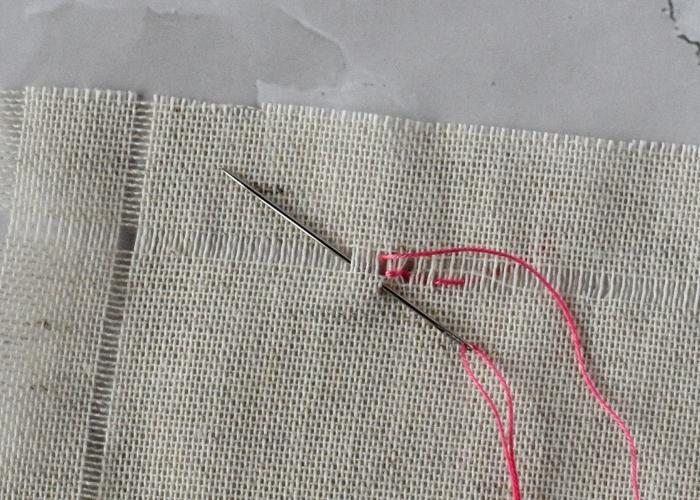
5. Pass the needle under the same group of stitches once more, wrapping them tightly. Pull slightly to compact the threads together.
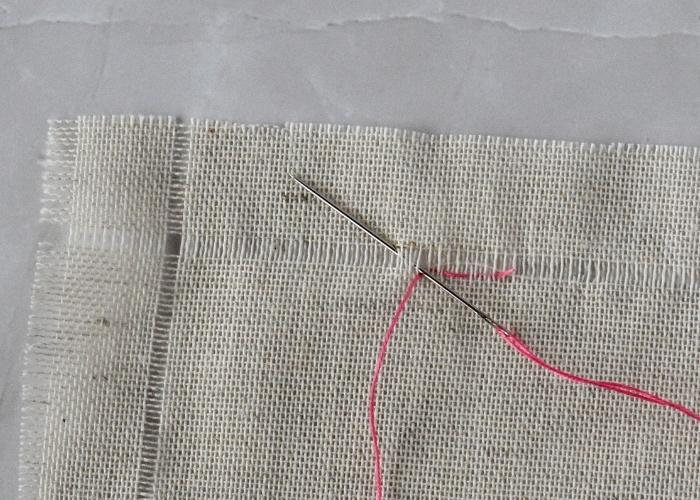
6. Now push the needle into the fabric a couple of threads under the edge, and bring it back to the surface inside the line of the drawn threads. Count the threads you are grouping to make the clusters of the same size.
7. Wrap the second group of pulled threads and tighten the stitch.
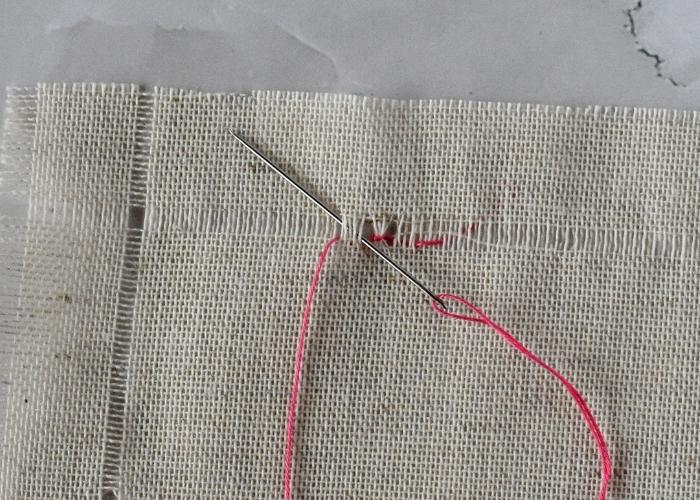
8. Make a tiny stitch into the fabric and move to the next cluster of drawn threads. Repeat the wrapping.
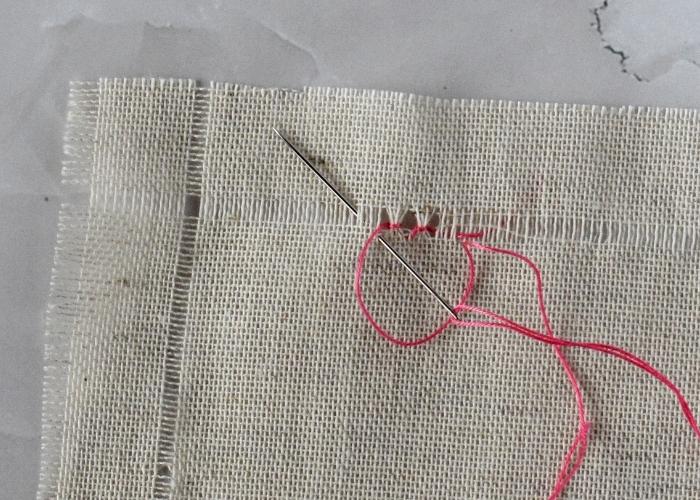
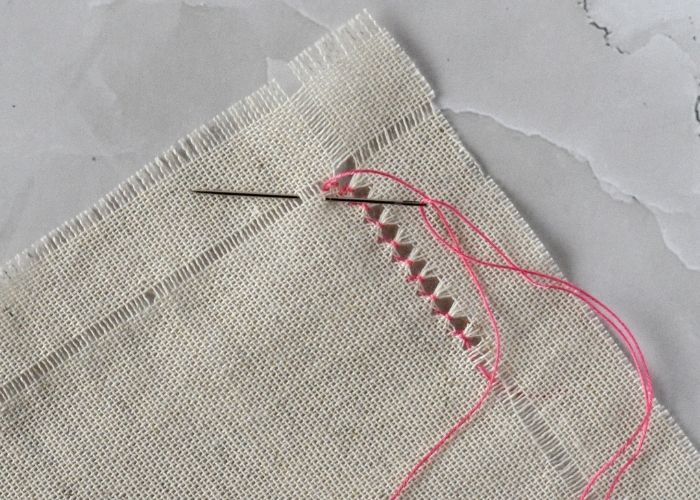
9. As you get closer to the corner, carefully count the threads and group them into the same-size clusters.
10. After that, work around the corner and continue on the next side of the fabric.
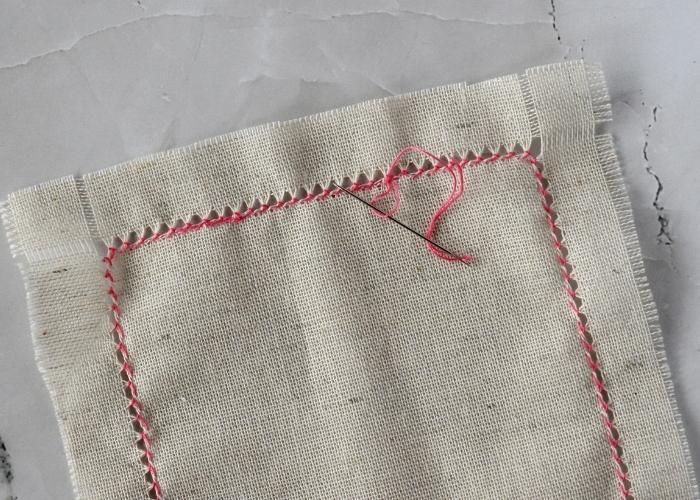
11. When the entire perimeter is secured with a Hem Stitch, you will work over the starting thread, securing it under the stitches.
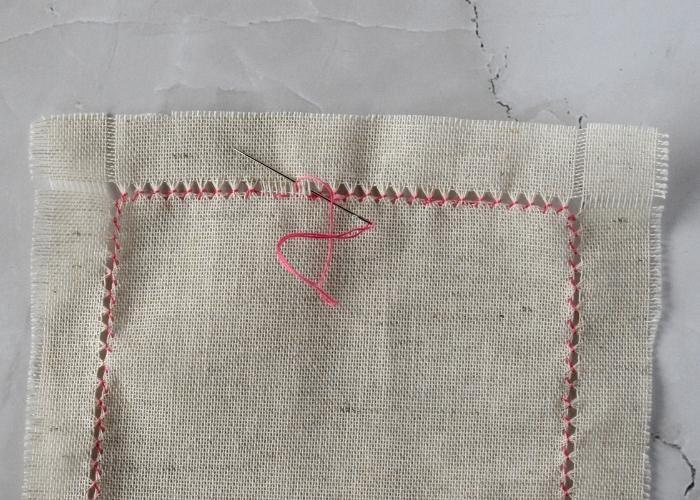
12. Finish the last stitch with a loop and weave in the end of the thread under the previously made stitches.
Create the fringe
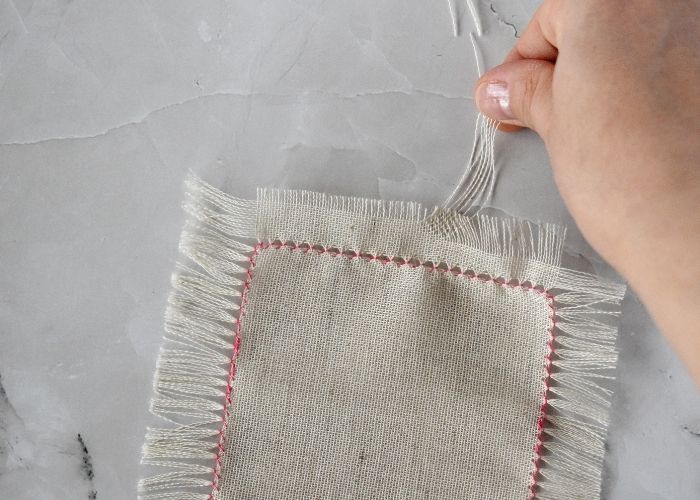
13. Finally, after all the sides are secured with a Hem Stitch, carefully remove the threads from the edges to form a fringe. You can trim it to make it shorter or make it long and spin or braid it after the hemming.
Hem Stitch with a self-fringing edge Video tutorial
Tools and materials I used for this sampler
Disclaimer. To cover the cost of creating free embroidery patterns and video tutorials for this blog, I do sometimes link to products. Please assume these links are affiliate links. If you choose to buy through my links then THANK YOU – it will make it possible for me to keep doing this.


What’s next?
If you’re in the mood to explore more hand embroidery stitches, check out the Stitches and Techniques page for the list of other fantastic stitches available on my blog. From basic embroidery stitches to complex and playful variations of classical techniques, a whole world of stitches is waiting for you to explore and master. So, grab your hoop and needle, and let’s stitch together!
Don’t miss a thing!
Follow me on YouTube, Instagram, Facebook, Flipboard, and Pinterest. On the other hand, you can subscribe to the Practical Embroidery newsletter and get embroidery tips straight to your inbox every week!
Need More Guidance?
The top 10 hand embroidery stitches to learn is a free online course created for beginners.