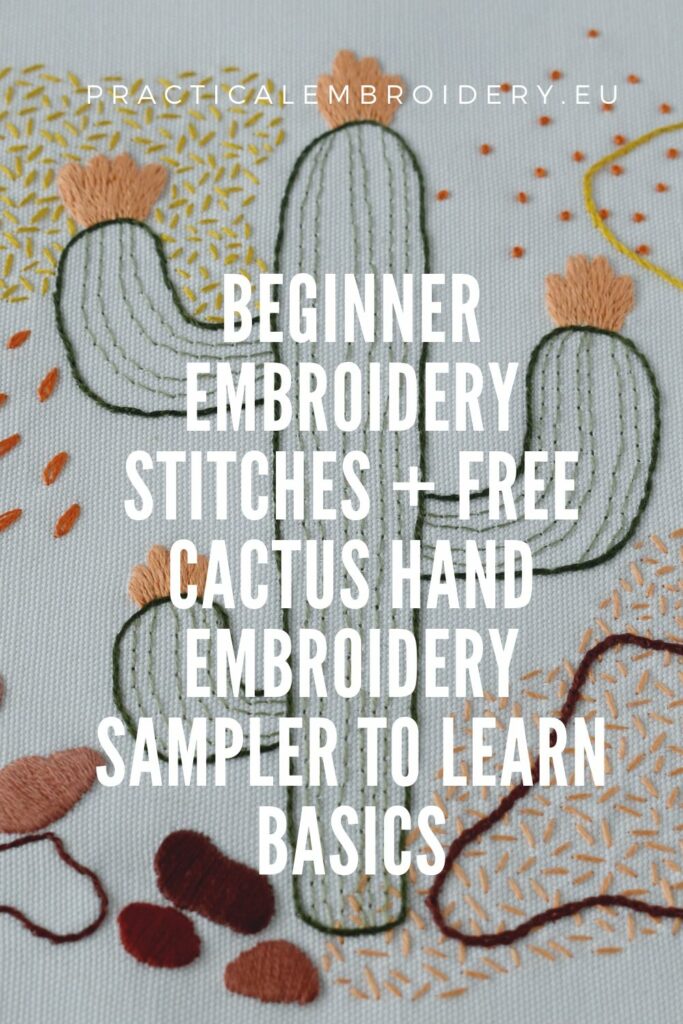
Beginner Embroidery Stitches + Free Cactus Hand Embroidery Sampler To Learn Basics
Hand embroidery is an ancient craft that grew into a popular modern hobby. It is a fun and relaxing activity that benefits your mental health and a practical skill that lets you create textile art, mend and embellish your garments, or create original home textiles and gifts.
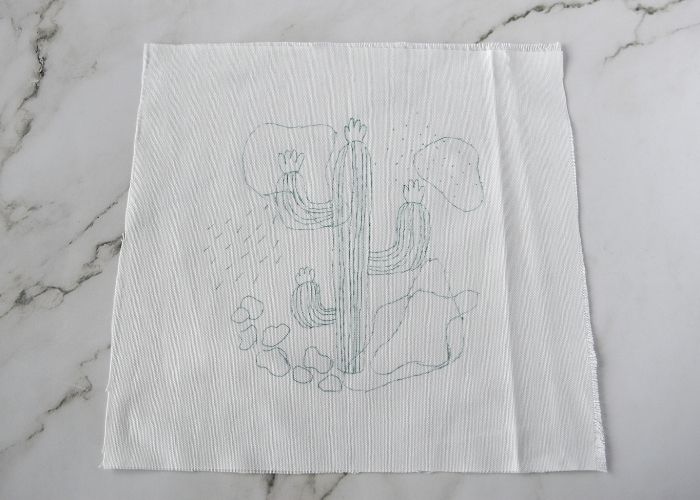
Want to learn hand embroidery? This hand embroidery tutorial will guide you step-by-step while you learn beginner embroidery stitches and stitch a fun sampler with an abstract cactus in the desert scene. Download a free Cactus PDF pattern and learn beginner embroidery stitches today!
Starting hand embroidery project
Before you jump into learning beginner embroidery stitches, here are some things you should prepare:
- Gather tools and materials. You will need a fabric, embroidery floss, a hoop, an embroidery needle, and small scissors. Head to the Hand Embroidery Supplies page on this blog for the list of tools and materials I use and recommend.
- Decide on the pattern transfer method you want to use. If you plan to embroider on light-colored fabric, the lightbox method with a friction pen is the most simple and affordable method that I use the most. Read the article “How To Trace Pattern on Fabric: Five Methods For Fast And Easy Embroidery Pattern Transfer” to learn how to choose the best fitting method and what materials you will need for it.
- If you are an absolute beginner, I recommend reading the article Hand Embroidery Basics: A Beginner’s Guide to Needlework before you dive into your first stitching project.
- Plan ahead. Will you frame your finished sampler in a hoop for wall decor? Or do you want to turn it into a pillowcase or a tote bag? Cut your fabric accordingly, leaving enough material for the project you want to make later.
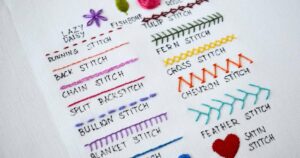
Beginner embroidery stitches
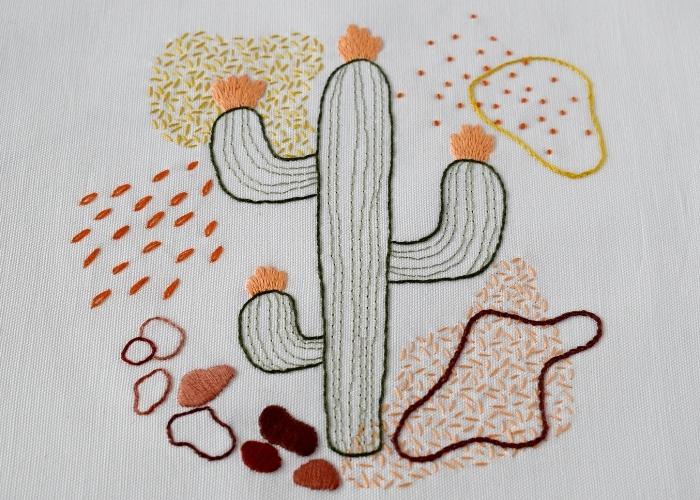
To make learning beginner embroidery stitches fun and dynamic, I’ve included nine hand embroidery techniques that you can use for outlines, filling, and decorating.
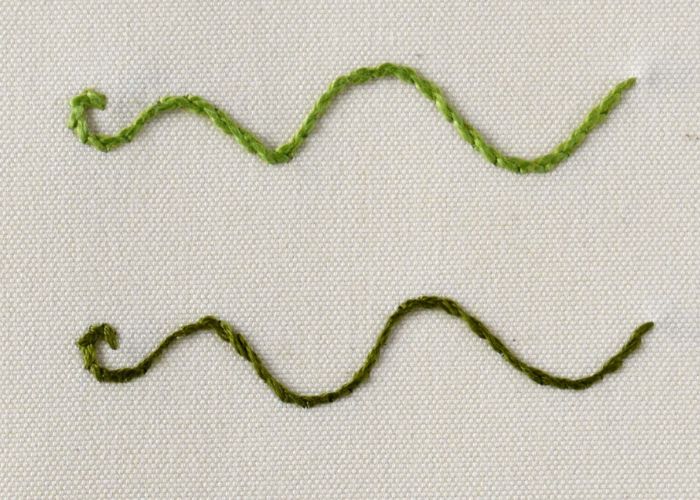
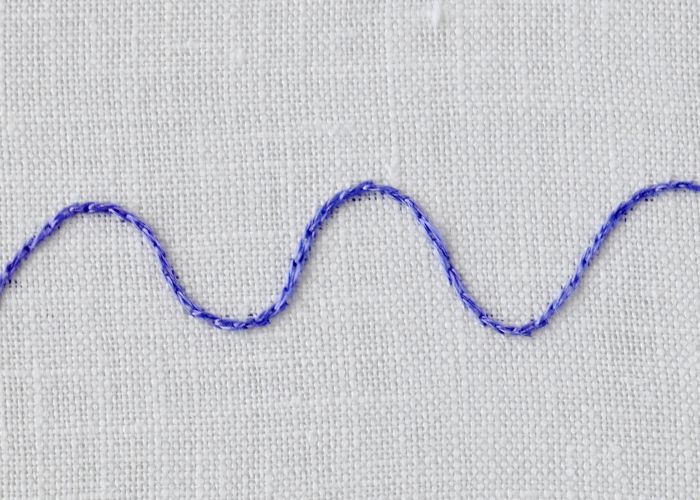
Backstitch
Backstitch is the most basic embroidery technique for outlines, lettering, sewing, and filling. Small, straight stitches create fluid lines that can be embroidered straight or curved.
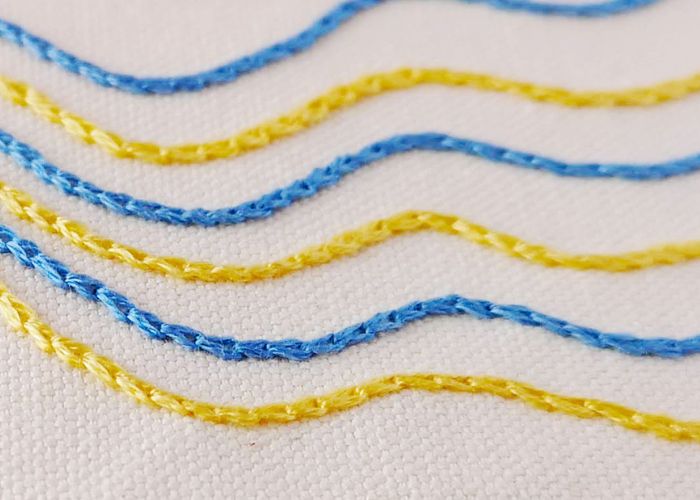
Stem Stitch
Stem Stitch is another hand embroidery technique suitable for beginners and widely used in hand embroidery. This stitch creates a fluid line and is used for outlines, lettering, or filling. This stitch is indispensable in botanical embroidery.
Split Backstitch
Split Backstitch is a variation of the Backstitch that creates smooth lines. This beginner-friendly technique is widely used for outlines, lettering, and as a base for filling stitches. In this Cactus sampler embroidery project, we will use Split Backstitch as an outline stitch and as a base for Satin Stitch and Long and Short stitch.
Chain Stitch
Chain Stitch is a very decorative yet simple hand embroidery technique every beginner should learn. Small loops connected into a line create a decorative line, letters, or embellishments. You can use this stitch for borders, outlines, or filling.
Detached Chain Stitch
Detached Chain Stitch is another beginner-friendly embroidery stitch that has multiple uses. With this stitch, you can add decorative accents to your embroidery project, fill it, create lines, or mix it with other stitches to make complex decorative bands.
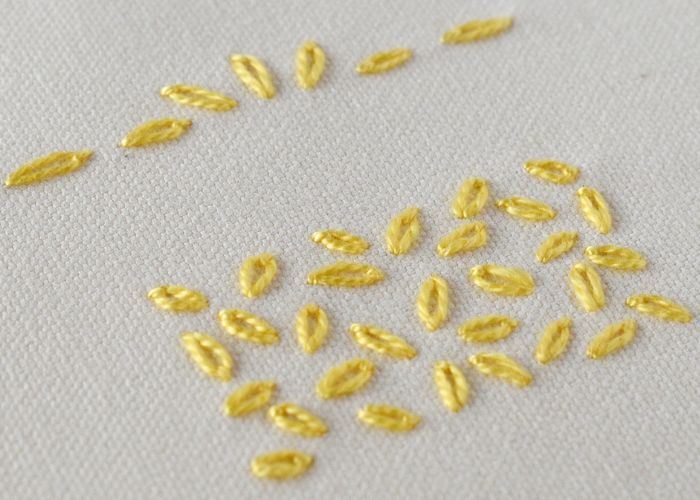
Seed Stitch

Seed Stitch is the most straightforward filling technique you can learn fast and use for various projects. This simple embroidery technique will surprise you with all its creative possibilities. Even if the method is straightforward, it has loads of options for personalization and variations – from length and colors to density and texture.
French Knots
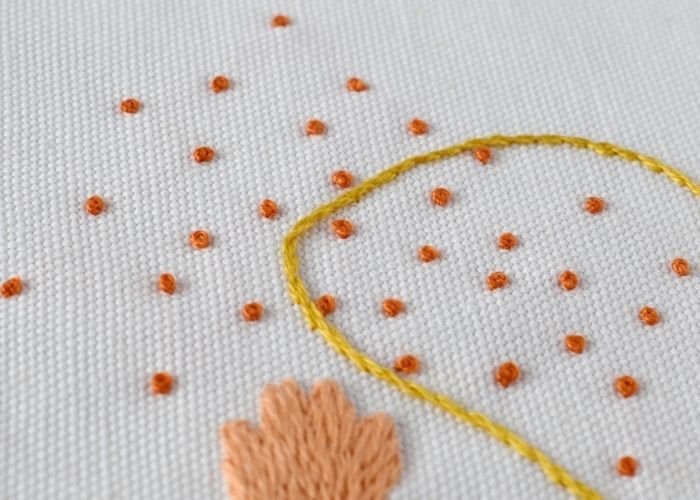
French Knot Stitch is a textural decorative hand embroidery technique. It has many uses – from filling areas and accent stitches to being a part of complex composite stitches.
This stitch has a reputation for being difficult, but fear not. Follow these simple tips, and you’ll love French knots as I do:
- Use both hands to make this stitch.
- Wrap the thread around the needle 2 times (3 times is maximum). If you need a bigger knot – use thicker yarn or more strands.
- Leave a small space between the beginning of the stitch and the place where you take the needle down into the fabric. The knot will not pop to the back of the material.
- Pull the thread slowly through the wraps to the back of the fabric. Also, keep the working thread under tension until the last possible moment as it passes to the back of the cloth.
- Use a milliner needle instead of an embroidery needle. It has an eye that’s the same thickness as the shaft, so it’s easy to pass the needle through the tight wraps without getting hung up on the eye.
Satin Stitch
Satin Stitch is a popular filling technique that beginners should learn. You will find this stitch in many embroidery patterns and projects. Therefore, you should learn it at the beginning of your stitching journey. Satin Stitch is widely used but has a reputation for being a complex stitch.
Here are some tips for a smooth Satin Stitch:
- Thinner threads (or single strands) work better than more or thicker threads.
- Ground fabric with a high count and a firm and full weave will work better.
- Keep it small; don’t try to fill extensive areas with this stitch.
- When embroidering, start the Satin Stitch in the middle and move to the sides of the design.
- For more beautiful edges, outline the shape first (we will use Split Backstitch for outlines).
Long and Short Stitch
Long and Short Stitch, aka Thread painting, is a hand embroidery technique for filling that fully covers the fabric. This hand embroidery stitch is popular and is widely used in different embroidery styles. The thread painting technique is popular in modern freehand embroidery for shading flower petals, birds, and animals. In Jacobean crewelwork, larger botanical elements like branches and animals are depicted using this stitch.
Read the article “Long and Short Stitch for Round Shapes. Learn how to Embroider a Sphere and a Circle” for additional guidance on the Long and Short Stitch.
Hand embroidery project to learn beginner embroidery stitches
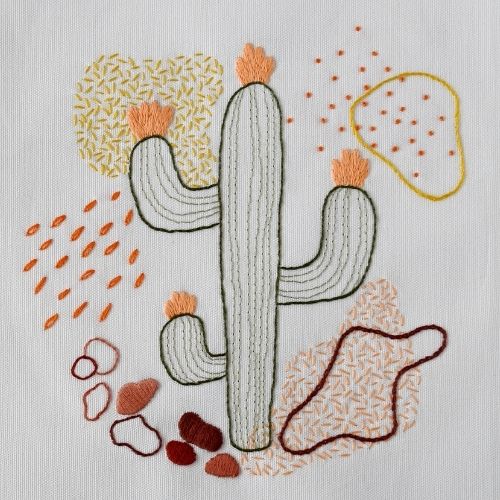
Cactus: hand embroidery sampler
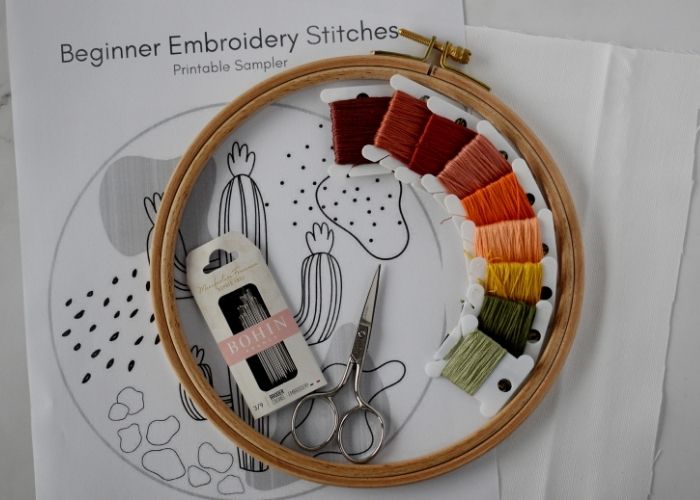
Tolls and materials
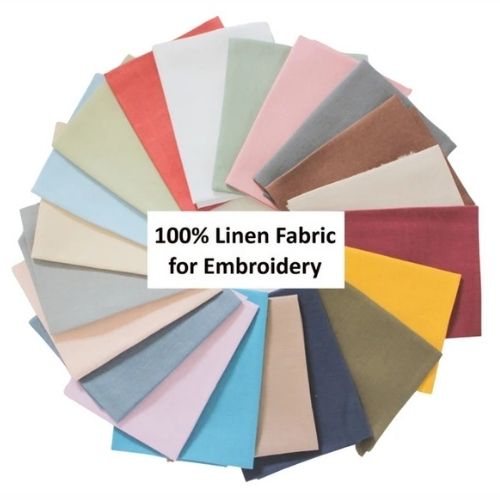
- Fabric. I used a white linen-cotton blend.
- A hoop. Mine is 18 cm.
- Embroidery floss. I used DMC embroidery floss.
- Embroidery needles.
- Scissors.
- Friction pen for pattern transfer.
Step-by-step hand embroidery tutorial
- Gather tools and materials
Download and print the Cactus PDF pattern. Choose colors for the project.
- Transfer the pattern to the fabric
I used a Lightbox method and a friction pen, but you can choose any method you prefer.
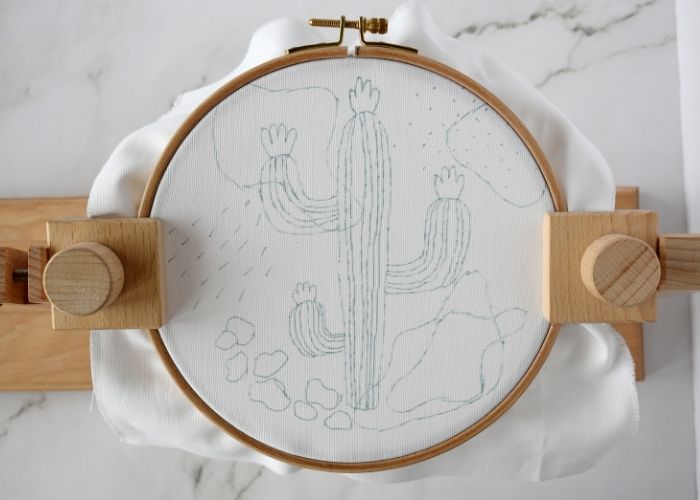
- Frame the fabric in a hoop
Adjust the tension and tighten the tensions screw. You can use a hoop stand for stability and the possibility to use both hands for stitching.
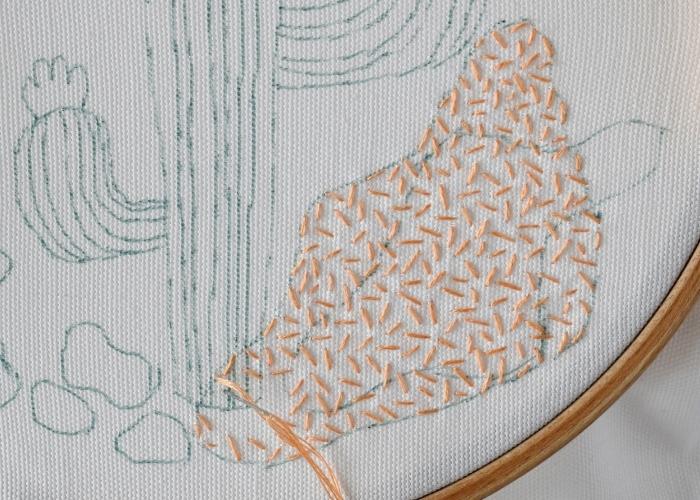
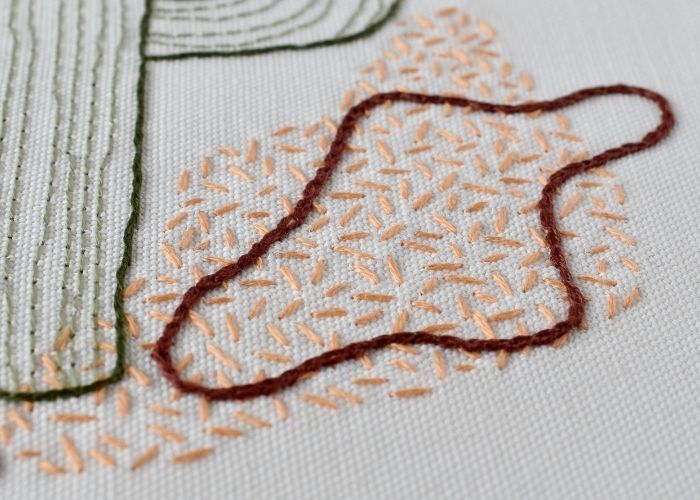
- Seed Stitch filling
Use two strands of embroidery floss and fill the shape with small straight stitches in random directions.

- Keep the same size
As you move, filling the shape, try to keep the stitches of a similar size and maintain the same density throughout the shape.
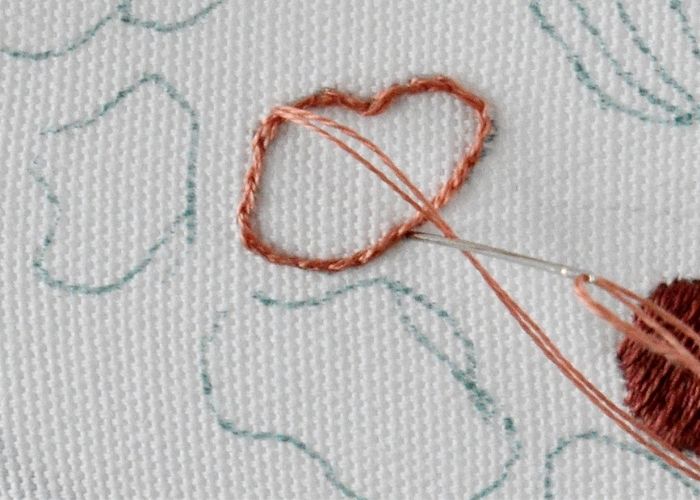
- Chain Stitch
Outline the shape with a Chain Stitch. Make small stitches as they follow the curves better.
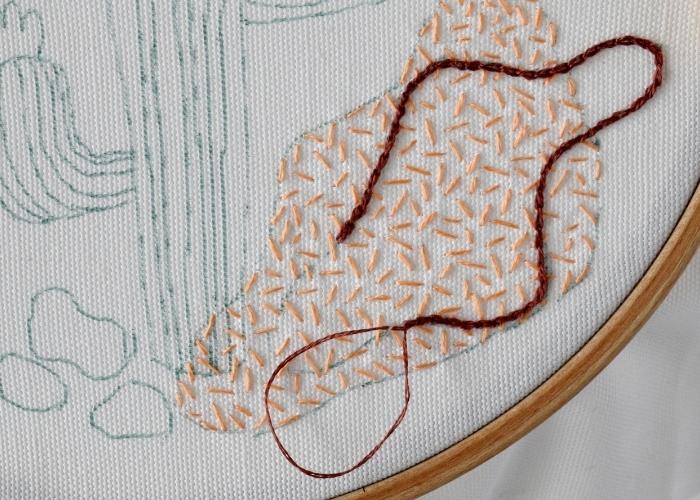
- Close the shape
To make a nice finish to the shape, connect the last stitch to the first one in an invisible circle. Watch a video lesson, “Chain Stitch Mastery: Unlock Secrets of Chain Stitch Hand Embroidery!” for more tips on Chain Stitch embroidery.
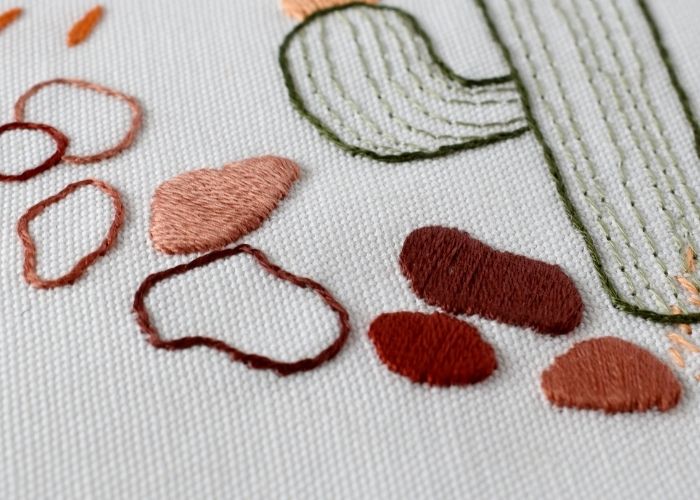
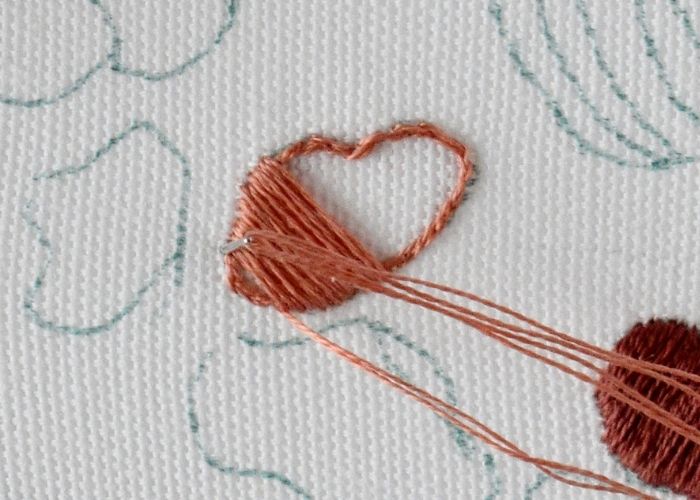
- Satin Stitch – outline
To make a Satin Stitch with a neat border, first outline the shape with a Split Backstitch.

- Satin Stitch – filling
Start filling from the center of the shape. Keep all the stitches parallel to the first one.
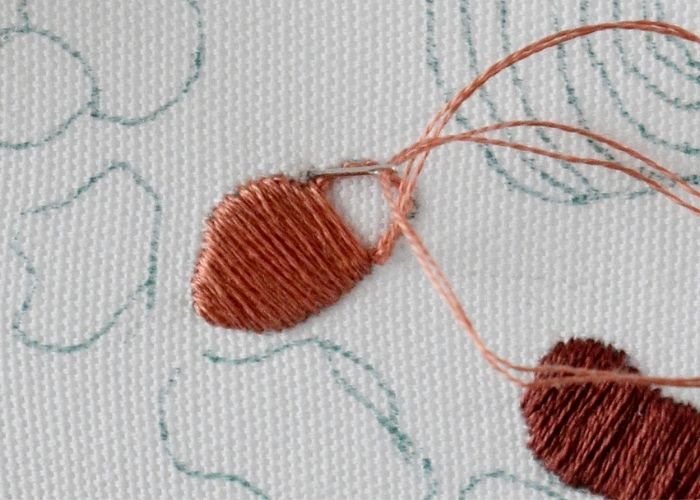
- Satin Stitch – filling
First, fill one side of the shape.
- Satin Stitch – filling
Then, return to the shape’s center and fill the design’s second part.
- Split Backstitch
After you fill some pebbles with Satin Stitch, outline others with a Split Backstitch.
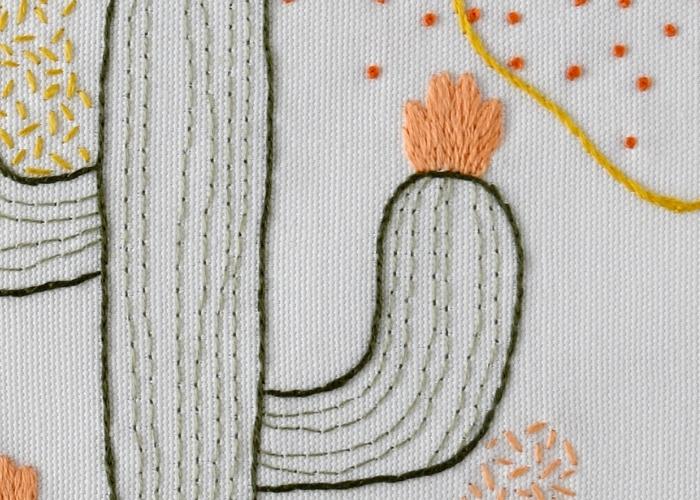
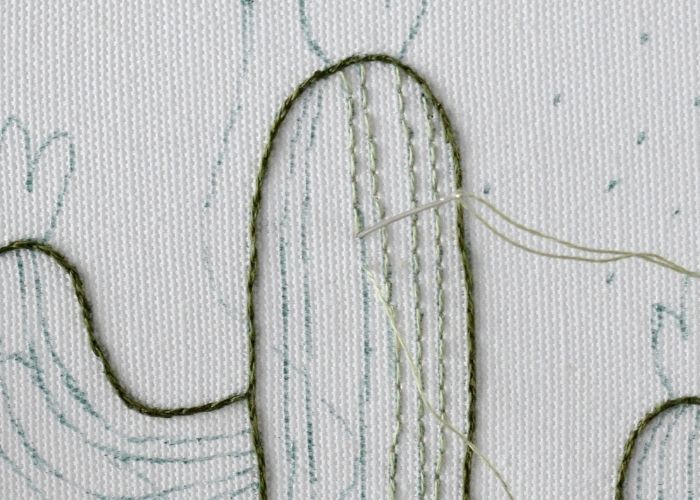
- Outline the Cactus
Use a Split Backstitch to outline the shape of the Cactus plant. Start with the central part.
- Outline the branches
Use the same Split Backstitch to outline the branches of the Cactus.
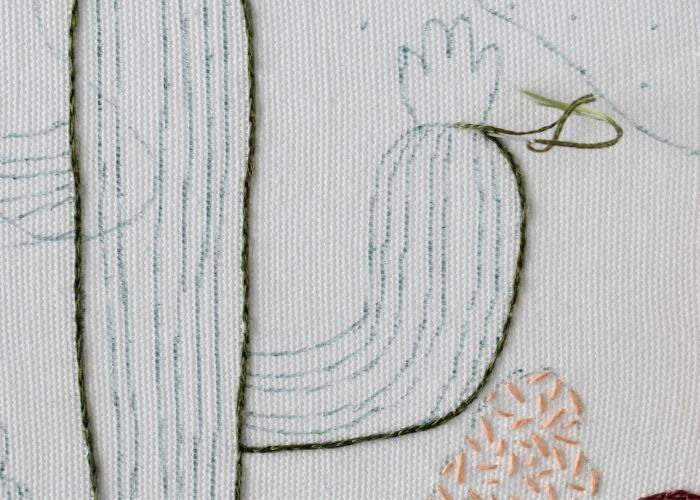
- Finish outline
On the curves, make your stitches slightly shorter; this way, the curves will look smoother.
- Backstitch
Embroider all the inner lines on the Cactus with a Backstitch. Use a single strand of embroidery floss.
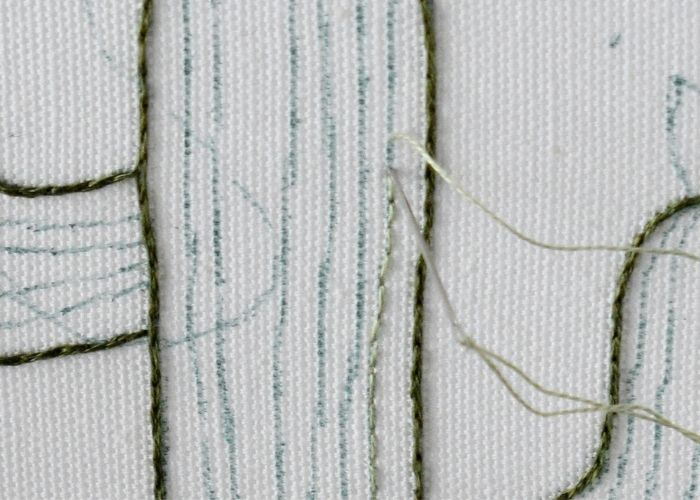
- Backstitch
You can embroider with a Backstitch in both directions, so do not cut the thread; move up and down and left and right until you embroider all the design lines.
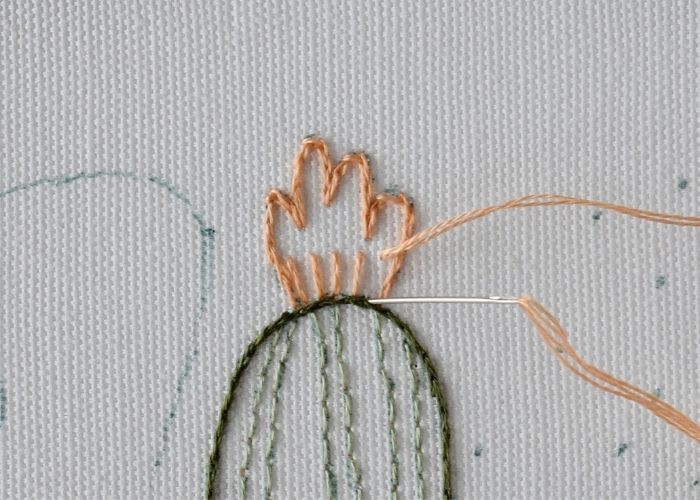
- Long and Short Stitch – outline
First, outline the flowers of the Cactus with a Split Backstitch. This will create a neat border for your Long and Short Stitch.

- Start with guiding lines
Before you start filling, make some guiding stitches that will indicate the direction for the upcoming stitches.
- Rows of Long and Short stitch
Add stitches row after row, till the entire shape is filled.
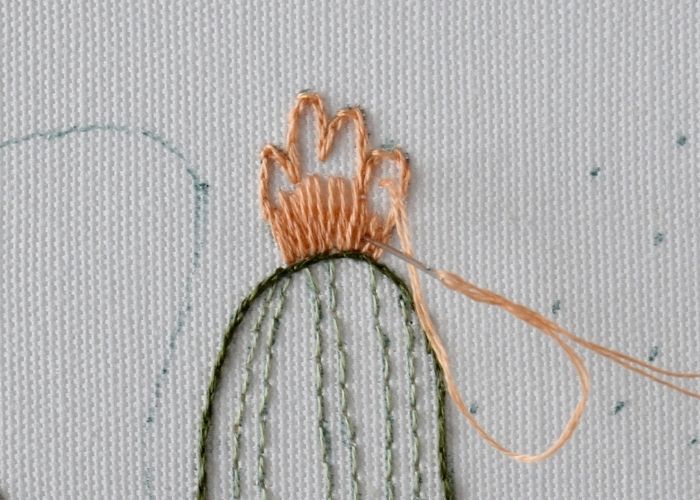
- Carefully fill the edges
Finally, make the stitches that will cover the last pieces of the fabric still visible.

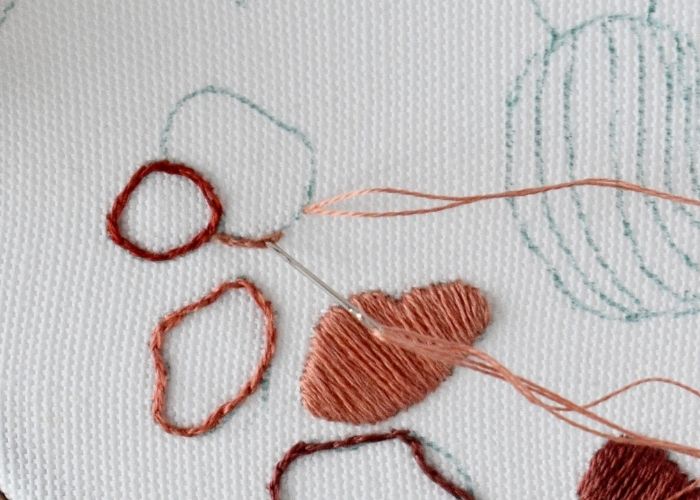
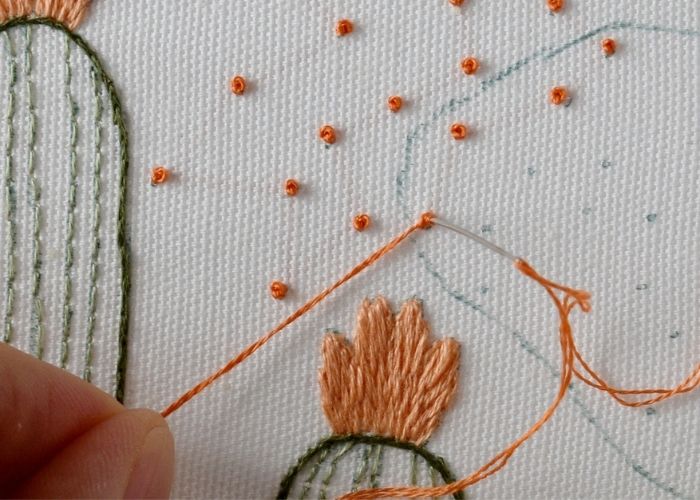
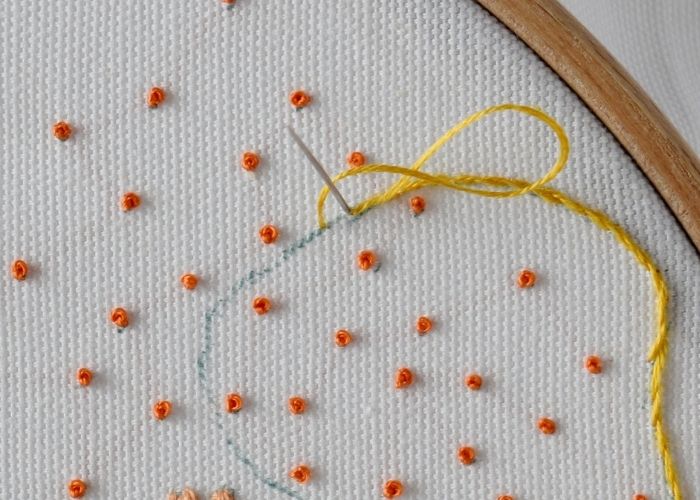
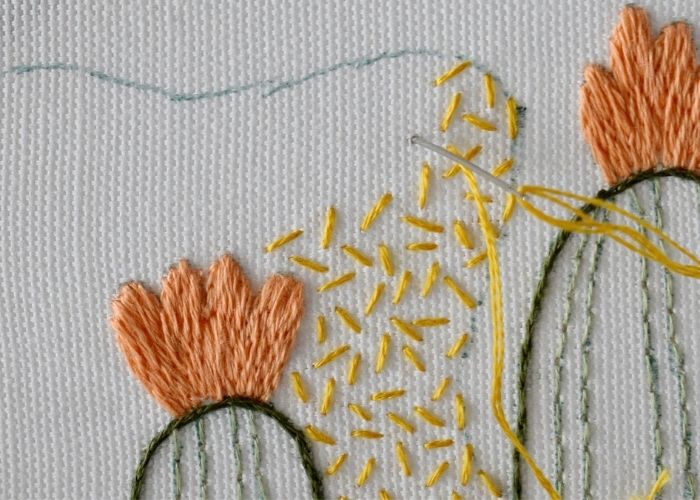
- French Knots
Embroider the cloud of French knots. Twist the thread around the needle twice.
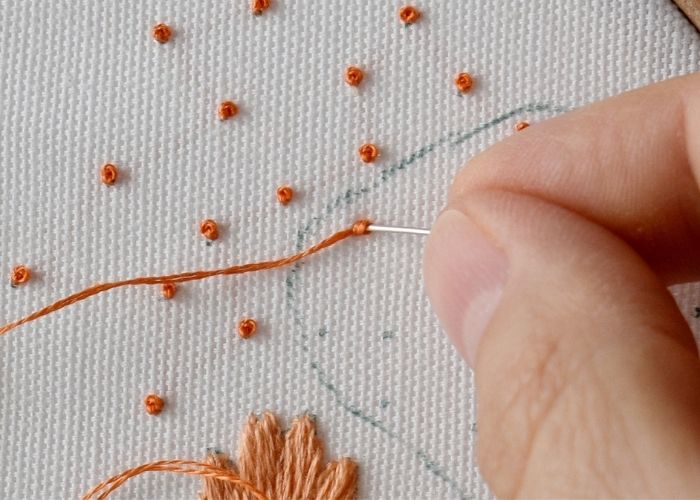
- French knots
Keep the working thread in tension till the last moment.
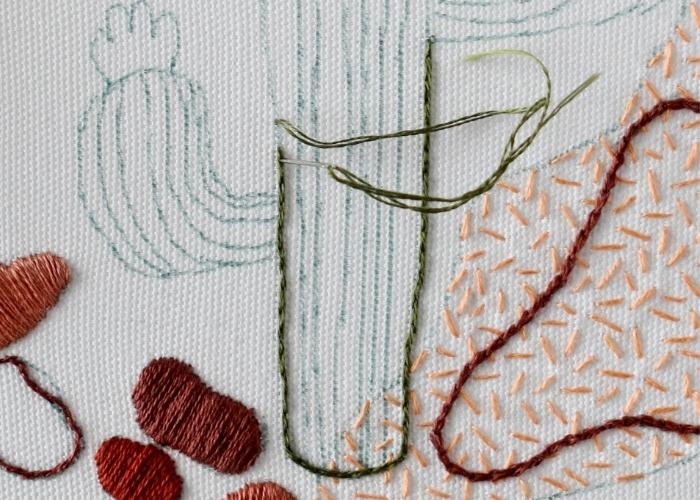
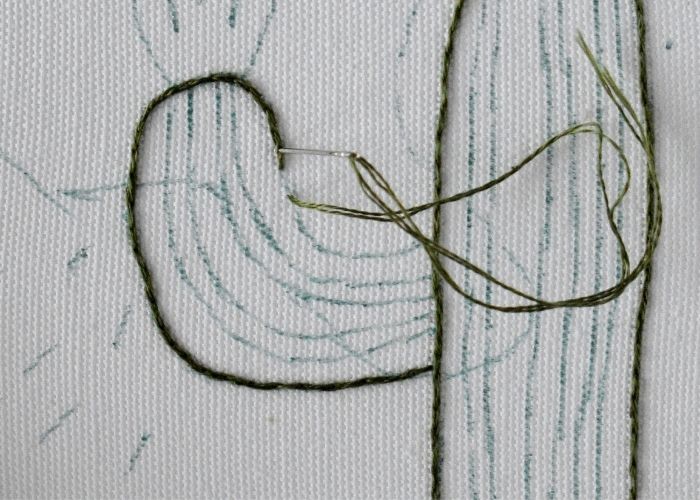
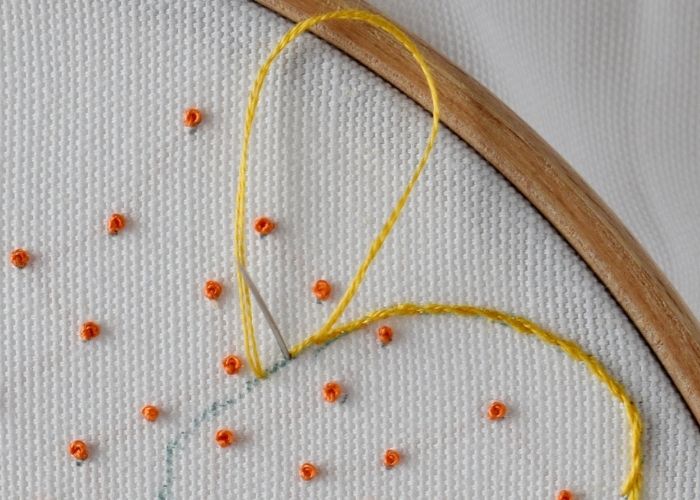
- Stem Stitch
Outline the shape with a Stem Stitch.
- Stem Stitch
Remember to keep the loop open in the same direction when you move around the shape.
- Seed Stitch
Fill the second shape with a Seed Stitch.
- Detached Chain Stitch
Make a single chain stitch on each line of the design. First, make an open loop.

- Detached Chain Stitch
Tighten the loop and add an anchoring stitch.

Video Tutorial
Recommended Products
Disclaimer. To cover the cost of creating free embroidery patterns and video tutorials for this blog, I do sometimes link to products. Please assume these links are affiliate links. If you choose to buy through my links then THANK YOU! – it will make it possible for me to keep doing this.


Over To You

This needlework project with beginner embroidery stitches was created to give you inspiration and a sampler to learn and practice beginner hand embroidery stitches with a fun design you can later use to create something useful and practical.
Take your time, and do not hurry to finish the Cactus design in a day. Give each technique some time, and do not aim for perfection! Only long hours of practice and patience will lead to neat stitches.
If you wish to frame this embroidered Cactus in a hoop and use it as a wall decor – read the article “How to Frame Embroidery in a Hoop: Six Methods of Finishing the Back of the Hoop” and I’m sure you will find a method that suites your needs.
Don’t miss a thing!
Follow me on YouTube, Instagram, Facebook, Flipboard, Telegram and Pinterest. On the other hand, you can subscribe to the Practical Embroidery newsletter and get embroidery tips straight to your inbox every week!
More about hand embroidery for beginners
Embroidery materials for beginners. All you need to start learning hand embroidery
Hand Embroidery Basics: A Beginner’s Guide to Needlework
Basic embroidery stitches for beginners: 18 basic hand embroidery stitches to start stitching like a pro