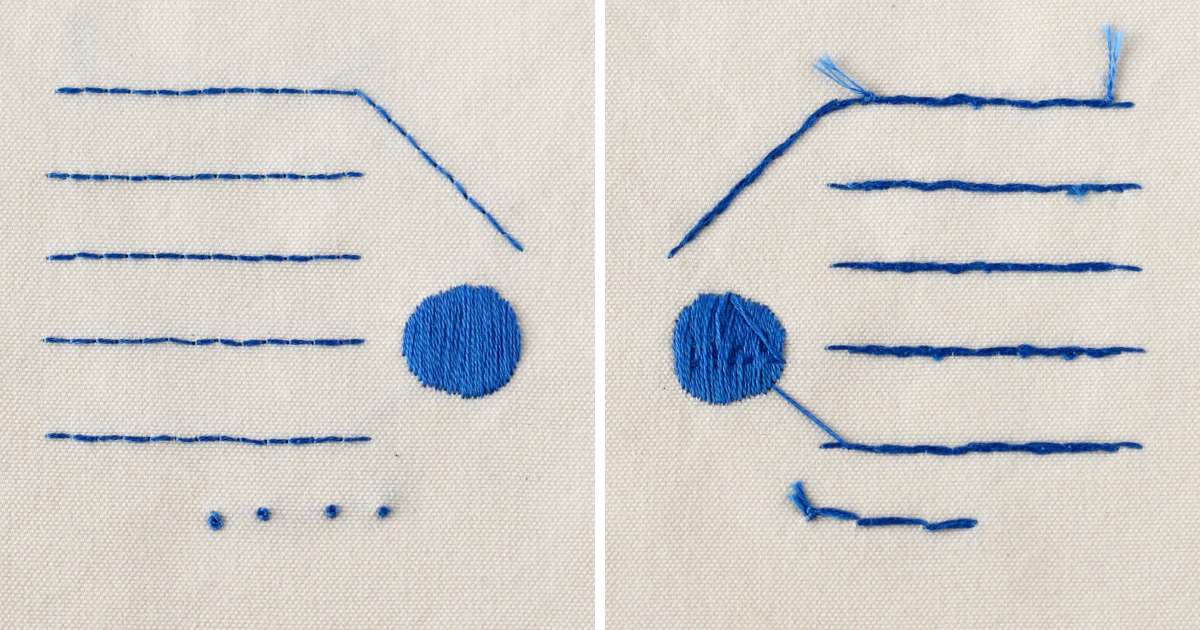
How to start and end embroidery stitches
Learn neat and tidy ways to begin and finish hand embroidery stitches
You can see a lot of hand embroidery tutorials on the internet, but how do they start and finish stitching? Usually, it remains a secret. In hand embroidery, there are many different ways to start stitching and finish the stitch. Your choice will depend on what kind of stitches you will use and whether you will cover the area where you begin and end embroidering with stitches later. Although almost no one will see your holding stitches, it might be your most crucial stitch. Make it right, and you will be safe knowing your hard work is secure.
Let’s explore all the methods available to start and end hand embroidery stitches and see each method’s pros and cons.
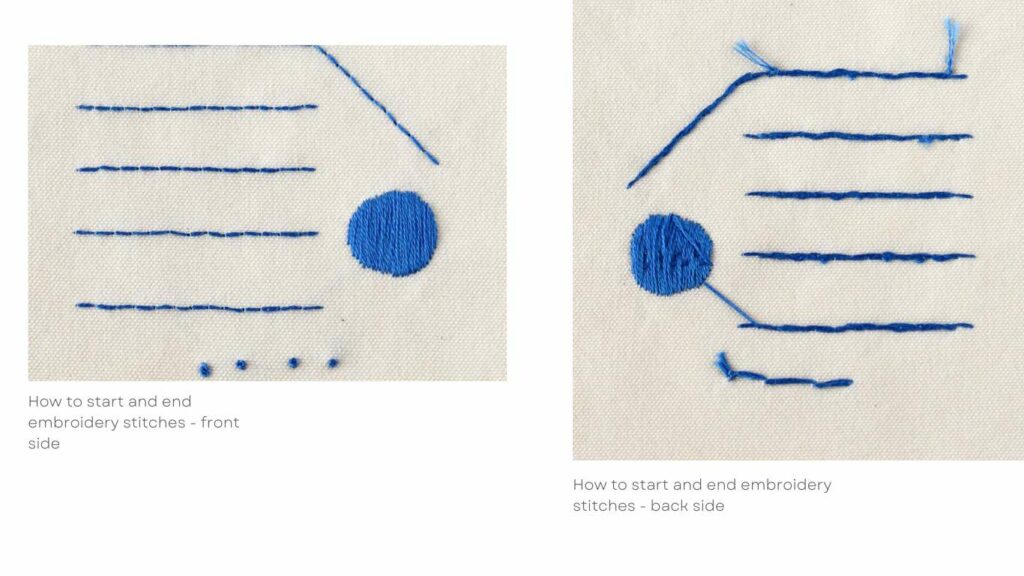
Simple knot on the back of the fabric
Starting to stitch with a knot on the back of the fabric is a straightforward method that most hand embroidery beginners know. Even if the knots on the back of the material are not appreciated, one can still use them if the back side of the embroidery art will not be visible. I use this method for the stitch samplers and testing pieces. But I recommend something other than this method of starting to stitch if you plan to embroider on the garments, home textiles, or the pieces that have to be framed later.
Simple knot: Method
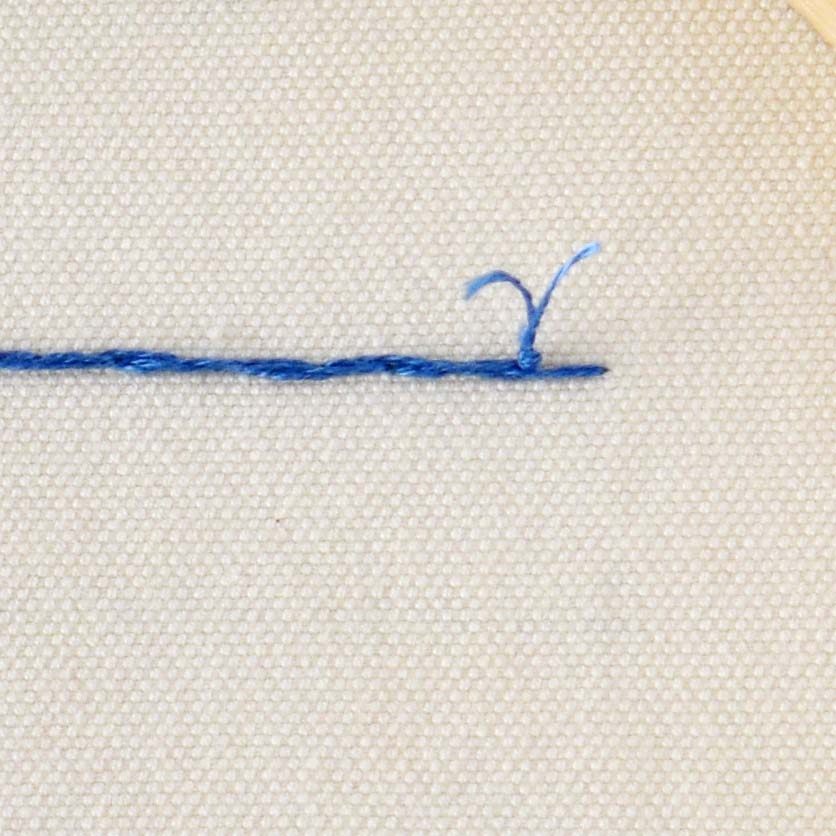
- Thread your needle and tie a little knot at the end of the thread.
- Start embroidering, leaving the knot on the backside of your embroidery.
Simple knot: Pros
- Making a knot is a simple and fast way to start embroidering.
- With a knot, you don’t need any additional stitches to secure the thread.
- There is no wasting of thread.
Simple knot: Cons
- With time, knots get looser, and you risk that your embroidery will start to fall apart, especially if you wash your embroidered piece often.
- Knots may be visible from the front side, especially if the material is thinner and the thread is dark.
- Even on thicker material, knots can be visible as tiny bumps when you frame the embroidery.
- If you embroider on clothes, knots on the inner side may scratch and irritate the skin.
- Suppose the back side of the embroidery is visible. In that case, knots will make the back of your embroidery look messy and unprofessional.
- Some fabrics, like Aida cloth for cross stitch or tule, have holes that will not hold the knot on the backside.
Holding stitch
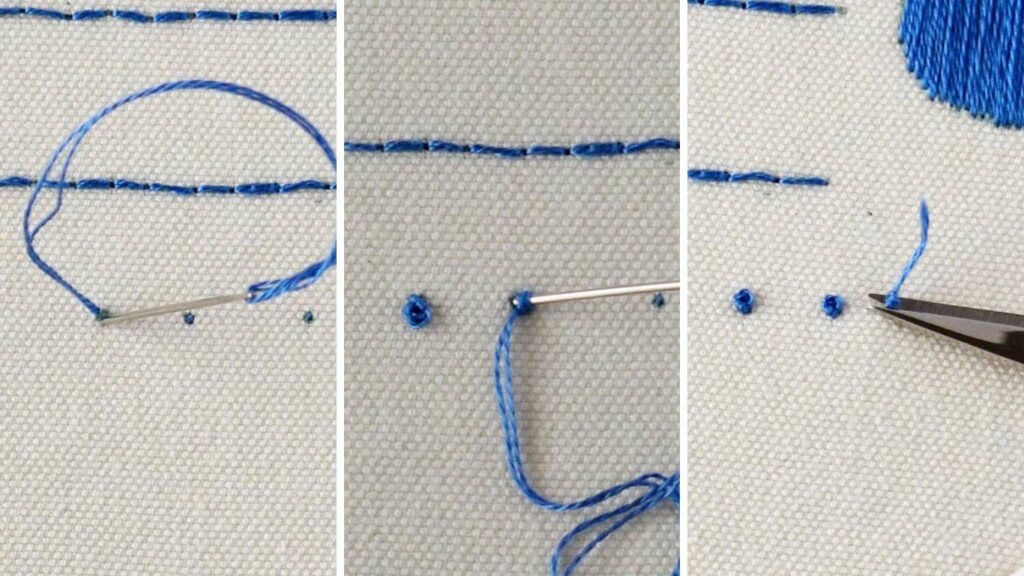
A holding stitch method is also called anchor stitches or waste knots. It is a series of tiny stitches to secure the thread on the fabric without making a knot. Holding stitches are made on the line or within the shape you are filling, so they will lie under the stitching.
Holding stitch: Method
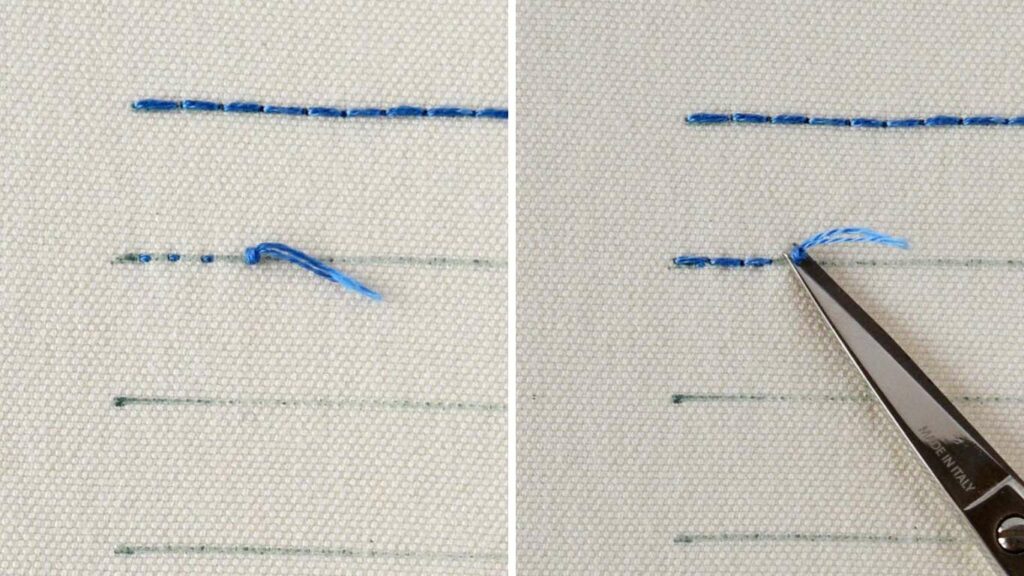
- Knot the end of the thread and take the thread down through the fabric from the top.
- Pull the thread through, then bring the needle up just behind the knot, either on the line or within the shape you are filling, so it will lie under the subsequent stitching.
- Then, pull the thread through and make two tiny stitches close by.
- Bring the needle up where you wish to start stitching and cut off the knot close to the fabric.
- TIP. If you plan to embroider single stitches like French knots or Colonial knots, make a tiny holding stitch under each planned knot.
Holding stitch: Pros
- Holding stitches are invisible after you cover them with the stitch or filling stitches.
- You need just a little additional thread to make these tiny stitches.
- You get a smooth surface of the stitch on both sides of the embroidery.
Holding stitch: Cons
- Making holding stitches is possible if your design includes filled areas or the stitches you use can cover holding stitches.
Folded thread method
This method to start embroidering is also called the loop method. It is straightforward and one of my favorites. I use it for all paper embroidery projects and when embroidering on home textiles.
Folded thread: Method
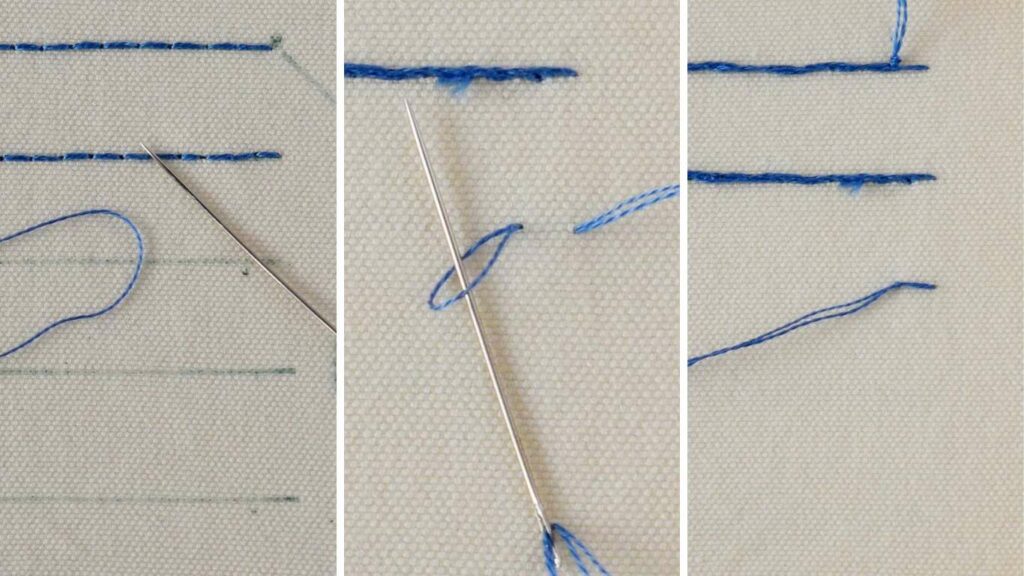
- To start stitching with this method, you will need a thread twice as long as you usually use.
- Cut the thread and thread the cut ends into the eye of the needle, with the folded end last.
- Push your needle from the back to the front of the fabric as you usually would, only don’t pull the thread all the way through. Leave a small loop on the back of the material.
- Make a stitch on the front of the fabric — but before you pull the needle and thread through, turn the piece over again and pass the needle through the loop.
- Pull the needle through the loop and tighten the thread. This will create a chain stitch around the working thread.
- Turn the fabric over and continue stitching. Your thread is secured to the back of the material with no knot.
Folded thread: Pros
- The starting point of your stitch will be invisible.
- There is no wasting of thread.
- No additional steps or stitches are required.
Folded thread: Cons
- This method can be used only if you use a pair of threads – two, four, or six strands of embroidery floss. Therefore this method does not work for single pearl cotton thread or other types of yarn you might want to use.
- This starting method requires that either the first formation of your stitch is a straight stitch or that you work a straight stitch to anchor the thread and then stitch over it with other stitches.
Waste away knot
This starting method is called this because you will eventually cut off the knot you start with. This technique works with any type of thread and any number of strands, and any kind of stitches.
Waste away knot: Method
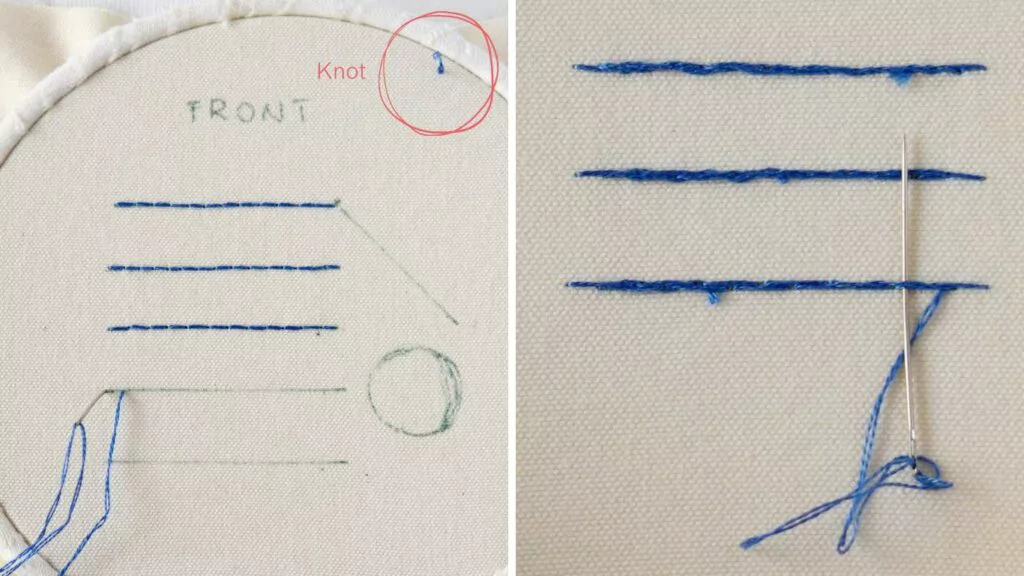
- Start with your fabric up, a knot at the end of your thread, and take your needle down into your material from the top like 10-12 cm (at least 3 inches) away from the point you intend to start stitching so that your knot is on top of your fabric.
- Take the needle up at the starting point of your embroidery. Ensure the path between the knot and where you’re starting isn’t in line with your stitching.
- Make all of your stitches and secure the end.
- Then pull up on the knot, and snip it close to the fabric. You will see a loose thread on the back of the stitching.
- Thread this loose end of the thread back onto your needle, and wrap your threads on the back to secure them like you would anchor the end of the stitch.
Waste away knot: Pros
- Waste away knot is invisible after you secure the loose thread.
- This method will work with any type of embroidery stitch.
Waste away knot: Cons
- You have to take care of every waste away knot immediately, as otherwise, it will get tangled under subsequent stitches, and the back of your embroidery will become a mess.
- It’s wasteful. For every stitch started this way, you will need an extra 10- 12 cm of thread.
Starting with a tucked tail
One more method to start embroidering is the tucked tail method. It is simple and does not require a lot of thread to waste, but you need a bit of experience to use it.
tucked tail: Method
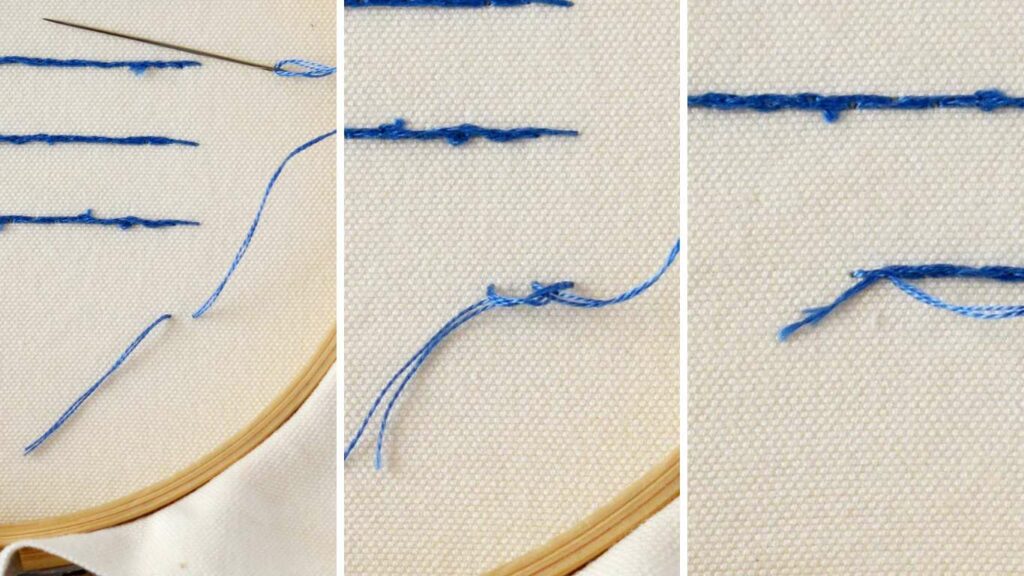
- Start stitching without any knots. Come up to the front side, make a stitch, and pull the thread, but leave a 3-4 cm tail on the back.
- When you make the next stitch, leave a loose loop on the back, turn the hoop, and tuck the tail you left under the stitch. Tighten the loop.
- Repeat this tucking under the back side of the stitches 3-5 times, or until all the tail is tucked.
- Cut away the excess thread.
tucked tail: Cons
- This starting method does not require additional threads or additional steps to make it.
- After you master it, it’s fast and straightforward.
tucked tail: Pros
- This method can be complicated for embroidery beginners, as you need to have experience maintaining the tension of the stitches.
- It will not work with detached stitches or semi-covering stitches like Running stitch.
Anchoring your stitches to the previously made stitches
Suppose you already embroidered your first shape and need to continue with another kind of stitch or in different colors (or your thread is finished). In that case, you can anchor your new stitches to the ones already made.
Anchoring Method
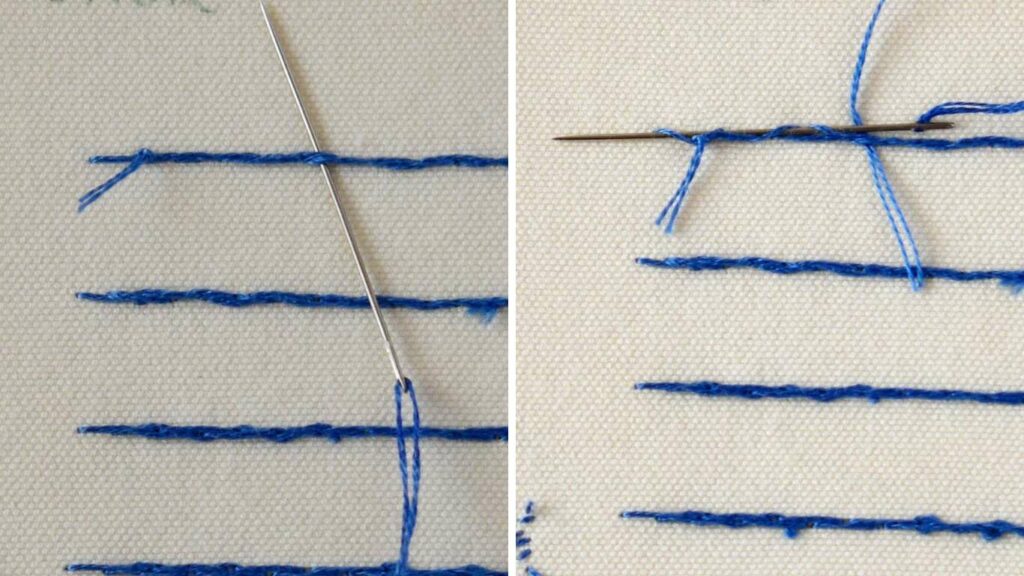
- Turn over your hoop as you start working from the back side of the embroidery.
- Take your threaded needle under the stitches of the previously embroidered shape at about 2 cm (half an inch) away from where you will start your new stitches.
- Backstitch over the thread you went under, and then continue threading your needle under the line of stitches until you’ve reached your starting point.
- Then pull the needle through to the front side of the embroidery and start your new shape or color.
Anchoring Pros:
- This method is straightforward.
- The starting point will be invisible from the front side.
- This method does not require any additional stitches or extra thread.
Anchoring Cons:
- This method can be used only if the new stitches are connected with previously made ones.
How to end embroidery stitches
Make a knot
This method is excellent for detached, filling, and most hand embroidery stitches. You can use it any time the back side of the embroidery will not be visible.
knot Method
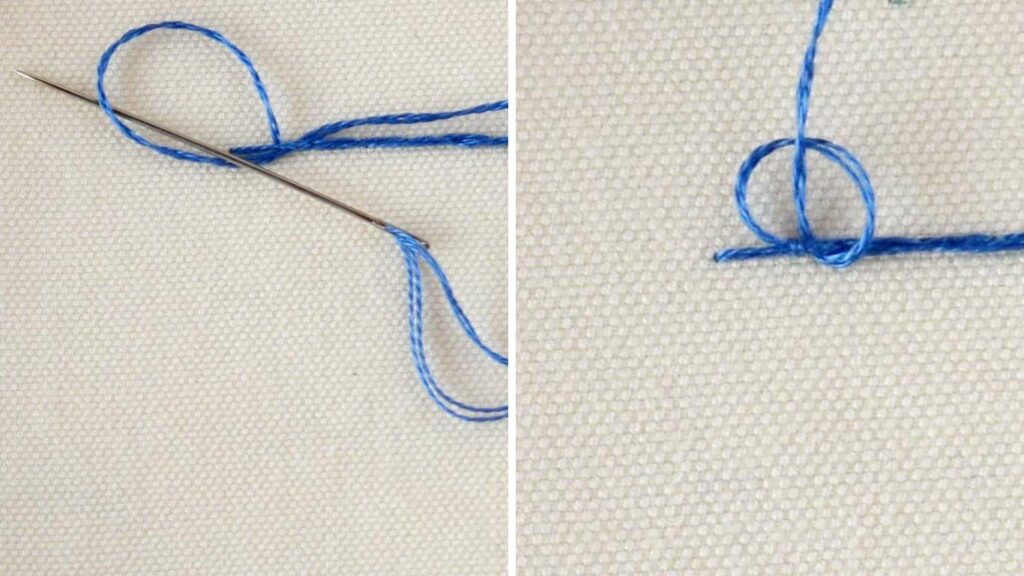
- Pass the needle under the back side of the last embroidery stitch and leave a loop.
- Push the needle through the loop and tighten it. You have a knot.
- Make a couple of knots and cut the thread.
Anchor under the stitches
This method of ending threads will work with practically any kind of stitch. Also, this method will not create knots or bumps on the back side of the embroidery.
Anchor under: Method
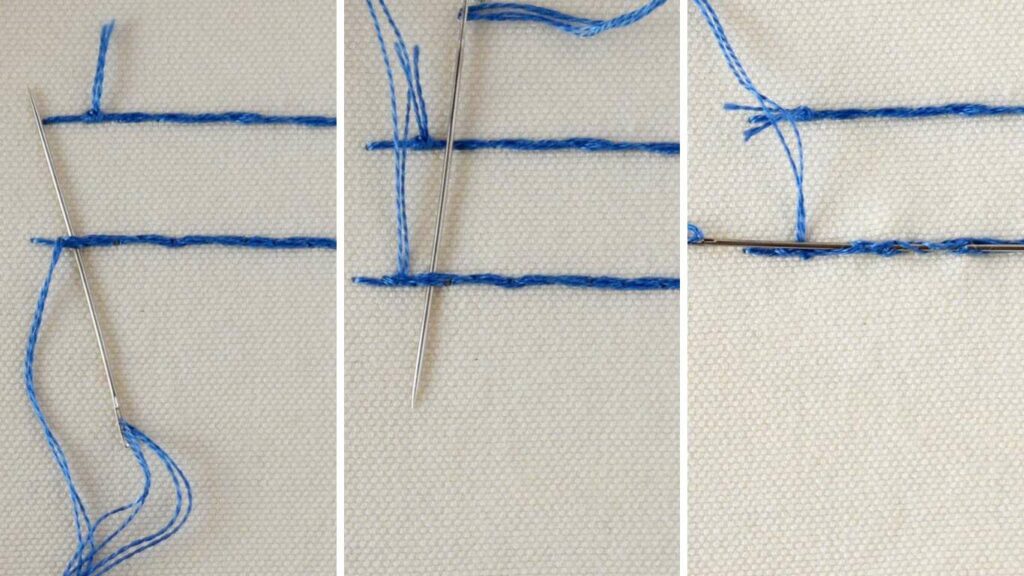
- Once you’re ready to end your thread, take your needle to the back of the fabric (with the last stitch) and turn your work over.
- Run your needle under the back of two or three stitches.
- Backstitch over the last thread you went under, and then continue threading your needle under the line of stitches until you’ve about covered your embroidery needle.
- Then pull the needle through and cut off the thread.
Ending embroidery with holding stitch
You can end your thread with holding stitches if you make embroidery with many covered areas.
Ending embroidery with holding stitch Method
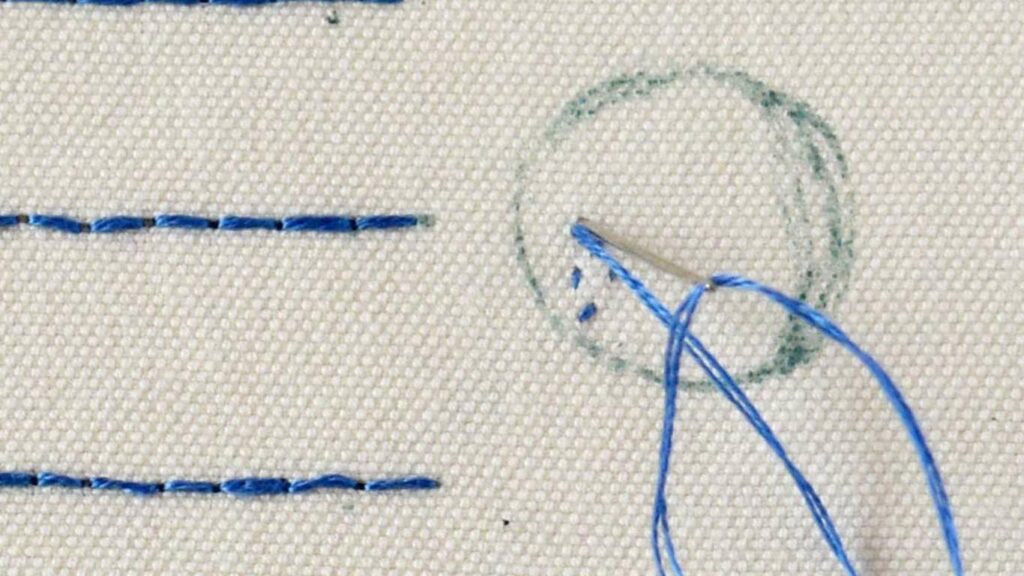
- When you finish stitching, make two or three tiny stitches at the end in the area that will be covered later, and bring the thread through to the top of the fabric.
- Cut it off close to the fabric. Subsequent stitches will cover those tiny stitches and will secure your embroidery.
What’s next?
“For the things we have to learn before we can do them, we learn by doing them.”
― Aristotle
I highly recommend trying all the methods to start and end embroidery stitches to find your favorite one. And you will have to practice it for some time before becoming really good at it. After you do that, you will never want to return to the simple knot on the back of your embroidery, I promise.
If you need visual guidance in trying the methods to start and end embroidery stitches, watch a video tutorial on the Practical Embroidery YouTube channel.

