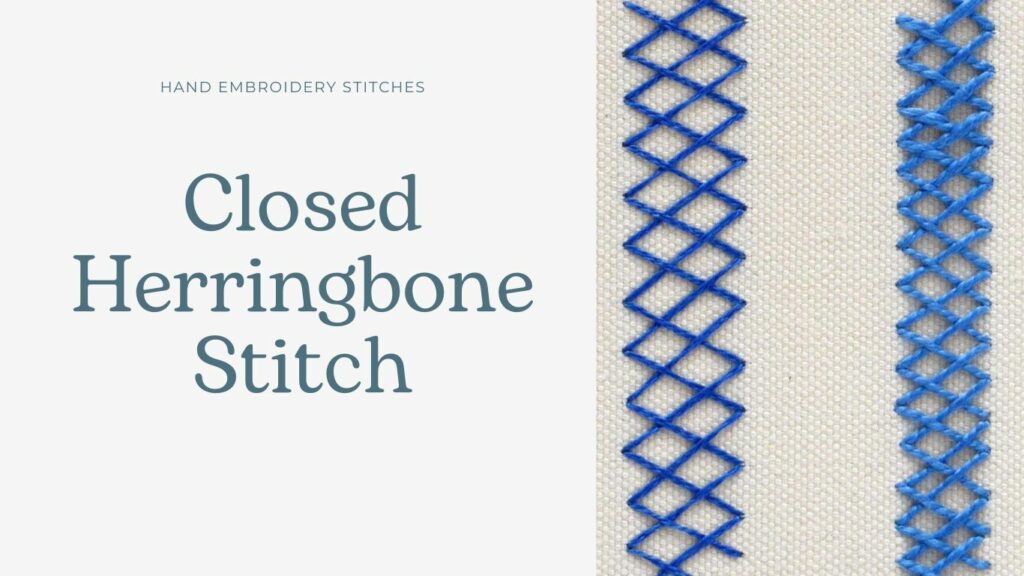
Closed Herringbone Stitch
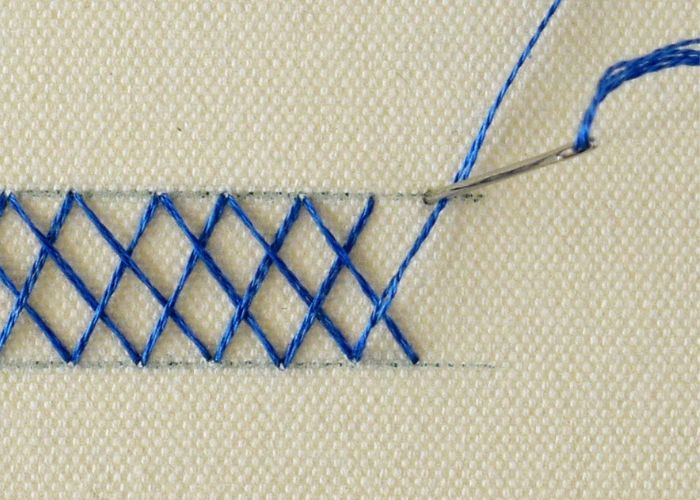
Closed Herringbone Stitch is one of the variations of the Herringbone Stitch. The stitches are placed close to each other so that the points of the stitches are touching each other at the top and the bottom. This stitch is worked on two parallel lines and forms a solid line.
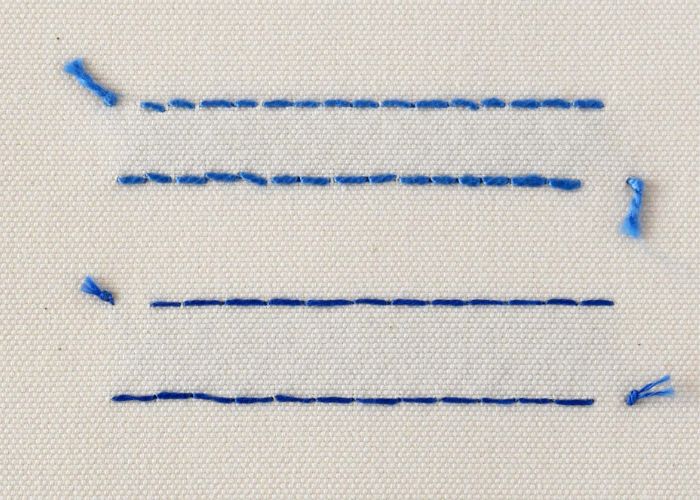
On the back side, this hand embroidery stitch looks like two parallel rows of backstitches. This makes Closed Herringbone Stitch very handy for garment embellishments.
This hand embroidery stitch is relatively flexible – you can modify the row width as you go and make curves with this stitch.
Other names of this embroidery technique
This hand embroidery stitch dates to the 16th century and has many alternative names. We also call this embroidery technique Persian Stitch, Algerian Plait Stitch, Crossed Back Stitch or Close Herringbone Stitch.
Another name for this embroidery technique – Double Back Stitch. Which name to use will depend on the visible side of the cloth – one side is Closed Herringbone Stitch, and the other is Double Back Stitch (a.k.a. Shadow Stitch).

Applications of Stitch
Due to its double-sided nature, this hand embroidery stitch is great for embellishing the garments. Besides that, you can use Closed Herringbone Stitch for filling, borders, outlines, or as a part of composite stitches. In botanical embroidery, this embroidery technique is used to depict the flowers’ leaves or petals.
Moreover, Double Back Stitch is convenient for mending tasks. You can replicate the double seams on the edges of the t-shirts with this embroidery stitch.
More stitches from the Herringbone stitch family
- Breton stitch
- Herringbone Stitch
- Otomi Stitch
Learn how to embroider Closed Herringbone Stitch
Follow the step-by-step tutorial with detailed photos below, and you will learn the Closed Herringbone Stitch stitch in no time. If you are a visual learner, watch a video lesson in the tutorial or on the Practical Embroidery YouTube channel to learn this hand embroidery stitch faster.

How to embroider Closed Herringbone Stitch
Step-by-step hand embroidery tutorial
Instructions
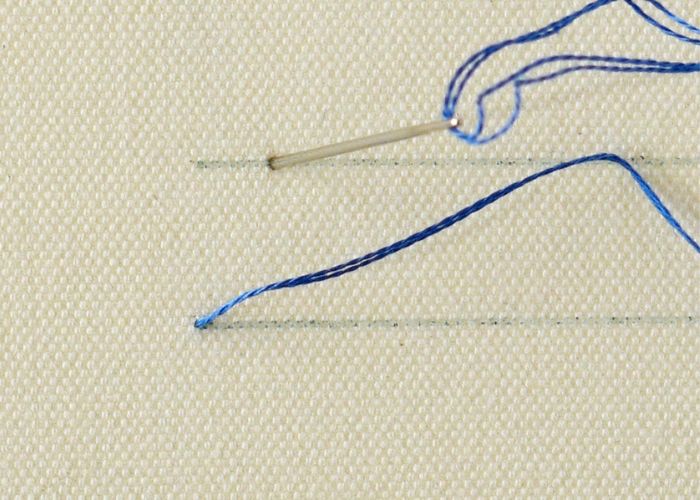
1. Mark two lines on the fabric.
2. Take the needle up on the left bottom corner of the mark. Make a diagonal stitch to the top right.
3. Make one stitch back and come up on the top line.
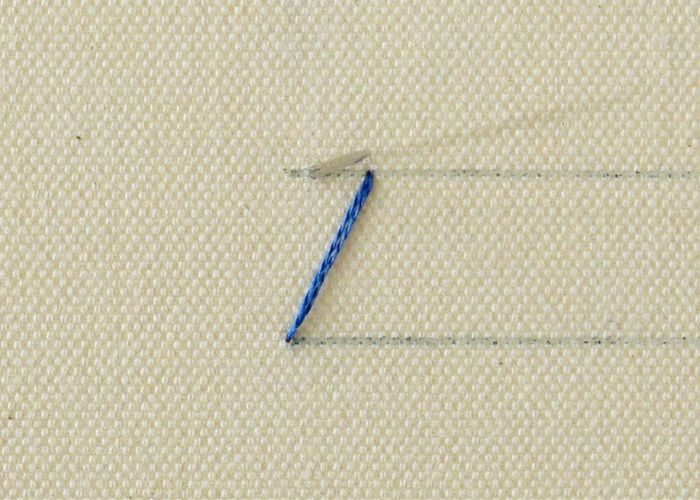
4. Make a diagonal stitch down.
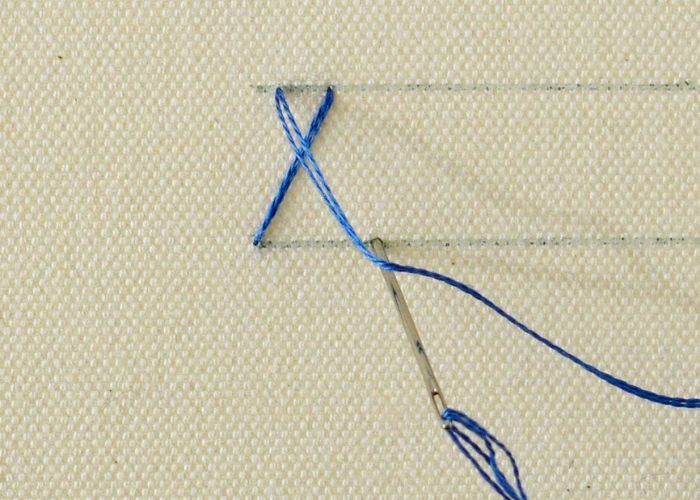
5. Make one stitch back and come up on the lower line.
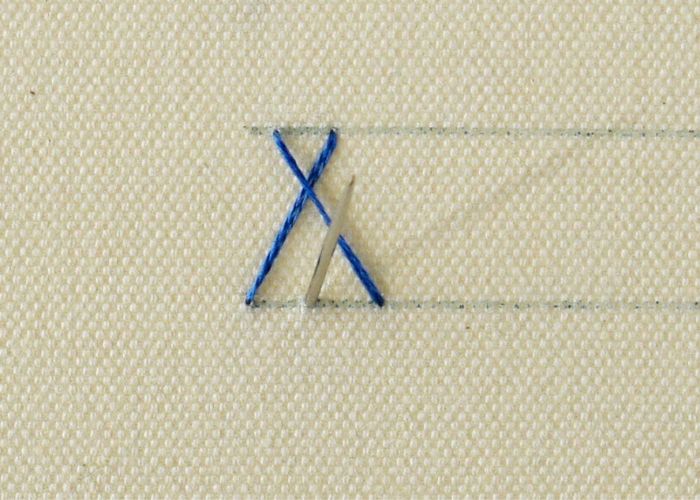
6. Make a diagonal stitch to the top right. This stitch should be parallel to the first stitch. Make a stitch back. Take a needle up on the top line at the same point where the last stitch was made.
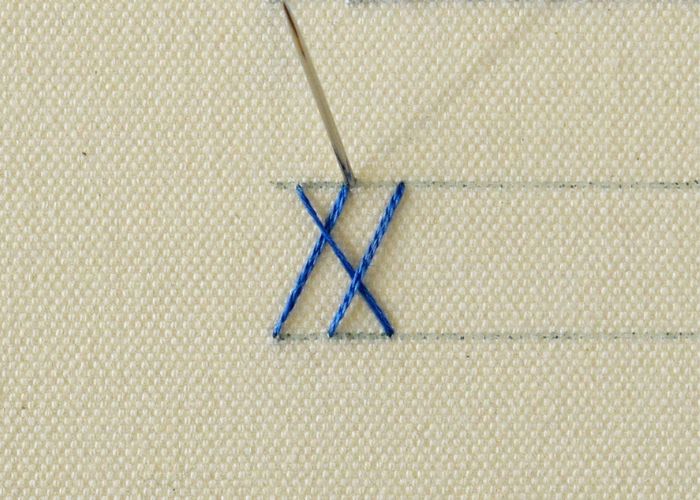
7. Make a diagonal stitch down. The stitch is parallel to the previous stitch.
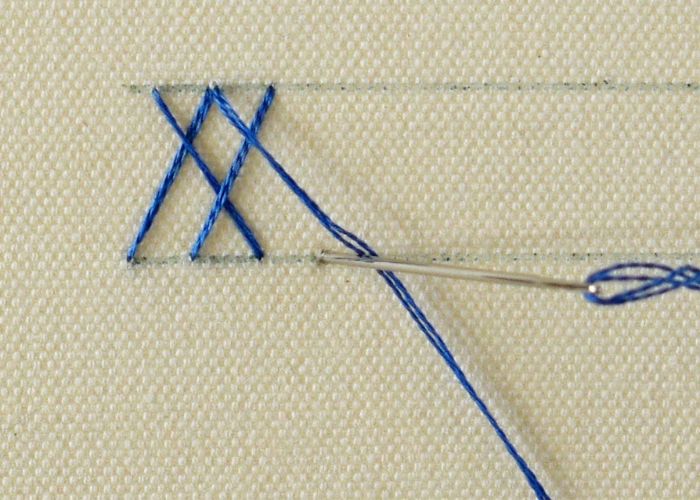
8. A stitch back to the same point as the previous stitch.
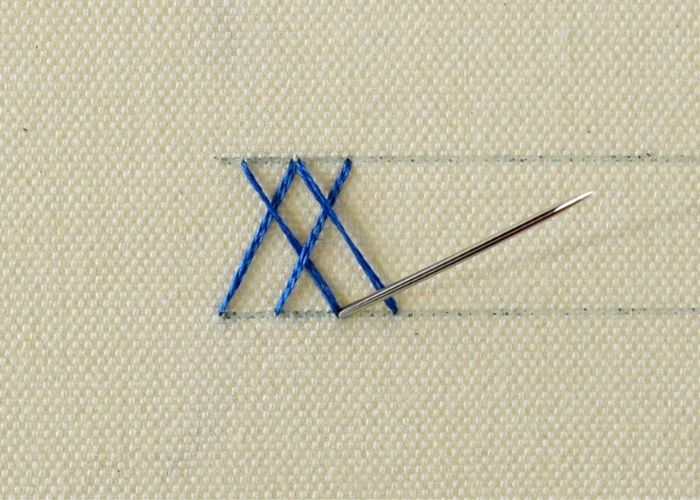
9. Repeat the sequence of the stitches until you fill the entire row.
Video tutorial
Tools and materials I used for this sampler
Disclaimer. To cover the cost of creating free embroidery patterns and video tutorials for this blog, I do sometimes link to products. Please assume these links are affiliate links. If you choose to buy through my links then THANK YOU – it will make it possible for me to keep doing this.
What’s next?
If you’re in the mood to explore more hand embroidery stitches, check out the Stitches and Techniques page for the list of other fantastic stitches available on my blog. From timeless classics to modern twists, a whole world of stitches is waiting for you to explore and master. So, grab your hoop and needle, and let’s stitch our way to creative bliss!
Don’t miss a thing!
Follow me on Instagram, Facebook, and Pinterest. Or why not subscribe to Practical Embroidery and get embroidery tips straight to your inbox every few weeks?
Need More Guidance?
The top 10 hand embroidery stitches to learn is a free online course created for beginners.


