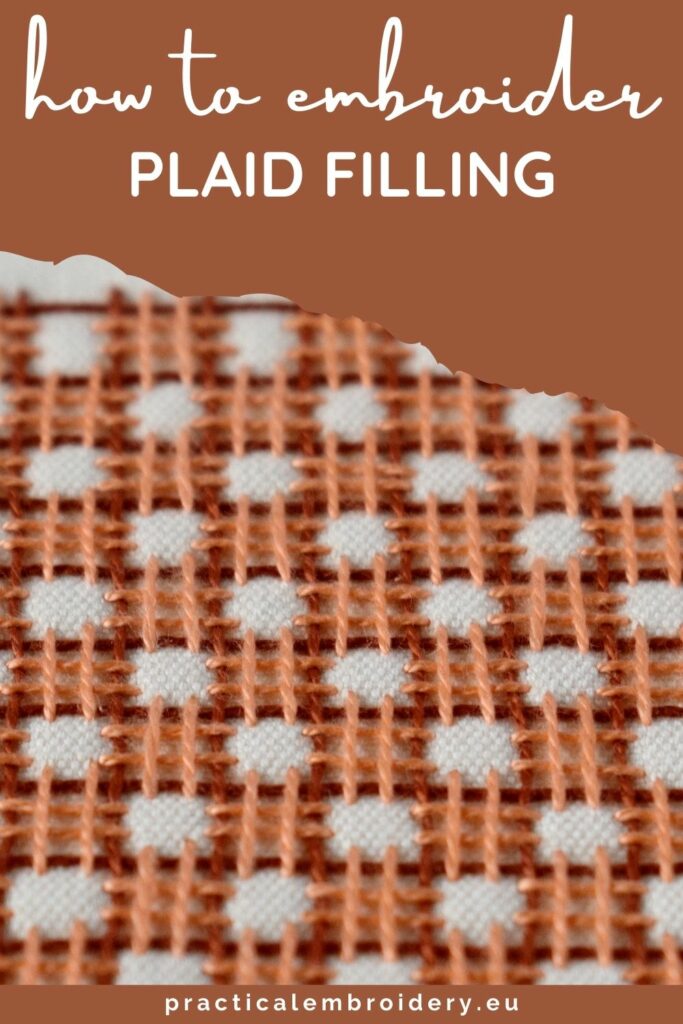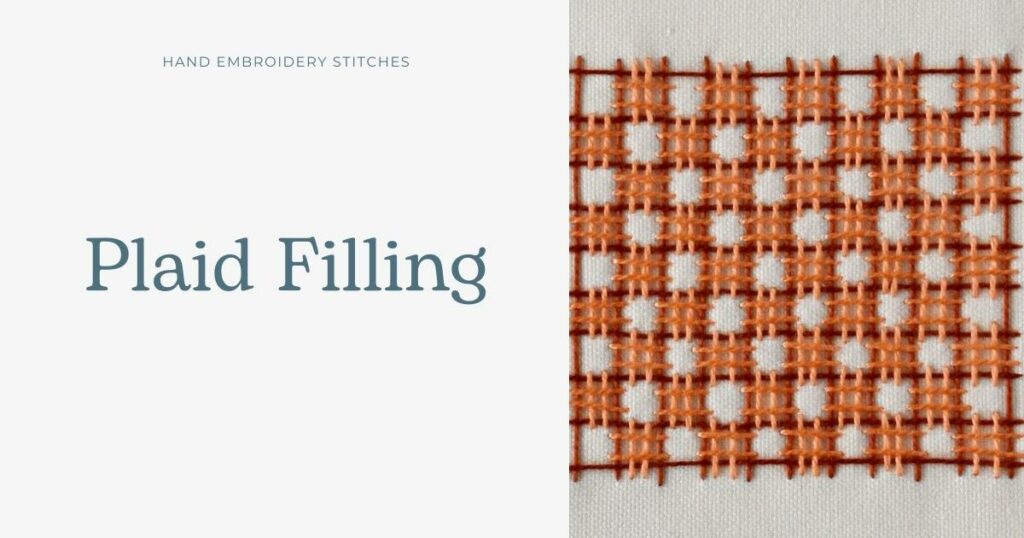
Plaid Filling
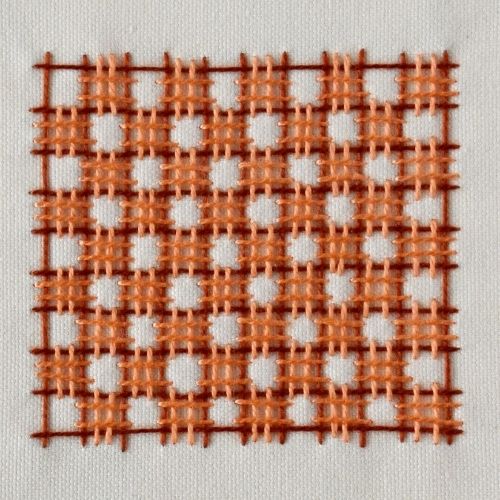
Plaid Filling is a hand embroidery technique from the Couching stitch family. Long laid threads are couched to the surface with crossed double stitches. This technique creates a geometrical layered surface that looks decorative and fills the surface quickly.
Applications of the Plaid Filling Stitch
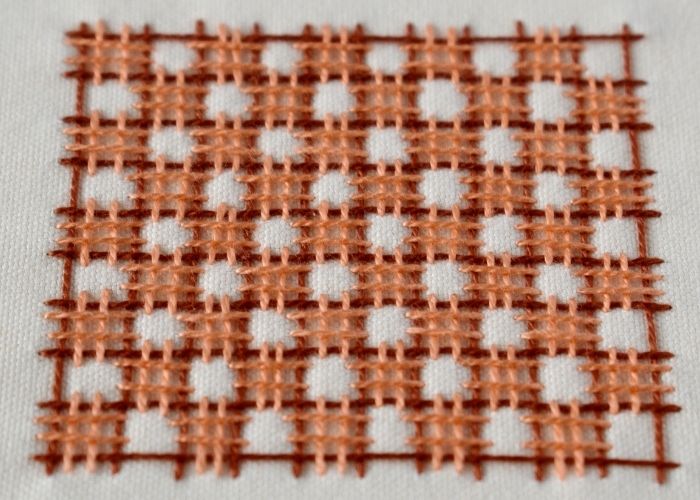
This hand embroidery technique allows the filling of large surfaces quickly. It creates a semi-covering filling where some background fabric is still visible.
The Plaid Filling technique allows for experimentation with various colors and color combinations. You can make laid threads of one color and the couching – of a contrasting color. Besides that, you can use two colors for couching – one for vertical stitches and the second for horizontal couching stitches. Of course, single-color Plaid Filling is also an option if your design requires a calm, monochromatic background with textural filling.
Visually, Plaid Filling Stitch resembles checkered blankets, plaid fabrics, or Scotch tartans. Therefore, you can use this hand embroidery technique to depict clothing or household textiles in modern surface embroidery.
More stitches from the Couching Stitch family
Learn how to embroider Plaid Filling Stitch
Follow the step-by-step tutorial with detailed photos below, and you will learn the Plaid Filling Stitch quickly. If you are a visual learner, watch a video lesson in the tutorial or on the Practical Embroidery YouTube channel to learn this hand embroidery stitch faster.
How to embroider Plaid Filling Stitch
Step-by-step hand embroidery tutorial
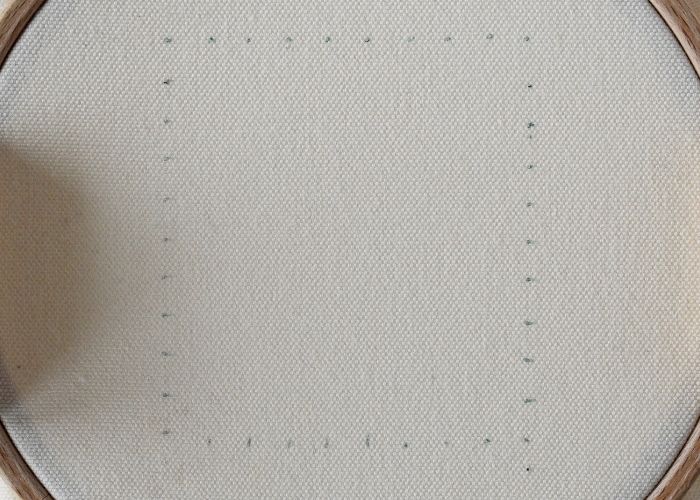
- Mark the grid
To make a neat grid, measure and mark equally distanced points for vertical and horizontal laid threads. I marked 10 points for horizontal and 10 points for vertical lines, distanced 1/4 inches (0.7 cm).
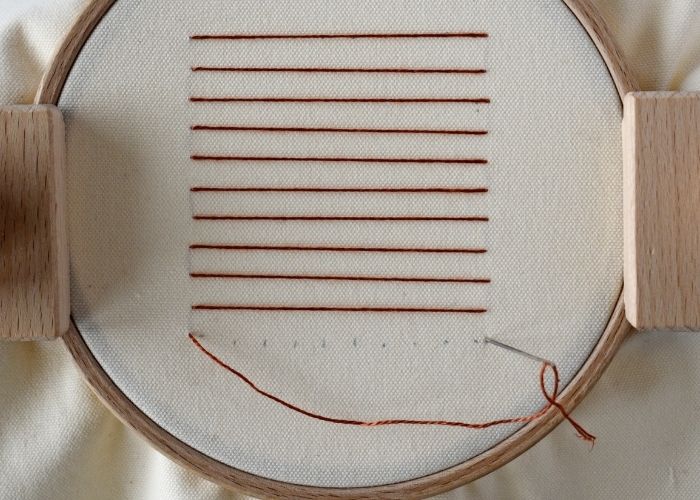
- Make horizontal laid threads
Follow the grid you just marked and embroider horizontally laid threads. Try to keep them parallel and equally distanced.
- Make vertical laid threads
Now, add equally distanced, parallel, vertically laid threads. This will form a neat square grid.
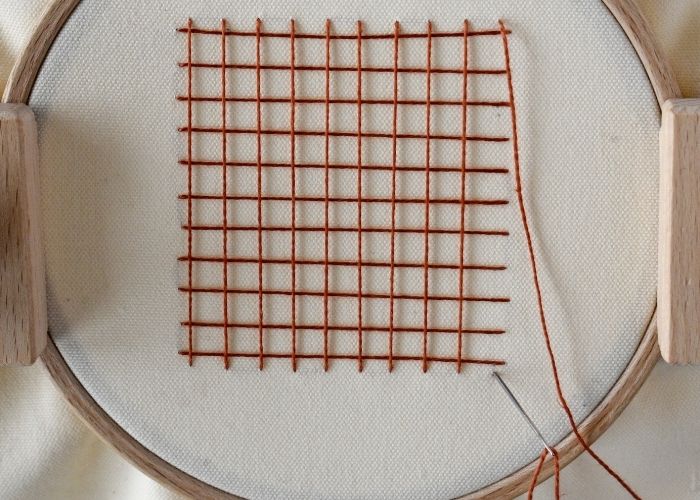
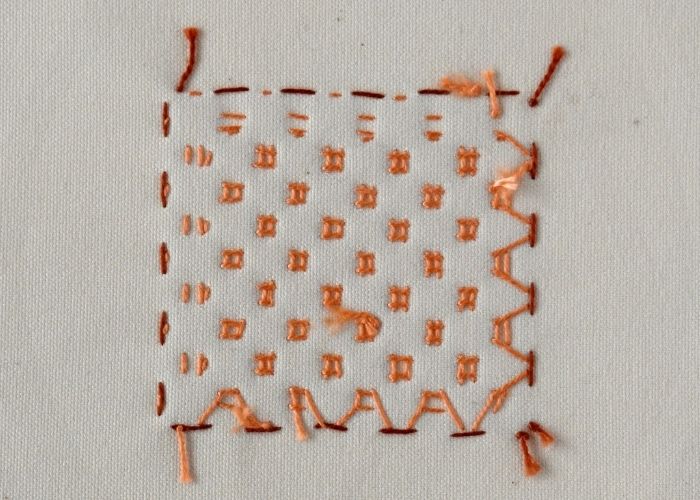
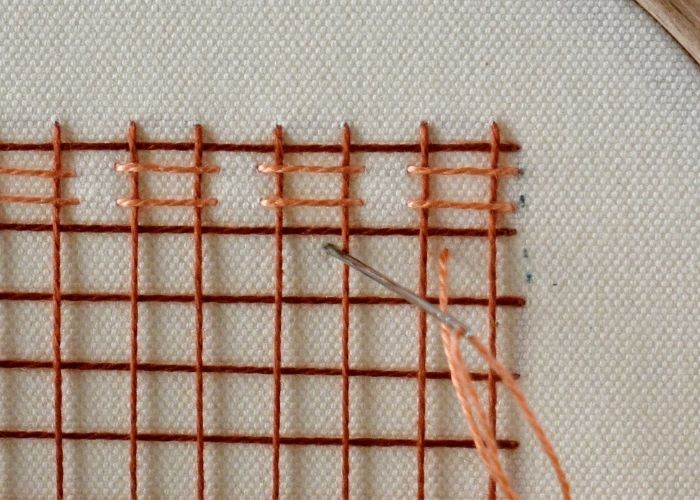
- First couching stitch
Start couching laid threads. I started with horizontal couching stitches. Each couching stitch holds two vertically laid threads. The first couching stitch holds the first and the second vertical stitches. You will need to place two rows of couching stitches between each line of laid threads.
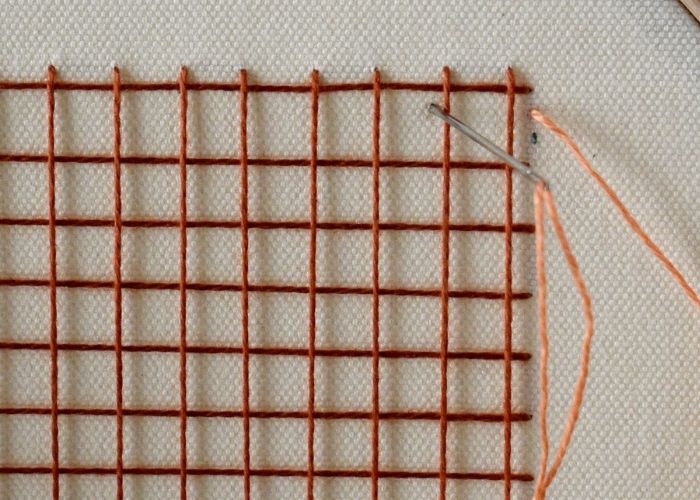
- Second couching stitch
Leave a gap and couch the third and the fourth vertical stitches. Couch all the vertical stitches in the row.
- The second row of couching stitches
Add one more couching stitch under the first on the return path.
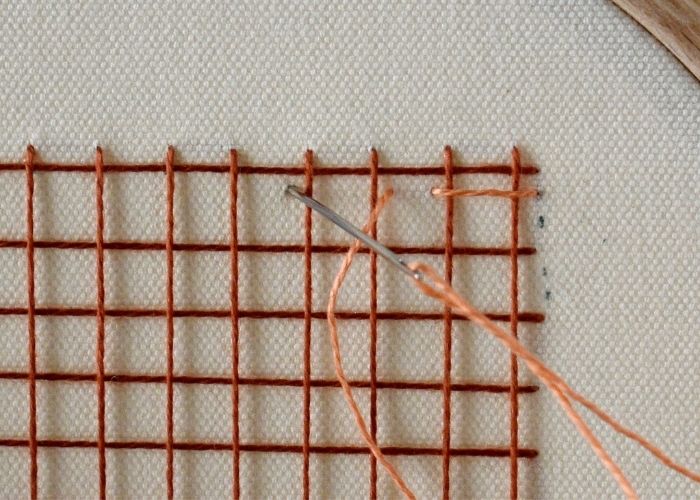
- Next row
We will start couching from the second vertical stitch on the second row and pair it with the third one.
- The return row
The return row will always duplicate the couching stitch from the previous row.
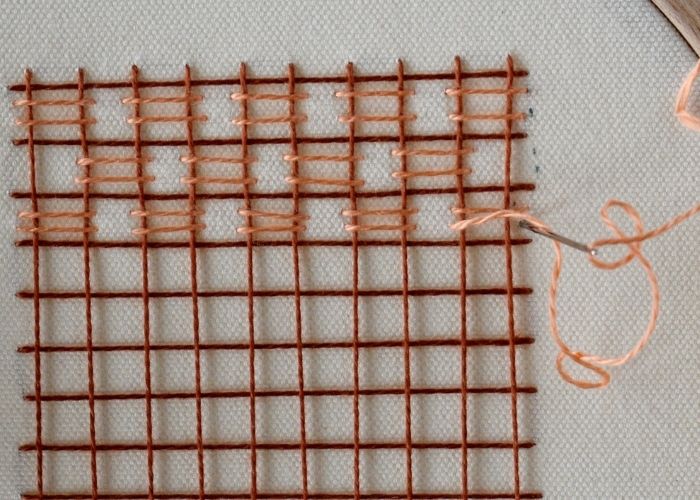
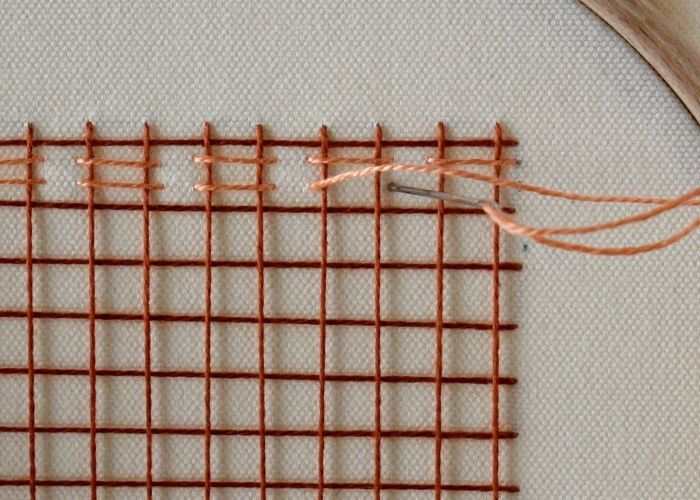
- Finish horizontal couching
Follow this sequence and make all the horizontal couching stitches.
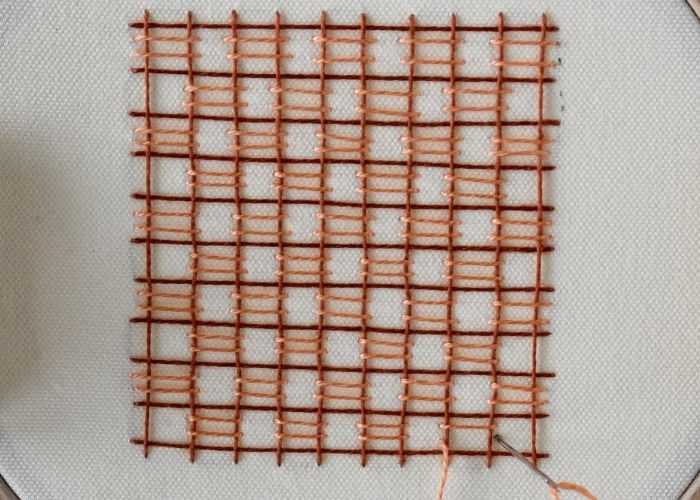
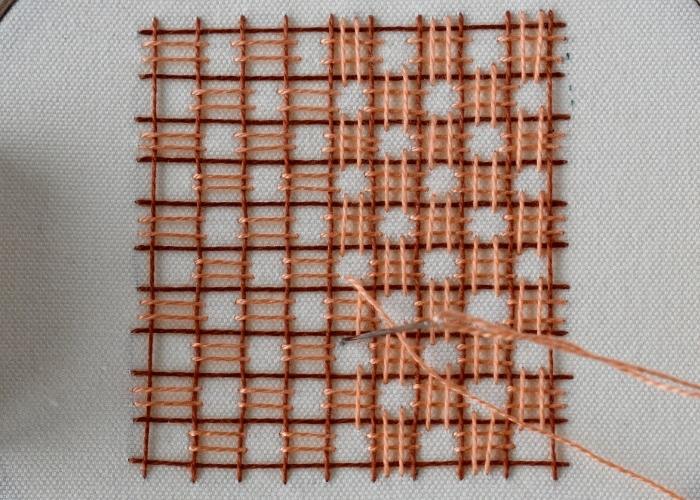
- Start vertical couching
Add vertical couching stitches above the horizontal ones. First, make one row.
- The return row
Duplicated couching stitches made on the return path will create double-crossing stitches that give Plaid Filling Stitch its characteristic look.
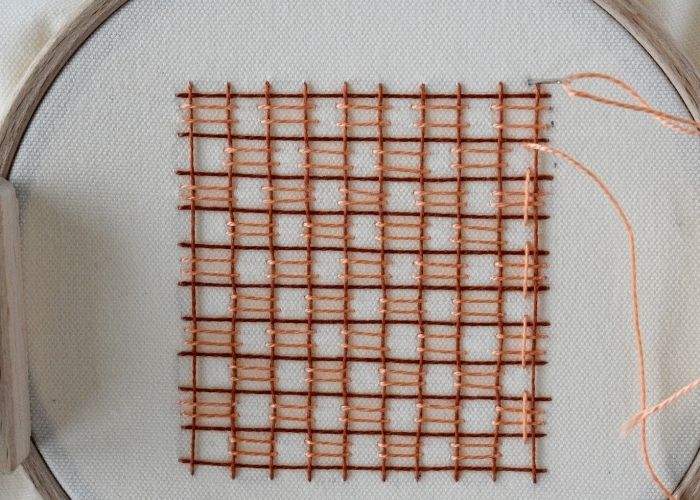
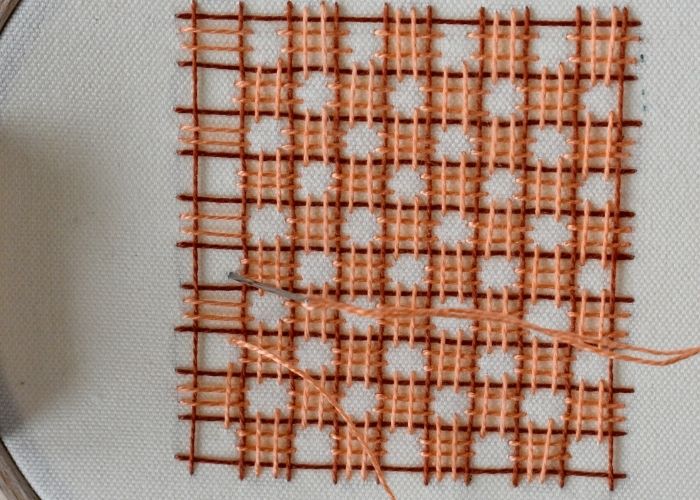
- Finish filling
Row after row, finish to fill the entire design.
Video tutorial
Tools and materials I used for this sampler
Disclaimer. To cover the cost of creating free embroidery patterns and video tutorials for this blog, I do sometimes link to products. Please assume these links are affiliate links. If you choose to buy through my links then THANK YOU – it will make it possible for me to keep doing this.


What’s next?
If you’re in the mood to explore more hand embroidery stitches, check out the Stitches and Techniques page for the list of other fantastic stitches available on my blog. From timeless classics to modern twists, a whole world of stitches is waiting for you to explore and master. So, grab your hoop and needle, and let’s stitch our way to creative bliss!
Don’t miss a thing!
Follow me on YouTube, Instagram, Facebook, and Pinterest. Or why not subscribe to Practical Embroidery newsletter and get embroidery tips straight to your inbox every few weeks?
Need More Guidance?
The top 10 hand embroidery stitches to learn is a free online course created for beginners.