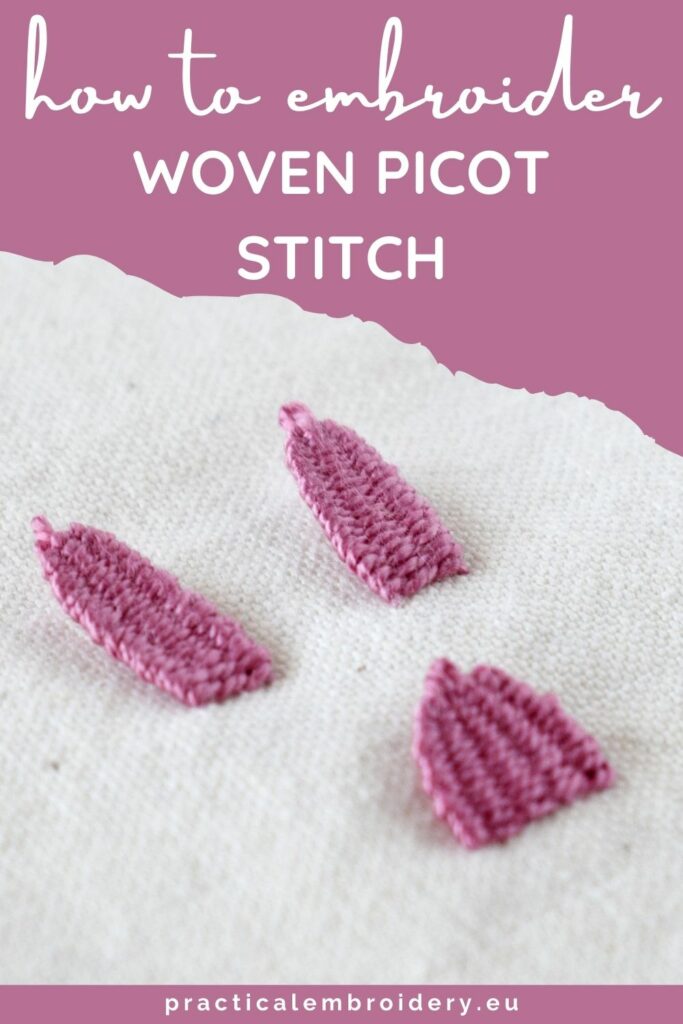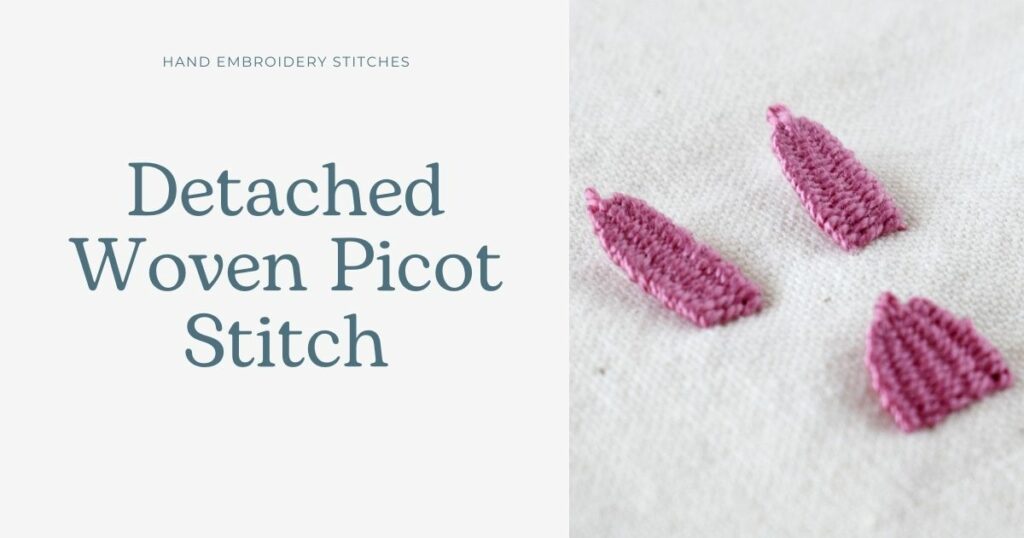
Detached Woven Picot Stitch
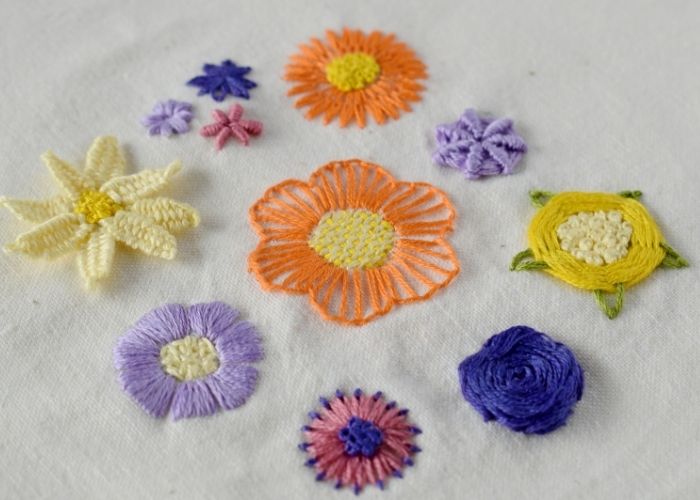
Woven Picot Stitch is a decorative isolated stitch from the Weave Stitch family. This three-dimensional stitch is fun to make and creates an expressive visual effect, adding dimension and depth to any textile piece.
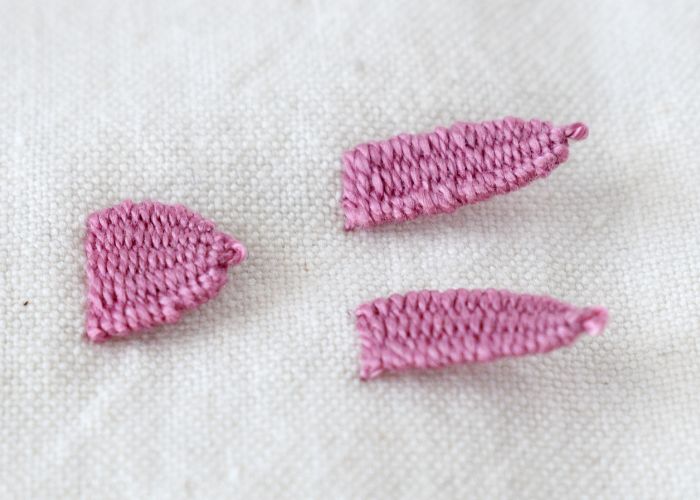
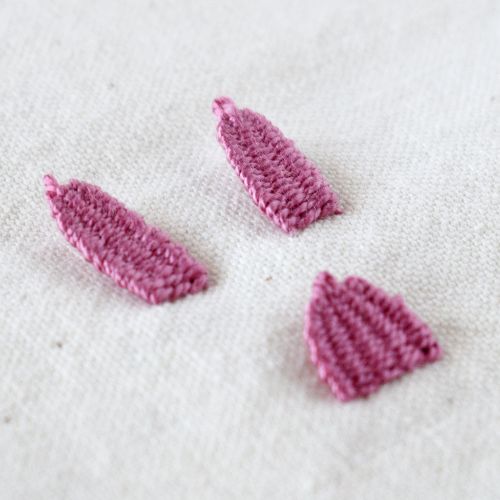
The stitch is woven on an uneven number of prongs – three, five, or even seven prongs can be used to create detached triangular shapes.
The picot created with the woven picot stitch technique is attached to the fabric only at the base of the stitch. Therefore, the stitch is almost invisible on the reverse side of the fabric.
Other names of the stitch
This hand embroidery technique is also called Woven Picot Stitch.
Applications of the Detached Woven Picot Stitch
Detached Woven Picot Stitch is one of the techniques textile artists use in Stumpwork to create dimensional needlework pieces. In the surface embroidery, we use the Detached Woven Picot Stitch to depict flowers, stitch leaves, and other raised and textured elements. In botanical embroidery, we often combine the Detached Woven Picot Stitch to make raised petals and the Woven Trellis Stitch to depict flatter petals.
More stitches from the Weave Stitch family
- Weaving Stitch
- Whipped Spider Wheel
- Striped Woven Band
Learn how to embroider Detached Woven Picot Stitch
Follow the step-by-step tutorial with detailed photos below, and you will learn the Detached Woven Picot Stitch quickly. If you are a visual learner, watch a video lesson in the tutorial or on the Practical Embroidery YouTube channel to learn this hand embroidery stitch faster.
How to embroider Detached Woven Picot Stitch
Step-by-step hand embroidery tutorial
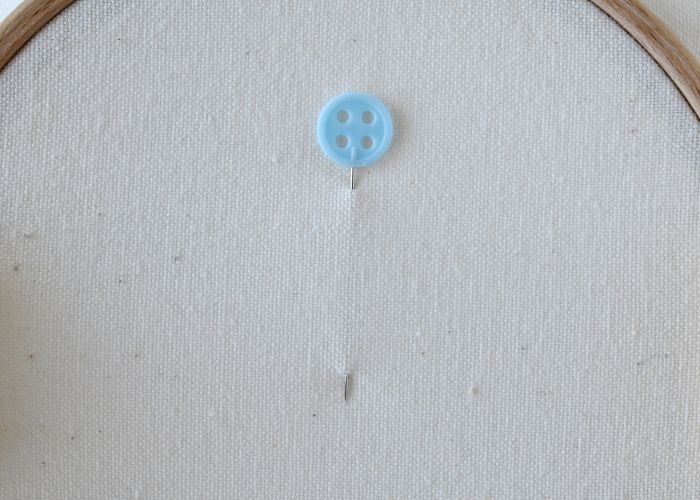
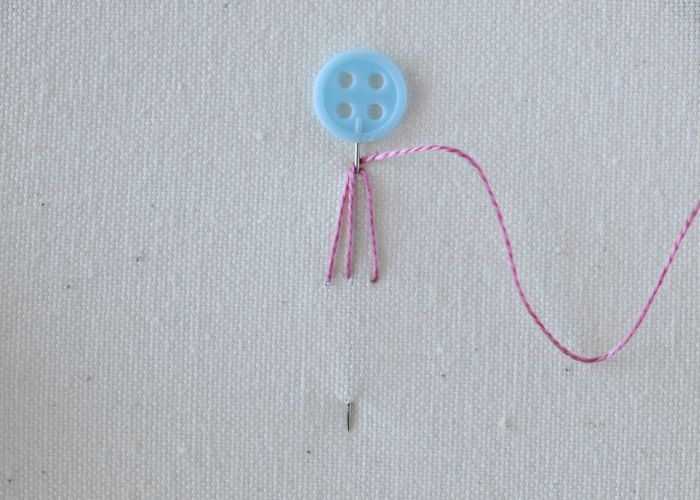
1. Place a pin in the fabric.
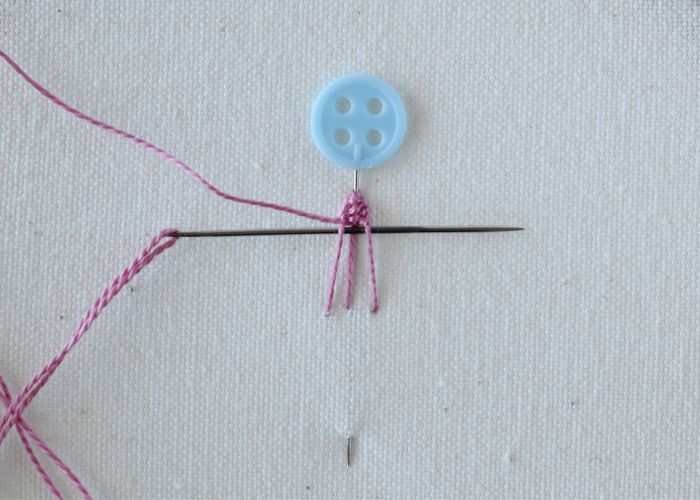
2. Take the needle up on the left side of the pin, pass the thread under the head of the pin, and push the needle down on the right side of the pin. This will form a loop held by the pin.
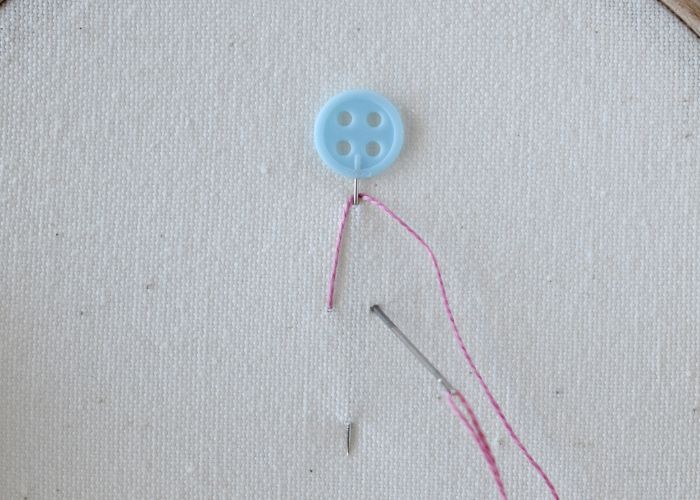
3. Take the needle up at the center between the starting points of the first stitch. Pass the thread under the head of the pin.
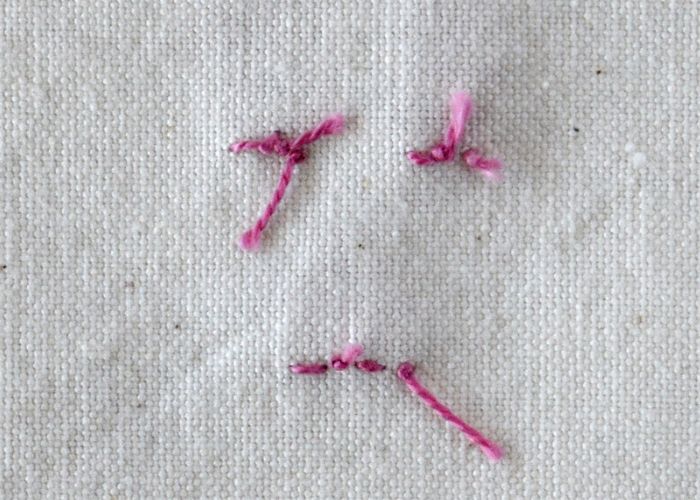
4. Start weaving. Pass the needle under the central prong.
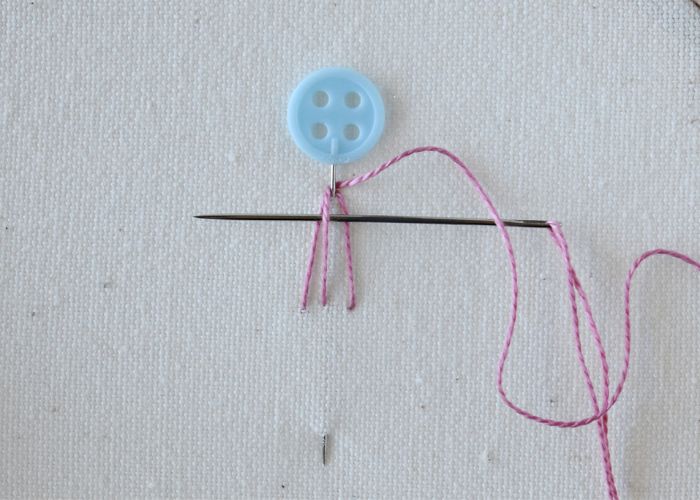
5. Change the direction. Weave the needle under the first prong, above the central one, and under the third prong. Pull the thread through.
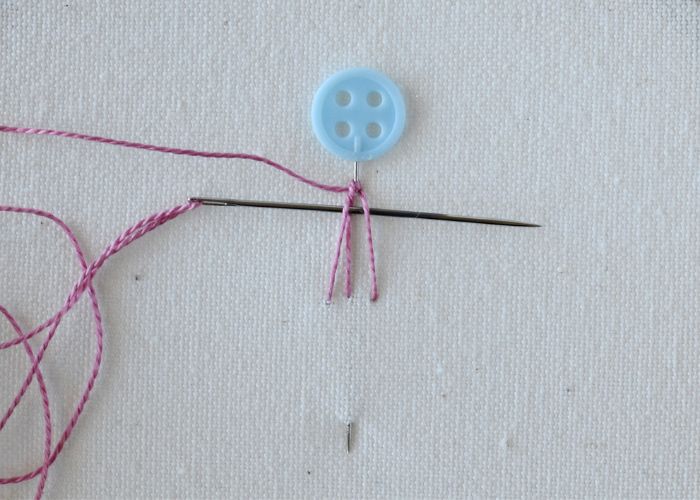
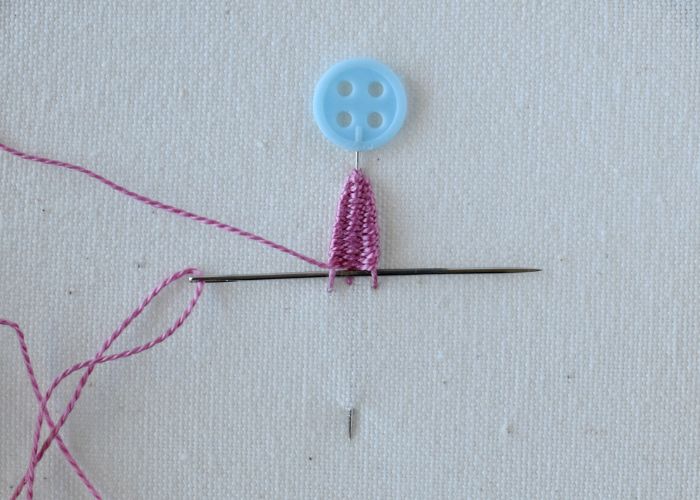
6. Change the direction. Weave the needle above the first prong, under the central one, and above the third one. Pull the thread through.
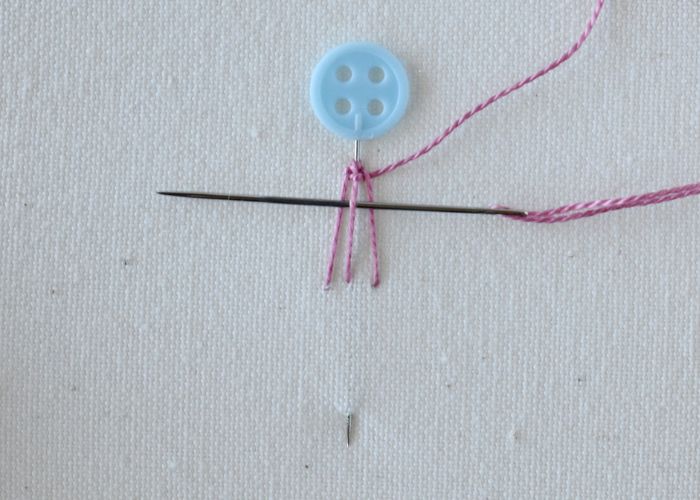
7. Repeat the steps. Weave the needle under the first prong, over the central one, and under the third prong. Pull the thread through. From time to time, push the woven threads up with the needle. This will ensure the weaving is dense and compact.
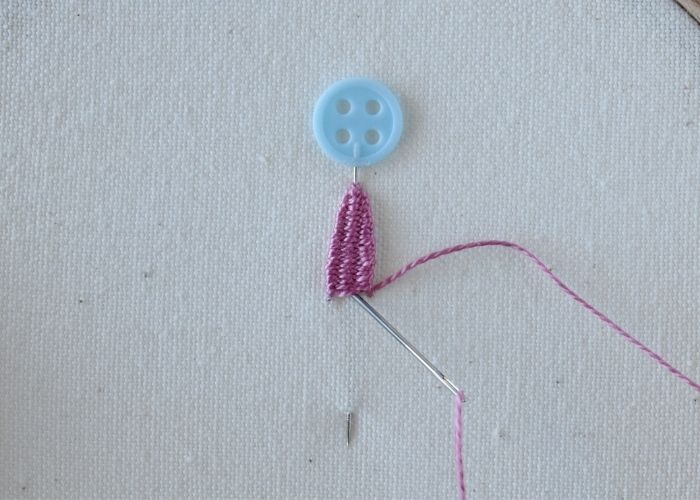
8. Continue weaving till the entire triangle shape is filled.
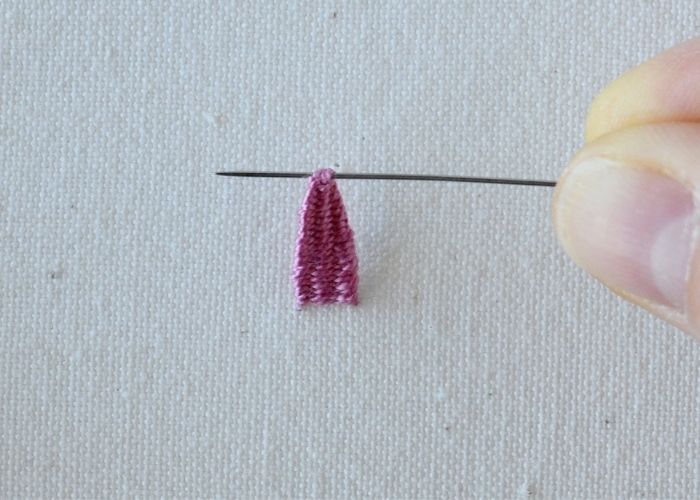
9. At the base, push the needle to the back of the fabric and secure the thread.
10. Remove the pin.
Video tutorial
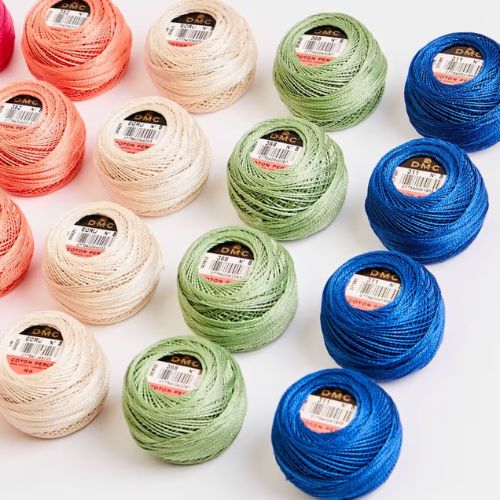
Tools and materials I used for this sampler
Disclaimer. To cover the cost of creating free embroidery patterns and video tutorials for this blog, I do sometimes link to products. Please assume these links are affiliate links. If you choose to buy through my links then THANK YOU – it will make it possible for me to keep doing this.


What’s next?
If you’re in the mood to explore more hand embroidery stitches, check out the Stitches and Techniques page for the list of other fantastic stitches available on my blog. From timeless classics to modern twists, a whole world of stitches is waiting for you to explore and master. So, grab your hoop and needle, and let’s stitch our way to creative bliss!
Don’t miss a thing!
Follow me on YouTube, Instagram, Facebook, Flipboard, Telegram and Pinterest. On the other hand, you can subscribe to the Practical Embroidery newsletter and get embroidery tips straight to your inbox every week!
Projects to practice Detached Woven Picot stitch
Need More Guidance?
The top 10 hand embroidery stitches to learn is a free online course created for beginners.