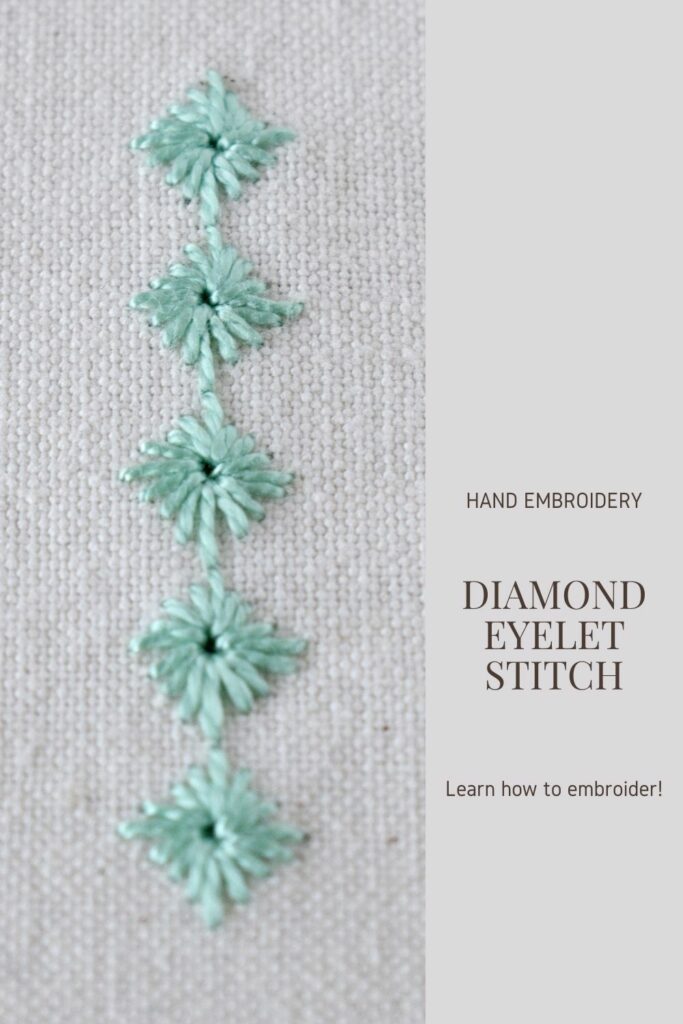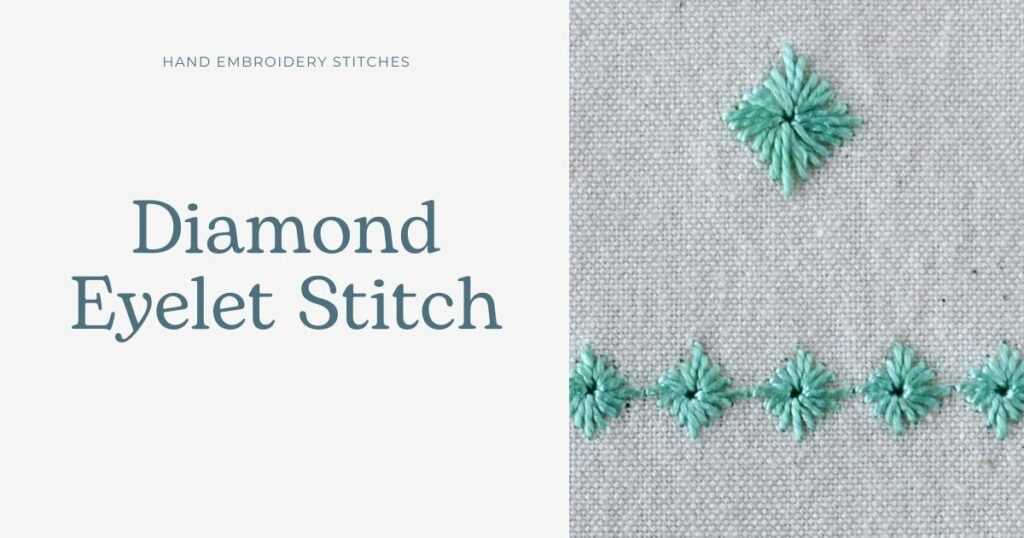
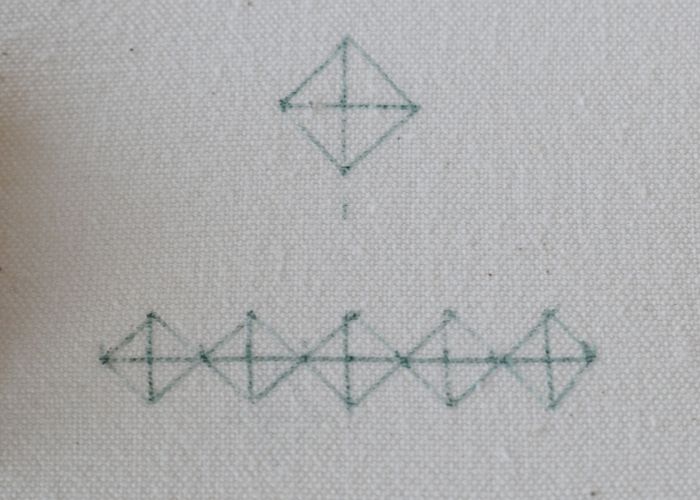
Diamond Eyelet Stitch
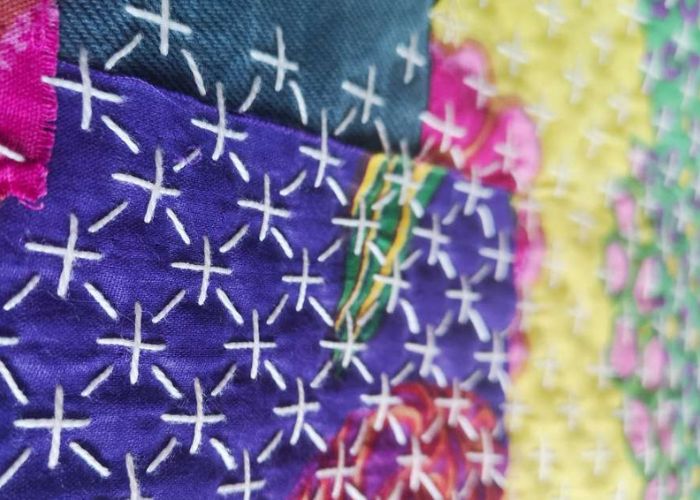
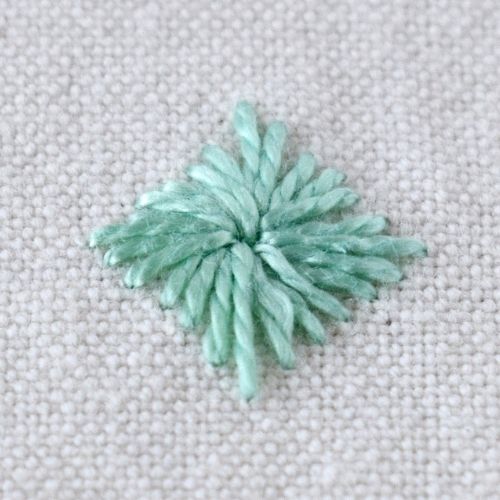
Diamond Eyelet Stitch is a decorative technique for filling with a Straight Stitch. The embroidery method is very similar to the Algerian Eyelet Stitch. Still, the shape we fill makes a significant visual difference. Instead of positioning the straight stitches around the central hole in the square shape, we fill the diamond shape.
The reverse side of the stitch looks very similar to the front side. You can easily hide starting and finishing knots under the stitches for a cleaner and neater look. If you plan to embroider the band or make a filling with Diamond Eyelet Stitch, plan the starting point ahead to avoid jumping threads visible on the back.
Other names of Diamond Eyelet Stitch
Other names for the Diamond Eyelet are Lozenge Eye Stitch and Diamond Daisy.


Applications of the Stitch
Even though Diamond Eyelet Stitch is super simple, it offers various applications and visual solutions:
- With this technique, you can use diamond shapes as detached decorative elements, position the stitches in the row to embroider a decorative band, or make a dense filling.
- The diamond shapes can be prolonged and positioned vertically or horizontally.
- You can use the Diamond Eyelet Stitch as a pulled thread stitch. For counted thread embroidery, use looser woven fabrics and pull the stitches to form a hole in the center of the stitch.
- Another visual solution is to work the stitch without pulling the threads tight. Dense, even-weave fabrics are the best option for this technique.
- Different colorways will create different effects. For example, white fabric with a white thread will result in a classical whitework motive where the diamond shapes are barely visible and the texture of the pulled thread technique is emphasized. Contrasting thread color will give more emphasis to the diamond shapes. Moreover, you can mix a couple of thread colors in the same eyelet or use a variegated thread for a more colorful design.
More stitches from the Straight Stitch family
Learn how to embroider Diamond Eyelet Stitch
Follow the step-by-step tutorial with detailed photos below, and you will learn the Diamond Eyelet Stitch quickly. If you are a visual learner, watch a video lesson in the tutorial or on the Practical Embroidery YouTube channel to learn this hand embroidery stitch faster.
How to embroider Diamond Eyelet Stitch
Step-by-step hand embroidery tutorial
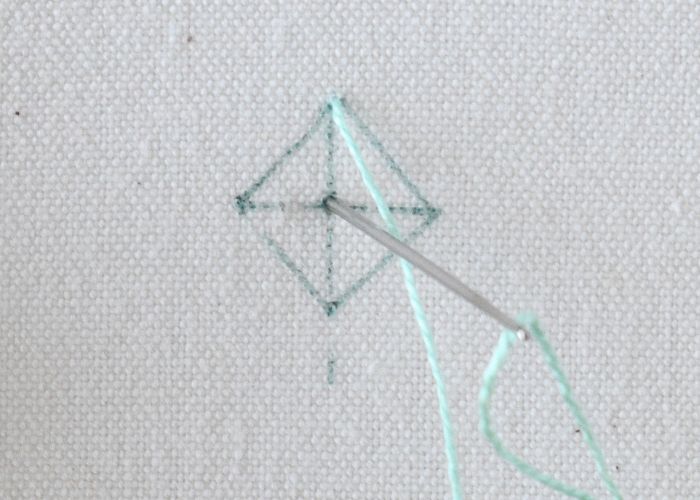
1. First, mark the shape you want to fill with a Diamond Eyelet Stitch. If you will use a non-counted thread fabric (as I do), draw a diamond shape and mark the center of the shape.
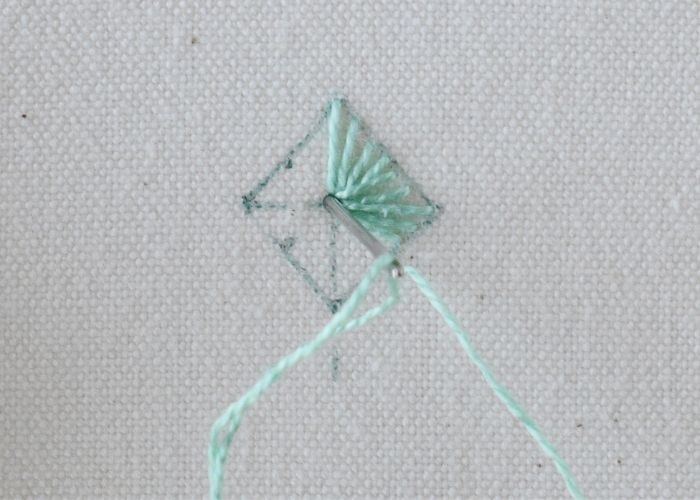
2. Start at one of the angles. Take a thread up to the surface at the angle and make a straight stitch towards the center of the shape. Pull the thread through. Decide if you want to make a bigger hole in the center.
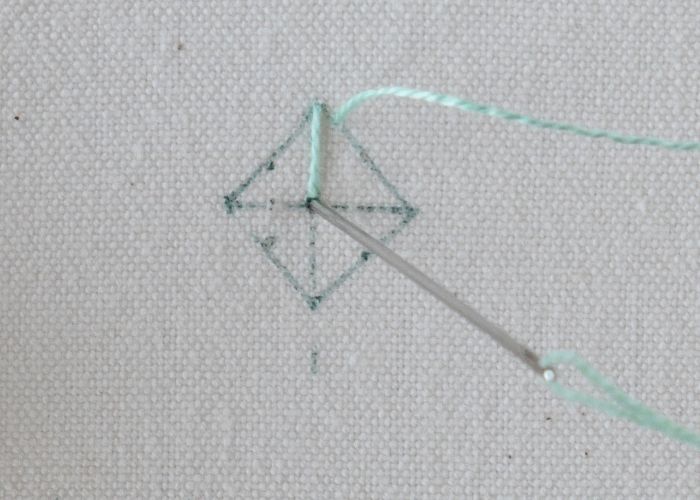
3. Take the needle up on the edge of the shape close to the first stitch and make one more straight stitch to the center.
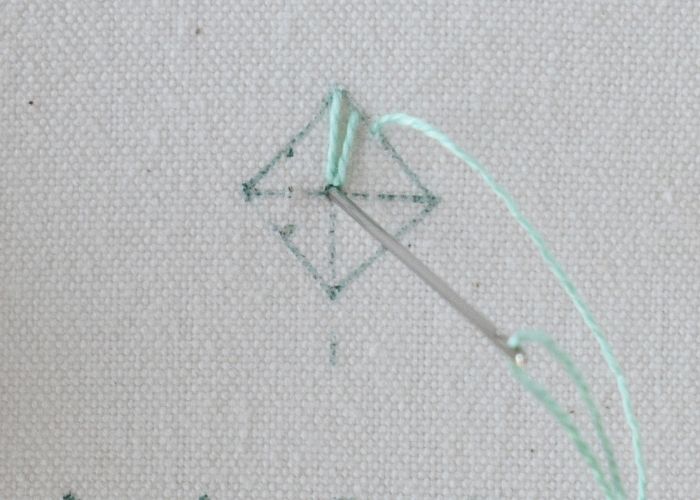
4. Add one more straight stitch close to the previous one.
5. Continue adding stitches. Move clockwise and try to accommodate the same number of stitches in each section of the diamond. For example, I made seven stitches on each side of the shape.
6. When you finish the round, the Diamond Eyelet Stitch is done. Make the last stitch and secure the thread on the back.
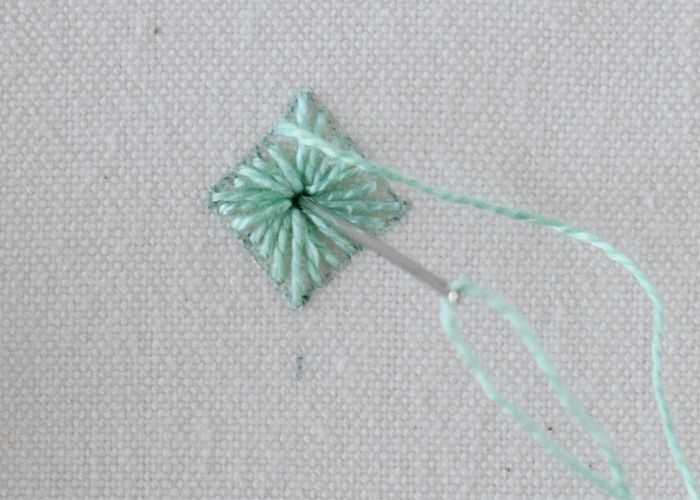
7. The number of spikes needed to fill the shape will depend on the size of the diamond and its desired density. I used five spikes per side to fill these smaller diamonds.

Video tutorial
Tools and materials I used for this sampler
Disclaimer. To cover the cost of creating free embroidery patterns and video tutorials for this blog, I do sometimes link to products. Please assume these links are affiliate links. If you choose to buy through my links then THANK YOU – it will make it possible for me to keep doing this.


What’s next?
If you’re in the mood to explore more hand embroidery stitches, check out the Stitches and Techniques page for the list of other fantastic stitches available on my blog. From timeless classics to modern twists, a whole world of stitches is waiting for you to explore and master. So, grab your hoop and needle, and let’s stitch our way to creative bliss!
Don’t miss a thing!
Follow me on YouTube, Instagram, Facebook, Flipboard, and Pinterest. Or why not subscribe to Practical Embroidery newsletter and get embroidery tips straight to your inbox every few weeks?
Need More Guidance?
The top 10 hand embroidery stitches to learn is a free online course created for beginners.