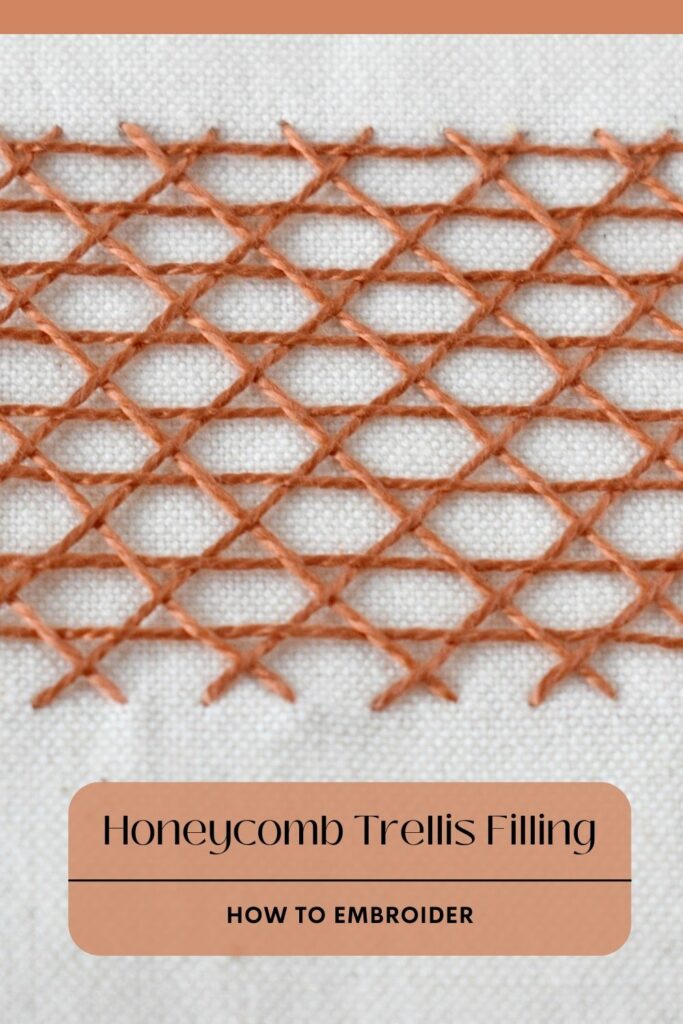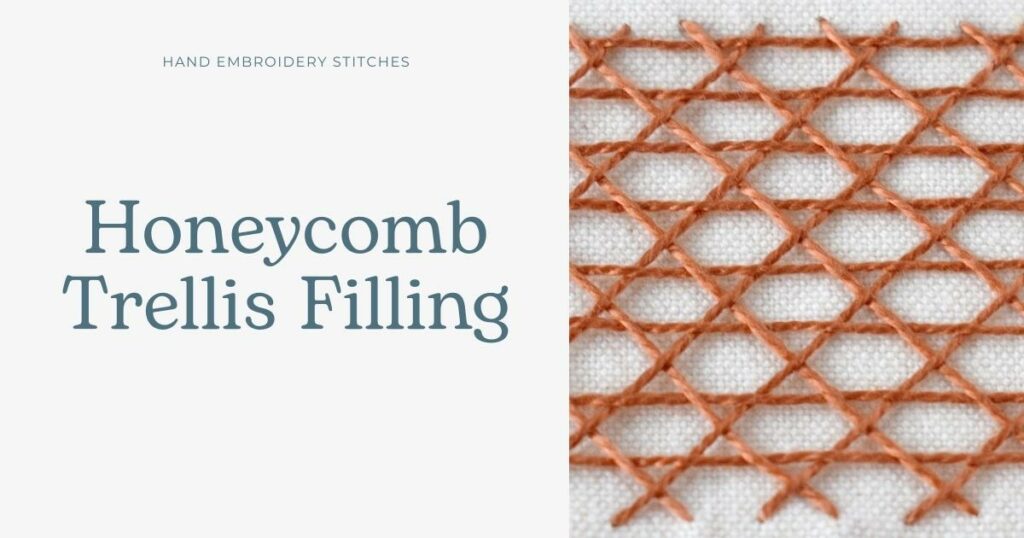
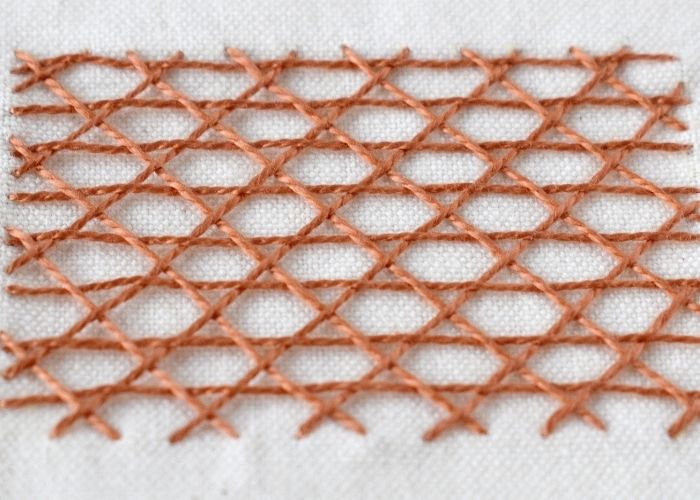
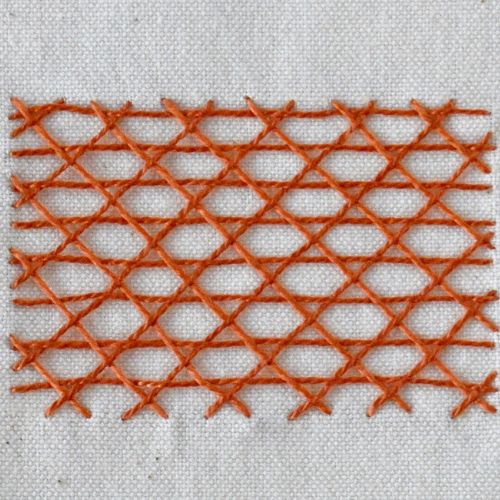
Honeycomb Trellis Filling
Honeycomb Trellis Filling is a surface hand embroidery technique from the Couching Stitch family.
Three groups of parallel stitches are weaved together to form a surface net with a honeycomb-like shape.
All the weaving is done on the fabric’s surface without piercing it; therefore, only anchoring stitches at the edge of the shape are visible on the back side.
Other names of the stitch
Honeycomb Trellis Filling can be used as a base for a Honeycomb Couching stitch and is sometimes called the same name. It can also be called Honeycomb Filling Stitch (not the same as Honeycomb Filling from the Blanket stitch family), Net Passing stitch, Brussels Net stitch, or simply Honeycomb Stitch.
Applications of the Honeycomb Trellis Filling
This decorative surface embroidery technique is used for the decorative filling of large areas. It is often combined with various laid threads and couching techniques, such as Jacobean Couching or Trellis Couching.
More stitches from the Couching Stitch family
Learn how to embroider Honeycomb Trellis Filling
Follow the step-by-step tutorial with detailed photos below, and you will learn the Honeycomb Trellis Filling quickly. If you are a visual learner, watch a video lesson in the tutorial or on the Practical Embroidery YouTube channel to learn this hand embroidery stitch faster.
How to embroider Honeycomb Trellis Filling
Step-by-step hand embroidery tutorial
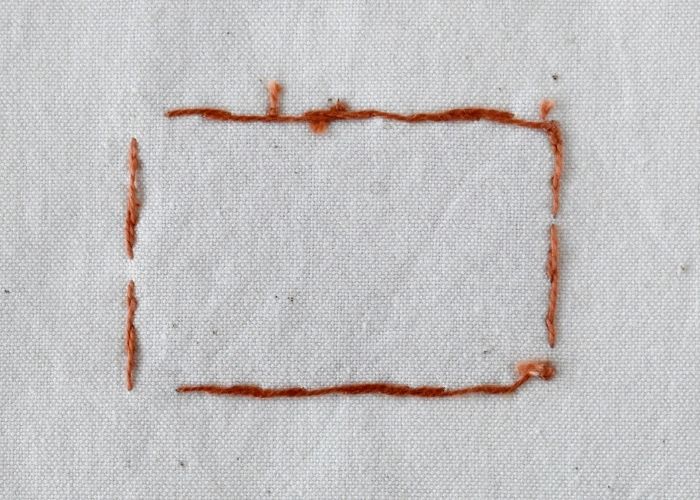
- Make horizontal stitches
Define the area you want to fill and make evenly spaced, parallel horizontal stitches that fill the shape.

- Add diagonal stitches
Add evenly spaced parallel diagonal stitches that are slanting from top left to bottom right.

- Weave in diagonal stitches
Add the third layer of stitches, this time slanting from top right to bottom left. Weaving is made by passing the needle under the horizontal stitches and over the diagonal ones.

- Finish weaving
Weave in the stitches row after row. When done, secure the thread on the reverse side.

Video tutorial
Tools and materials I used for this sampler
Disclaimer. To cover the cost of creating free embroidery patterns and video tutorials for this blog, I do sometimes link to products. Please assume these links are affiliate links. If you choose to buy through my links then THANK YOU – it will make it possible for me to keep doing this.


What’s next?
If you’re in the mood to explore more hand embroidery stitches, check out the Stitches and Techniques page for the list of other fantastic stitches available on my blog. From timeless classics to modern twists, a whole world of stitches is waiting for you to explore and master. So, grab your hoop and needle, and let’s stitch our way to creative bliss!
Don’t miss a thing!
Follow me on YouTube, Instagram, Facebook, and Pinterest. Or why not subscribe to Practical Embroidery newsletter and get embroidery tips straight to your inbox every few weeks?
Need More Guidance?
The top 10 hand embroidery stitches to learn is a free online course created for beginners.