

How to Display Embroidery: Finishing Methods and Accessories for Art Display
The hand embroidery process doesn’t end with the last stitch. To be admired, it has to be displayed in a way that shows the work we put into it and highlights the value of a handmade item. Your choice of how to display embroidery can add value to your art or depreciate it.
How we finish and display our work can change people’s perceptions of the quality of the needlework and the value they associate with it. Thoughtful finishing touches protect the embroidery and honor the time and care that went into it. These finishing methods and accessories will help you finish your textile art and display it as a piece of visual art.
Finish the embroidery in a hoop

The most straightforward and intuitive way to display a piece of surface embroidery is in a hoop. Many embroidery designs are created with the round shape of the hoop in mind; therefore, the best frame for the display is also round.
If you decide a rounded shape is the best for your textile art, you will have several decisions to make:
- Do you wish to cover the back of the embroidery or leave it open?
- You may want to use a special display hoop. For example, flexi hoops are created specially for framing, not for stitching.
- How about decorating the hoop? You can color it, wrap it with colorful fabric, or crochet a lacy border.
- Do you want to frame the art as a circle, but without the hoop?
- Or you want to cover a simple hoop with a display frame?
Hand embroidery art displayed in the hoop will look great hanging on the wall or placed on a bookshelf, or you can use a little holder that fits a hoop perfectly to stand it up and display it.
Here are some accessories that will help you display your hoop art:


Methods for framing needlework in the hoop

There are various methods for framing your artwork in the hoop. Some require fabric glue and backing materials; others need as little as thread. In my article “How to Frame Embroidery in a Hoop: Six Methods of finishing the back of the hoop,” you will find detailed tutorials of all the methods, with step-by-step instructions, material lists, and video guides.
Display hoops
Hoops for display – often with a polished or stained finish – cover the basic hoop and hide the tightening screw inside the frame. Display hoops are selected for appearance and are sometimes paired with backing fabrics, hoop back covers, or decorative trims.
Wooden display hoops offer a simple, ready-to-hang framing solution that complements the handmade aesthetic of embroidery with natural materials. This solution doesn’t require glass, matting, or professional framing, yet looks professional and expensive.
Wooden display hoops are:
- Ideal for stitchers who want an easy, attractive finish without a lot of extra work.
- Great for gifts, nursery art, or wall hangings.
- Useful for markets and handmade shops looking for affordable display options.
Check out these display hoops:


Mounting boards, canvas, and frames

Mounting boards are firm surfaces (like foam board, mat board, canvas, or card stock) used to stretch and secure embroidery before placing it in a frame or shadow box. To preserve longevity, always use acid-free materials and avoid adhesives directly on the stitching when framing textiles.
There are various mounting methods – from pins to stitching or specialized archival adhesives. This framing method keeps the fabric flat and wrinkle-free, preventing sagging over time. It is great for larger or heavily stitched pieces, and creates a crisp, professional finish ready for gallery or home display.
Mounting boards are:
- Indispensable if you want to enter competitions or keep your work under the glass.
- Recommended for anyone preserving high-detail or sentimental work.
- Fantastic option for stitchers looking for a professional finish.
Consider these options for framing:


Display embroidery as a tapestry

Another great way to display finished textile art without a hoop is to turn it into a tapestry. You can back your embroidered piece with fabric and sew it into a banner. Add pompoms, fringes, or leave the edges raw. You can hang your tapestry by cotton cording, or use specialized tapestry hangers for a more finished look.
In my video tutorial, “April Showers Bring May Flowers – Hand Embroidered Banner DIY tutorial,” I demonstrate the entire process of turning the embroidery into a simple banner.
Turning embroidery into tapestry:
- This lets you add decorative elements like pompoms, tassels, or a fringe edge to your embroidery, making it fit any interior.
- Various hangers – from modern to vintage – will fit any embroidery.
- This method works for any size embroidered piece.
Here are some options for hanging your banner:


Turn your hand embroidery into a home decor object
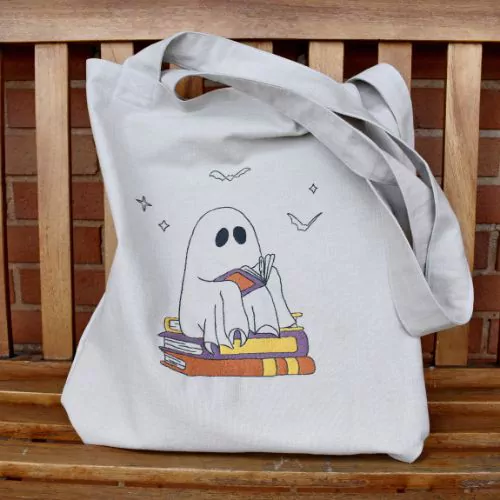
If displaying your hand embroidery as a piece of visual art isn’t your thing, consider turning the needlework into a home decor object. Quilts, pillowcases, table runners, tote bags, and similar textile objects look great when embellished with stitching.
Of course, it is best when you plan and cut the fabric to the correct size and shape before stitching. But sometimes you stitch first and find a use later. In these cases, you can appliqué your embroidery onto ready-made home textiles, or turn it into a pocket, and sew it onto a garment or bag. Also, incorporating embroidered pieces into quilts is a nice way to display your stitching practically.

How to choose the right display method
With so many ways to finish and display your embroidery, it helps to think about the piece itself before picking a method. Here’s a quick guide to match your project with the right finish.
Small, round designs = Display hoop. If you stitched your embroidery in a hoop and it has a circular composition, keeping it in the hoop is the most natural choice. It’s also the fastest finishing method.
Sentimental pieces = Mounting board. If you want your work displayed under glass, entered in a competition, or preserved as an heirloom, mount it on an acid-free board first. This keeps the fabric flat and protected long-term, which a hoop alone won’t do.
Large or freeform piece = Tapestry. Bigger designs, or ones that don’t fit a hoop’s proportions, work best as a hanging tapestry. It’s also the better option if your embroidery has an irregular shape or you want to add embellishments like fringe or pompoms.
Simple, fun pieces = Home decor object. Some embroideries are meant to live on a pillow, tote bag, or table runner rather than a wall. Skip framing altogether and turn your embroidery into a piece of home textile or home decor object.
Handmade labels or tags for finished projects
Whichever framing method you choose, a label is worth adding any time the piece is meant to be kept, gifted, or passed down. It’s a small step that turns a finished project into a documented piece of work.
Personalized tags or labels – sewn, ironed, stamped, or glued – added to the back of finished pieces add a little bit of professionalism and value to the stitched piece. They may include the stitcher’s name, the date, initials, or a short message.
Labels add a personal signature to heirloom or gift projects and help document the time and author of the piece, which is meaningful for family keepsakes. This simple accessory elevates the perceived value in handmade markets or commissions.
Tags for embroidery are:
- Ideal for anyone who gifts their embroidery or participates in exhibitions.
- A lovely touch for makers who want to track and archive their work.
- Especially nice for pieces made for weddings, baby gifts, or memorials.
Explore these options for labeling your work:


Over to you
A hand-embroidered piece left in a pile of finished works, or framed carelessly, ignores hours of careful work, while the right finish can turn your needlework into a piece people want to hang, gift, or pass down.
If you ever wondered how to display embroidery, note that there’s no single correct way to do it. Your options can vary from simple display hoops to banners, tapestries, and mounting boards.
Whichever method you choose, the goal is the same: protect the stitching, and let it be seen the way it deserves. Take a little time with this finishing step, and your embroidery will hold its value – visually and sentimentally – long after the last stitch is tied off.
Don’t miss a thing!
Follow me on YouTube, Instagram, Facebook, Flipboard, Telegram, Reddit or Pinterest. On the other hand, you can subscribe to the Practical Embroidery newsletter and get embroidery tips straight to your inbox every week!
More about embroidery accessories on this Blog

Accessories For Embroidery: Everything You Need for a Better Stitching Experience

Mini Embroidery Hoops: How to choose the best tiny hoop and how to use them

Hand Embroidery Tools — What Do You Actually Need?
