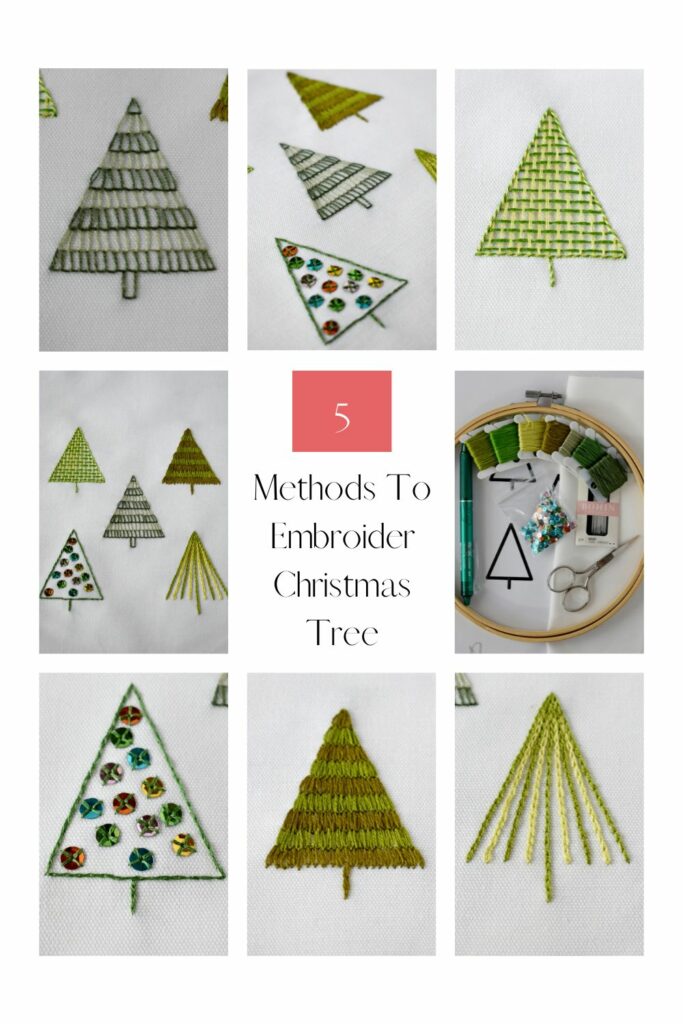
How To Embroider Christmas Tree: 5 Simple Methods + Free PDF Pattern
In this DIY tutorial, I demonstrate 5 methods of how to embroider Christmas tree. A Christmas tree adorned for the holidays is a traditional symbol of joy and holiday cheer. It is common to add this festive image to holiday greeting cards, stockings, sweaters, or kitchen textiles.
These five hand-embroidered Christmas trees are fun to make. The simple patterns and embroidery techniques used make them a great project for beginners.
Ready to stitch? Download my free PDF pattern with a stitch and color guide, gather tools and materials, and follow along as I demonstrate each step of the process!
How to embroider a Christmas tree – 5 ways
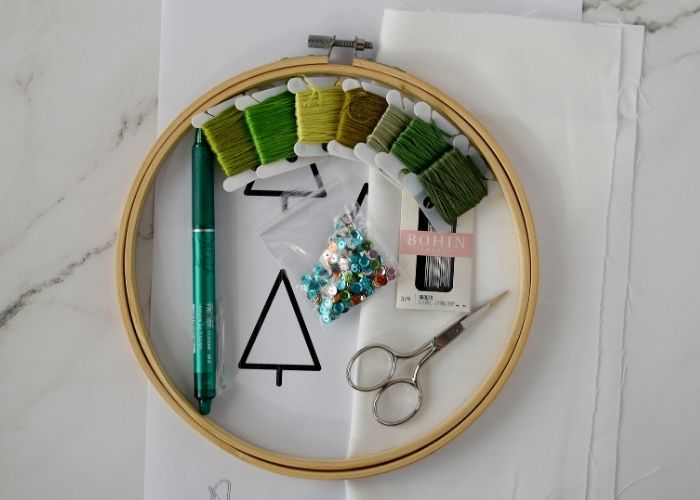
Tolls and materials
- Embroidery pattern. Download and print my free PDF pattern.
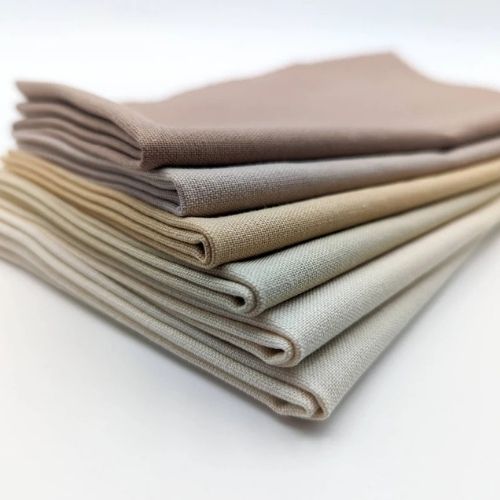
- Fabric. I used white linen material.
- Embroidery hoop. If you want to fit all five Christmas trees, use an 18-20 cm hoop.
- Embroidery floss. You will find color codes for DMC embroidery floss in the PDF download.
- Sequins. I used a mix of small sequins.
- Embroidery needles.
- Scissors.
- Friction pen for pattern transfer.
Get ready
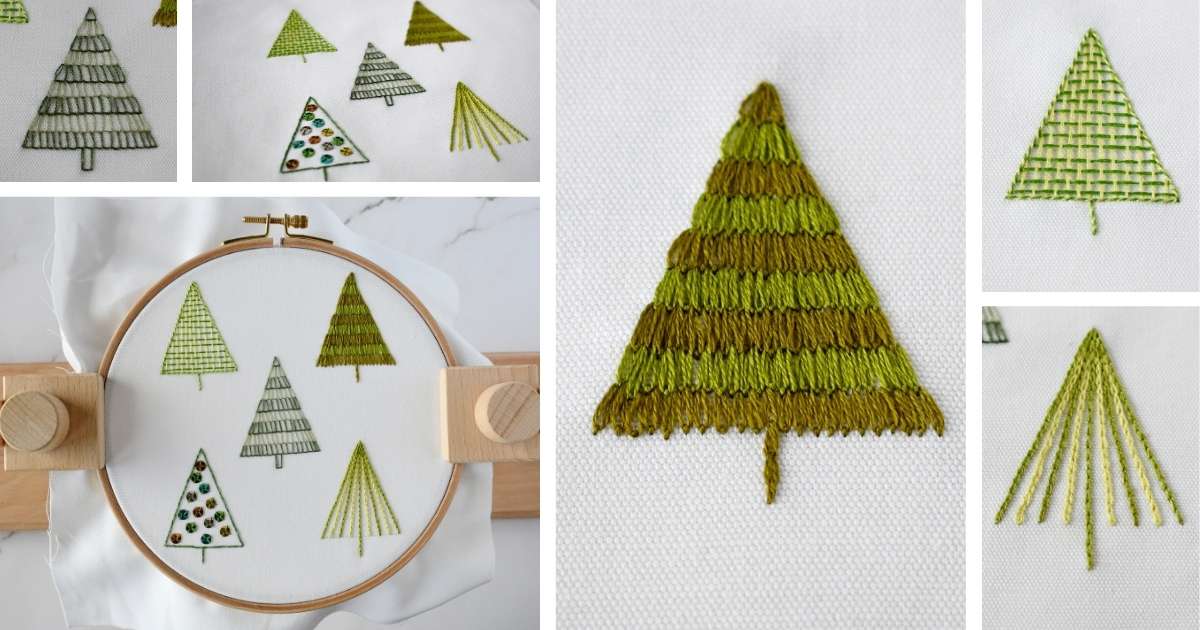
1. Gather tools and materials. Print the pattern and gather all the tools and materials you will need for this project.
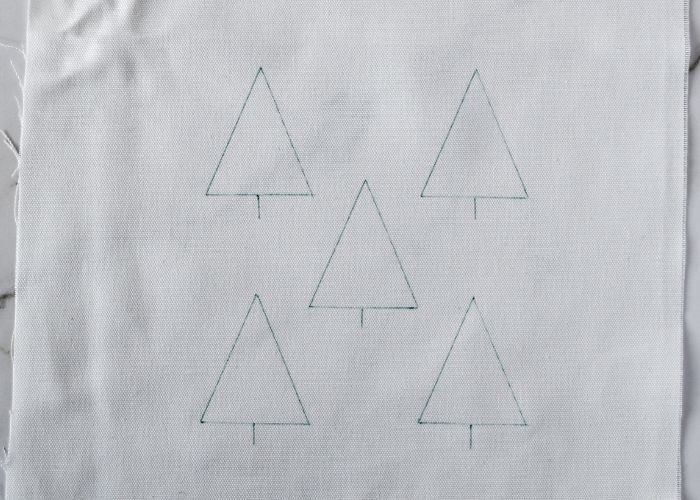
2. Transfer the pattern to the fabric. I used a friction pen and a light box method.
To choose the best pattern transfer method for your fabric, read the article “How To Trace Pattern on Fabric: Five Methods For Fast And Easy Embroidery Pattern Transfer.“
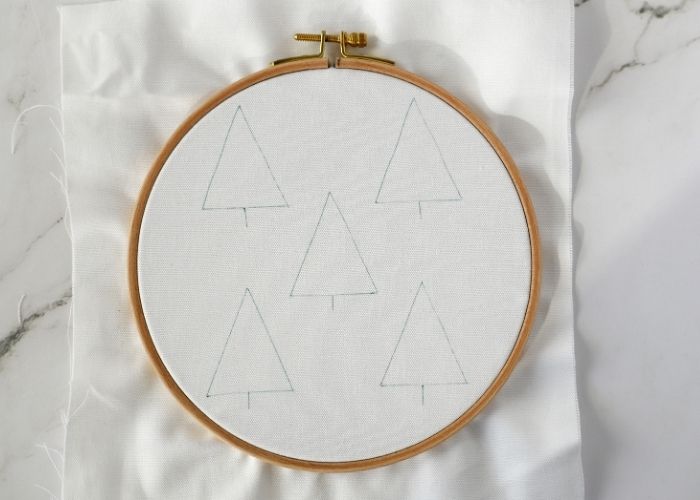
3. Place the fabric in the hoop, stretch it, and tighten the tension screw.
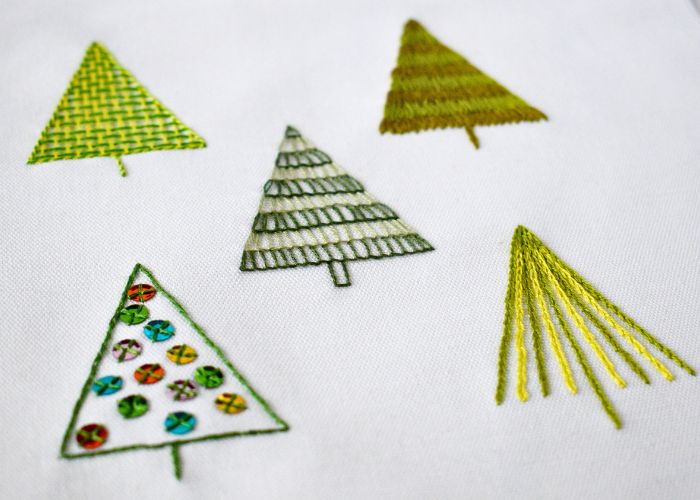
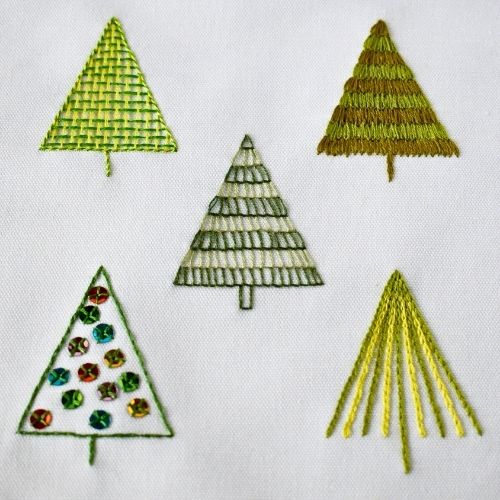
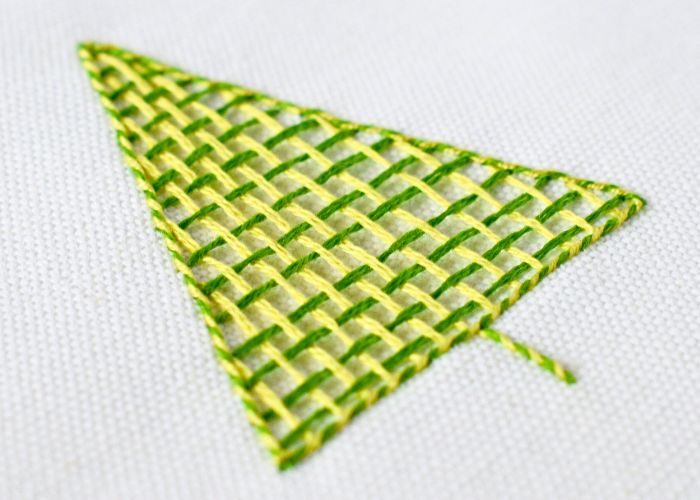
Christmas tree embroidery with a Weave stitch
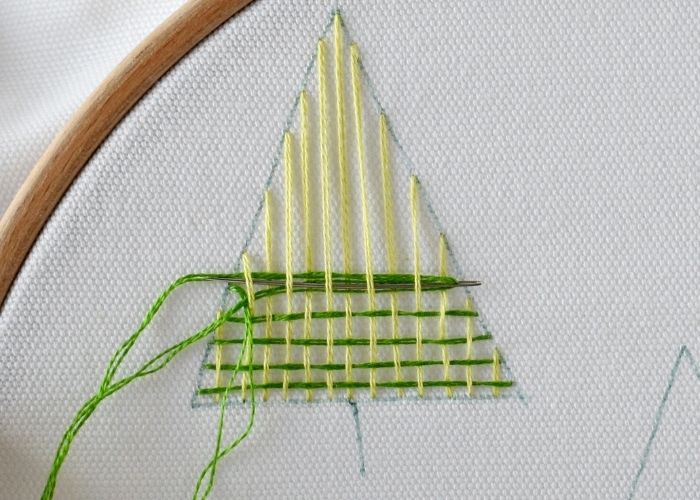
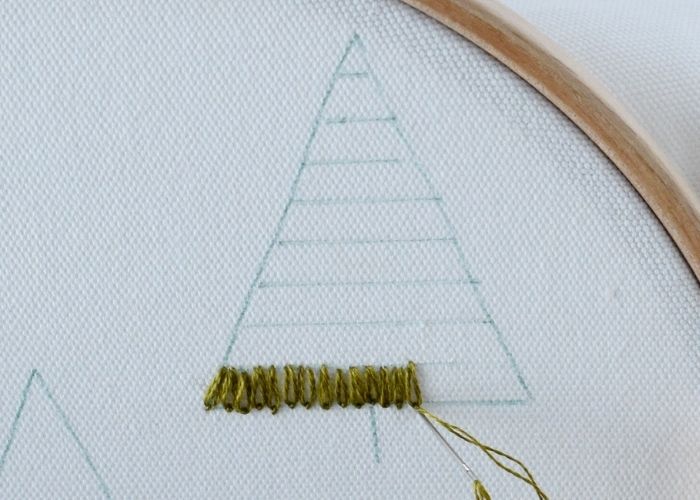
1. To make a Weave stitch, first embroider long vertical stitches, keeping them parallel and equally spaced.
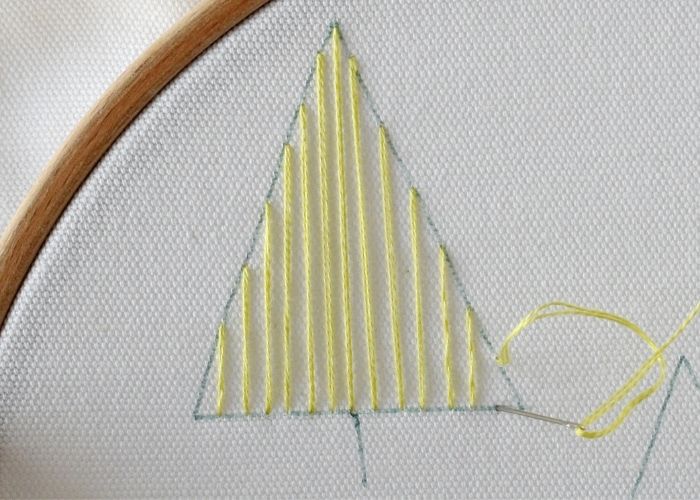
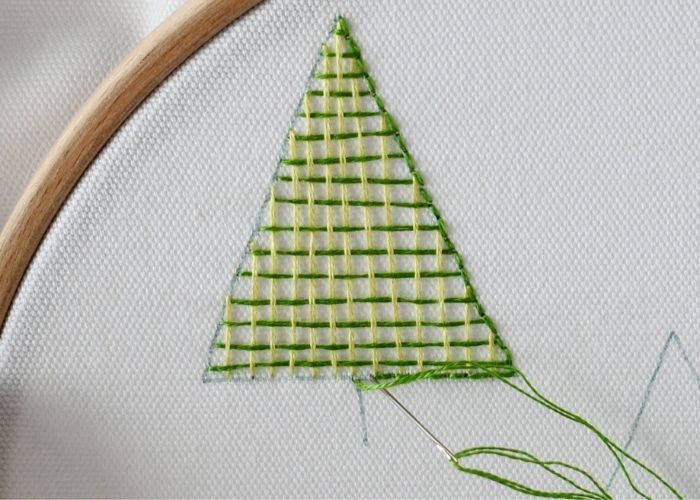
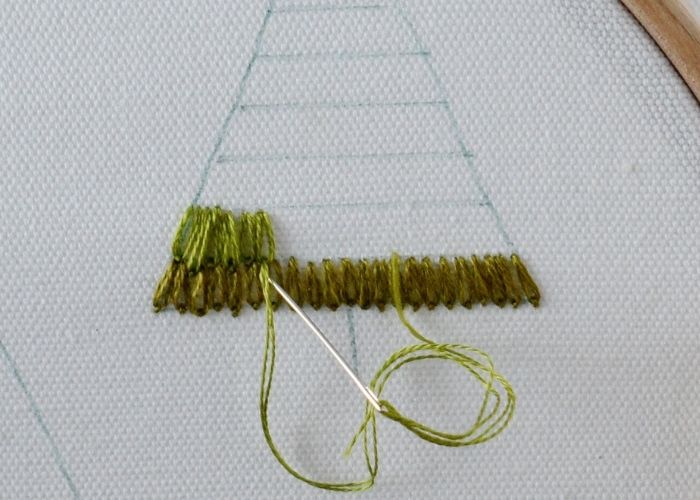
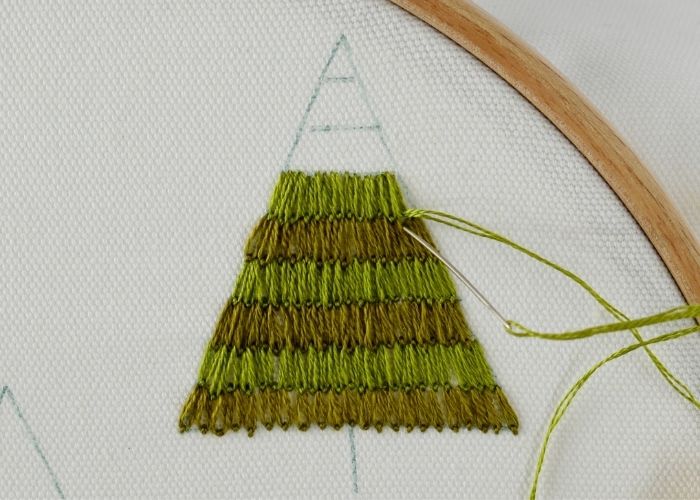
2. Now, weave in the horizontal stitches. Keep them parallel and equally distanced. When weaving, use a blunt needle or the back of the needle to prevent snagging vertical threads. Protect your fingers with a thimble.
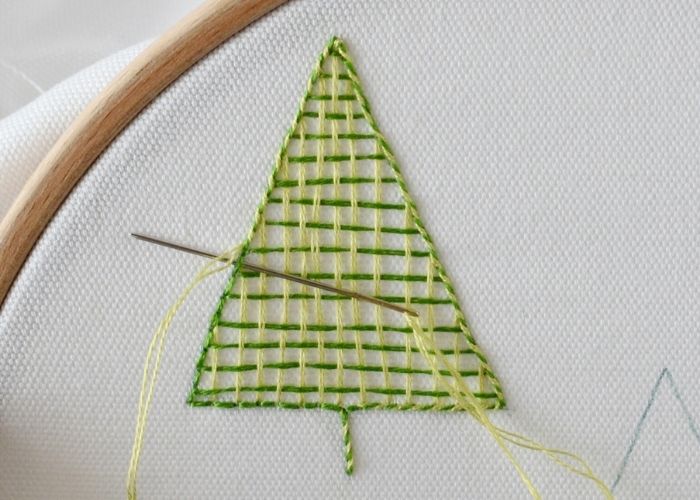
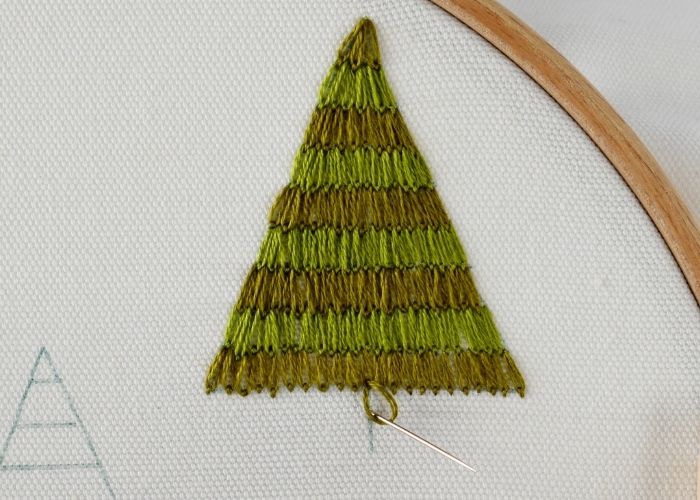
3. To create a decorative outline, first embroider the outline of the tree with a Backstitch. Use a darker shade of green.
4. Now, make a Whipped backstitch. Use lighter green thread for the whipping stitch. Use a blunt needle or the back of the needle for whipping.
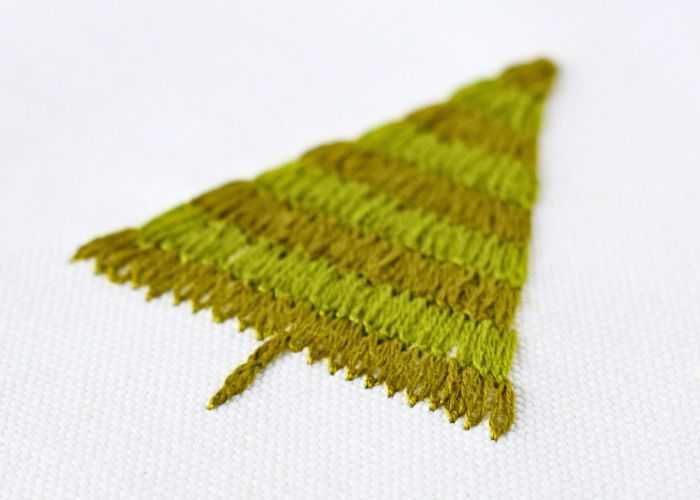
Detached chain stitch tree
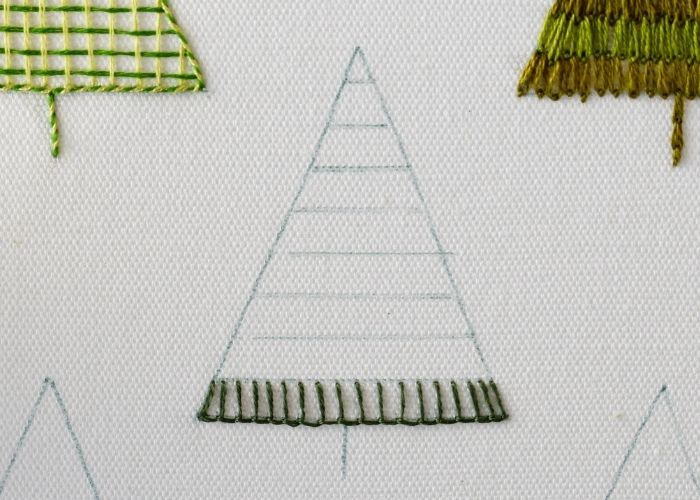
1. First, mark equally distanced horizontal lines to divide the shape into rows. Aim for 0,5-1 cm height.
2. Make Detached chain stitches positioned close to each other to cover the lowest row of the tree.
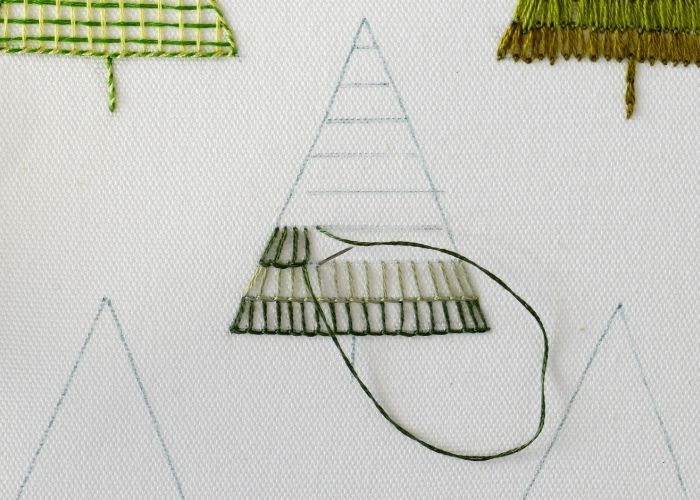
3. Use a thread of another color to embroider the second row of detached chain stitches. At the bottom, stitches should slightly cover the starting points of the previous row.
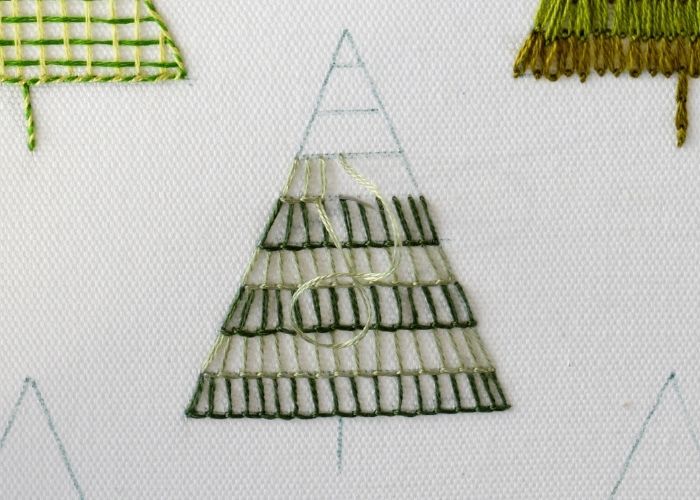
4. Change the thread color for every second row.
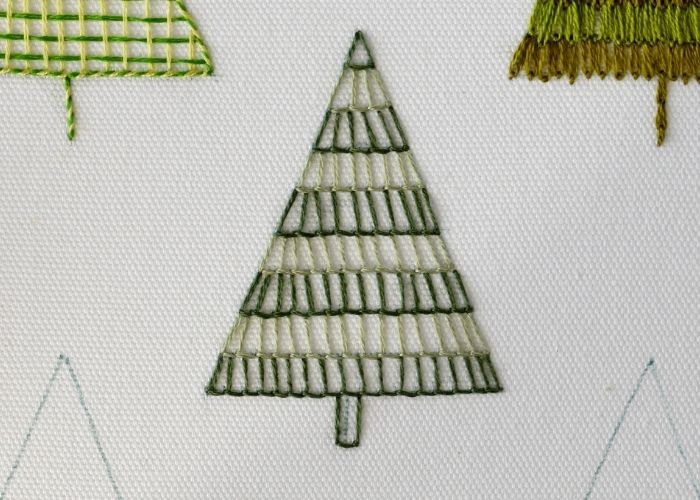
5. When all the rows are done, embroider the trunk of the tree with a simple Chain stitch.
Embroider the tree with Blanket stitch
1. First, mark equally distanced horizontal lines to divide the shape into rows. Aim for 0,5-1 cm height. Then, embroider a row of Blanket stitch on the bottom of the tree. Keep the stitches equally distanced.
2. Now add more rows of the Blanket stitch above. This will create a Blanket stitch filling in two colors.
3. Keep adding rows of blanket stitch, one above another, until the tree’s shape is filled.
4. Make a single blanket stitch to depict the trunk of this tree.
Christmas tree embellished with sequins
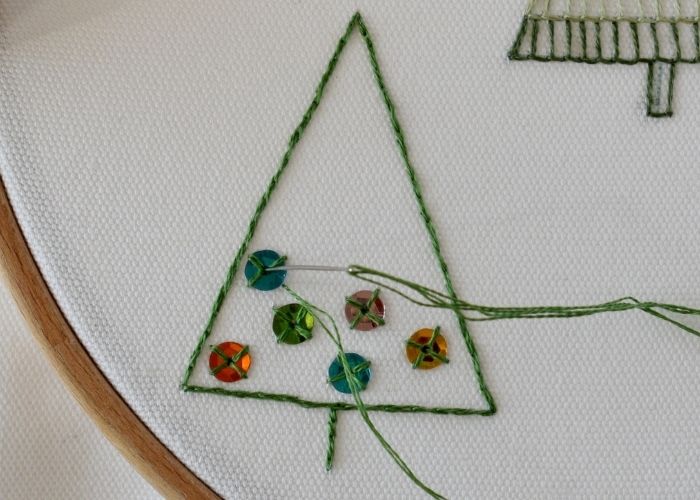
1. Outline the shape of the tree with a Split stitch. Start at the trunk and then go around the entire shape.
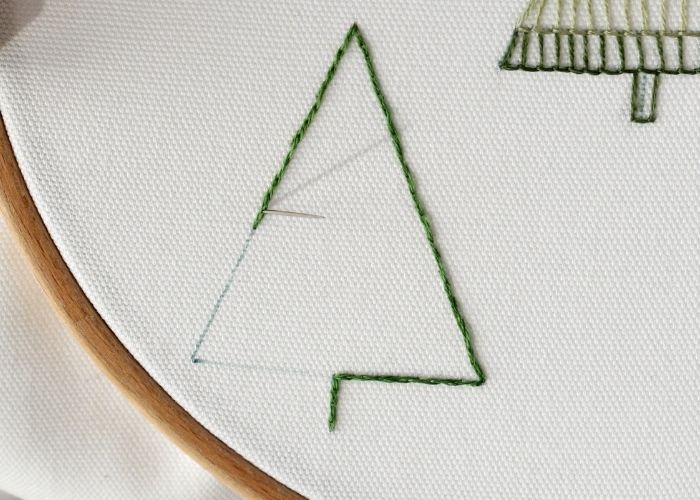
2. Use Eyelet star stitch to attach the sequins to the fabric.
Chain stitch Christmas tree
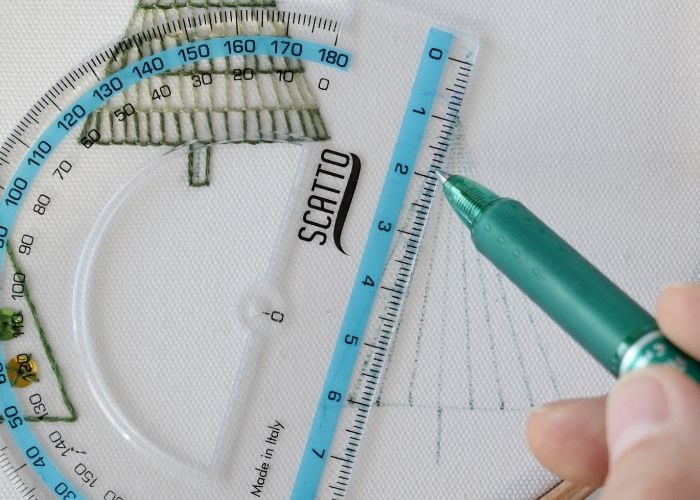
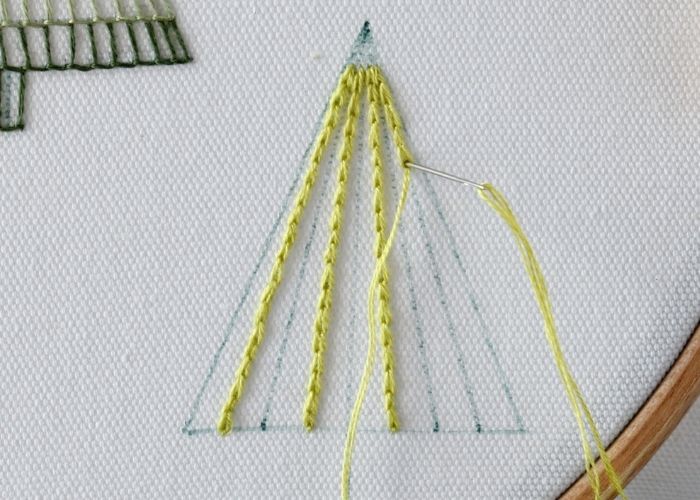
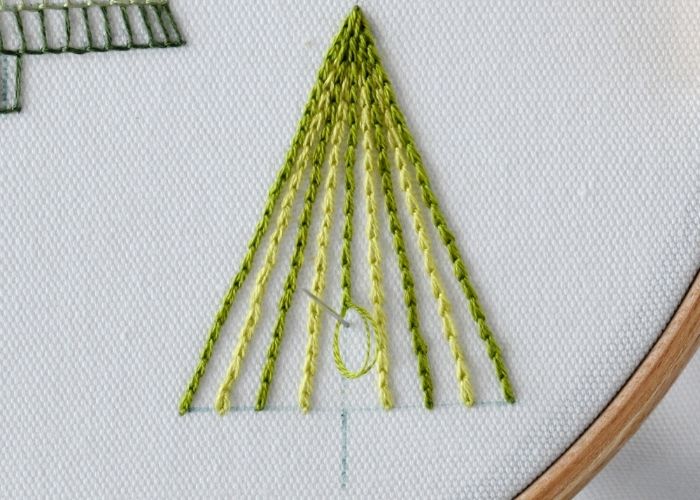
1. Mark the lines for the stitches. Divide the base of the tree into equal parts and draw the lines that go to the top of the tree.
2. Start embroidering with the second line and embroider every second line with a lighter green color. Use a Chain stitch and embroider from the top downwards. Do not start the lines at the top but 0.5 cm below.
3. Now, embroider the third and the fifth lines. Use the darker shade of the green floss and start stitching closer to the top of the tree shape.

4. Embroider external lines. Use a darker shade of green floss. Start embroidering at the top of the shape.
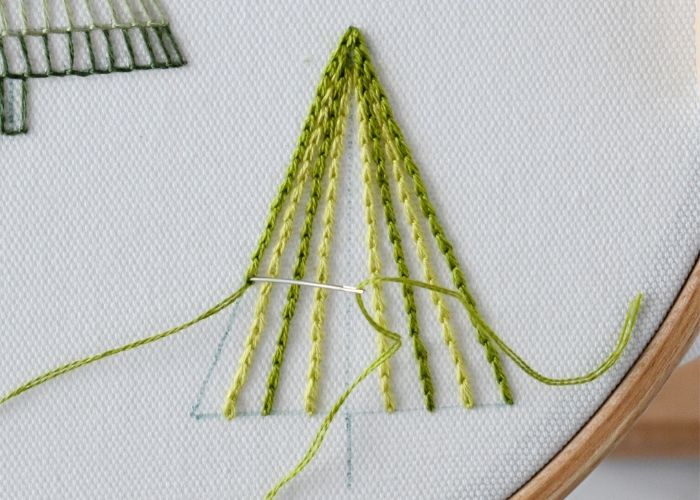
5. Finally, add the central line. Start at the top – this will hide all the imperfections of the previous lines. Embroider a straight line of Chain stitch all the way down to the trunk of the tree.
Pine tree embroidery Video Tutorial
Recommended Products
Disclaimer. To cover the cost of creating free embroidery patterns and video tutorials for this blog, I do sometimes link to products. Please assume these links are affiliate links. If you choose to buy through my links then THANK YOU! – it will make it possible for me to keep doing this.


Where to use hand embroidered Christmas trees
Even though hand embroidery is a relaxing and fun art, I try to make it practical, too. Therefore, before you start stitching, brainstorm a little bit about how to make your hand-embroidered Christmas tree useful.
Here are some ideas on where to use your hand embroidery with festive designs:
- Make Christmas tree ornament hoops. Embroider one of the trees and frame it in a small hoop (6-7 cm). Hang this small hoop on a tree! Use one of the six methods of finishing the back of the hoop to make the rear side of the hoop look neat.
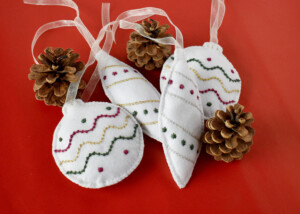
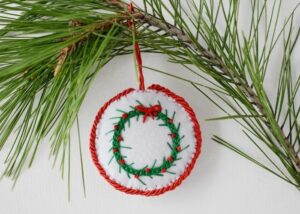
- Create a felt ornament with a hand-embroidered Christmas tree. Embroider the design on felt fabric and then sew it into the ornament. In the “DIY Christmas Ornaments With Wreath Embroidery” tutorial I demonstrate the entire process of sewing felt ornaments with embellished borders.
- Make wall or mantel decor. Embroider one – three – or all five trees and frame them in a hoop. Use this hoop art as wall decor or to decorate a mantel or a bookshelf.
- Prepare a Christmas greeting card. Cut out the embroidery and glue it to the stock card. I have detailed step-by-step instructions for this on this Blog.
- Embellish Christmas stockings. Embroider the trees on the fabric and sew a Christmas stocking from it. You can also embroider monograms or holiday wishes on the stocking.
- Embroider fabric napkins for your festive table setup. Use a different tree design for each napkin to create a cohesive set where every napkin is unique.
- Decorate a gift bag. Embroider one of the trees on the fabric and then sew a gift bag from it. It is a nice way to create a gift bag that is a gift itself.
Over to you
Learn how to embroider Christmas trees and enjoy a fun and simple holiday project. This tutorial explores five hand embroidery methods: Weave stitch, Detached chain stitch, Blanket stitch, Split stitch, and Chain stitch techniques. These Christmas tree designs are not only fun to make but are also beginner-friendly, making them accessible for anyone eager to try their hand at embroidery.
You can create charming embroidered Christmas trees by following the step-by-step instructions and using my free PDF pattern. These designs can be used in various ways, such as for making ornaments, wall decor, greeting cards, stockings, fabric napkins, or gift bags, ensuring your creations are both beautiful and practical.
Download the free PDF pattern with a color and stitch guide, and have a cozy time crafting your holiday decorations and gifts!
Don’t miss a thing!
Follow me on YouTube, Instagram, Facebook, Flipboard, Telegram and Pinterest. On the other hand, you can subscribe to the Practical Embroidery newsletter and get embroidery tips straight to your inbox every week!
More Christmas projects on this Blog
Felt Embroidered Christmas Ornaments: PDF Pattern & DIY Tutorial

DIY Christmas Gift Tags With Snowflake Embroidery: Step-by-Step Guide + Free PDF Templates

Monogrammed Velvet Ribbon Bow DIY: Hand Embroidered Ribbon for Holiday Decor
DIY Christmas Ornaments With Wreath Embroidery

Handmade Christmas decorations. Detailed step-by-step guide