How to transfer embroidery pattern to the fabric
All you need to know about embroidery design transfer tools, materials, and techniques
It is so exciting to start a new embroidery project. But before diving into the fun part – embroidery, we have to transfer the design to the fabric. So let’s see how we can copy embroidery designs to material and what techniques and tools are the best for embroidery pattern transfer.
Embroidery pattern transfer techniques

There are four main embroidery pattern transfer techniques:
- Tracing
- Transferring
- Using a stabilizer
- Drawing a pattern directly on a fabric.
Let’s get more details about each option!
Pattern tracing
Tracing is a “copy of a drawing or pattern made by drawing over it through a piece of thin, transparent paper” (Cambridge dictionary). In hand embroidery, we use a piece of fabric instead of thin, transparent paper.
This embroidery design transfer technique works best with light-colored and smooth fabrics.
To use the Tracing method, you will need the following:
- Printed pattern;
- Fabric;
- Light source. You can use a light window or a lightbox as a source of light for tracing;
- Tracing tool (pen or pencil).
Pros of the Tracing method:
- Simple
- Cheap
- Washable or erasable marks so you can make adjustments as you go
Cons:
- Not suitable for dark fabrics
- Using a window as a light source can be rather complicated to transfer very detailed patterns.
You can learn more about the Lightbox method and watch a video tutorial on my YouTube channel or read the article “How to transfer hand embroidery patterns – simple and inexpensive Lightbox method“.
Design Transferring
Transferring is when you move a design from one surface to another. This method works well on dark and light colored fabrics, but to use this method, the material has to be relatively smooth.
You can also use the design transferring method and special printable transfer paper to copy a photo or a drawing to your fabric.
Use tools like heat transfer pencils or materials like iron-on transfer paper or carbon paper.
Pros of Transferring method
- The method works well on both light and dark fabrics
- Not expensive, as you can use carbon paper or a transfer pen many times
Cons:
- Some heat transfer pens are permanent and won’t wash away. Hence, you need to be extra careful to cover all the transferred lines with embroidery.
Using a stabilizer for pattern transfer

Sometimes, nor Transferring nor the Tracing method works well. For example, think of dark fabric with texture, embroidery on clothes, or a detailed pattern that is hard to trace or transfer. In this case, you can use a stabilizer.
The stabilizer for the pattern transfer is an additional layer of “fabric” (it can be sticky or not). You can draw your pattern on it, transfer it, or print it directly from your printer. Place the stabilizer with a design above your fabric and embroider through both layers. After you finish the embroidery, submerge your embroidery in lukewarm water, and the stabilizer will dissolve.
Easy like this! You can learn more about water-soluble stabilizers in the article “The Ultimate Guide to Water Soluble Stabilizers for Hand Embroidery” on this blog.
Pros of the Stabilizer method:
- Very fast and easy
- Works on any type and color of the fabric
- The pattern is not affected by the imperfections of hand drawing.
Cons:
- It is a relatively expensive method of transferring the pattern.
Embroidery design transfer technique with tissue paper

This technique is very similar to a stabilizer but is much cheaper. Take smooth white tissue paper, trace the pattern with a pencil or ballpoint pen, and pin or baste the tissue paper on top of your base fabric. Then, begin stitching just as you would without the paper. Stitch your complete design, running your needle from the wrong side of the material up to the top through the tissue paper and then back to the wrong side. Gently tear away the paper in small pieces, careful not to tug at your stitches. Use tweezers or a blunt needle to pick out any tissue paper bits you cannot remove with your fingers when you have finished. Also, lint remover is excellent for collecting the most minor remaining pieces of tissue paper.
Tools you will need:
- Tissue paper (paper napkin will do nicely)
- Any pen or pencil that does not bleed on a tissue paper
- The pattern
Pros of the Tissue paper method:
- Fast and simple
- Cheap
- Works on any type and color of the fabric
Cons:
- If the pattern has many small details, the tissue paper may get ruined before you finish the embroidery.
- You must tear away tissue paper before making filling stitches; otherwise, it will remain under them.
You can watch a video tutorial on this embroidery design transfer technique on my YouTube channel or read a more detailed article about this method.
Drawing the pattern directly on a fabric
If the design is relatively simple, you can use any pens or pencils for tracing mentioned above and draw your pattern directly on the fabric!
Pros of drawing directly on the fabric:
- Fast
- Cheap
- You will get an original design for every piece you embroider
Cons:
- If you want to embroider the exact pattern, this method will not work unless you are a drawing professional
Tools and materials you can use to transfer embroidery patterns to the fabric
Many tools and materials can be used to transfer an embroidery pattern to the fabric. Some are specialized and made for embroidery purposes, and some are simple tools we have at home and use daily. You can read about my favorite embroidery supplies in the article “My favorite hand embroidery supplies, tools, and materials” on this blog.
Embroidery pattern transfer tools

You can use many pens and pencils to trace the pattern on the fabric. Here is a list of tools I have and use for this method:
For drawing on the light-colored fabric, use these:
- Water-soluble pens. These markers are fabulous for tracing patterns and transferring designs when embroidering. The marks stay there while you work, but they disappear forever as soon as you wash your finished embroidery. These pens go in different sizes, so you can choose how thick your drawing line will be.
- Pencil. Regular lead pencils are nice to use for transferring designs. The markings they make are light, so if you don’t completely cover them with stitches, you probably won’t notice in the end.
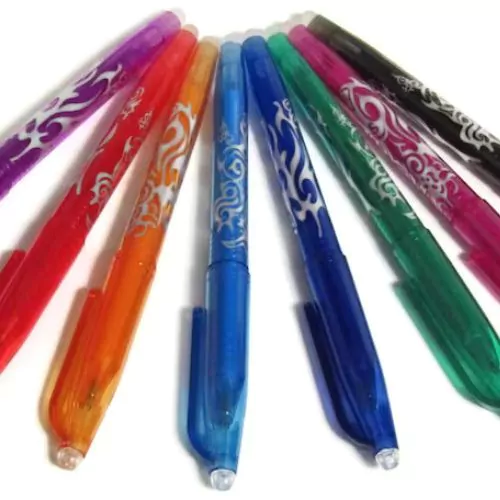
- Friction pens in different colors. These are like simple ball pens, but the lines’ marks will disappear with heat (use a hairdryer or iron).
- Dressmaker pens. Cheap, simple, and washable.
Tools for drawing on the dark fabric:
- White water-soluble marking pens
- Chalk pencil
- Dressmaker pen (light colored)
- Dressmakers chalk
Other drawing tools:
- Heat transfer pens and pencils. Print the pattern in reverse form and trace directly on the drawing with a heat transfer pen. Then, place it on the fabric face down, and iron it. The pattern will move to the fabric after a few seconds of heat application.
Materials you can use to transfer an embroidery pattern
Iron – on Transfer paper. Print your design onto this paper, trim it to size, and use your iron to transfer the pattern onto your fabric. Follow the manufacturer’s instructions. Remember this critical detail: iron-on transfer designs will be a mirror image when you flip them over and iron them on. That’s why you should use a reverse view of a printable pattern for this transfer method.
Carbon paper. Carbon paper for dressmaking comes in different colors to be used both on dark and light fabrics. It is easy to use this method: put the carbon paper (colored side of the transfer paper on the fabric) and then place the design face up. Use a ballpoint pen to trace each line to transfer to the material. You may have to go over the lines more than once.
Stabilizer. There are two ways to use a stabilizer for hand embroidery. One way – use it to stabilize the fabric, putting the layer of stabilizer under or over the material. The other way to use a stabilizer is for pattern transfer purposes. There are water-soluble stabilizers (sticky and non-sticky) that you can use for pattern transfer. Also, you can use a simple fabric stabilizer and tear it off when you finish embroidering over it.
Tissue paper. Take smooth white tissue paper, trace the pattern with a pencil or ballpoint pen, and pin or baste the tissue paper on top of your base fabric. Then, begin stitching just as you would without the paper.


In conclusion
The most popular embroidery design transfer techniques are:
- pattern tracing with a lightbox method,
- design transferring with heat transfer pens,
- iron-on paper,
- carbon paper,
- pattern transfer with a stabilizer or tissue paper.
Also, we can draw our design directly on the fabric.
The best tools for pattern transfer are:
- water-soluble pens,
- friction pens,
- pencils,
- dressmaker chalk,
- pens.
Now you know the differences between the various embroidery design transfer techniques and tools. Which one will you choose for your next project?
Related Techniques


More Articles About Embroidery Pattern Tracing:
More about hand embroidery tools and materials:
- My favorite hand embroidery supplies, tools, and materials
- Hand embroidery needles
- Embroidery hoops
- Embroidery floss and threads
- Guide to hand embroidery fabrics
- Scissors for hand embroidery
- Water soluble stabilizers
- Carbon paper for pattern transfer
- Mending tools and materials
- Mini embroidery hoops
- Best hand embroidery books
- Embroidery materials for beginners