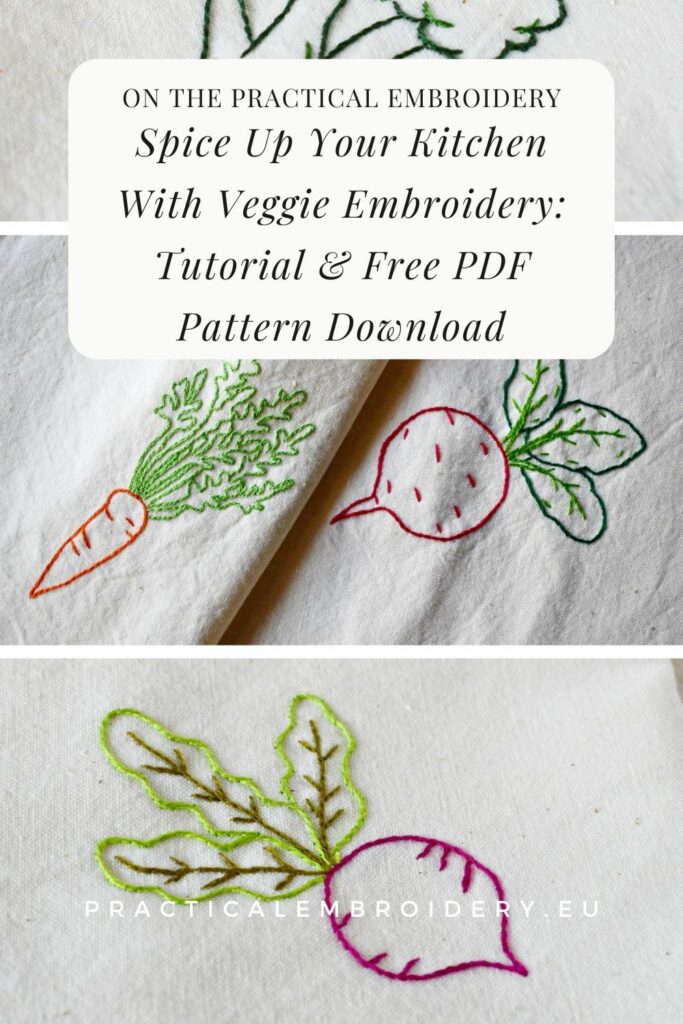
Spice Up Your Kitchen With Veggie Embroidery: Tutorial & Free PDF Pattern Download
I’m a big fan of reusable kitchen textiles like tea towels, napkins, dish towels, and wipes. I think it is more sustainable, cozy, and aesthetically pleasing. And, of course, I like to embellish my home textiles with hand stitching. In this veggie embroidery tutorial, I will demonstrate how to add simple and cute veggies to your tea towels.
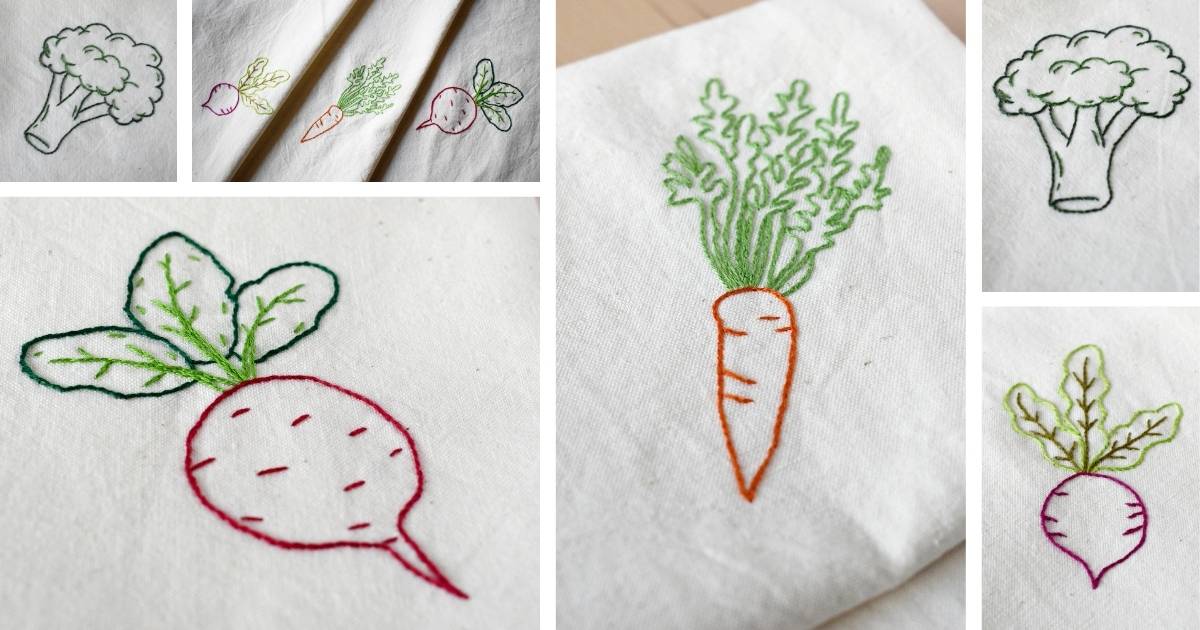
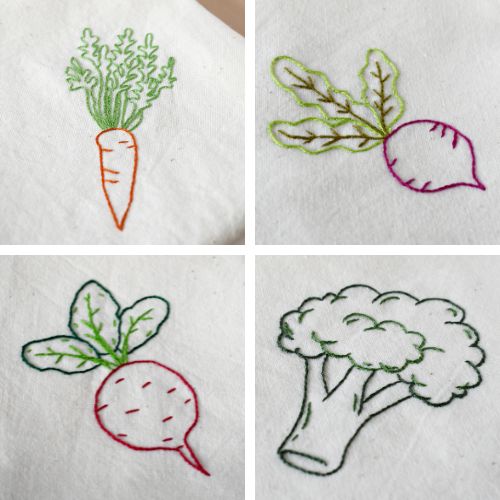
Grab a free PDF pattern, and you can stitch along with me. We will embroider broccoli, radish, carrot, and beetroot using simple hand embroidery stitches – Stem Stitch, Straight Stitch, and a Split Backstitch.
Before you start stitching
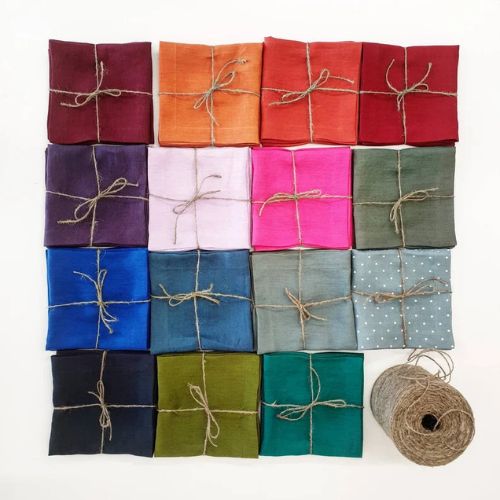
Hand-embroidered vegetables are a great design option for embellishing tea towels or other kitchen textiles – as I did for this veggie embroidery tutorial. But you can also use these cute designs to stitch on fabric napkins, tote bags, aprons, or even a shirt.
Objects to embellish with veggie designs
You can embroider the fabric first and sew a piece afterward. Otherwise, choose ready-made textile objects from natural fibers like cotton or linen and stitch them.
Here are some home textiles you could embellish with veggie embroidery:

Pattern transferring
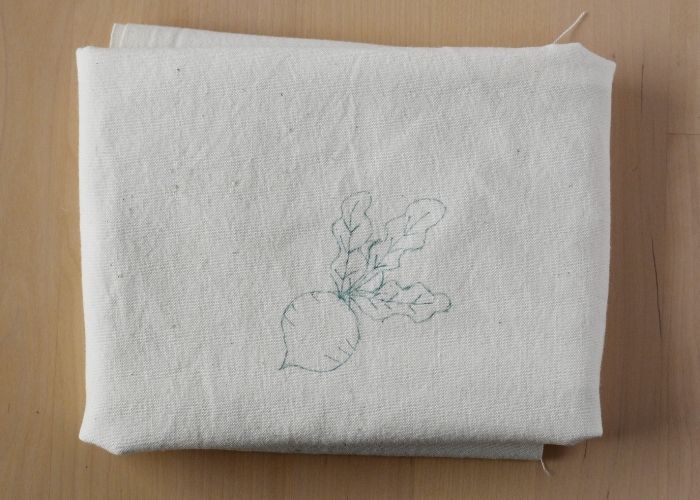
There are plenty of methods how to transfer the embroidery design to the fabric. I used a friction pen and lightbox method to trace my veggie designs to the unbleached cotton fabric. But if you opt for dark-colored fabrics, you will need another option, like a water-soluble stabilizer for pattern transfer.
Read the article “How To Trace Pattern on Fabric: Five Methods For Fast And Easy Embroidery Pattern Transfer” to learn about other methods and tools you could use to mark the fabric.
The reverse side of the embroidery
If you want to stitch a textile with a visible front and reverse sides – like tea towels or napkins – you must also pay attention to not making the back of the stitching messy. Making the reverse side of the embroidery look neat is not that difficult. I follow these rules to make the impeccable reverse side:
- Avoid knots. I start stitching using a folded thread method.
- Secure the ends of the stitches under the previously made stitches so they are secure and invisible.
- Avoid jumping stitches. If I need to bring the thread more than 1 cm away from the ending point, I will end stitching and start anew in the new spot. In the video guide of this veggie embroidery tutorial, I demonstrate how you can hide the jumping thread under previously made stitches.
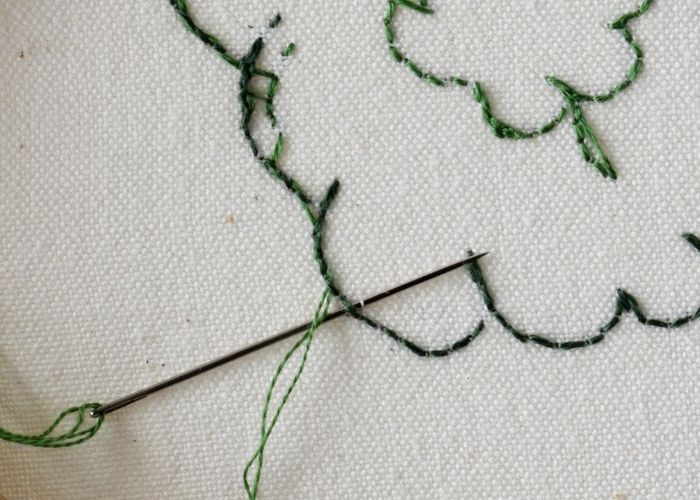
For detailed instructions on how to start stitching without knots, read the article “How to start and end embroidery stitches” or watch a dedicated video tutorial.
Veggie embroidery tutorial
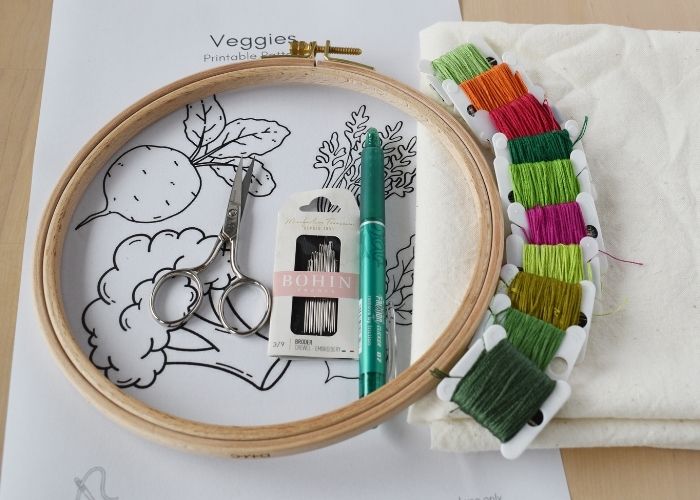
Tolls and materials
- PDF pattern. Download it and print the page with the pattern. You can use all the designs or only choose to stitch your favorite veggie – it’s up to you.
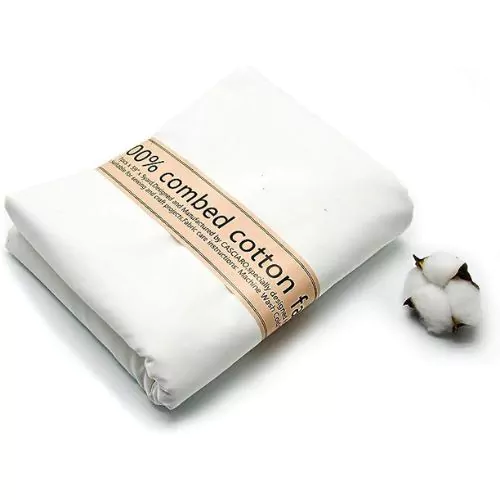
- A textile to embroider. I opted to sew tea towels from scratch and used unbleached cotton fabric.
- Embroidery floss. I used DMC cotton floss. You will find the color codes I used in the downloadable PDF.
- Embroidery hoop and hoop stand (optional).
- Embroidery needles.
- Scissors.
- Friction pen or other tool for pattern transfer.
Veggie embroidery tutorial: step-by-step instructions
1. Download and print the pattern. Gather the tools and materials you will need.
2. Transfer the pattern to the fabric. Use your favorite method.
3. Stretch the fabric in the hoop and tighten the screw. You can use a hoop stand for more convenience.
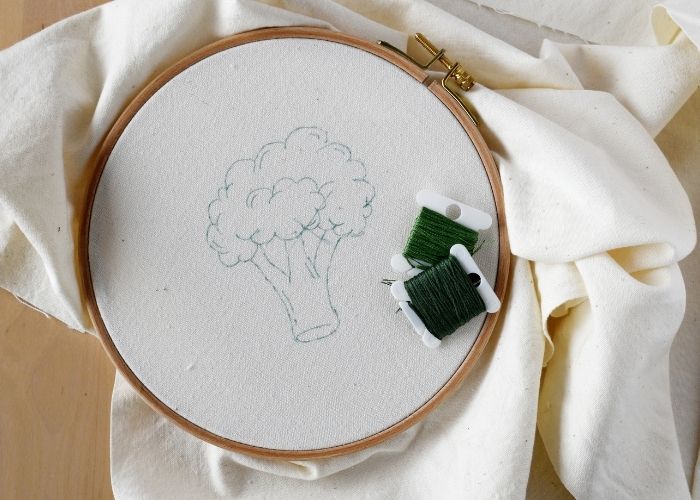
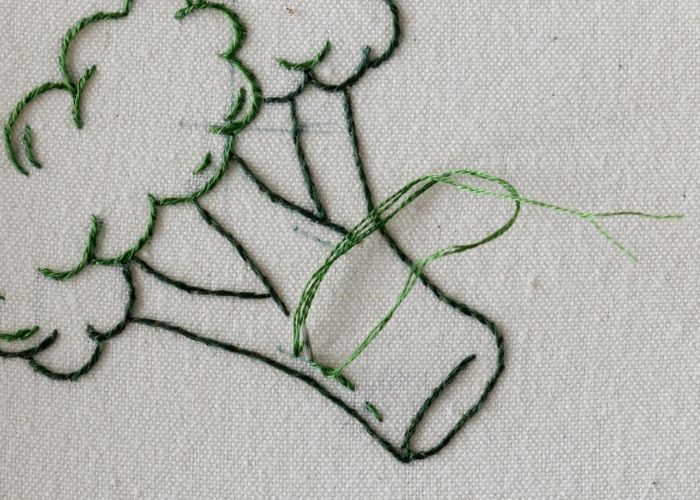
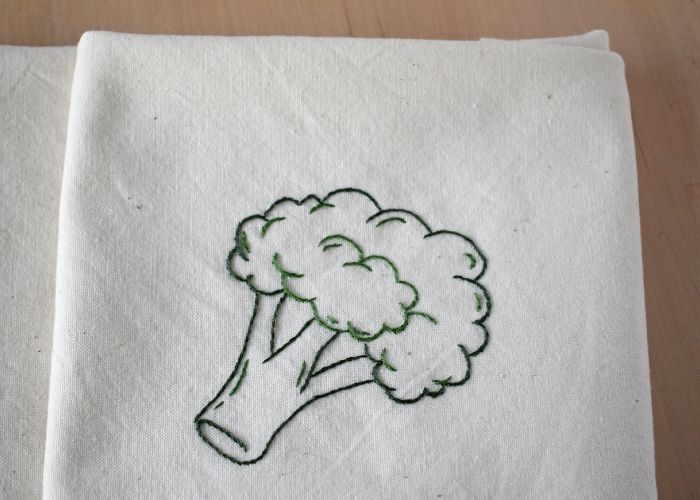
4. To embroider a Broccoli, use the Stem Stitch.
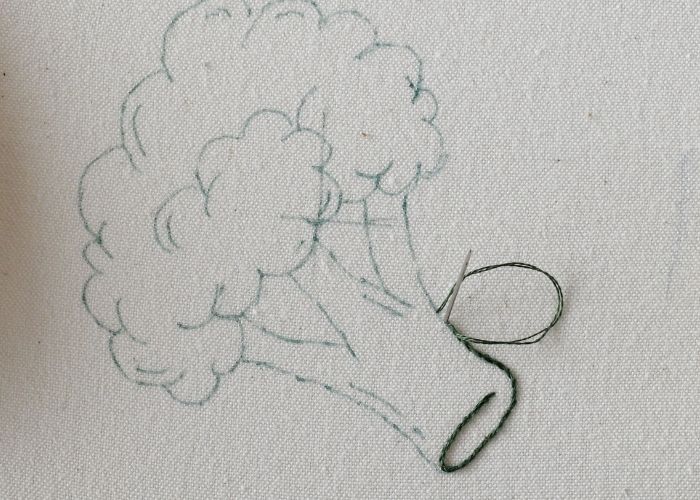
5. Start with outlining the stem.
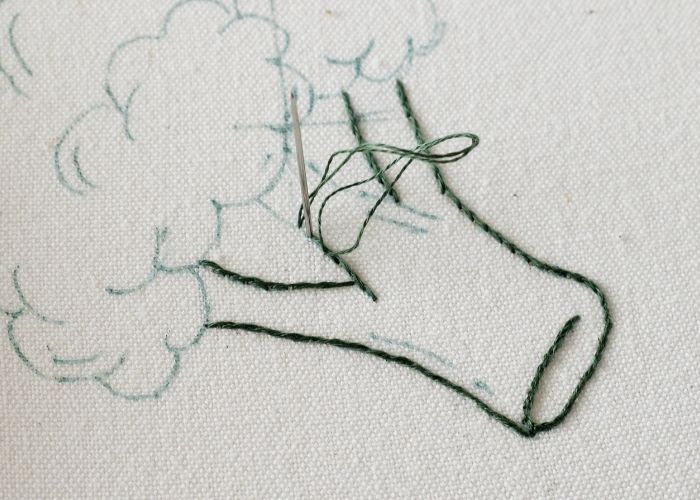
6. Then, stitch out the florets. I used a lighter tone of green floss for the inner florets.
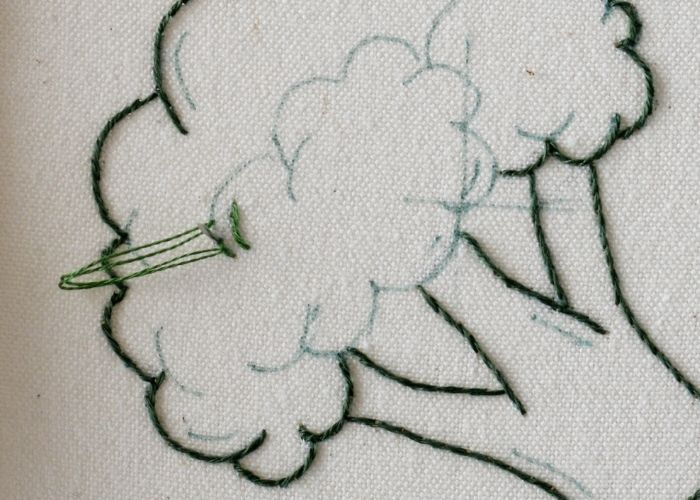
7. Finally, add the details on the stem.
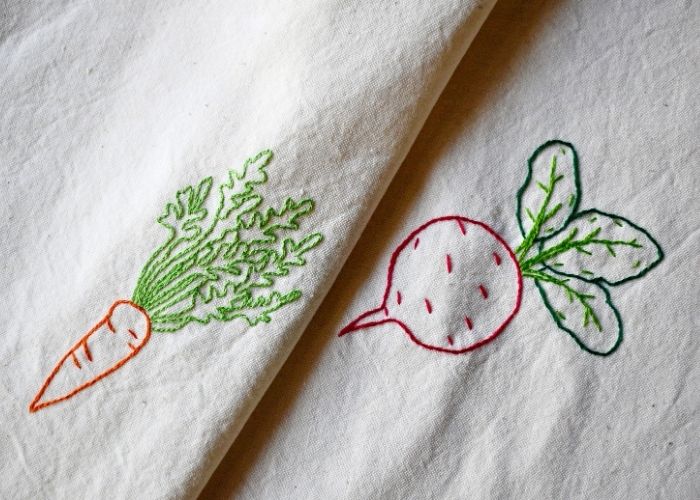
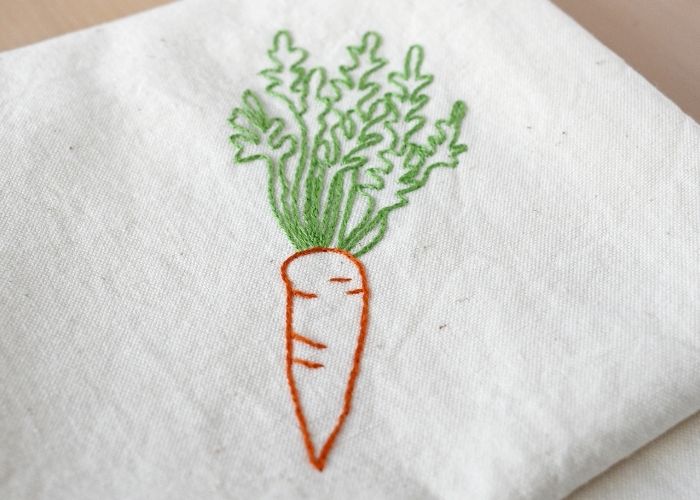
8. To embroider the Carrot, use two strands of orange embroidery floss and embroider the outlines with a Split Backstitch.
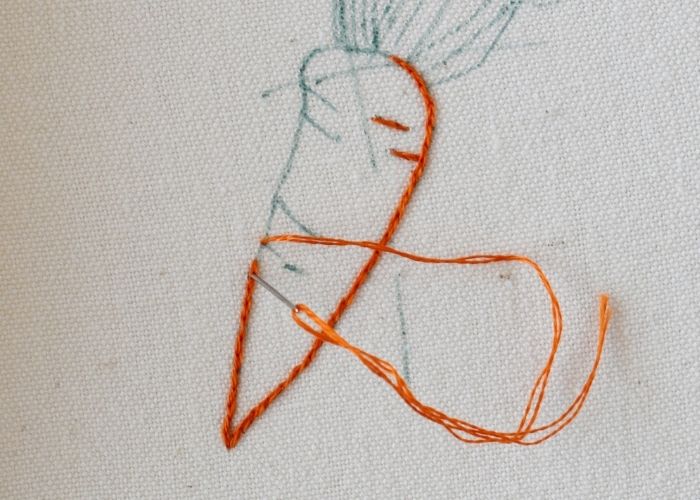
9. Add small details on the root as you go. This will help you avoid jumping threads on the backside.
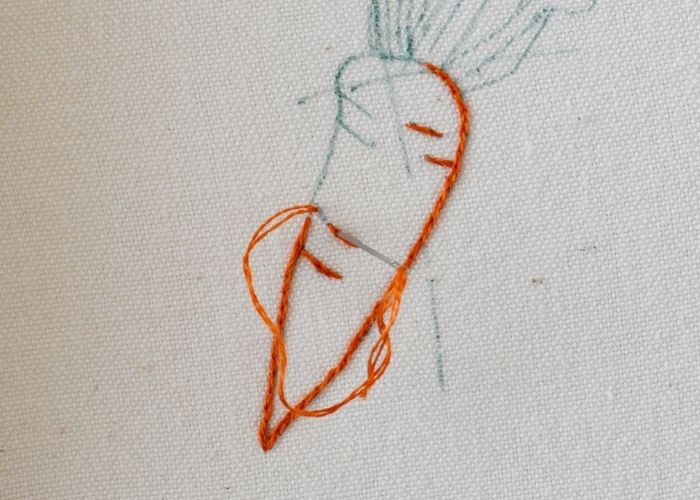
10. Outline the stem and the leaves of the carrot with Split Backstitch.
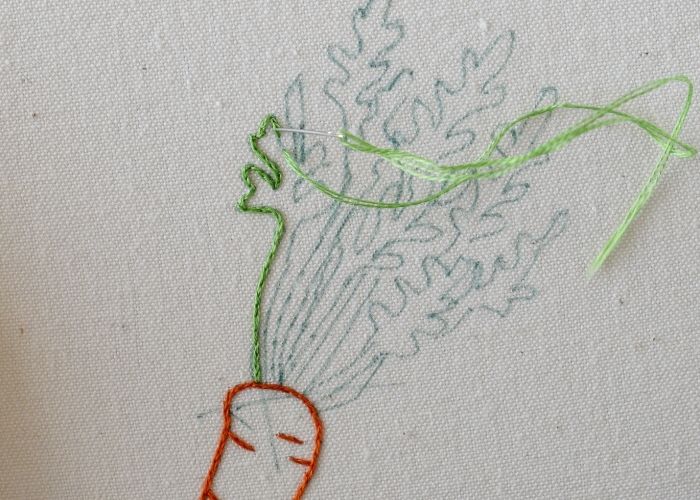
11. On the curves, make tiny stitches so the embroidery is more detailed and precise.

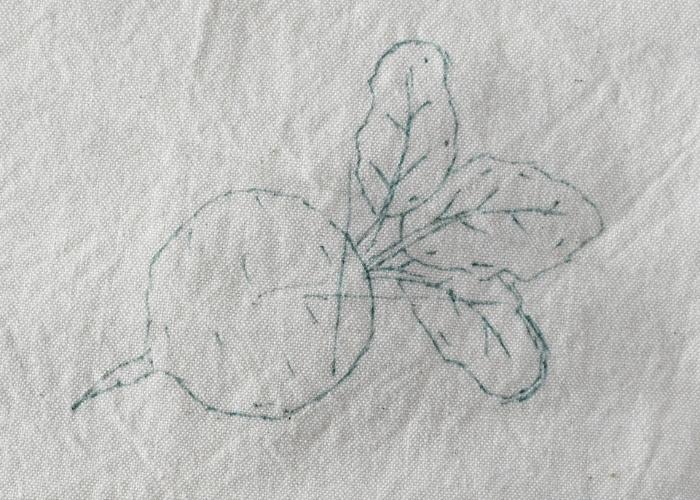
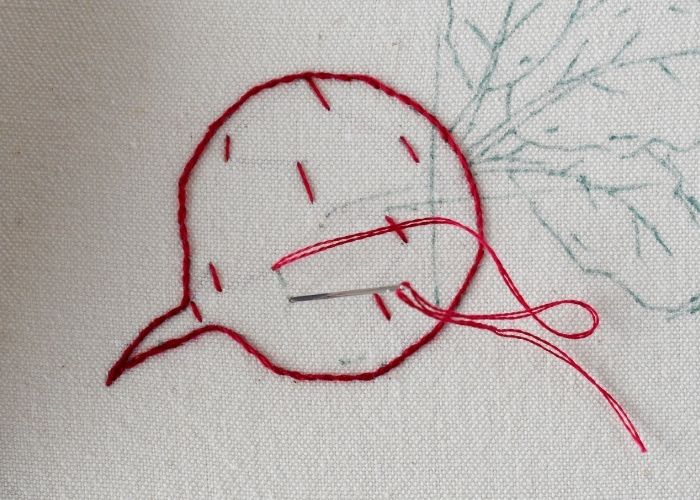
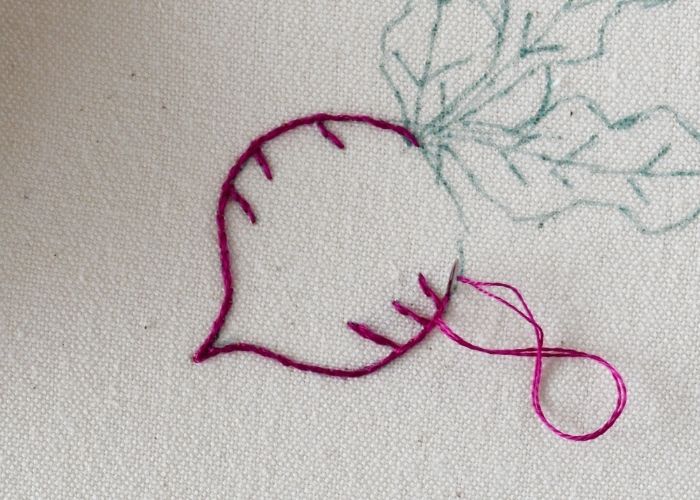
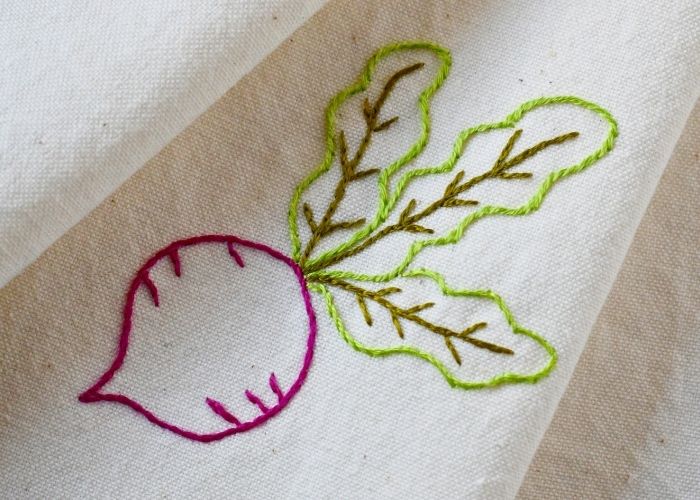
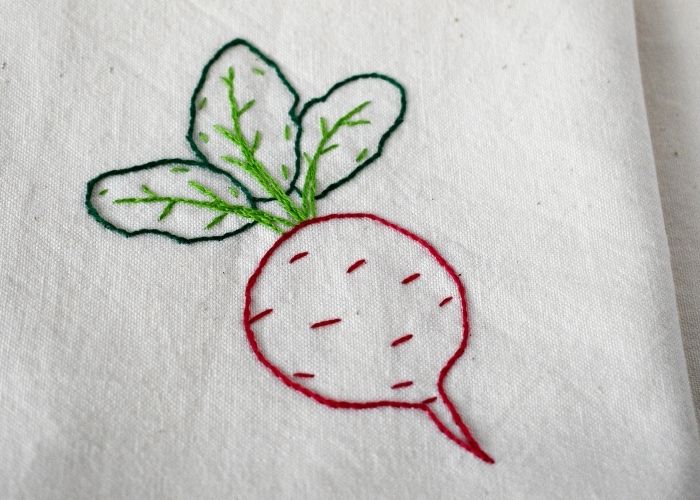
12. To embroider the Beetroot, start with the outline of the bulb and the root with a Stem Stitch. Use two strands of dark pink embroidery floss.

13. Use a Straight Stitch to add small horizontal marks on the bulb.
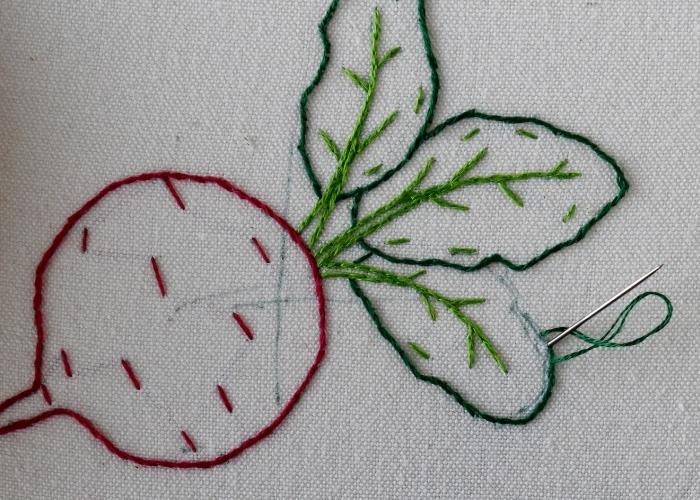
14. Embroider the stems of the beetroot with Split Backstitch. Use two strands of light green floss.
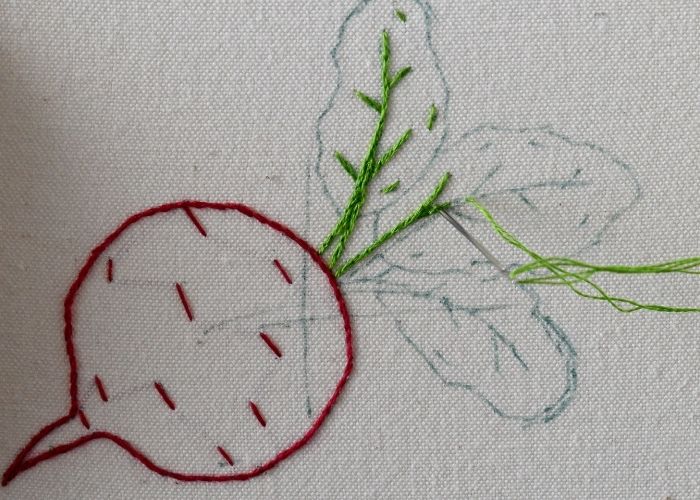
15. Add small details on the leaves with a Straight stitch.
16. Outline the leaves with a Stem Stitch. Use two strands of a darker shade of green floss.
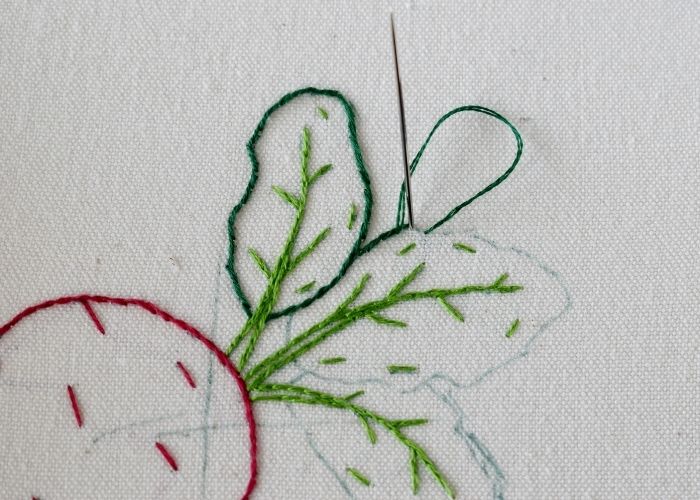
17. On the curves, make stitches smaller so the stitching looks neat and precise.
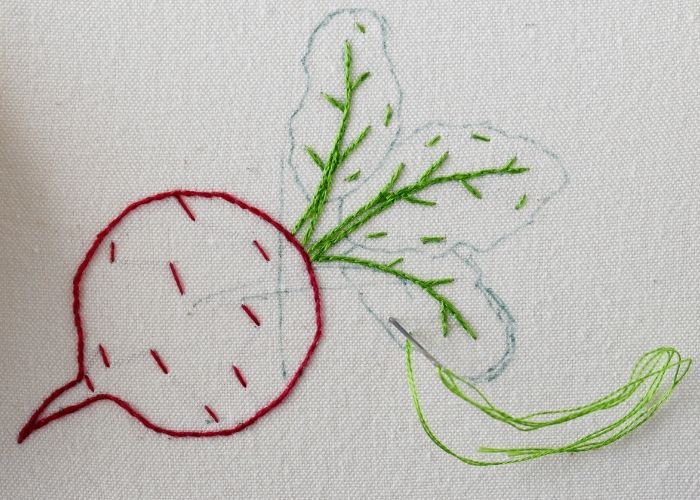
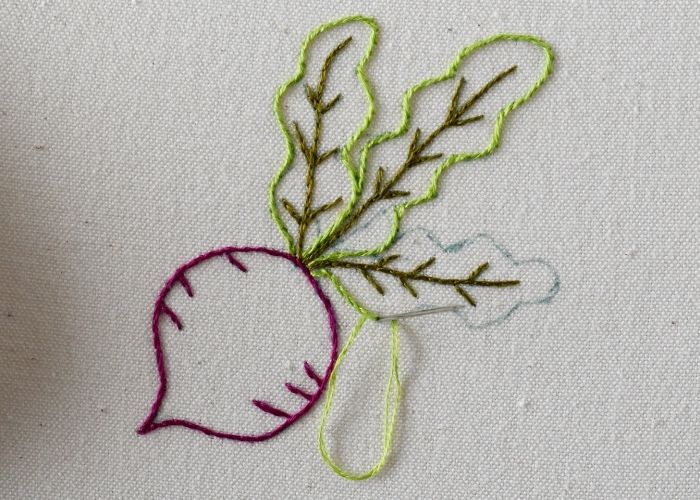
18. To embroider the Radish, outline the root with Stem Stitch. Use two strands of dark pink embroidery floss.

19. Add the horizontal lines with Stem Stitch as you go.
20. Embroider the veins of the leaves with Split backstitch.

21. Use two strands of a darker shade of green.
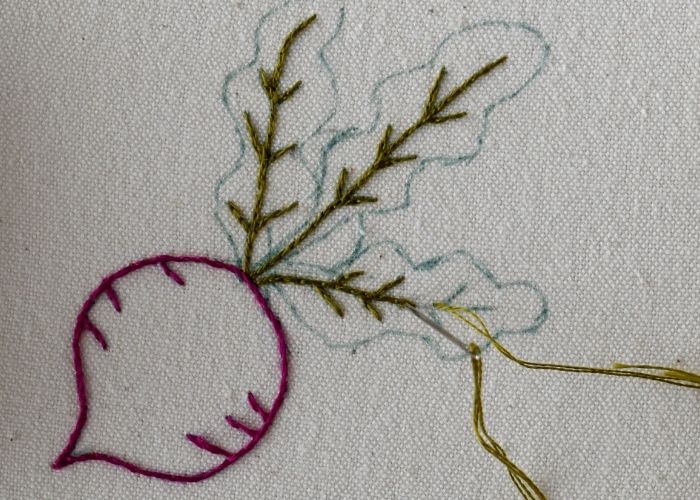
22. Outline the leaves with Stem Stitch.
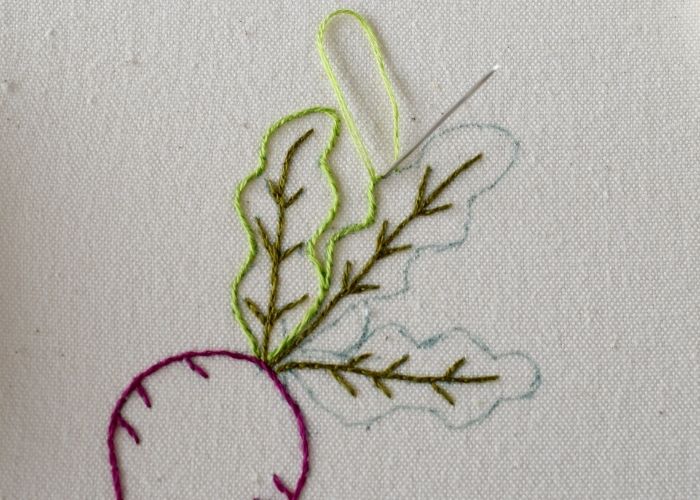
23. Use two strands of light green embroidery floss.
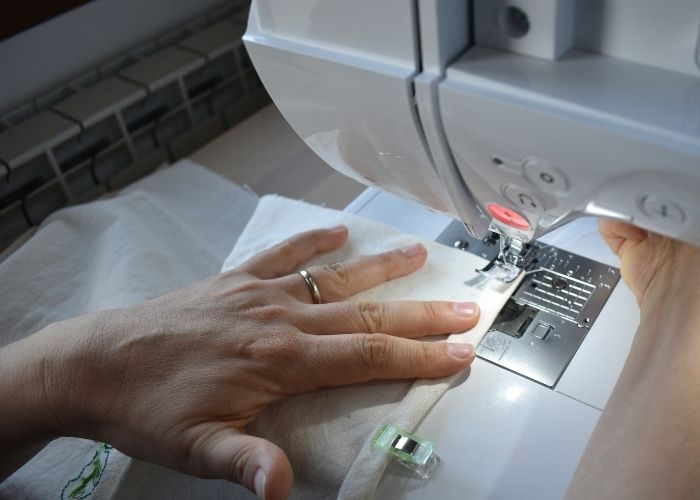
24. Remove the tracing marks and iron the finished piece when all the stitching is done. Sew the edges of the tea towels or napkins if you sew your kitchen textiles from scratch.
Video Tutorial
Recommended Products
Disclaimer. To cover the cost of creating free embroidery patterns and video tutorials for this blog, I do sometimes link to products. Please assume these links are affiliate links. If you choose to buy through my links then THANK YOU! – it will make it possible for me to keep doing this.


Over to you
If you like decorated kitchen textiles, this veggie embroidery tutorial is the right place to start embellishing your tea towels, aprons, and napkins.
Which vegetable did you like the most? Please comment and share your projects with all the readers!
Don’t miss a thing!
Follow me on YouTube, Instagram, Facebook, Flipboard, Telegram and Pinterest. On the other hand, you can subscribe to the Practical Embroidery newsletter and get embroidery tips straight to your inbox every week!
More embroidery projects for home decor on this Blog

Hand embroidered Easter napkin rings DIY tutorial
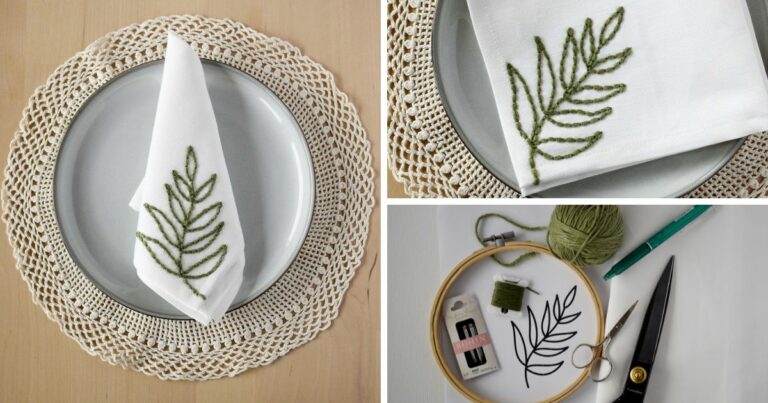
DIY embroidered napkins with an olive branch: Free pattern download and step-by-step hand embroidery tutorial
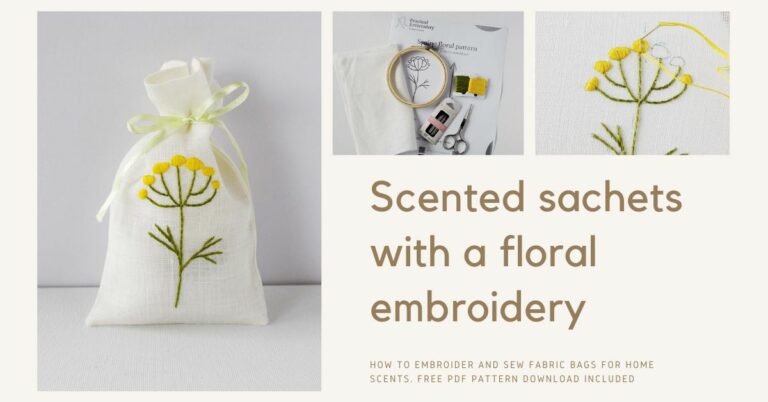
Scented sachets with a floral embroidery DIY tutorial