
Embroidery Mending Basics: Beginner’s Guide to Sustainable Wardrobe
Embroidery mending is more than just a practical way to repair clothing—it is an act of sustainability and a statement against the wastefulness of fast fashion. By learning embroidery mending basics and embracing visible mending and garment repair, we can contribute to a more thoughtful and ethical approach to fashion, extending the life of our clothing while reducing environmental impact.
Mending with embroidery transforms worn or damaged clothing into unique, long-lasting pieces. Rather than discarding garments due to minor tears, holes, stains, or thinning fabric, embroidery mending allows for:
- Repairing tears and holes and masking stains.
- Strengthening weakened areas to prevent further damage.
- Personalizing clothing with creative and artistic stitches.
- Preserving sentimental or high-quality pieces that might otherwise be thrown away.
Embroidery mending helps reduce textile waste by repairing garments instead of replacing them, keeping clothing in circulation longer.
Essential materials & tools for embroidery mending

Mending with hand embroidery stitches does not require expensive tools or materials. Still, some of them are essential and will simplify the process. These tools ensure a smooth embroidery mending experience, whether fixing small tears or creating decorative repairs.
The article “Mending tools and materials: What you need to get started with visible mending” on this Blog provides a more extensive list of mending tools and materials.
Here’s what’s needed to get started:
Embroidery hoop
An embroidery hoop isn’t obligatory for mending. Still, in some cases, it can make stitching easier by keeping the fabric taut. It is beneficial when working with delicate or stretchy materials, as it prevents puckering and uneven stitches. A 10-15 cm (4-6 inches) hoop will work great for small mending projects. You can learn more about this embroidery tool in the article “Embroidery hoops. Types, sizes, and how to choose the best hoop for hand embroidery“.
Needles

The choice of the needle for the mending project depends on the fabric type, weight, and the type of stitches you want to use:
- Embroidery needles (aka crewel needles) are ideal for general embroidery mending. They have a sharp tip and a long eye to accommodate thicker threads.
- Darning needles (or bigger tapestry needles) have a blunt tip and are used for weaving stitches or mending knitwear.
- Sharps or milliner needles are regular sewing needles. They are great for mending fine, delicate fabrics like silk or chiffon, where a small hole from the needle is less noticeable.
- Sashiko needles. These longer needles are indispensable for all darning tasks, Sashiko stitching, and Boro or Kogin mending projects.
For more detailed information about the needles, read the article “Hand Embroidery Needles and All You Need to Know to Choose the Right One.“
Threads
Threads, floss, and yarn choices for mending are endless. The correct thread choice ensures durability and visual appeal of the mend:
- Cotton embroidery floss is versatile and available in various colors, making it perfect for most fabric types.
- Silk thread is best for delicate fabrics or high-end garments, as it blends well and adds a slight sheen.
- Wool thread and yarn are ideal for mending thick fabrics like wool coats or sweaters.
- Sashiko thread is a slightly thicker cotton thread, traditionally used for visible mending with a bold effect.
Read a full guide – “Embroidery Floss and Threads. An in-depth guide to hand embroidery threads, floss, and other types of yarn you can use to embroider” – to learn more about various threads you can use for mending.

Fabric stabilizers
Fabric stabilizers can provide extra support for fabrics prone to stretching or fraying. Here are some options:
- Iron-on stabilizers can reinforce the damaged area before stitching, especially on thin fabrics.
- Water-soluble stabilizers temporarily stabilize the fabric and assist in pattern transfer. These stabilizers melt in water and dissolve after mending.
- Scrap fabric or interfacing can be added beneath a hole for extra strength and stability.
Scissors, marking tools, and additional supplies
- Embroidery scissors – Small, sharp scissors make it easy to trim thread with precision.
- Fabric marking tools – A water-soluble fabric pen, friction pen, or tailor’s chalk helps outline designs before stitching.
- Thimble – Protects fingers when working with thick fabrics or dense stitches.
- Tweezers and seam ripper – Useful for removing old stitches or adjusting fine details.

Choosing the right stitch for mending
Almost any hand embroidery stitch can be used for mending. Traditionally, some embroidery techniques and stitches are more often used for adjusting clothes. Here are the most common embroidery techniques to learn for the embroidery mending basics:
- Backstitch
- Darning Stitch (Running Stitch)
- Japanese Darning Stitch
- Kogin Stitch
- Weave Stitch
- Blanket Stitch (Blanket stitch for sewing and Filling with Blanket stitch)
- Scotch Darning Stitch
- Duplicate Stitch
The article “Hand Embroidery Stitches for Mending” provides more details about each technique and advice on when to use it.


Besides traditional mending stitches, there are more needlework techniques you can use for mending:
- Woven Star Stitch, Fishbone Stitch, Long and Short Stitch, or Satin Stitch will help you hide small holes or stains in the fabric with embroidery.
- Triangular Turkish Stitch, Buttonhole Shading Stitch, Ceylon Stitch, or Burden Stitch will help you decorate the fabric and hide small mends or stains with semi-covering filling.
- Use Bullion Knots, Lazy Daisy Stitch, and French Knots to add simple floral designs that reinforce the fabric, hide stains or rips, and adjust garments.


Embroidery mending basics: Step-by-step guide
Embroidery mending is an artistic way to repair worn or damaged clothes. If you have never mended before, this guide will help you get started:
Assessing the damage

Before you start stitching, closely examine the area that needs mending. Understanding the type of damage will help determine the best repair method:
- Small holes or stains. This localized damage can be hidden with embroidery stitches or darning techniques.
- Tears or ripped seams. You must secure the rips and sew the seams before adding decorative embroidery. Consider using a stabilizer to close the rips nicely.
- The worn-out fabric can be reinforced with darning stitches, sashiko, or other filling techniques. If the fabric is weak, consider adding a layer of backing fabric for extra support before stitching.
- Large holes can be covered with a patch, applique, or weaving stitch. If the hole is too large or frayed edges are difficult to work with, an appliqué patch or reinforcing with a stabilizer underneath can strengthen the repair.
Preparing the garment
Proper preparation for mending ensures that the stitches stay neat and the mend lasts longer.
- Before mending, clean the garment. If possible, wash and dry the fabric. This process will help you notice stains that can’t be removed by washing. Besides that, mending clean clothes is more pleasant.
- Trim loose threads. Snip off any frayed edges to prevent further unraveling.
- Secure the fabric. If the fabric is delicate or stretchy, an embroidery hoop can help keep the area stable. Place a fabric stabilizer or scrap piece of fabric behind the damaged area for extra strength if needed.
- Working with knit fabrics, avoid pulling the stitches too tightly, which may cause puckering. Instead, allow for a bit of stretch in the stitches.
Choosing a design
Decide whether the mend should blend in or stand out as a decorative feature.
- Invisible mending: Use matching thread and try to integrate the repair into the fabric. For knitwear – use the duplicate stitch.
- Visible mending: Contrasting thread colors, bold embroidery patterns, or decorative patches will turn the repair into a unique design.
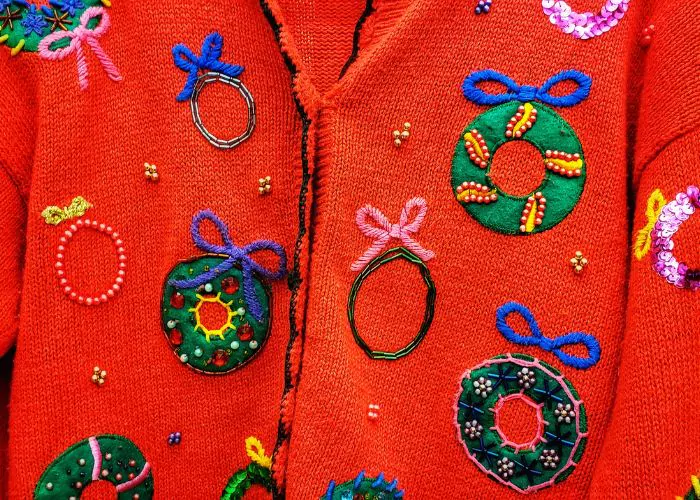
- Creative embellishments: Dimensional floral motifs, bead embellishments, woven patches, and colorful appliques will transform your old clothes into one-of-a-kind art.


Finishing touches
To complete the mend and ensure it lasts, follow these final steps:
- Secure the thread ends. How you start and finish the stitches might be crucial in mending. Tie off stitches neatly on the back of the fabric and weave in loose ends to prevent unraveling.
- Trim excess stabilizer or backing fabric. If you used a stabilizer or extra fabric, trim it close to the stitches while leaving enough for support.
- Remove pattern marks and water-soluble stabilizers. After the stitching, clean all the markings, remove basting stitches and temporary stabilizers.
Embroidery mending basics for beginners
Embroidery mending is a fun and rewarding skill, but you will need time and practice to become good at it. If you are a beginner, start with simple techniques and small mends. Here are some essential tips to help ease into embroidery mending while achieving beautiful and durable results.
Start on small, less noticeable areas
When learning embroidery mending basics, it’s best to begin with repairs in low-risk areas, such as the inside of a sleeve, pocket corners, or underarm sections. Practicing the clothes you wear at home is another excellent way to grow confidence. This allows room for practice without worrying about imperfections being too visible. As experience and confidence grow, you can take on more extensive and notable mends.
Practice stitches on scrap fabric first
Before stitching directly onto the garment, practicing embroidery stitches on scrap fabric is a great way to refine the technique. Practicing on a sampler will help to:
- Learn to maintain the stitch tension to avoid puckering or pulling the fabric.
- Getting comfortable with new embroidery techniques and stitches.
- Experimenting with thread thickness and color combinations.
If you enjoy trying new stitches, keep a small swatch book of stitched samples to refer to when choosing stitches for future mending projects.

Create a mending routine
Preventing extensive damage and incorporating mending into regular maintenance will help you wear your clothes longer and avoid extensive and complex mends.
Control your garments and do small mends regularly:
- Reinforce weak seams and sew small seam tears immediately.
- Patch worn-out areas before they tear.
- Adjust loose buttons and replace lost ones as soon as you notice it.
- Check your knitwear for thinned threads. Adding duplicate stitches to reinforce the knit is faster than mending the hole when you need to recreate the fabric.
- Clean the stains as soon as possible. Food stains are easier to clean if you address them immediately.
- When purchasing new clothes, choose natural fibers like cotton, linen, and wool, which are more durable and easier to mend than synthetic fabrics.
Over to you
We can all participate in a growing slow fashion movement by learning embroidery mending basics, and choosing to repair our clothes instead of replacing them. By transforming old garments into wearable works of art, we can make a positive impact on the planet.
Mending is an act of care—for both clothing and the environment. Embroidery mending not only revives worn garments but also challenges the culture of disposability, advocating for a more sustainable and thoughtful approach to fashion.
I choose to repair rather than replace! What about you? What is your favorite mending method? Please share in the comments!
More about mending on this Blog

Visible Mending Knitwear: A Creative and Sustainable Approach

Visible Mending Ideas, Techniques and Inspiration to Transform Your Clothes

Hand embroidery for mending. Decorative mending techniques and stitches
