Felt Embroidered Christmas Ornaments: PDF Pattern & DIY Tutorial
Decorating your Christmas tree with handmade treasures — especially when they’re stitched with love – is pure magic. Handmade felt embroidered Christmas ornaments are a fantastic way to bring warmth, creativity, and a personal touch to your holiday décor. Soft, colorful, and timeless, these handmade baubles can be reused year after year, becoming cherished pieces of your festive traditions.
In this DIY tutorial, you’ll learn how to make your own felt embroidered Christmas ornaments from scratch — including how to transfer embroidery patterns, choose the right stitches, and assemble each ornament into a beautiful, finished decoration. Whether you’re an experienced crafter or just starting your embroidery journey, this beginner-friendly guide (plus a free printable PDF pattern!) will walk you through every step.
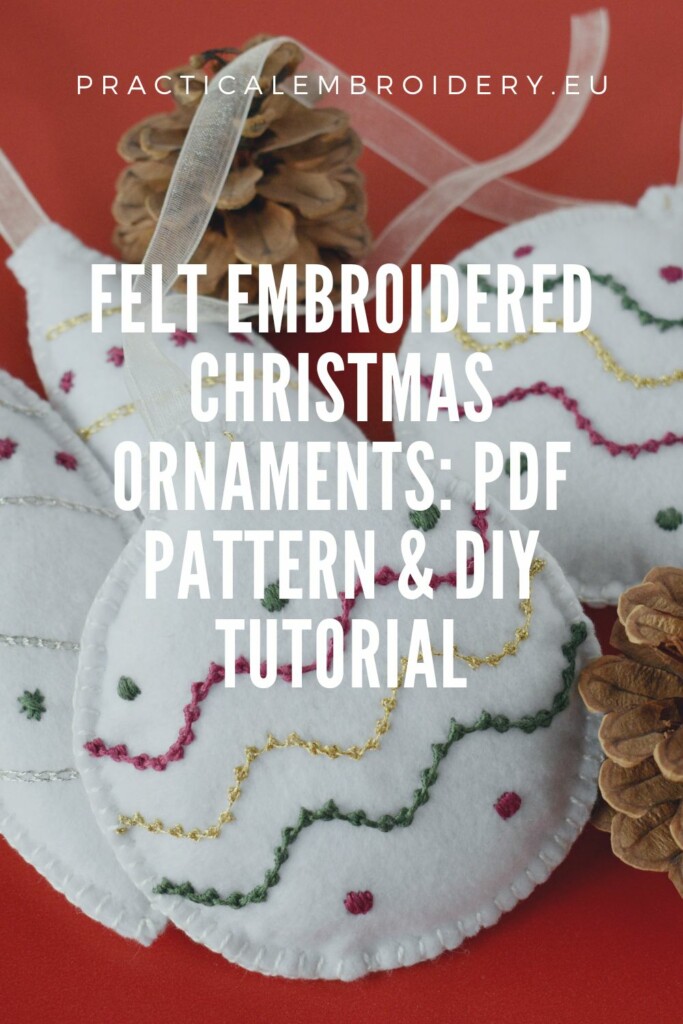
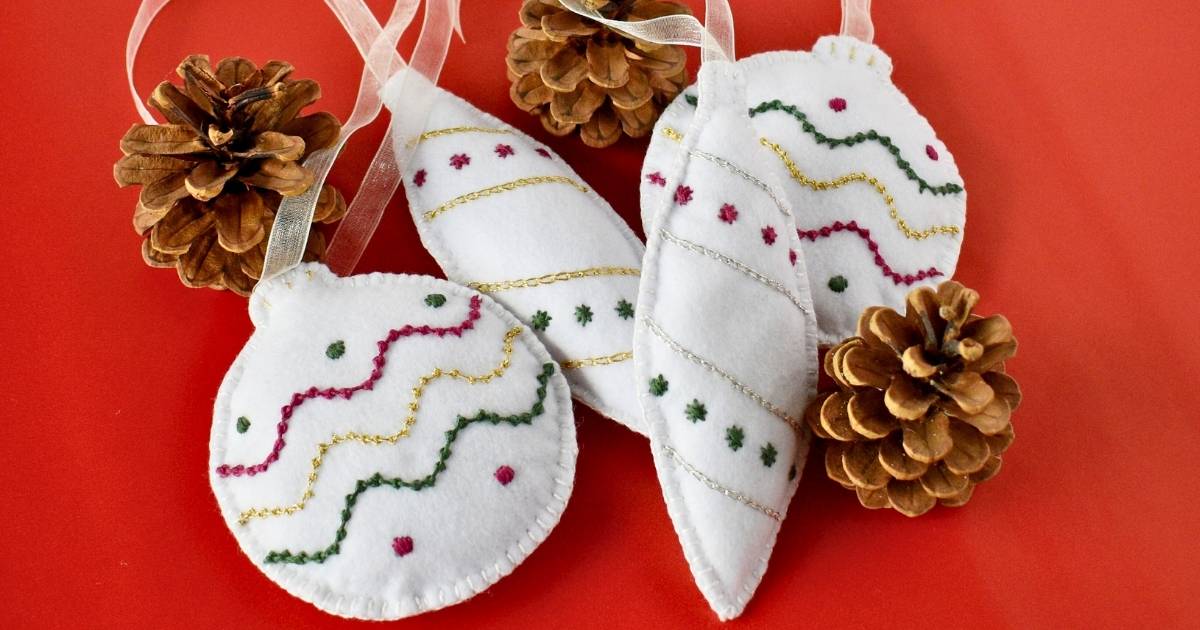
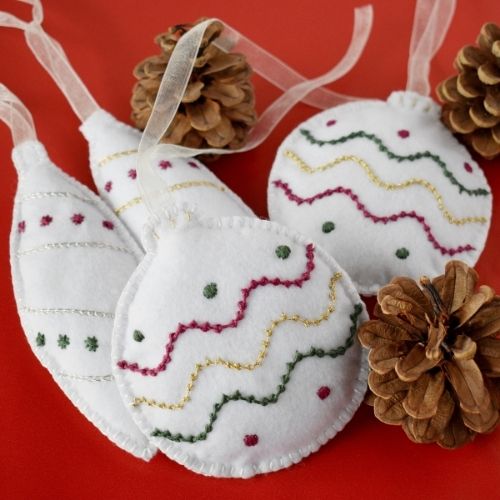
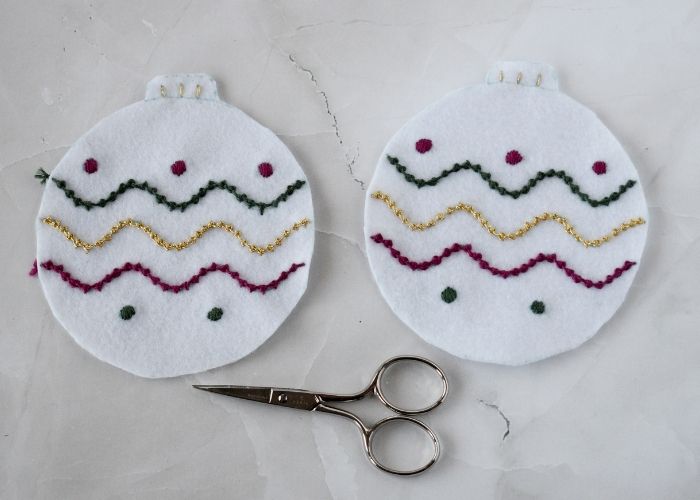
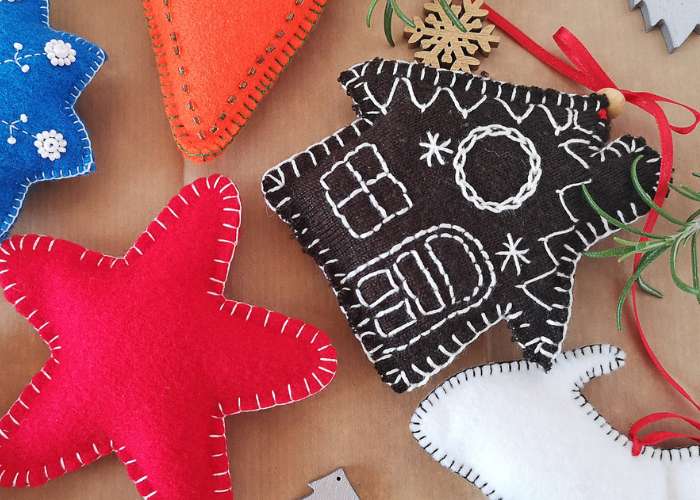
Felt embroidered Christmas ornaments
Felt ornaments are one of the creative ways to decorate your Christmas tree with handmade baubles you can reuse year after year. There are various models of embroidered felt ornaments you could make – from highly elaborate 3D shapes with layers of colored felt and complex embroidery to baubles of simple shapes that even a beginner can make.
Making felt ornaments with this guide for your Christmas décor is a fun, beginner-friendly project you can split over the long, dark autumn evenings. Embroidering a bauble or two a day can be a relaxing wind-down activity. And the final result—baubles to decorate your tree—will make you feel proud and happy!
How to make felt embroidered Christmas ornaments
Step-by-step hand embroidery and sewing guide
Tolls and materials
- Bauble pattern. Download and print my free Felt Embroidered Christmas Ornaments Printable PDF Pattern.
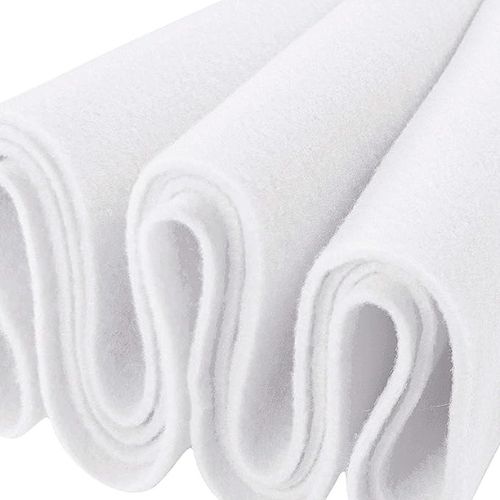
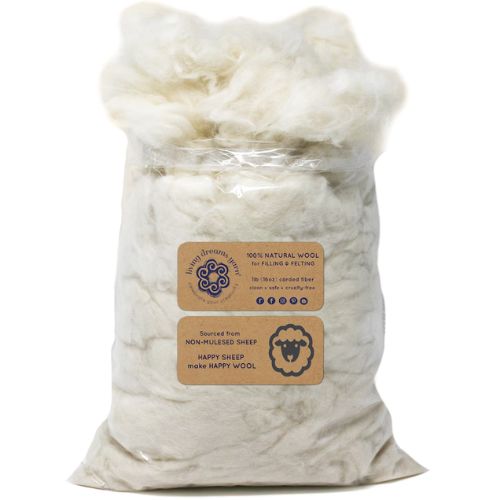
- Felt fabric. I used white felt.
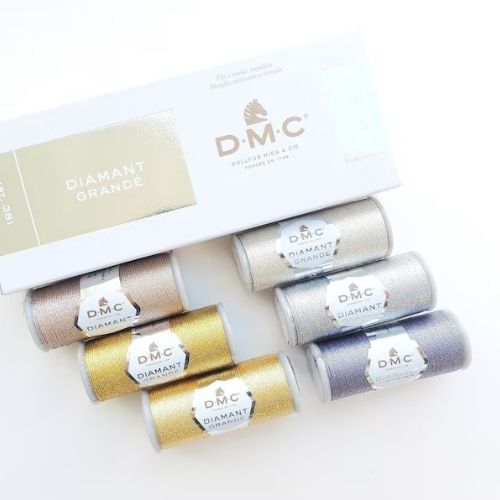
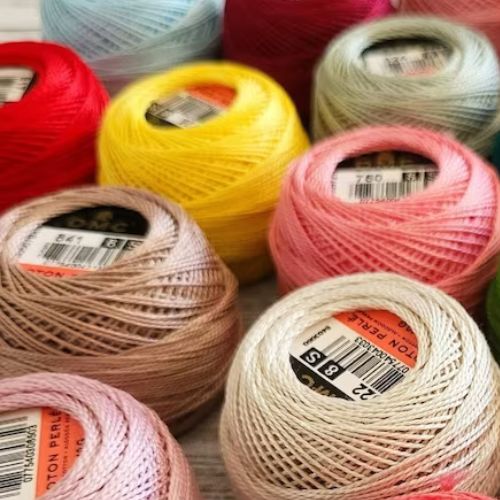
- Embroidery floss. I used a combination of red and green DMC embroidery floss: #3803 and #520 for darker tones, and #304 and #904 for brighter colors. I combined these with DMC Diamant Grande golden thread (G3821).
- Embroidery needles.
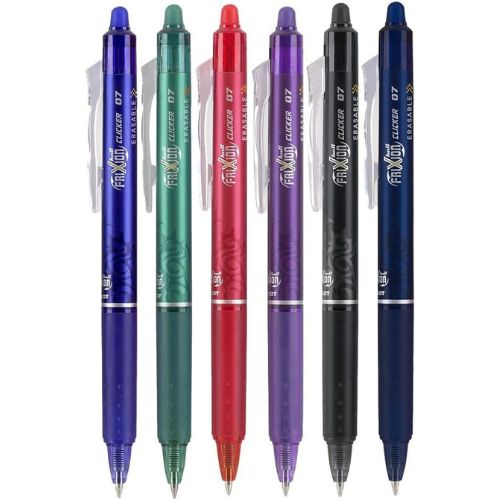
- Friction pen for pattern transfer.
- Scissors for fabric and paper.
- Stuffing or filler for the ornaments.
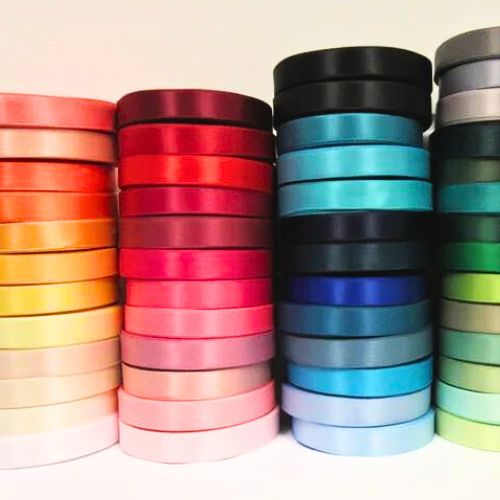
- Some ribbon for the hanging loops.
- Pearl cotton or other thread for sewing.
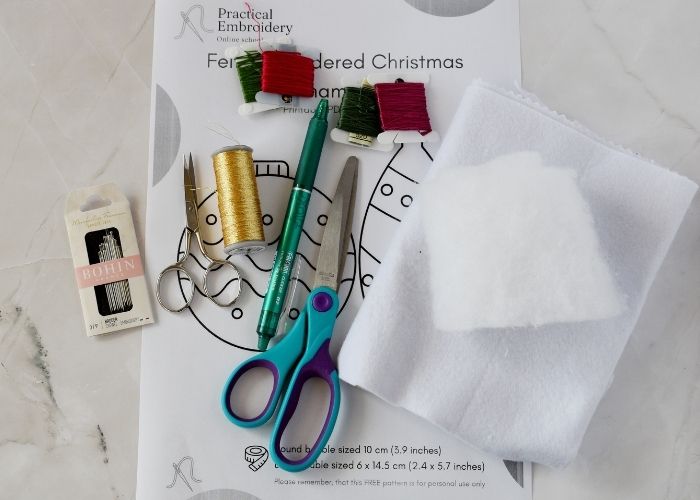
For this project, you will use basic materials like felt, embroidery floss, and stuffing. I linked the exact products I used under the tutorial.
Also, you can learn more about various felts and stuffing materials in the FAQ section of the “DIY Christmas ornaments with wreath embroidery” tutorial, where I dive deeper into different options.
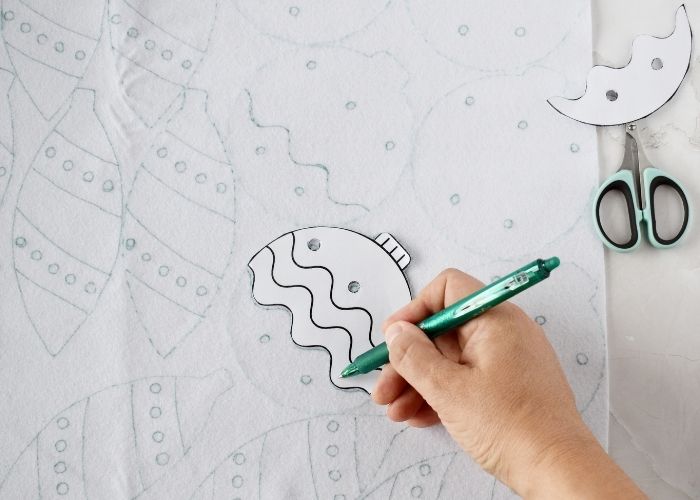
Pattern transfer to felt fabric
Felt fabric is dense and has a pile; therefore, transferring the embroidery pattern onto it might be tricky. If you want to make a few baubles, you can use a water-soluble stabilizer. Otherwise, follow the steps below, where I demonstrate how you can trace the shapes and stitching lines for the embroidery with a simple friction pen.
1. First, cut out the bauble shapes from the paper.

2. Then place the shapes on felt and trace their outlines with a friction pen. You will need two shapes to make one ornament.
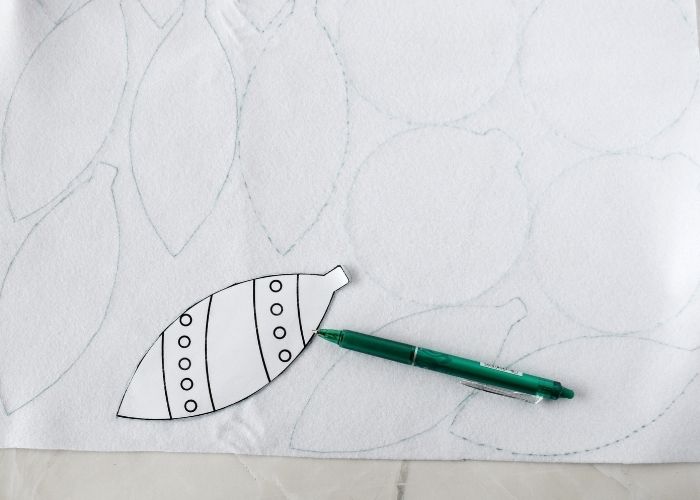
3. To transfer the embroidery stitching lines, cut away the end of the shape along the line, position the shape back on the felt, and draw the line. Repeat on each transferred shape. Use the same technique for the dots.
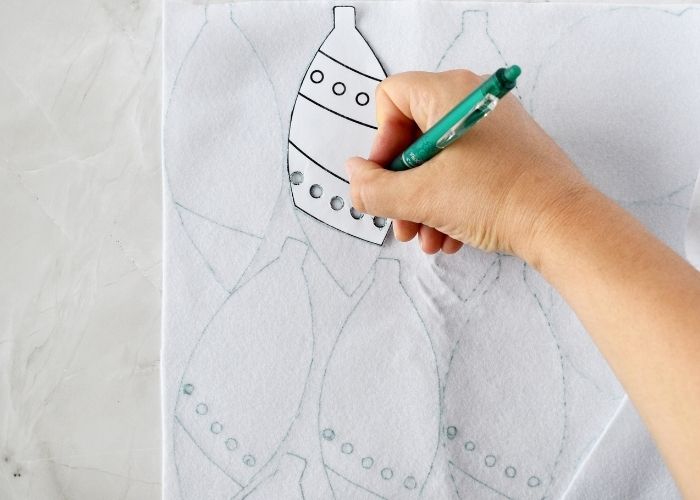
4. Repeat the steps with a rounded bauble.
Rounded felt ornament – embroidery instructions
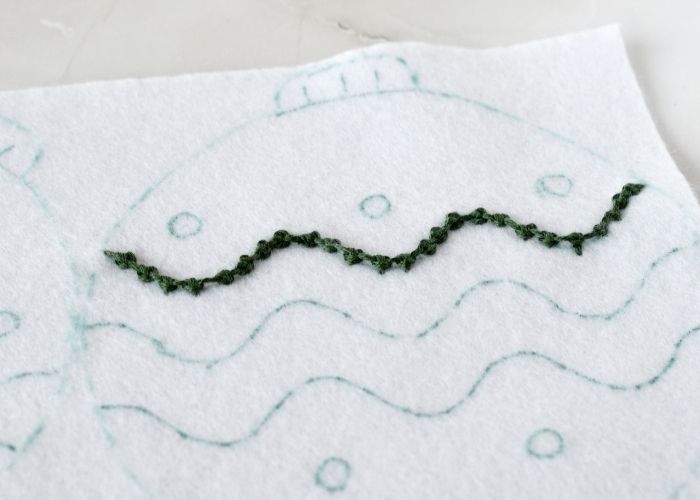
1. Start with wavy lines. Use six strands of embroidery floss and embroider Palestrina stitch along the line. I used DMC #3803 dark mauve thread.
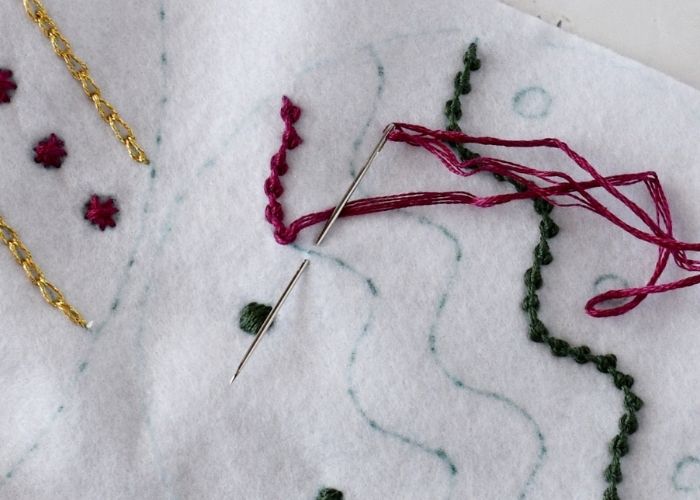
2. If your felt has a high pile, you can use the back of the needle for the knotting part of the Palestrina stitch.
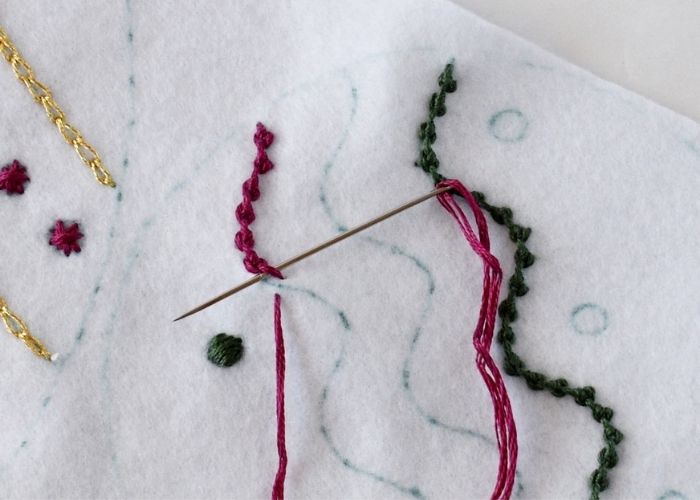
3. Equally spaced stitches will look like a line of beads.
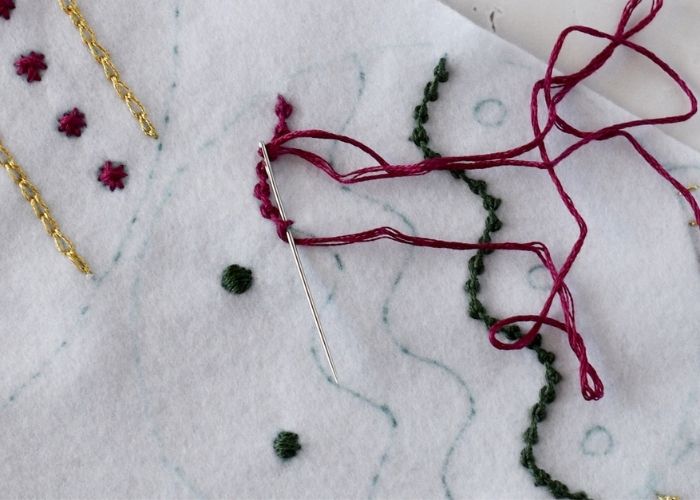
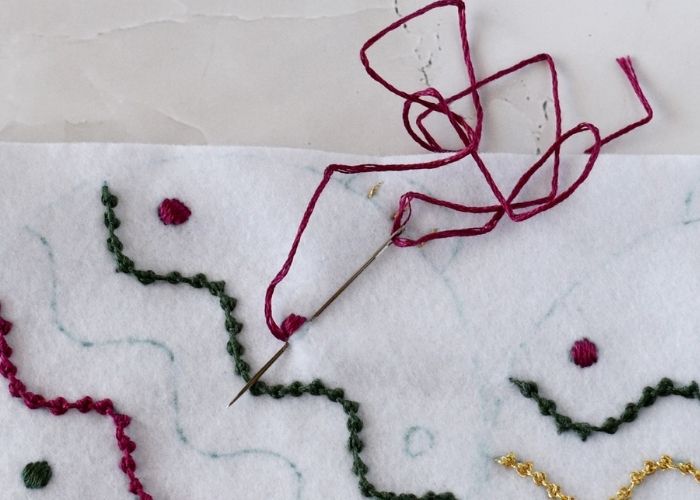
4. For the central wavy line, I used DMC Diamant Grande # G3821 golden thread. Embroider this line with Palestrina stitch.
5. For the top wavy line, I used six strands of DMC #520 dark fern green embroidery floss and stitched it with Palestrina stitch.
6. To embroider the dots in this design, I used the Satin stitch. Start in the center of the shape and make parallel stitches towards the edge.
7. After one side is filled, return to the center and fill the second half of the shape.
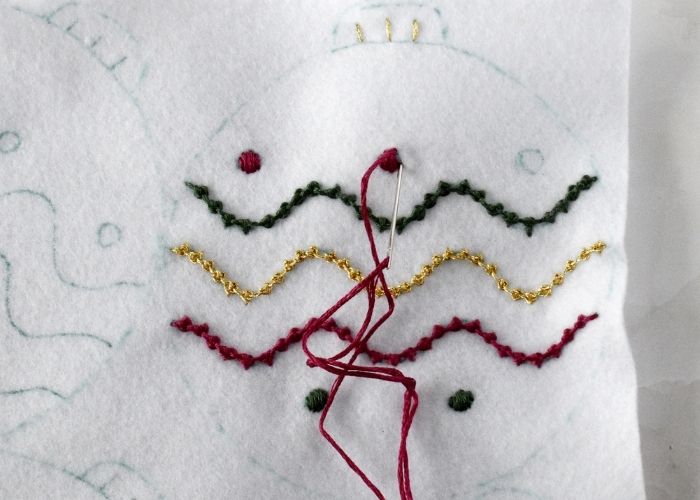
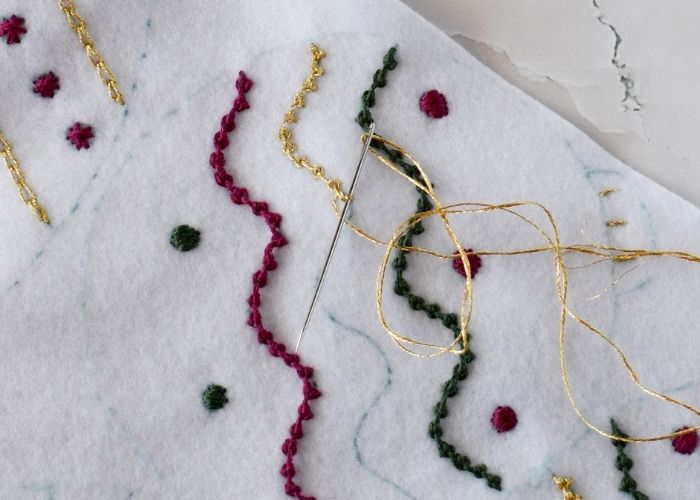
8. To embellish the top of the bauble, make three parallel Straight stitches with golden thread.
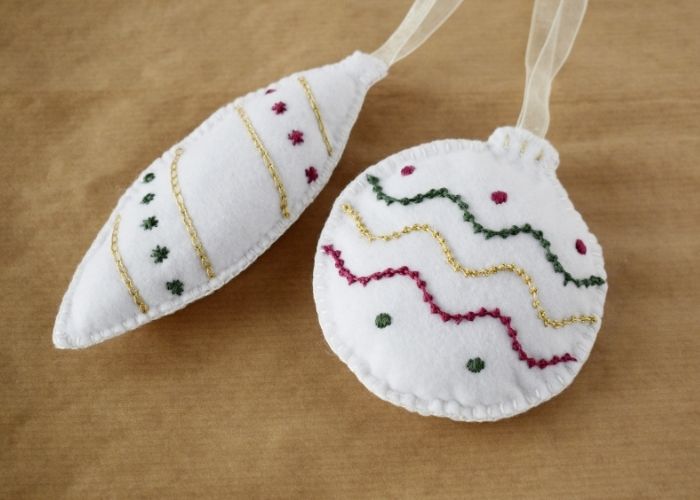
Oval felt ornament – hand embroidery steps
1. Embroider the design lines with Chain stitch. Use DMC Diamant Grande # G3821 golden thread.
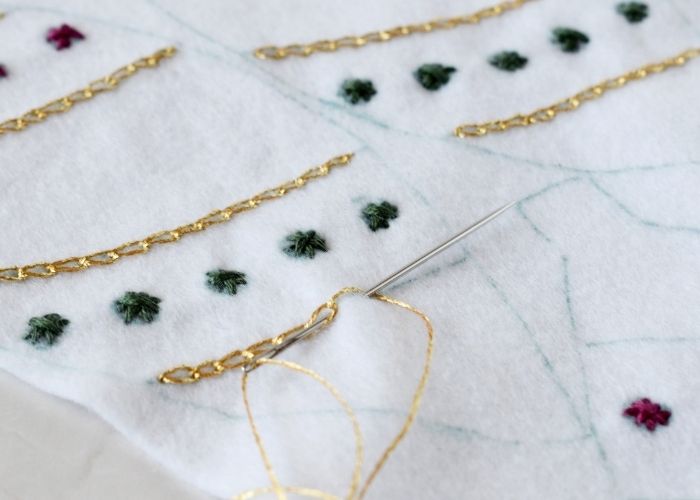
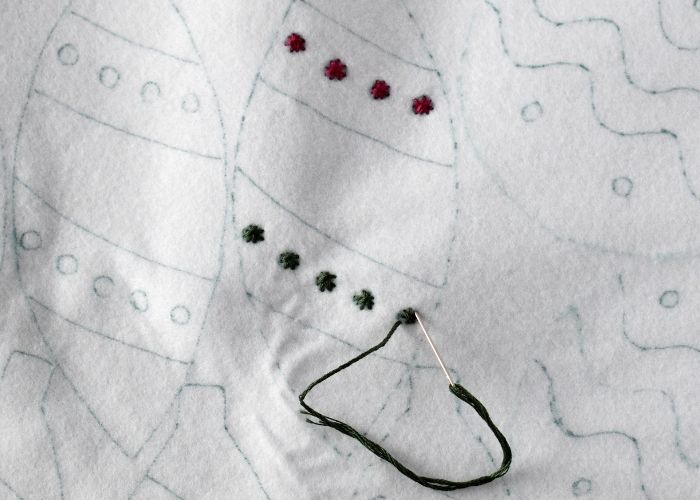
2. To embroider the dots, make a Star stitch. Start with a cross stitch.
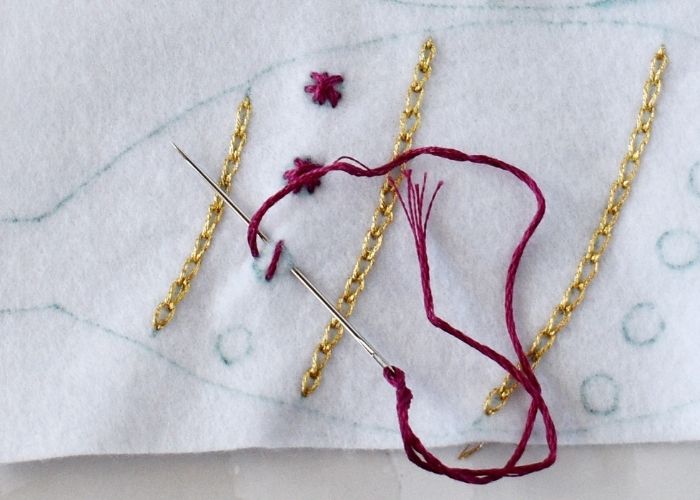
3. Then add one more pair of straight stitches crossing at the center to fill the shape.
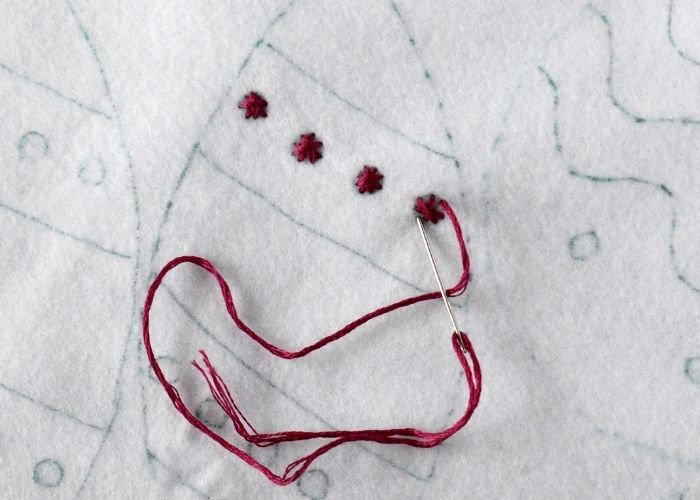
4. Use red for one line of dots and green for the second line of dots.
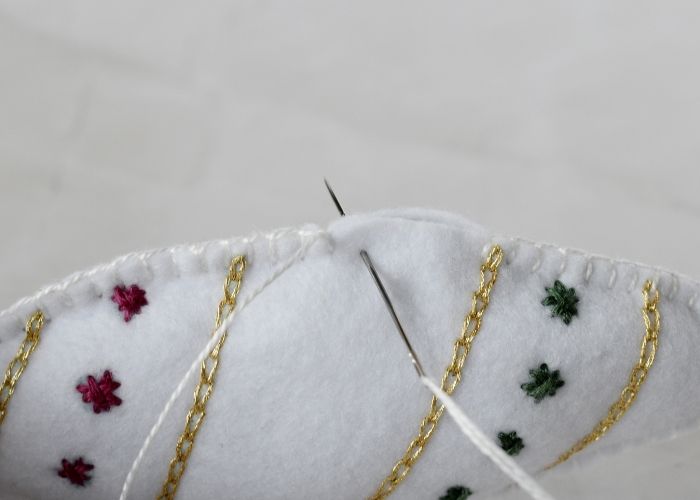
Sewing felt embroidered Christmas ornaments
1. After all the stitching is done, cut out the ornament shapes from the felt. Be careful not to damage the stitches or the holding knots when cutting.
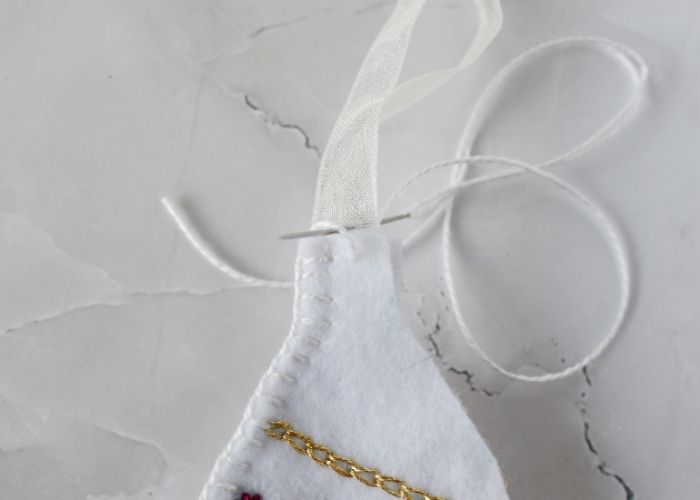
2. Pin two sides of the ornament and a ribbon loop at the top, and sew them with a Blanket stitch. The embroidery on both sides is facing outwards.
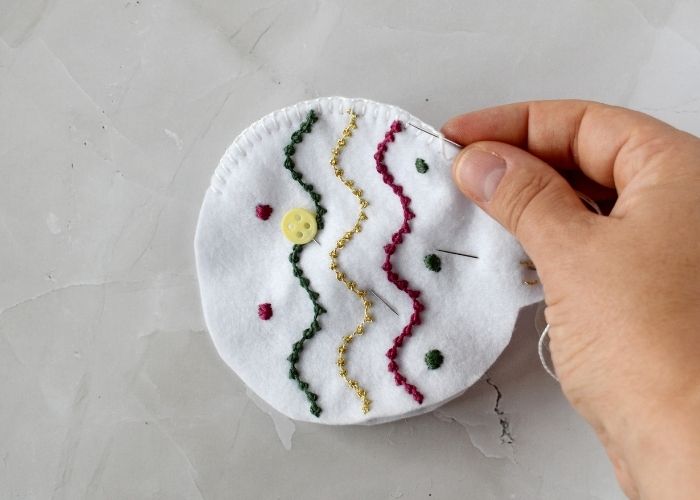
3. As you move around the shape, secure the ribbon in place. Also, leave the gap on one side of the shape.
4. Fill the ornament with stuffing material. You can use tweezers to make stuffing easier.
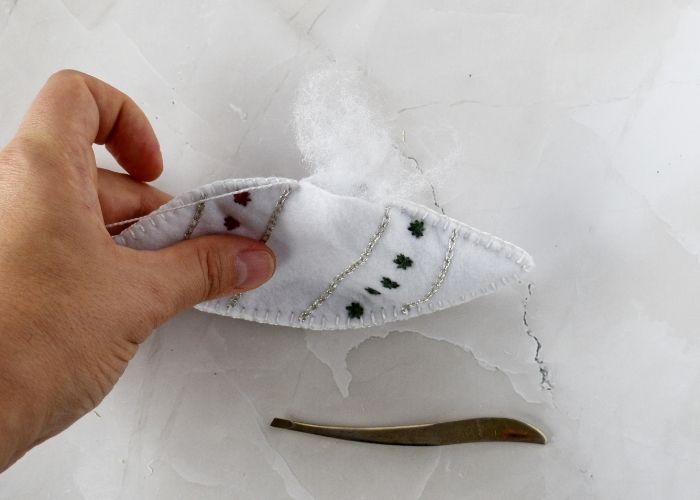
5. Finally, close the gap with the Blanket stitch.
Video Tutorial
Recommended Products
Disclaimer. To cover the cost of creating free embroidery patterns and video tutorials for this blog, I do sometimes link to products. Please assume these links are affiliate links. If you choose to buy through my links then THANK YOU! – it will make it possible for me to keep doing this.


Over to you
Creating your own felt embroidered Christmas ornaments is more than just a craft project — it’s a way to slow down, embrace creativity, and add a meaningful, handmade touch to your Christmas celebrations. Each ornament you stitch carries your time, care, and personality, making your tree not just festive but also personal and precious.
Once you’ve mastered the design included in my free download, you can experiment with other colors, stitches, and shapes to build a complete collection of handmade felt ornaments. They also make thoughtful gifts or keepsakes for family and friends who appreciate the beauty of handmade crafts.
So gather your felt, threads, and needles — and relax while crafting your felt embroidered Christmas ornaments!
Don’t miss a thing!
Follow me on YouTube, Instagram, Facebook, Flipboard, Telegram and Pinterest. On the other hand, you can subscribe to the Practical Embroidery newsletter and get embroidery tips straight to your inbox every week!
More Christmas DIY projects on the Blog
DIY Christmas Gift Tags With Snowflake Embroidery
Step-by-Step Guide + Free PDF Templates
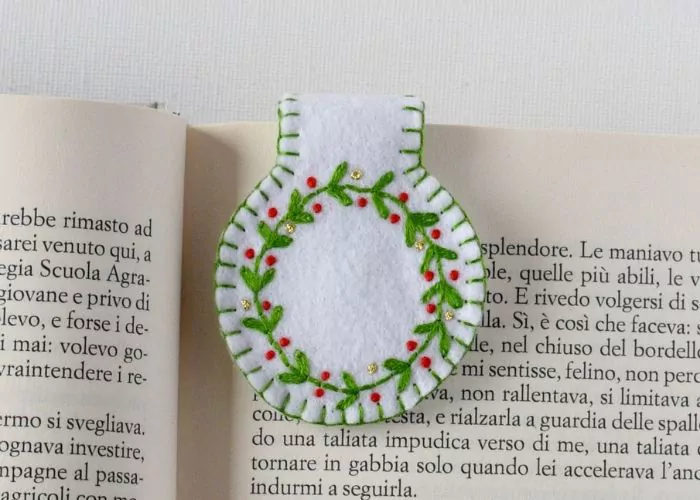
DIY magnetic bookmark tutorial: Create a personalized hand-embroidered page holder
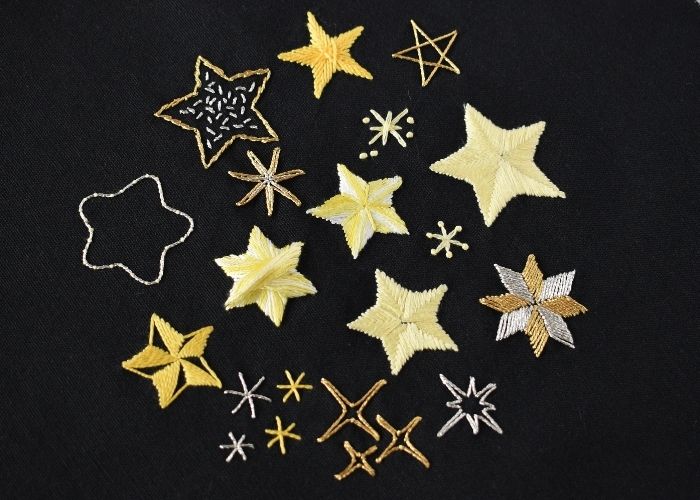
How to Embroider Stars and Sparkles: Hand Embroidery Stitches

Monogrammed Velvet Ribbon Bow DIY: Hand Embroidered Ribbon for Holiday Décor
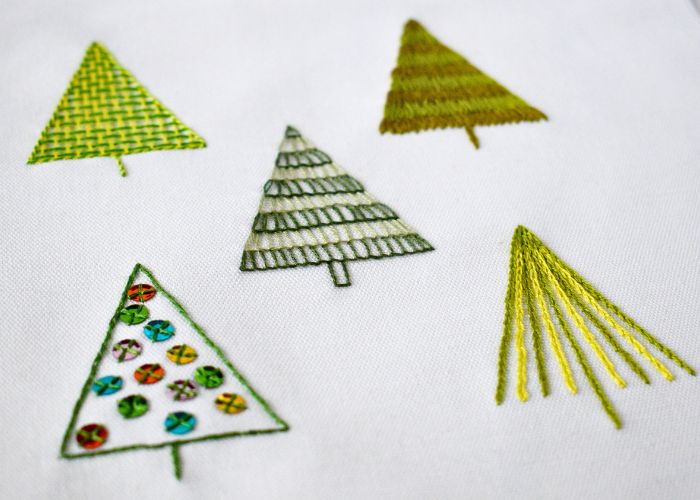
How To Embroider Christmas Tree: 5 Simple Methods
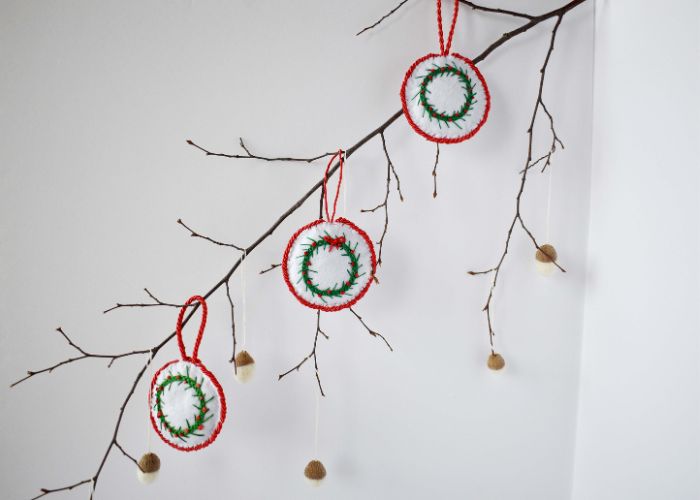
DIY Christmas ornaments with wreath embroidery
Handmade Christmas decorations. Detailed step-by-step guide
Christmas Card Tutorial. Make a unique greeting card with your hand embroidery