Five Simple Border Embroidery Designs For Absolute Beginners: Basic Stitches For Decorative Borders
Looking for a simple border embroidery design to begin your hand-stitching journey? You’re in the right place! Decorative borders are one of the easiest—and most enjoyable—ways to add charm to handkerchiefs, napkins, pillowcases, clothing, and just about any embroidery project. Even as a complete beginner, you can create neat, beautiful borders using only a few basic stitches.
In this tutorial, I’ll walk you through five simple border embroidery designs that are perfect for absolute beginners. Each design uses easy, beginner-friendly techniques and stitches, so you can start stitching right away. Whether you’re practicing your first stitches or looking for quick embellishments for your handmade projects, these designs will help you build confidence as you learn essential embroidery skills.
And to make your learning experience even easier, I designed a free sampler PDF pattern. I also filmed a video tutorial so you can download the pattern and stitch along with me.
Basic stitches to decorate edges, borders, cuffs, or necklines
Before we dive into the sampler stitching, let’s take a look at the hand embroidery stitches I used to design these five decorative bands. If you are not familiar with some of these stitches, click to watch a video tutorial or look at the step-by-step embroidery guide with detailed pictures before you jump to the combination of the stitches in the decorative borders.
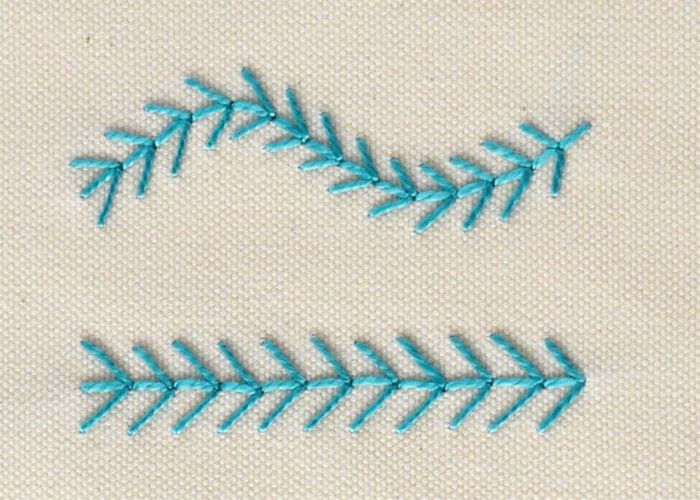
Double Feather Stitch
Double Feather stitch is a variation of the Feather Stitch. It is a series of V-shaped stitches connected in a zig-zag line. This stitch looks good on straight lines and slight curves, making it perfect for botanical embroideries, decorating seams, and borders.
Lazy Daisy Stitch
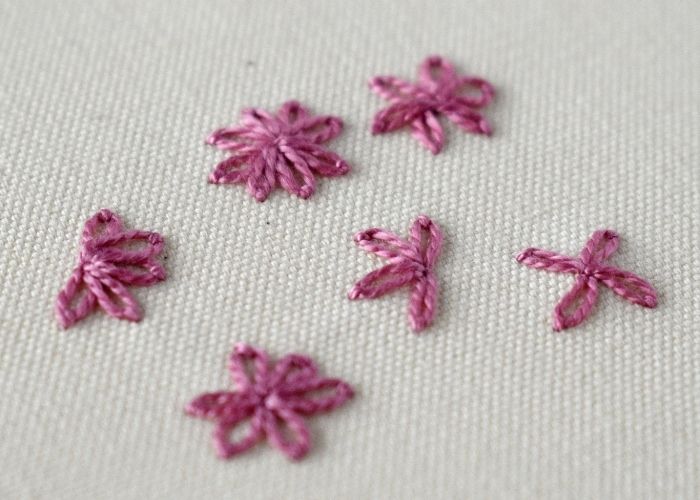
Lazy Daisy Stitch is a popular decorative hand embroidery technique from the Chain Stitch family. This stitch is easy to learn and to incorporate into modern hand embroidery designs.
Fly Stitch
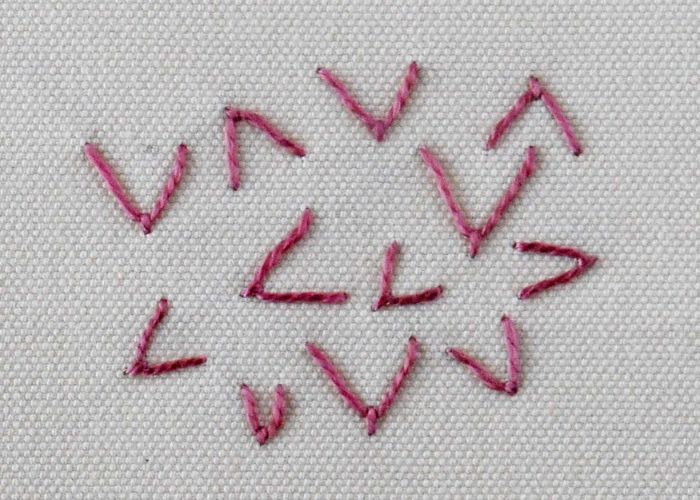
The Fly Stitch is a straightforward, detached decorative stitch. A straight stitch is pulled and anchored to form a V or Y shape. It is a decorative surface embroidery stitch with many applications, from botanical elements like stems, leaves, and grass to small elements like birds in the sky.
French Knot Stitch
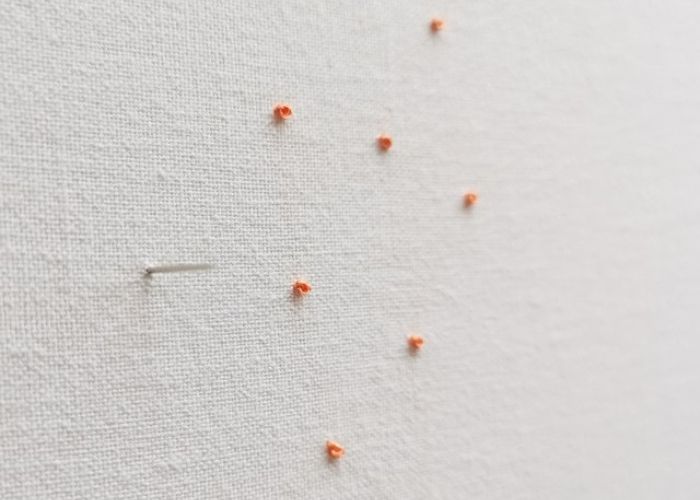
The French Knot Stitch is a textural, decorative hand embroidery technique. It has many uses – from filling areas and accent stitches to being a part of complex composite stitches.
The French knot is an embroidery technique in which the thread is knotted around itself in a specific way. This stitch has a reputation for being difficult, but I guarantee you that with some practice, you will start to like this technique as much as I do.
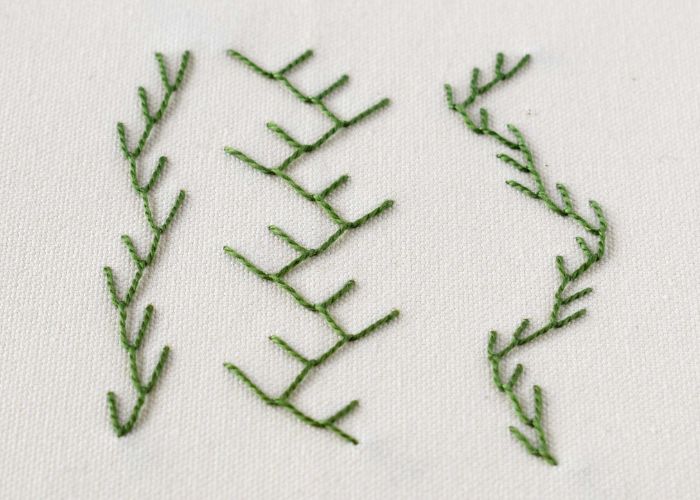
Fern Stitch
Fern stitch Embroidery is a simple hand embroidery stitch from the Straight stitch family. This stitch is formed from three straight stitches and can be embroidered in lines, rows, or even detached stitches. This embroidery stitch looks excellent in straight and curved lines and lends itself to various border designs and decorative bands.
Double Cross Stitch
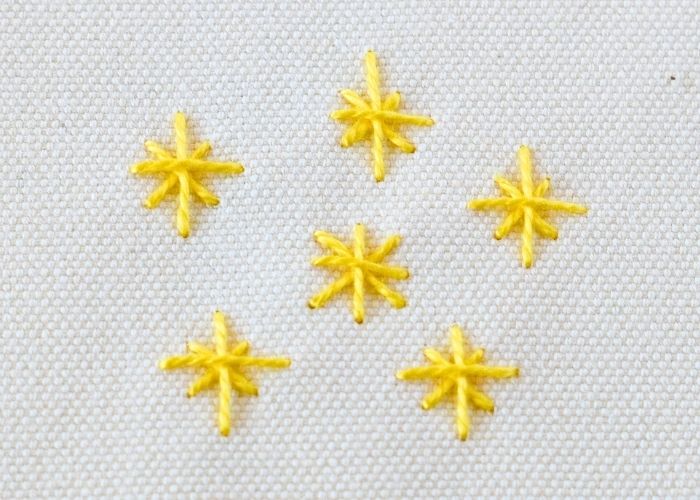
Double Cross Stitch is a decorative variation of the Cross Stitch from canvas work and counted thread embroidery. To make this stitch, embroider a classical Cross Stitch and add an Upright Cross Stitch on top of it.
In modern surface embroidery, the Double Cross Stitch is a detached decorative stitch depicting stars or sparkles. You can combine it with other stitches to create interesting border patterns, too.
Straight Stitch

Straight Stitch Hand Embroidery, often considered the backbone of hand embroidery, is as simple as it sounds. It involves pulling the needle up through the fabric, then back down a short distance. Despite its simplicity, it’s incredibly versatile and serves as the foundation for many complex stitches and designs.
Half Chevron Stitch
Half Chevron Stitch is a variation of the Chevron stitch where one side has a traditional Chevron Stitch leg, and the other has vertical peaks. This stitch is simple yet versatile. You can create various decorative patterns by simply positioning the stitches differently. To make the designs even more outstanding, you can add beads or other decorative stitches in the middle of the Half Chevron stitches.
The Half Chevron stitch works well on straight lines and curves, so you can use it to decorate the hems and necklines of garments.
Pistil Stitch
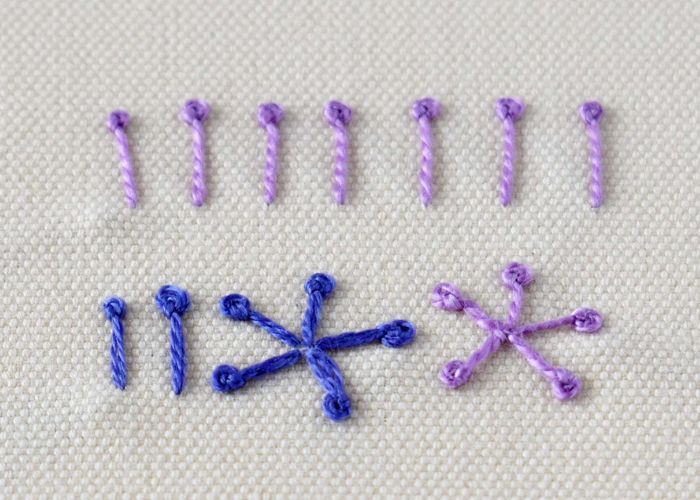
A Pistil stitch is a knot with a tail or a straight stitch with a knot at the end, as you wish to see it. This hand embroidery technique comes from the knot stitch family and is executed very similarly to a French Knot.
This hand embroidery stitch depicts the central part of the flower and is mainly used in floral embroidery. You can also combine this technique with other hand embroidery stitches to create intriguing border designs or composite stitches.

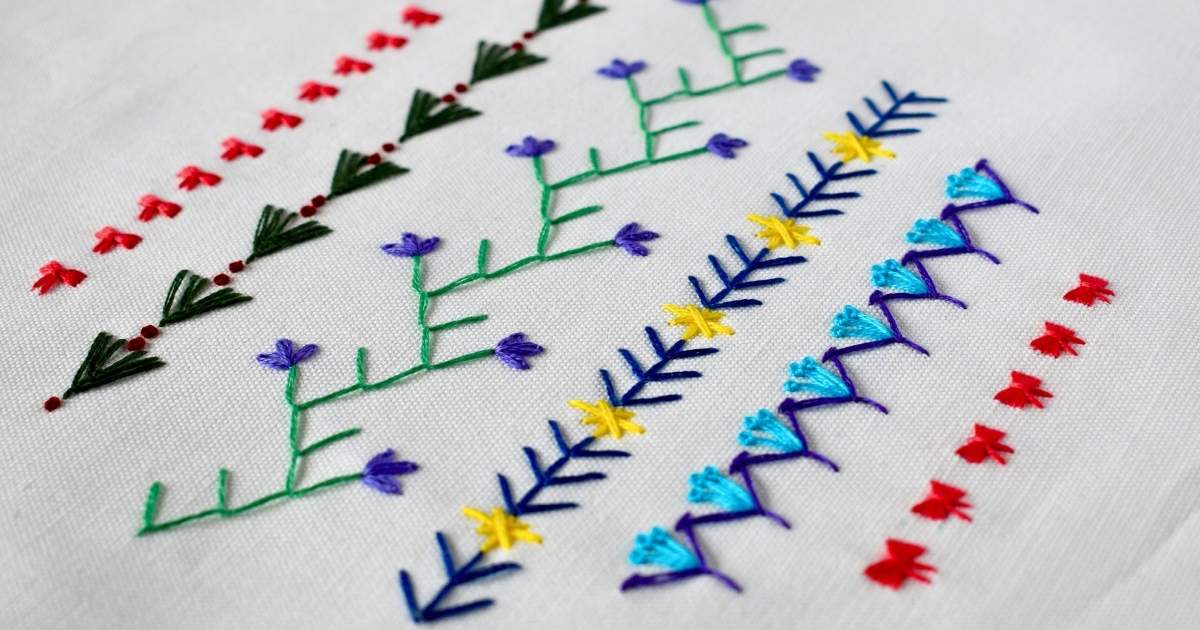
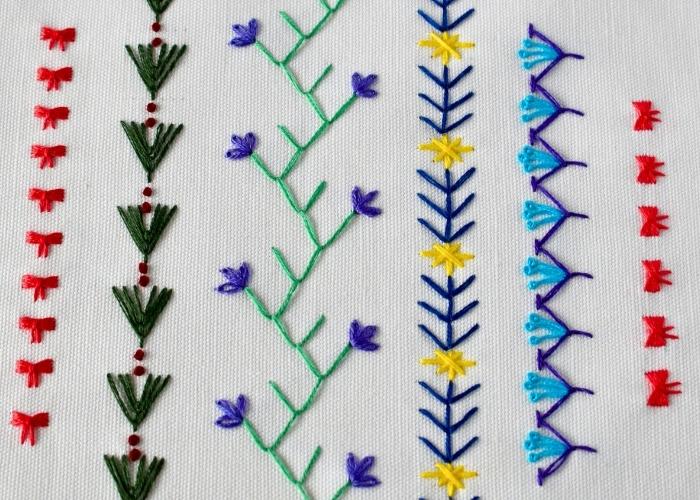
Sampler of simple border embroidery designs for beginners
Step-by-step hand embroidery tutorial
Tolls and materials
- Sampler embroidery pattern. Download and print my free “5 Border Designs For Beginners” sampler PDF pattern.
- Fabric. I used a white linen blend material, sized ~27 x 27 cm (10 inches).
- 18 cm (7 inches) embroidery hoop and a hoop stand (optional).
- Embroidery floss. I used various colors of DMC floss.
- Embroidery needle.
- Embroidery scissors.
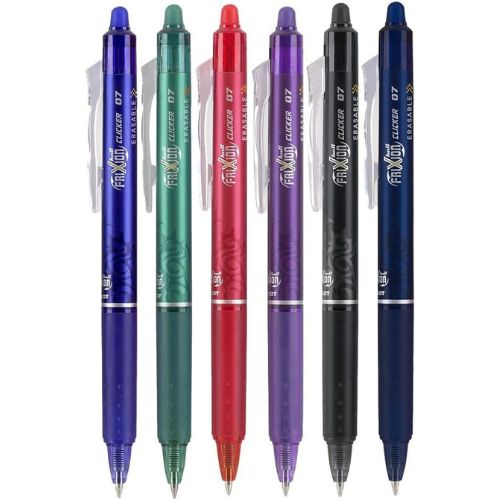
- Friction pen for pattern transfer.
Preparation for embroidery
1. Gather tools and materials. Print the pattern.

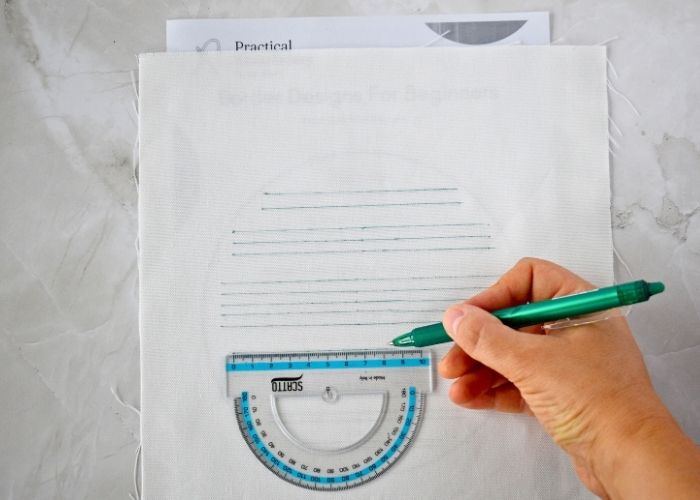
2. Trace the pattern onto the fabric. Choose your favorite method to trace the pattern to the fabric (read the guide “How To Trace Pattern on Fabric: Five Methods For Fast And Easy Embroidery Pattern Transfer” for options).
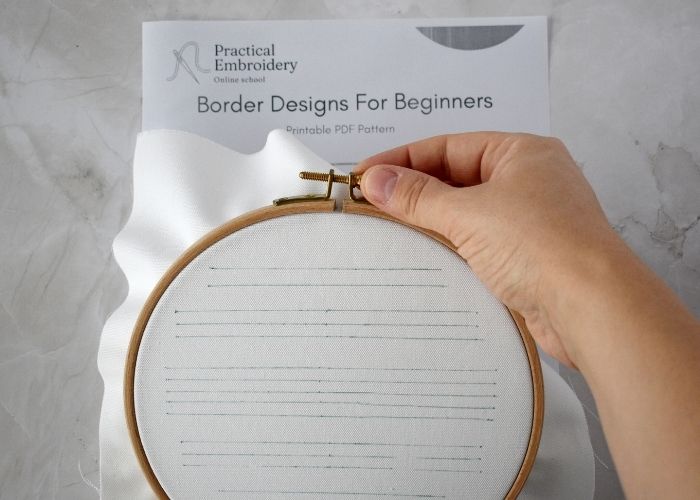
3. Stretch the fabric in the hoop and tighten the screw. You can use a hoop stand for more stability and convenience.
Double Feather stitch band with flowers
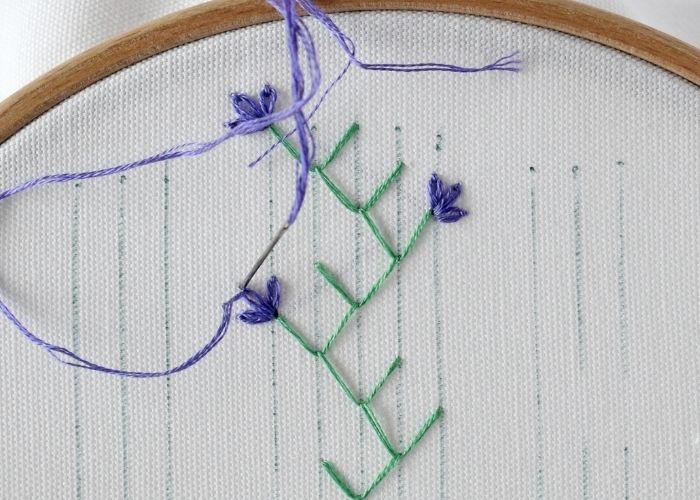
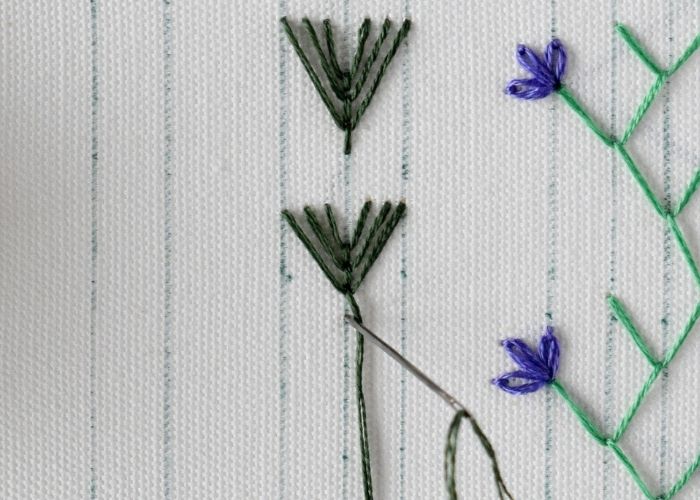
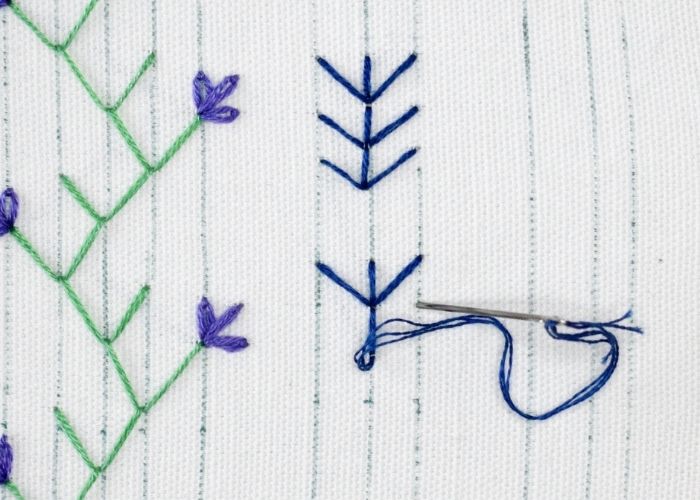
1. I used a combination of DMC #912 and #3746 to embroider this decorative border. First, embroider a band of Double Feather Stitch along the five parallel marking lines.

2. Then, add three petals with a Lazy Daisy stitch. Start with a stitch, parallel to the marking lines.
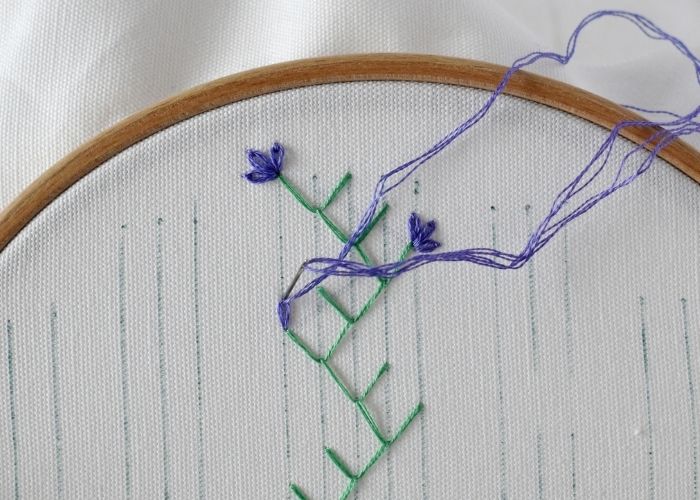
3. After that, add another petal at a 90-degree angle.
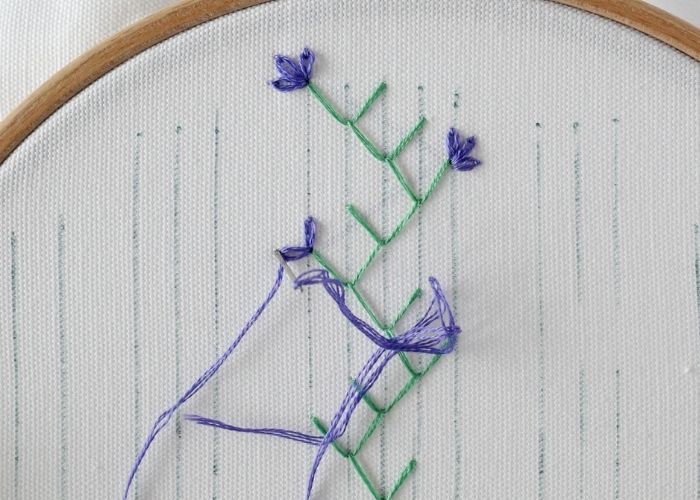
4. Finally, add the third petal in the middle.
Fly Stitch border
1. To embroider this decorative band, I used DMC#520 and #3777. Start embroidering with a narrow Fly Stitch in the center of the marked section.
2. Then add another Fly Stitch that is wider than the first. This stitch is hugging the first one.
3. Finally, add the third Fly Stitch. This one runs from one side of the marked band to the other, hugging the first two stitches and completing the shape.
4. Fill the entire band with equally spaced Fly Stitch clusters of three.
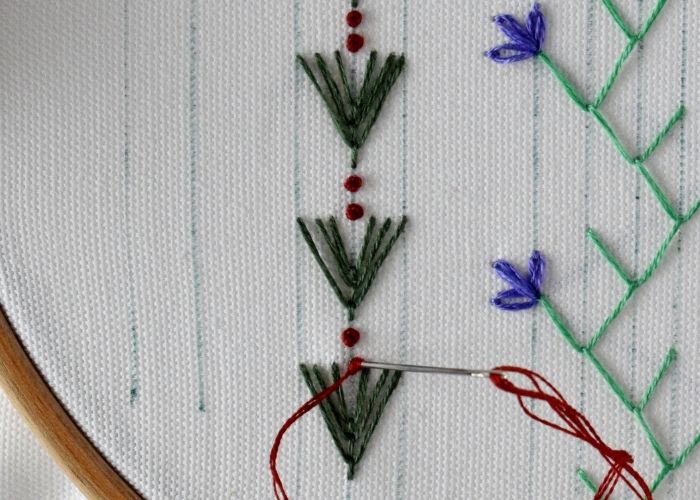
5. To finish this decorative border, add French knots. The first one goes between the clusters of the Fly Stitch.
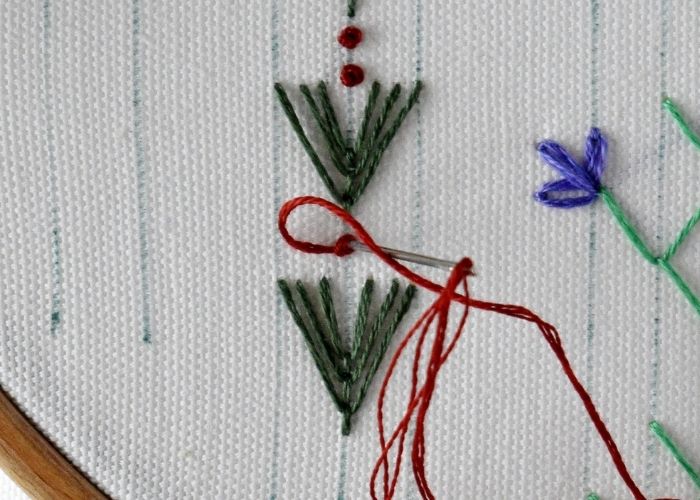
6. Make the second French knot between the legs of the smallest Fly Stitch.
Fern Stitch band
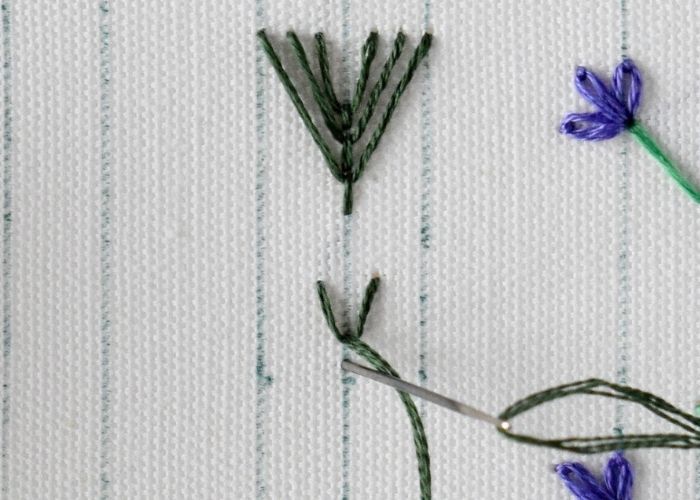
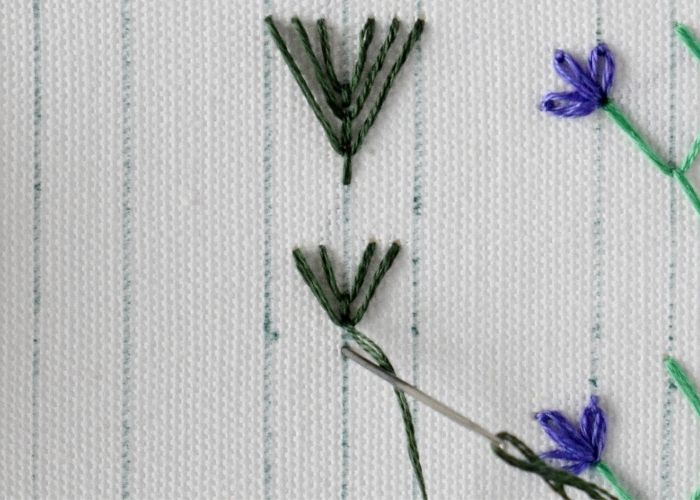
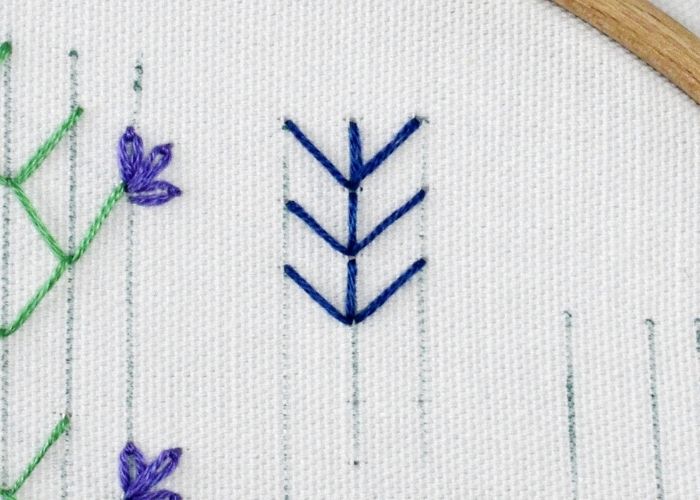
1. I used DMC #824 and #973 to embroider a decorative border with Fern Stitch and the Double Cross stitch. Start with embroidering sections of Fern stitch.
2. Each section is made of three Fern stitches.

3. Make the gaps between the sections equal.
4. Embroider a Double Cross stitch in each gap you left. Start with a vertical stitch, connecting one section of the Fern Stitch with the next one.

5. Add a horizontal stitch to create a cross.
6. Finally, make two diagonal stitches to complete a Double Cross stitch.
Decorative bows
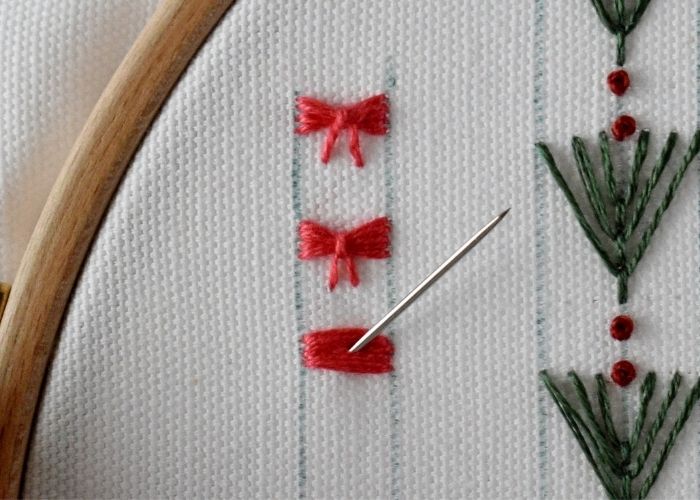
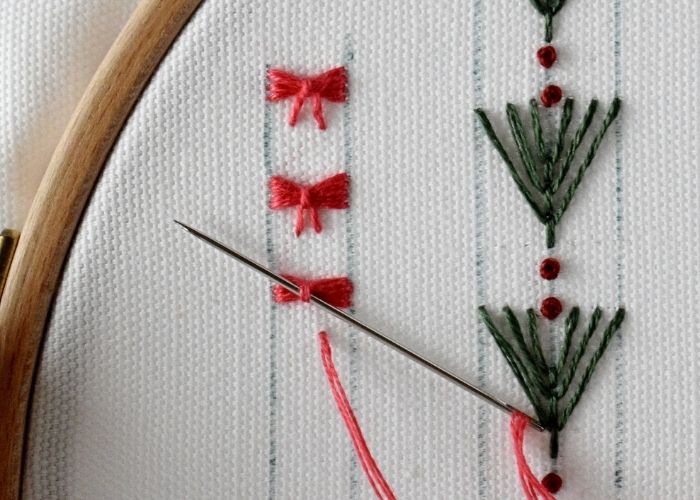
1. I used DMC #891 to embroider these cute little bows. Start with a group of parallel Straight stitches.
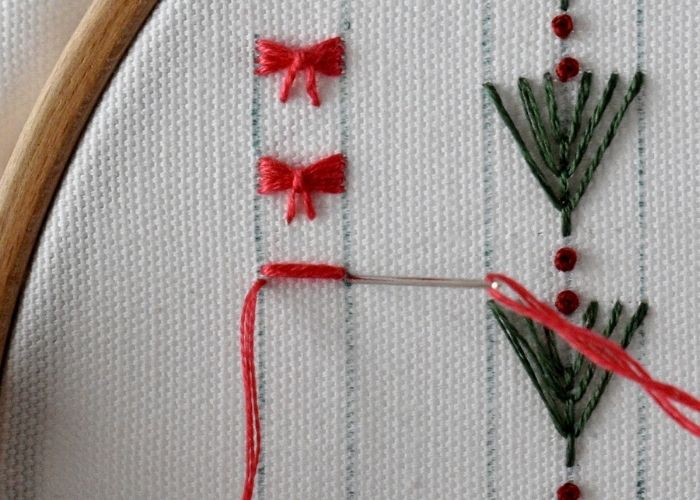
2. I made five vertical stitches.
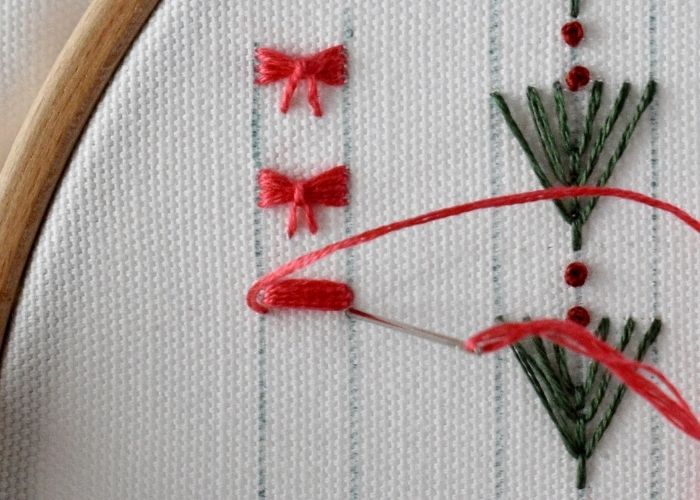
3. To form a bow, take the needle to the surface in the middle of the shape.
4. Then, pass the needle under the stitches. Make sure you do not snag any stitches or fabric.
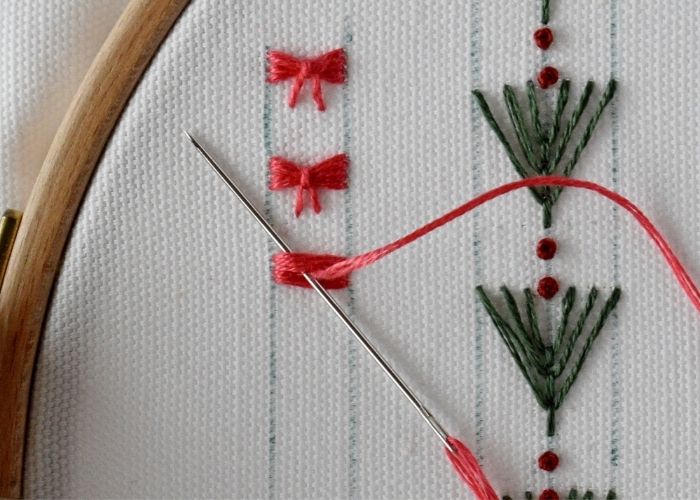
5. Push the needle back to the fabric under the stitches, at the same spot where you pulled it up. This will gather the stitches, forming a bow shape.
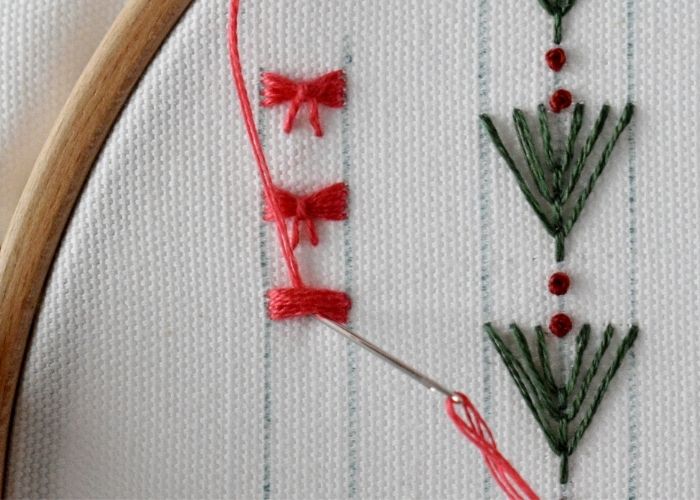
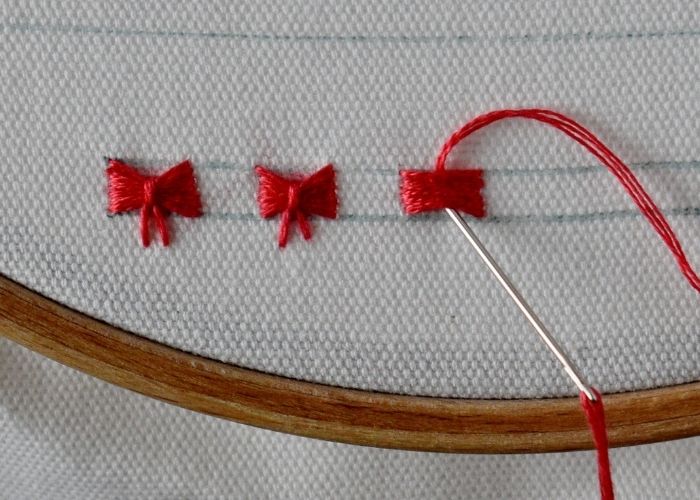
6. To add a ribbon to your bow, make a Fly stitch using the gathering stitch. Pass the needle under this stitch.
7. Then, push it back to the fabric at a short distance, forming a Fly stitch.
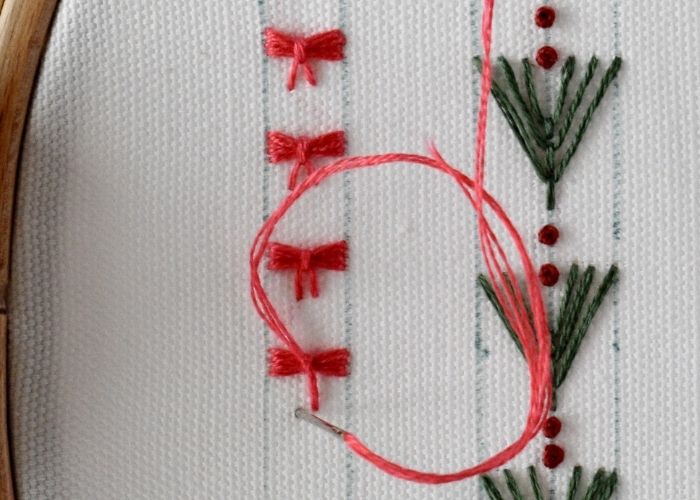
8. You can position the bows in a vertical direction or horizontally. Also, you can adjust the size of the bows by making more stitches or making the stitches longer.
Half Chevron stitch band
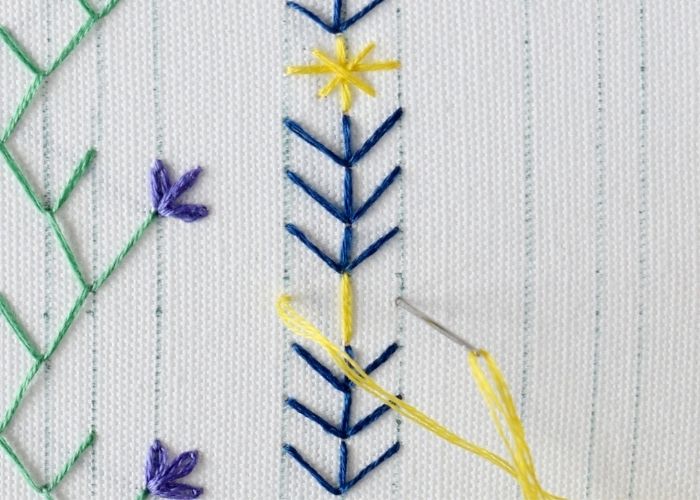
1. To embroider this decorative border of Half Chevron stitch and Pistil stitches, I used DMC #333 and #3845. Start with a row of Half Chevron stitch, which looks like a row of Y letters joined together.
2. On one side of the bar, you will form a traditional Chevron stitch edge.
3. On the other side of the border, the stitch will look more like the Cretan stitch.
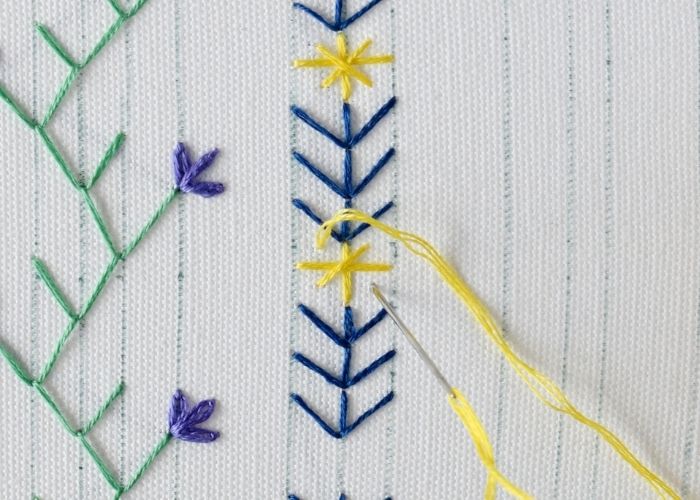
4. When the entire row of Half Chevron is stitched, add Pistil stitches. Start with a central stitch.
5. Then, add two stitches on the sides.
Simple Border Embroidery Designs For Beginners – Video Tutorial
Tools and materials I used for this sampler
Disclaimer. To cover the cost of creating free embroidery patterns and video tutorials for this blog, I do sometimes link to products. Please assume these links are affiliate links. If you choose to buy through my links then THANK YOU – it will make it possible for me to keep doing this.


Over to you
Creating a simple border embroidery design doesn’t have to be complicated—even as a complete beginner. With just a handful of easy stitches, you can transform plain fabric into something beautifully detailed and uniquely yours. I hope these five border ideas inspired you to experiment, practice, and enjoy the soothing rhythm of hand embroidery.
If you’d like to stitch along or try all the designs in one place, don’t forget to download your free PDF sampler. It includes the exact layout I used in this tutorial, so you can follow every step with confidence and build your border-stitching skills one line at a time.
Don’t miss a thing!
Follow me on YouTube, Instagram, Facebook, Flipboard, Telegram and Pinterest. On the other hand, you can subscribe to the Practical Embroidery newsletter and get embroidery tips straight to your inbox every week!
More beginner friendly embroidery projects on this Blog
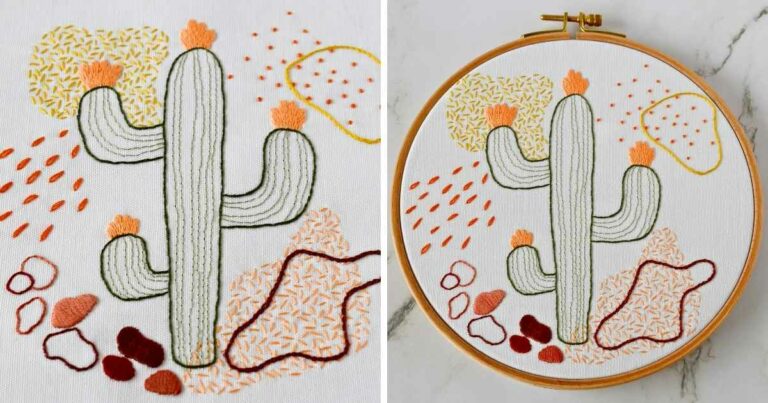
Beginner Embroidery Stitches + Free Cactus Hand Embroidery Sampler To Learn Basics
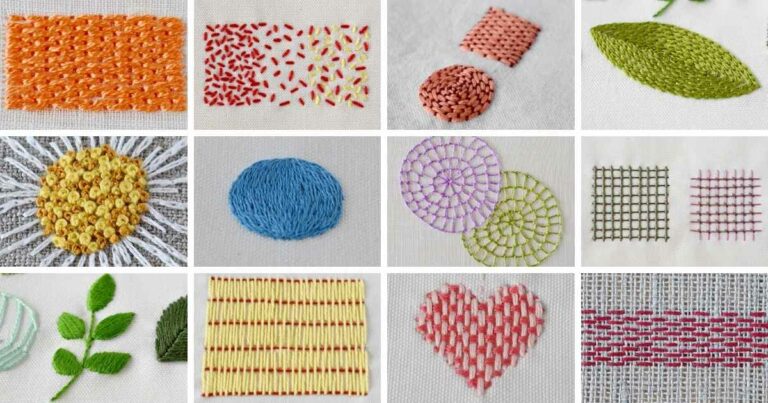
The Ultimate Guide to Embroidery Stitches for Filling: Master Texture, Coverage & Dimension
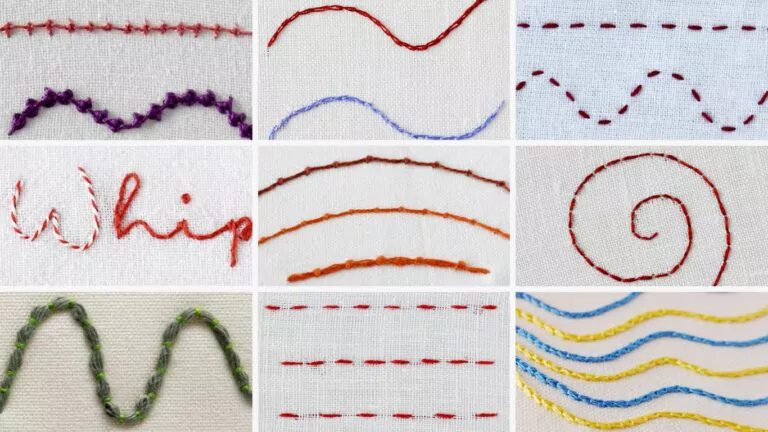
Hand embroidery stitches for outlines – from the most simple to decorative ones
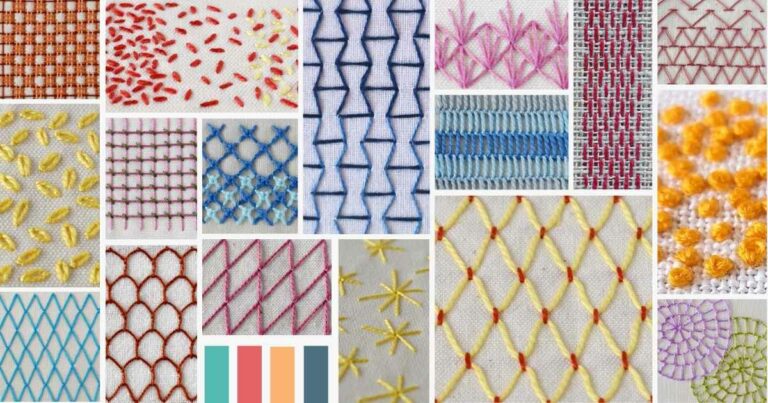
Open Filling Stitches For Light and Airy Fills in Modern Hand Embroidery
