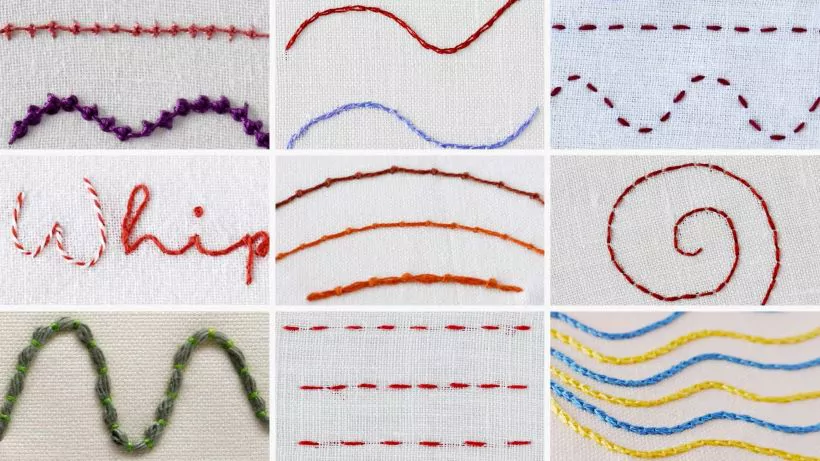
Hand Embroidery stitches for outlines – from the most simple to decorative ones
From historical tapestries to contemporary fabric designs, the outlines of embroidered pieces set the foundation for stunning visual narratives. In this blog article, I want to showcase a variety of embroidery stitches that are perfect for creating outlines, from the most simple and straightforward to more decorative options. Whether you’re a beginner looking to master the basics or an experienced embroiderer searching for new techniques to enhance your work, this guide will provide valuable insights into selecting the right stitch for your project needs.
Simple, uninterrupted stitches for outlines
These simple stitches for outlines are handy when you need to outline the shapes before filling them with other decorative or filling stitches like Satin Stitch or Long and Short Stitch.
Backstitch
This hand embroidery stitch is the basic stitch every embroiderer should learn. As the name suggests, the Backstitch is made backward in the general sewing direction. This stitch forms continuous lines and is mainly used to outline shapes and add fine detail to an embroidered picture. It is also used to embroider simple lettering.
More information about this embroidery technique is available on the Backstitch page or the Backstitch video tutorial. Also, you can read the article “Backstitch and its variations. Hand embroidery stitches from the Backstitch family” for a more complete picture of this embroidery technique, and its applications.
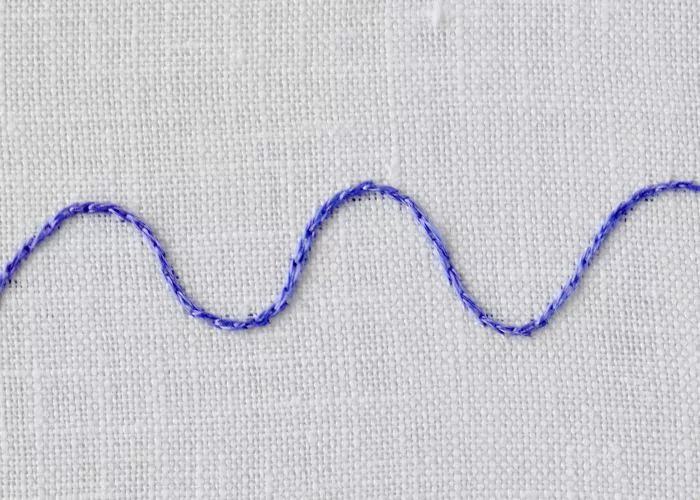
Stem Stitch

The Stem Stitch forms a rope-like line and is one of the basic hand embroidery stitches one should learn at the beginning.
This stitch is used in modern surface embroidery as it is decorative and versatile. This technique is handy for outlines, curves, waves, or tiny circles. The Stem Stitch also works well as an outline for the Satin Stitch and other filling stitches.
More information about this embroidery technique can be found on the Stem Stitch page or in the Stem Stitch video tutorial.
Outline Stitch

Outline Stitch is a simple yet fundamental hand embroidery stitch from the Stem Stitch family. It is often mistaken for a Stem Stitch, as their embroidery methods are similar. The difference between these stitches is the position of the working thread when you embroider. When you make a Stem Stitch, keep the thread to the right, and when you make an Outline Stitch, keep it to the left side of the working direction.
You will find more information about this embroidery technique on the Outline Stitch page or Outline Stitch video tutorial.
Split Stitch

Split Stitch is perfect for any pattern that involves outlining or lettering. Also, this stitch is a go-to when you need to outline for a Satin Stitch, as it has a smooth surface of the line and will support a clean edge for the Satin Stitch.
The technique of the Split stitch is simple: We divide the previous stitch from down up, forming a smooth chain-like line.
Head to the Split Stitch page or the Split Stitch video tutorial for more information about this embroidery technique.
Split Backstitch
A Split Backstitch is a variation of the Backstitch that looks very similar to a Split Stitch. It is easy to embroider straight lines and curves with this stitch, making it an excellent option for outlines and lettering.
People often call both stitches a split stitch, but they are different. To understand the difference better, watch the video tutorial “Split Stitch vs. Split Backstitch: What is the difference?“
More information about this embroidery technique is on the Split Backstitch page or in the Split Backstitch video tutorial.
Holbein Stitch
Holbein Stitch is a variation of a Running stitch. Visually, it resembles a Backstitch. However, unlike the Backstitch, it appears the same on both sides of the fabric. Therefore, the Holbein stitch is an excellent outline option when both fabric sides are visible.
The method of embroidering this stitch is simple. First, embroider the line of the running stitch. Then, embroider one more line of the running stitch above, closing the gaps of the stitches from the first row.
Head to the Holbein Stitch page or the Holbein Stitch video tutorial for more information about this embroidery technique.
Simple interrupted stitches for outlines
Running Stitch
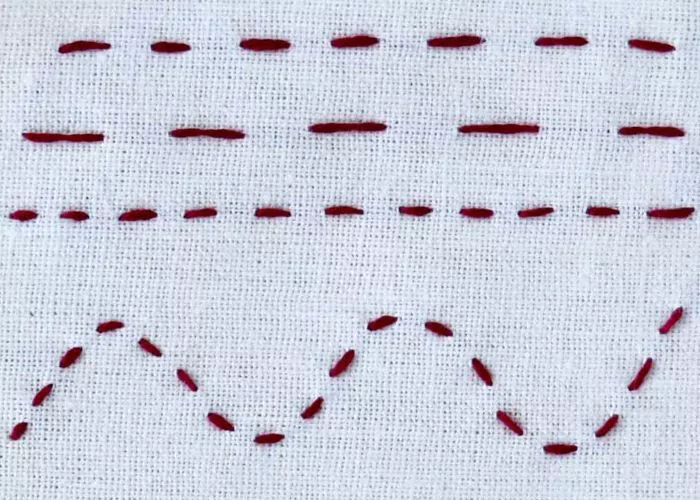
The Running Stitch is the most basic stitch of hand embroidery, on which all other forms of sewing are based. The stitch is worked by passing the needle in and out of the fabric. The needle is continuously pushed through the cloth, starting on one side and ending on the other.
Running stitch works excellent for outlining, lettering, and even filling. It is also a base for some composite whipped, threaded, and parallel stitches. The article “Running stitch and its variations” explains more about the variations.
For more information about this embroidery technique, visit the Running Stitch page or watch the Running Stitch video tutorial.
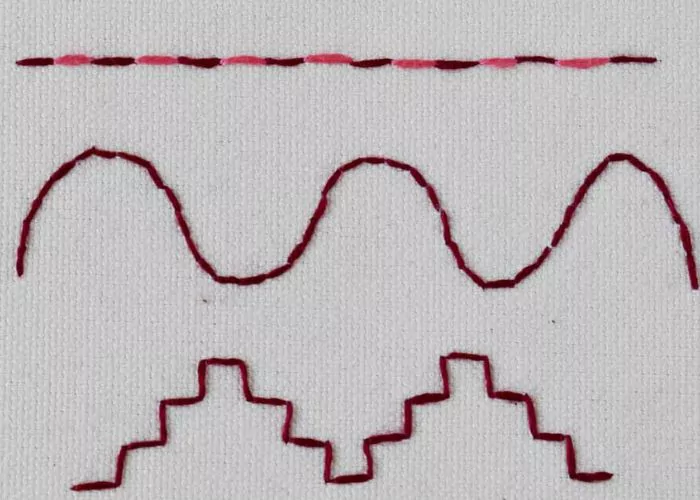
Open Backstitch

Open Backstitch is a variation of the Backstitch, also called Half Backstitch. Visually, the Open Backstitch and the Running Stitch look the same from the front side of the embroidery. Still, you will see the difference on the backside of the fabric.
This stitch makes it easy to embroider straight lines and curves. It can also be used for outlines, lettering, or borders.
Head to the Open Backstitch page or Open Backstitch video tutorial for more information about this embroidery technique.
Decorative outline stitches
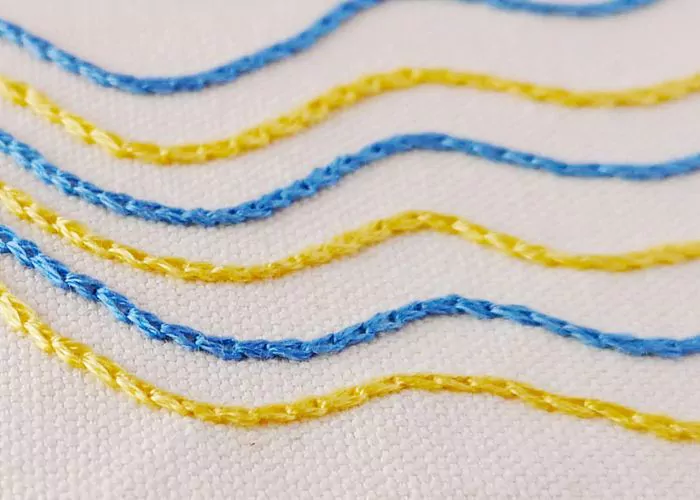
Whipped Backstitch

A Whipped Back Stitch is a decorative variation of a Back Stitch and is made in two steps. First, we embroider a simple Backstitch and then whip it with another thread. You can use the same color thread to make a straight raised line or two contrasting colors to create a rope-like line. Whipping of the backstitches makes the embroidered line smoother, more fluid, and raised from the surface. Another benefit of the Whipped Backstitch is that you can use two contrasting colors for this stitch and create colorful lettering or outlines.
You will find more information about this embroidery technique on the Whipped Backstitch page or in the Whipped Backstitch video tutorial.
French Knots
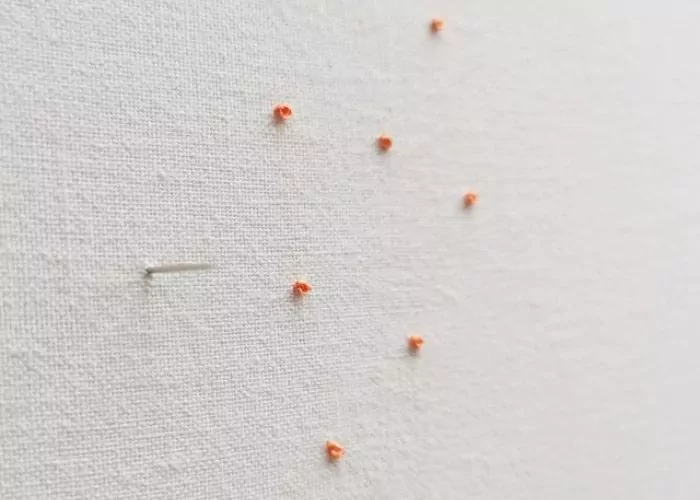
French Knot Stitch is a textural decorative hand embroidery stitch. The French knot is made when the thread is knotted around itself in a specific way. This hand embroidery technique is mainly used as a decorative filling stitch. Still, you can embroider the line of French knots positioned close to each other to create dimensional decorative outlines.
Head to the French Knot Stitch page or French Knot video tutorial for more information about this embroidery technique.
Couching Stitch

Couching Stitch is a hand embroidery technique in which one thread attaches another thread (or a group of threads) to the fabric’s surface. This technique works on straight lines, curves, and angles. Therefore, it is an excellent choice for outlines, borders, and lettering. There are many options for combining different laid threads and couching threads. Mix different textures, colors, thicknesses, shear, and materials for various visual effects.
Head to the Couching Stitch page or Couching Stitch video tutorial for more information about this embroidery technique.
Chain Stitch
Chain Stitch is an embroidery technique in which looped stitches form a chain-like pattern. This simple hand embroidery stitch is great for outlining, filling, lettering, border designs, and as a part of other composite stitches. You can also opt for a Reverse Chain stitch technique when changing the direction.
More information about this embroidery technique – on the Chain Stitch page or in the Chain Stitch video tutorial.
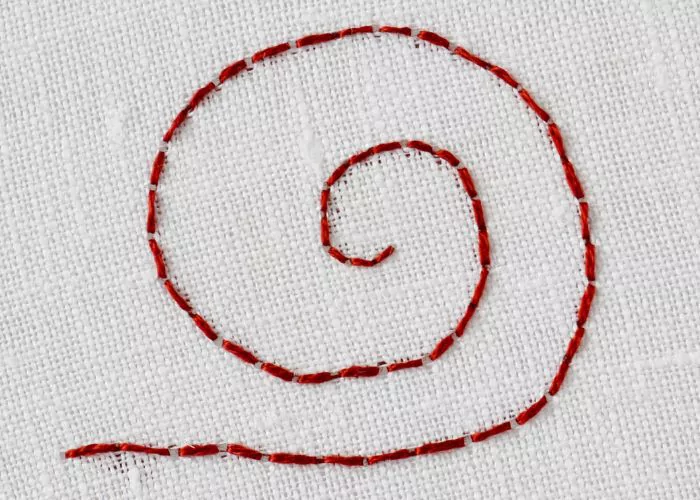
Coral Stitch

Coral Stitch is a hand embroidery technique from the Knot Stitch family. Visually, It is a line with evenly spaced knots. This knotted stitch is a decorative option for outlines. It takes curves and angles well, so you can use it to embroider letters or outline complex shapes.
You will find more information about this embroidery technique on the Coral Stitch page or in the Coral Stitch video tutorial.
Palestrina Stitch

Palestrina Stitch is a decorative surface embroidery stitch that creates a line of raised knots. These knots have a unique texture and appearance, making them an excellent choice for embellishing outlines. This knotted stitch creates outstanding outlines. You can reach different visual effects by adjusting the gap between the knots.
More information about this embroidery technique can be found on the Palestrina Stitch page or in the Palestrina Stitch video tutorial.
Video Tutorial
If you prefer to learn by watching video tutorials, I made a compilation of hand embroidery stitches for outlines video tutorials.
Over to you
Embroidery stitches for outlines vary significantly in complexity and aesthetic appeal, each with a unique character.
Whether your goal is to create sharp, clean lines or intricate, textured decorative outlines, understanding these stitches will enhance your embroidery repertoire, ensuring that every project you undertake is beautiful and well-crafted. As you continue to explore the art of embroidery, check out detailed tutorials linked throughout this article to perfect your technique and bring your creative visions to life.
Don’t miss a thing!
Follow me on YouTube, Instagram, Facebook, Flipboard, Telegram, Reddit or Pinterest. On the other hand, you can subscribe to the Practical Embroidery newsletter and get embroidery tips straight to your inbox every week!
More about hand embroidery stitches and techniques

Hand embroidery stitches, stitch groups, and families. The classification of hand embroidery stitches by purpose and technique

Hand Embroidery Basics: A Beginner’s Guide to Needlework
