Best embroidery stitches. The top 10 of basic hand embroidery stitches – learn them all to start embroidering
Hand embroidery is a relaxing craft and has many benefits for our health, wallet, and the earth. But there are more than 300 hand embroidery stitches out there. So, where should you start learning? Which ones are the best embroidery stitches to begin with?
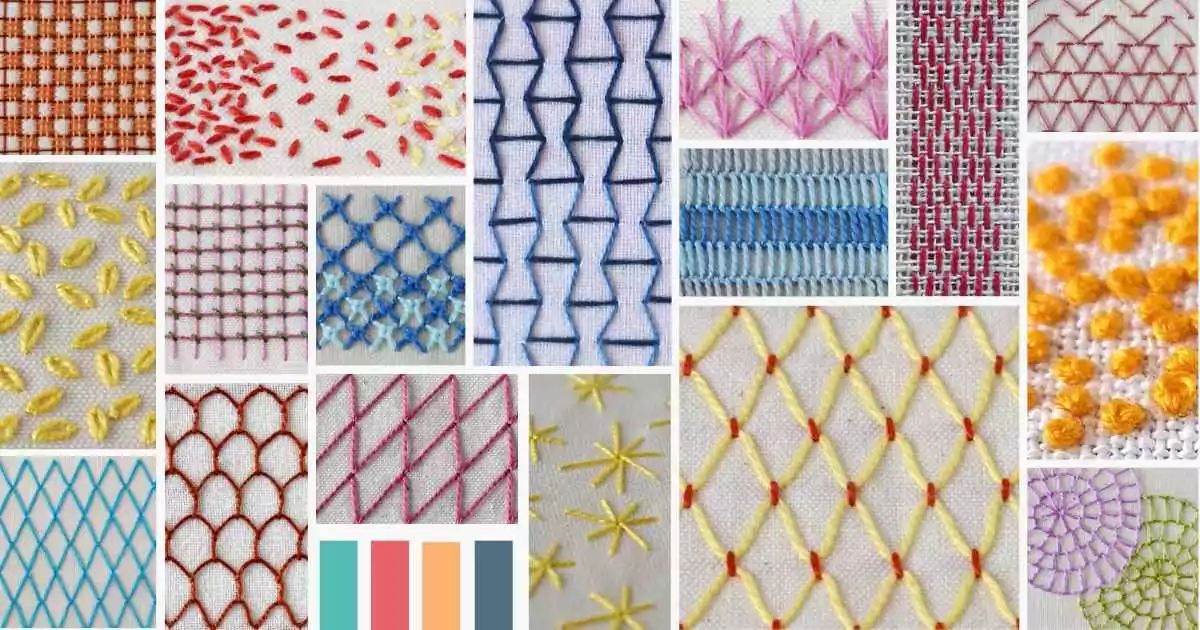
I made a list of the top 10 hand embroidery stitches that you should learn first. Maybe these are not really the best embroidery stitches, but surely, the ones you should start learning from.
PS. I have a free hand embroidery course to learn these stitches too.
Running stitch
The first on the list of the best embroidery stitches – the running stitch. It is also called straight stitch and is the basic stitch of hand embroidery, on which all other forms of sewing are based. Running stitch is worked by passing the needle in and out of the fabric. The needle is continuously pushed through the cloth, starting on one side and ending on the other side. By varying the length of the stitches, you can create very versatile pictures using this stitch only.
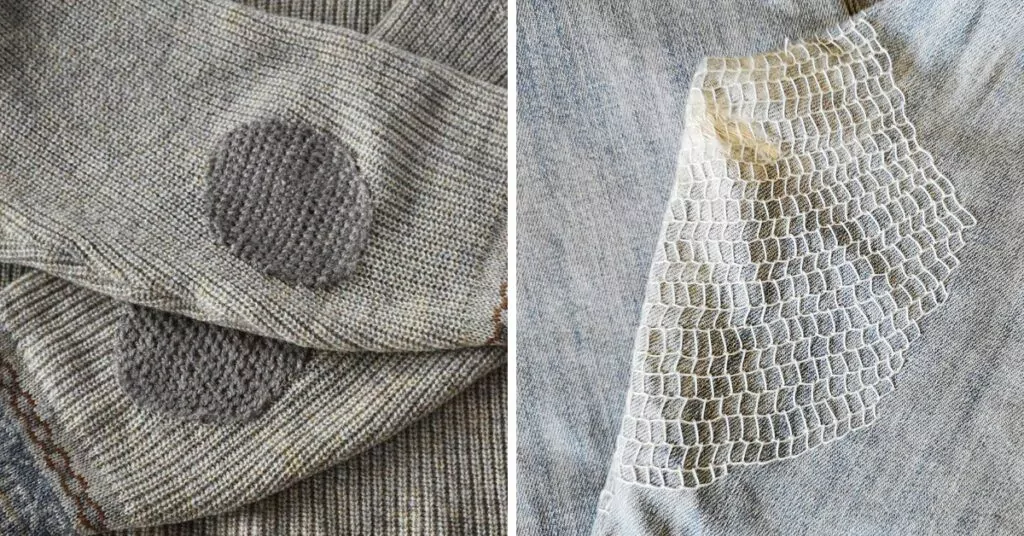
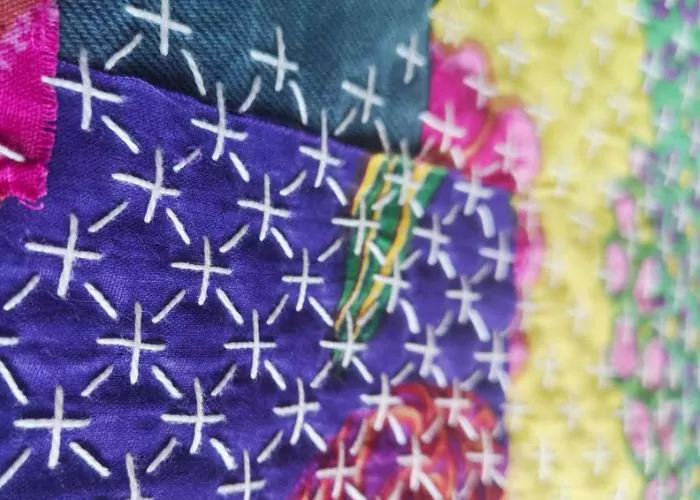
Running stitch is widely used in Sashiko, Boro, and Kantha embroidery styles as it’s perfect for mending clothes or attaching multiple layers of fabric to each other. Also, running stitch is used in quilting. Therefore, I like to use this basic embroidery stitch in my mending projects.
Also, the running stitch is a base for some complex whipped, threaded, and parallel stitches. Amongst these are a threaded running stitch, a meandering stitch, and an Eskimo laced ending stitch.

Back stitch

One more essential embroidery stitch on the list of the best embroidery stitches – the back stitch.
This simple stitch is the main sewing stitch in hand sewing. Besides that, it has a vital role in hand embroidery too. As a name suggests, backstitch is made backward to the general direction of sewing. In embroidery, this stitch forms the lines and is most often used to outline shapes and add fine detail to an embroidered picture. It is also used to embroider lettering. This stitch can be worked straight and curved. Stitches of different lengths will allow you to make even the most minor and most detailed curves.
Also, this basic stitch is often used as a base for more complex stitches. For example, Pekinese stitch, brick stitch, and whipped backstitch are all made on a foundation of simple backstitches.
Split stitch
I added this simple stitch to the list of the best embroidery stitches because the split stitch is perfect for any pattern that involves outlining or lettering. Also, this stitch is a go-to when you need to outline for satin stitches as it has a smooth surface of the line and will support a clean edge for the satin stitch. Thick rows of split stitches can be used for fill stitching too.

Stem stitch

The stem stitch makes a rope-like line. I added this stitch to the list of best embroidery stitches because of its versatility.
Stem stitch can be very delicate and used on the most delicate embroidery pieces. Or it can be bold. How heavy the rope is will depend upon the thread you use.
Stem stitch is very handy if you need to embroider curves, waves, or tiny circles. As the name of the stitch suggests, it’s widely used to depict the leaves and stems of the plants. Also, you can fill an area with stem stitch by working rows of stem stitch close together. I like to use a stem stitch as an outline for a satin stitch.
Seed stitch
The basic filler stitch I included in this list of the best embroidery stitches – is a seed stitch. Sometimes it is also called Rice stitch.
The seed stitch is a simple series of straight stitches that are even size and evenly spaced apart but go in random directions. It can also be worked in a uniform pattern when the stitches are aligned in the same direction.
Depending on how dense your stitches will be, you can get a very light filling or very heavy and textural. Also, you can play with colors – mix colors and make a confetti filling or use the same color as a fabric and get a simple but textural look.
Besides that, you will need a seed stitch to fill the padded satin stitches.

Satin stitch

A Satin stitch or Damask stitch is a series of flat stitches used to completely cover a section of the background fabric. I added this stitch to the list of the best embroidery stitches because you will need it for almost every embroidery pattern – so popular it is. It is considered a filler stitch, but you should be careful to use it only for small filling areas, as bigger satin stitches tend to loosen up.
If you look to a more smooth satin look, keep in mind that:
- Thinner threads (or single strands) work better than more strands or thicker threads.
- Ground fabric with a high count and a firm and full weave will work better.
- Keep it small, don’t try to fill extensive areas with this stitch.
- When embroidering, start the satin stitch in the middle and move to the sides of the design.
- For more beautiful edges, outline the satin stitch first (using a split stitch or a stem stitch)
Chain stitch
A chain stitch is an embroidery stitch in which a series of looped stitches form a chain-like pattern. Chain stitch is an ancient craft – examples of surviving Chinese chain stitch embroidery dates back to the 5th – 3rd century BC.
This simple stitch has made its place on the list of the best embroidery stitches because it is so versatile. Chain stitch is great for outlining, filling, lettering, border designs, and as a part of other composite stitches, like tulip or wheatear stitch. In addition, this stitch is very handy when embroider flowing, curvy lines. Also, you can make detached chain stitches and embroidery Lazy Daisy flowers.
Did you know that chain stitch can be made in two different ways? You can make regular and reverse chain stitches. Try them both and choose which one is your favorite, or use them both, as sometimes it’s convenient to switch from one way to another.

Lazy Daisy stitch

Lazy daisy embroidery stitch, also called detached chain stitch, is a very popular decorative stitch. It is elementary and versatile; therefore, it is widely used in modern hand embroidery.
Use this stitch to depict flowers, petals, raindrops, leaves, or anything with a teardrop shape. Also, use it for filling or outlines, or combine it with other stitches to create beautiful borders.
Also, this simple stitch has many variations.
Blanket stitch
One more essential stitch on this list of the best embroidery stitches – the blanket stitch. It is also called a buttonhole stitch. It was used to finish the edges of blankets and other household textiles like tea towels and pillowcases.
Now we use a blanket stitch to finish an edge of the garment, attach an appliqué for sewing felt ornaments, or as a decorative stitch all on its own. There are many ways to use this stitch as a decorative stitch – from flowers and leaves to filling and outlining.
Blanket stitch looks excellent as a border design stitch, especially combined with other stitches or made as a double blanket stitch. Also, it has great applications as a filling stitch because you can apply it in lines or in circles – as your design requires.

French knot

The last one on the list of the best embroidery stitches – French knot stitch.
This textural stitch has many uses, from filling areas and accent stitches to being a part of complex composite stitches as a lattice stitch.
The French knot is an embroidery technique in which the thread is knotted around itself in a specific way. This stitch has a reputation for being one of the most difficult, but I find it very simple, and I like to use it.
Follow these simple tips, and you’ll love French knots as I do:
- Wrap the thread around the needle 2 times (3 times is maximum). If you need a bigger knot – use thicker yarn or more strands.
- Leave a small space between the beginning of the stitch and the place where you take the needle down into the fabric. The knot will not pop to the back of the material.
- Pull the thread slowly through the wraps to the back of the fabric. Also, keep the working thread under tension until the last possible moment as it passes to the back of the cloth.
- Use a milliner needle instead of an embroidery needle. It has an eye that’s the same thickness as the shaft, so it’s easy to pass the needle through the tight wraps without getting hung up on the eye.
Learn all the best embroidery stitches and start embroidering!
You learned all the best embroidery stitches! Start practicing them.
Practice makes perfect. After a long time of practicing, our work will become natural, skillful, swift, and steady
Bruce Lee
This blog’s Video lessons page includes video tutorials of all the stitches mentioned above. So take a piece of fabric, draw some straight lines (and curved ones too), and start embroidering.
Need More Guidance?
The top 10 hand embroidery stitches to learn is a free online course created for beginners.
More hand embroidery Stitches on this Blog

Stitches For Script Lettering – From Basic to Fancy + Free Sampler and Hand Embroidery Tutorial
Open Filling Stitches For Light and Airy Fills in Modern Hand Embroidery