

French Knot Embroidery Stitch: Complete Tutorial, Tips & Troubleshooting Guide
French Knot embroidery stitch has a reputation. Some stitchers adore the technique and make these knots all the time (like me). Others hate it and avoid it at all costs. Some hand embroidery teachers will include French Knots in the list of beginner stitches, while others will treat them as an advanced technique. And I get it.
If your French Knots keep popping to the back of the fabric, have strange “beards” and “legs”, it’s not you. You don’t know how to troubleshoot your French Knot embroidery stitch yet.
Read this guide to the end, and you will know how to make perfect French Knots every time, avoid common beginner mistakes, and resolve any problems that come up as you stitch.

To make this a practical guide, I created a free French Knot Embroidery Stitch Sampler PDF download and wrote up a detailed step-by-step tutorial to guide you, so you can start applying the tips you will find in this guide right away.
What is a French Knot?
If you are not familiar with French Knot embroidery stitch technique, here’s what you should know:
- It is a decorative stitch that creates a small knot on the surface of the fabric.
- To make this stitch, wrap the thread around the needle, then return the needle to the fabric, leaving a twisted knot on the surface.
- French Knot has various applications. You can use it as an isolated stitch, line it up for outlines, borders, and lettering, cluster the knots for filling, or combine it with other stitches. Below, you’ll find a full chapter that goes in depth on the applications of the French Knot Stitch.
- Alternative names of this technique are: French dot, Knotted stitch, Twisted knot stitch, Point Noué Stitch, and Wound stitch.
If you are curious about the history of the French Knot and its traditional applications, explore this technique on websites like the Royal School of Needlework or the Textile Research Center Leiden.
Where to use French Knots
French Knot Stitch is small but mighty. This hand embroidery technique is versatile and has various applications in both modern and classical hand embroidery. You will see these knots in the Crewelwork embroidery patterns, Stumpwork, Whitework, Ribbonwork, Elizabethan embroidery, Crazy Quilting, and modern surface embroidery. The technique is so versatile that you can make French knots on evenweave fabric, Aida cloth, felt, paper, and even wood.
Here are some of the ways you can use the French Knot embroidery stitch in your textile practice:
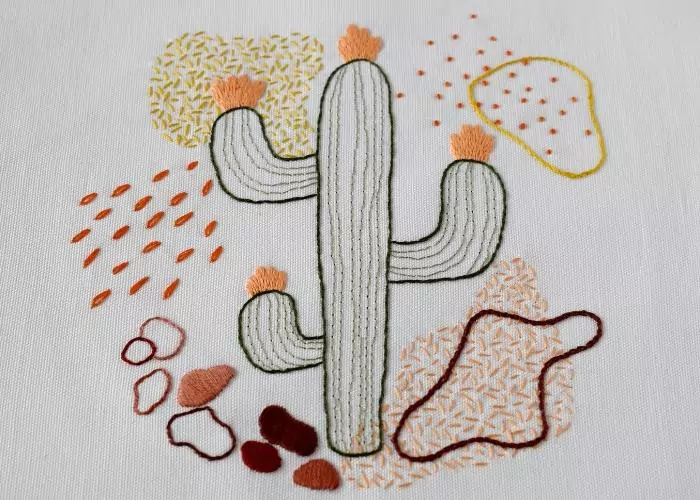
Botanical embroidery
French knots are an excellent choice for flower centers that need volume and texture. They also help you depict berries (especially blackberries and raspberries), fill in leaves, make tiny blossoms on small trees, portray fluffy bushes, or make a hyacinth look real.


Textural filling
French Knots, stitched closely together, create a dense, textural filling that fully covers the fabric surface. Use it anywhere this appearance is needed, whether it’s clouds in the sky, a sheep in a field, or curly hair in the portrait you are stitching.


Powdered filling
Dense filling is not always required. Sometimes we aim for a powdered, seeding effect. French knots, made with the same color thread as the base fabric, add an elegant look without overwhelming the design.

Bead and sequin work
French Knots can secure sequins to the fabric. This combination is an alternative to the bead in the center of the sequin and can be used to sew sequins. To make your beadwork less shiny and more elegant, mix seed beads with French Knots in your design.


Composite stitches
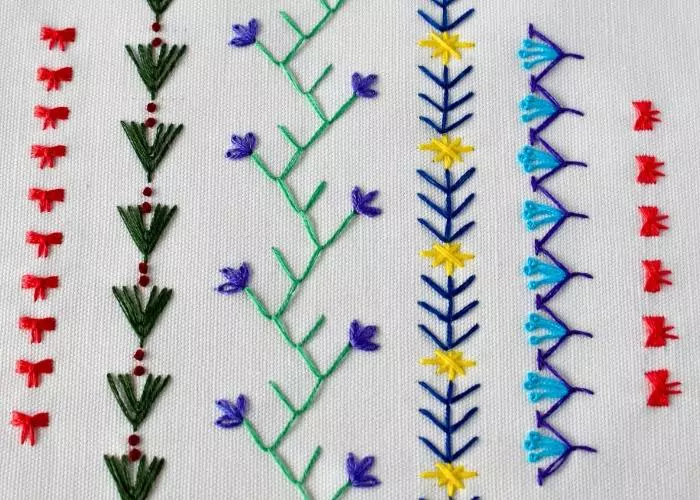
French Knots are a component of some composite stitches. For example, the Guilloche stitch and Lattice filling incorporate these knots. You can also create your own composite stitches using French Knots.

Borders and lettering
When placed close together on the line, French Knots create raised outlines, letters, or any linear shape. You can also group them into small clusters to depict tiny flowers along the garment borders or collars.


Details and accents
French Knot is a handy technique when you need to add tiny details, such as an eye on a bird or a dot on the letter “i”.


How to embroider French Knots: Step-by-Step tutorial
1. To make a French knot, insert the needle into the fabric and pull the thread up.

2. Hold the needle in one hand and wind the thread around the needle two times with the other hand.

3. Push the needle tip into the fabric close to the starting point (not the same spot). Hold the needle and pull the working thread to tighten the wrapped thread.

4. Pull the needle from the back side while holding the working thread taut with your other hand. Keep the thread in tension until the last moment when the knot is formed. This helps avoid tangled threads.

5. Making a French Knot Stitch takes practice and patience. Try embroidering French Knots with a single strand, two strands, or all six strands of embroidery floss. Notice how the knot’s size changes and which number of strands you prefer.

NOTE. To embroider French Knots with ease, you will need both hands. Consider using a lap stand or hoop holder to keep both hands free for stitching.
Tips for perfect French Knots
While the step-by-step tutorial explains every move you need to make to create a French Knot, a few tips and tricks can make your knots neater and the stitching experience more pleasant.
- Use a milliner’s (straw) needle. The eye is the same thickness as the shaft, so it passes through the knot wraps without resistance.
- Tension is everything. Wrap “just tight enough” for the eye to pass smoothly — not too tight, not too loose. You can also change tension to change the size of the knots you are making.
- Two wraps, not more. Need a bigger knot? Add strands or reduce thread tension, but don’t add too many wraps.
- Always re-enter beside, not through, the exit hole. This prevents the knot from popping to the back of the fabric.
- Keep the working thread under tension until the very last moment as it passes to the back — prevents tangles and loose wraps.
- Practice with different strand counts, different threads, and tension variations to understand how knot size changes.
French Knot Stitch troubleshooting guide
|
Problem |
Likely Cause |
Fix |
|
Knot disappears/pulls through to the back |
Needle re-entered the same hole; hole stretched too large |
Re-enter beside the exit point, not into it; reduce the size of the needle. |
|
Knot looks loose or lumpy |
Insufficient tension while wrapping or pulling through |
Maintain constant tension with non-needle hand; ensure the wrap is tight before pushing needle through. |
|
Thread tangles/knots on itself |
Tension released too early; working thread too long; strands are tangling between them |
Keep tension until the knot is fully formed; work with shorter lengths; separate the strands and recompose them, sliding each thread between your fingers. |
|
Needle gets stuck in the wraps |
Using a standard embroidery needle with a bulky eye; wraps too tight |
Switch to a milliner’s needle; loosen wrap slightly. |
|
Knot sits too far from intended spot or has a strange “leg” |
Re-entry point too far from exit |
Aim to reenter the needle really close to exit point; practice spacing. |
|
Knot is too small |
Too few strands, thread is too thin |
Add strands rather than wraps; try thicker thread. |
|
Knot is too big/bulky |
Too many wraps; too many strands; the tensions is too loose |
Reduce number of raps to 2; reduce strand count; wrap your knots tighter. |
|
Knots look inconsistent |
Varying wrap count, tension, or strand count |
Use the same number of wraps, same tension, and same number of strands. |
|
Uneven spacing in filling |
No marking |
Mark dot placement with a water-soluble pen or heat erasable pen. |
|
Back of work is messy |
Frequent starts/stops; long jumping threads |
Avoid carrying long threads between isolated knots; Pass the jumping thread under the previously made stitches; Start/stop each knot separately |
|
Difficult to pierce the fabric |
Starting knot on the way; too many knots in one place |
Use alternative starting methods and avoid starting with knots; Use smaller needle. |
NOTE. You can download this French Knot troubleshooting guide in a convenient PDF format and keep it for your reference whenever you need it.
Isolated French Knots: start, finish, and trailing between the stitches
French knot is an isolated stitch that you can work in groups or as single dots. It’s easy to hide the starting stitch and secure the end of the thread when the filling is dense, and there are plenty of tiny stitches on the back to use as anchors. But some designs will require one single French Knot. Others will place French Knots far apart, creating very long jumping threads on the back. So how do you start and finish these lonely stitches?

A knot
The first idea that comes to mind is to start with a knot. But a knot on the back isn’t the best option for French Knots. When you wrap the thread around the needle and push it back into the fabric near the starting point, the knot on the back gets in the way. If your needle gets into that starting knot, you risk pulling it and distorting a stitch you just created. It also doesn’t solve the problem of securing a finished thread.
Starting with a waste knot
With this method, you start embroidering your isolated French Knot Stitch with a waste knot, and when the stitch is done, you tie both ends in one knot on the back of the fabric. This method works with any thread and any number of strands.
Starting with a folded thread
This method works well if you use embroidery floss that comes in pairs of threads (2, 4, or 6 strands of floss) or any thread doubled. Start stitching with a folded thread loop, and finish by anchoring the thread to the small stitch on the back side.
I use these two last options for starting and finishing isolated French Knots most of the times. My choice mostly will depend on the thread I use. You will find detailed step-by-step instructions and a video guide of both methods in the “Isolated French Knots: start, finish, and trailing between the stitches” tutorial.
Size of French Knots
French Knots are a great filler stitch and can create various visual results. A shape filled with same-sized knots will look dimensional, polished, and neat. On the other hand, a design filled with knots of various sizes will look natural, playful, and almost alive.


So how do you vary knot size when that is your intention, or keep it the same when needed?
Three elements influence the size of a French Knot:
- thickness of the thread
- number of wraps in the knot
- tension of the wraps
If your goal is to embroider a filling with equally sized knots, keep the same number of wraps throughout the design and use the same thread. Once you get good at maintaining the same stitch tension, your knots will be perfectly equal in size.
Now, if you need to vary knot size in the same design, the easiest way is to change the number of embroidery floss strands you use.

If you are working with non-divisible thread like pearl cotton, you can influence knot size by tightening your knots (makes the knot smaller) or loosening the tension (makes knots bigger). Practice on scrap fabric or embroider a sampler to build confidence in changing knot size by adjusting tension, since it takes practice.
French Knot vs. Colonial Knot
French and Colonial knots are isolated stitches from the same stitch family and often are difficult to distinguish. So what is the difference?
- French Knot: thread wrapped around the needle; produces a rounder, slightly smaller knot; two wraps standard.
- Colonial Knot: thread wrapped in a figure-eight around the needle; produces a fuller, flatter, more consistent knot.
- Which one should you use? The one you like more! I find the French Knot faster to make and use more often. Some stitchers prefer Colonial Knots instead.
I have a full blog post “French and Colonial Knots Explained: Hand Embroidery Beginner’s Guide” and YouTube video “What is the difference between French knots and Colonial knots?” that explain the differences between these two techniques and go deeper into when to use each.

FAQ: French Knots Explained
How many times should you wrap thread for a French Knot?
Two (2) wraps are a standard number for French Knots.
Why do my French Knots disappear?
The starting point and needle entry point are the same; the stitch pops into the back of the fabric. Make a tiny gap between exit and entry points.
Can you make French Knots with a regular embroidery needle?
Yes. However, a milliner needle is more convenient for wrapped stitches.
How do you make a bigger French Knot?
Use bulkier thread or more strands of the same embroidery floss to make knots. Do not change the number of wraps.
How do you secure a French Knot stitch?
You can anchor the end of the thread on the back side of nearby stitches. If you make an isolated French Knot, start with a waste knot and tie off the starting and ending threads.
What’s the difference between a French Knot and a Colonial Knot?
The wrapping method is slightly different, but they look similar and can be used interchangeably.
Can you do French Knots on any fabric?
Yes. Keep the gap between the needle entry and exit points, and the knot will stay on top even if the fabric is not tightly woven.
How do you do isolated French Knots without leaving long jumping threads?
Start and end each stitch individually. Use one of the methods mentioned in this article to secure the stitch.
More on French Knots on this Blog

French and Colonial Knots Explained: Hand Embroidery Beginner’s Guide

French Knot Embroidery Sampler: Detailed Step-By-Step Hand Embroidery Tutorial
