
How to Embroider Hearts: 13 Ways to Stitch a Heart
A Valentine’s Day hand embroidery tutorial + free PDF sampler
Valentine’s Day is the perfect occasion for practicing and showcasing your hand embroidery skills! In this tutorial, I’ll demonstrate 13 different ways how to embroider hearts, using various hand embroidery stitches and techniques. From basic Running stitch to elaborate Jacobean trellis, textural French knots and classical Satin stitch.
Free PDF sampler download

I created a free Embroidery Hearts Sampler PDF to make it easier to follow along and learn how to embroider hearts. Download the PDF with a printable design for all 13 styles and a Stitch guide. Print it, and you will be ready to get started!
How to stitch hearts: Step-by-step instructions
I wrote this tutorial on how to embroider hearts to demonstrate the vast possibilities of the decorative and filling stitches you can use to embellish and decorate heart shapes. Consider it as a guide and inspiration for your projects. Feel free to experiment with various stitches, colors, and design layouts.
You can transfer the sampler to the fabric as it is and follow along to stitch all of the hearts. Otherwise, you can choose only one part of the design that suits your creative idea best and jump to the part where I demonstrate the stitches for your chosen design. Remember that you can change up the stitches to fill the heart shapes as you feel suitable.

How to embroider hearts: 13 ways
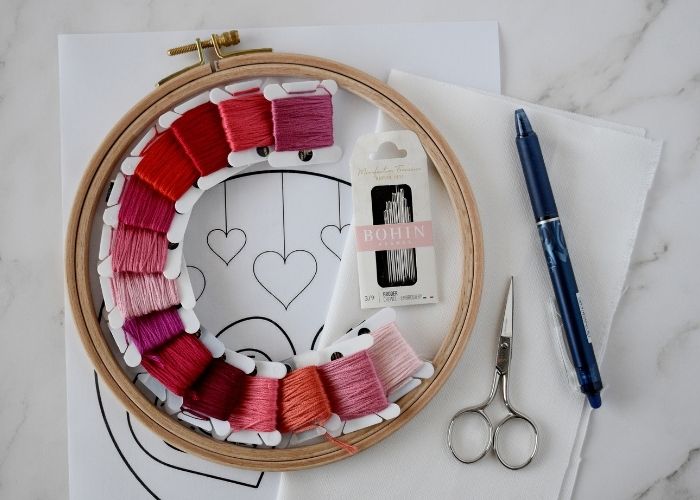
Tolls and materials
- 18 cm (7 inches) hoop
- Piece of fabric. I used a white linen and cotton blend
- Embroidery needle
- Scissors
- Friction pen for pattern transfer
- Small ruler
- Embroidery floss. You can use any combination of pink and red tones. You will find my exact color codes in the description of each stitch.
- Embroidery pattern. Download a free Embroidery Hearts Sampler PDF and print a page with a printable pattern.
Step-by-step hand embroidery instructions
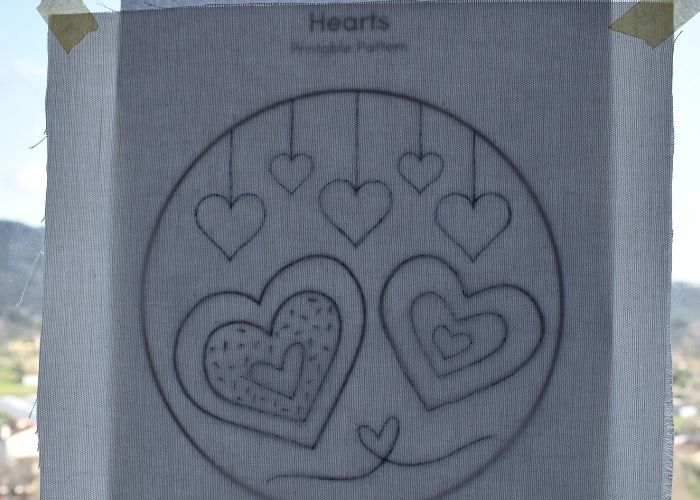
- Garter tools and materials
Garter tools and materials. Print the pattern.
- Transfer the pattern to the fabric
You can use the pattern transfer method that suits your fabric best or you like the most. The article “How To Trace Pattern on Fabric: Five Methods For Fast And Easy Embroidery Pattern Transfer” will help you choose the best method. I used a friction pen and lightbox method to transfer the Hearts design to the fabric.
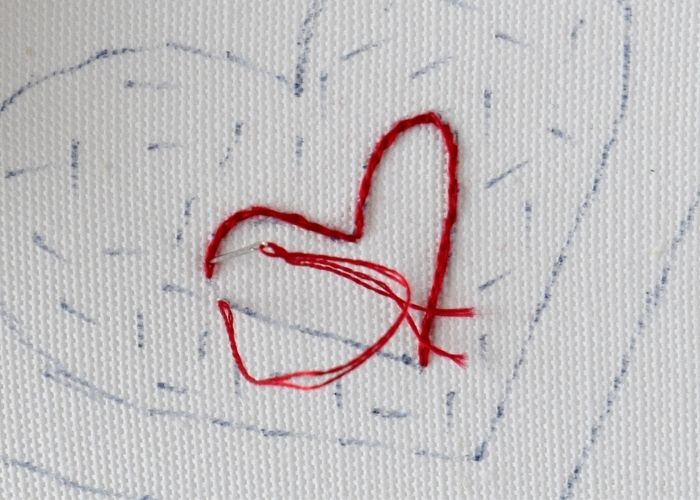
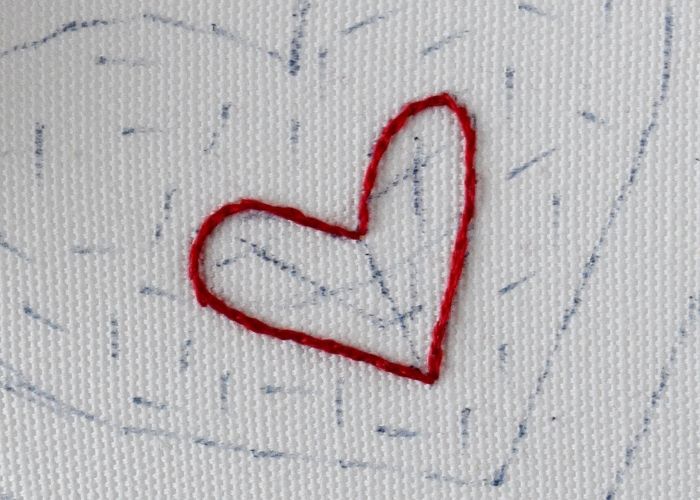
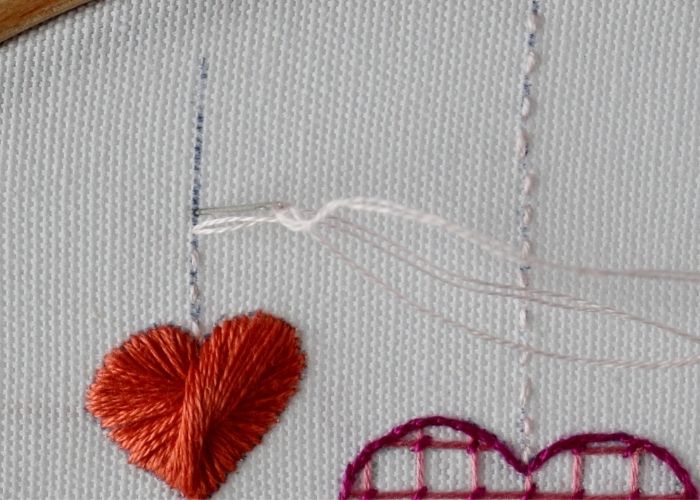
- Long and Short stitch heart 1
Start with the outline. Embroider the outline of the shape with a Split Backstitch. I used two strands of #321 DMC embroidery floss.
- Long and Short stitch heart 2
Use a friction pen to draw some guiding lines to mark the direction of the filling stitches.
- Long and Short stitch heart 3
Start filling the shape with Long and Short stitch. Use two strands of #321 DMC embroidery floss.

- Long and Short stitch heart 4
Fill one side of the heart shape and then – move to the second side. If you need more guidance on the Long and Short stitch technique, read the article “Long and Short Stitch for Round Shapes. Learn how to Embroider a Sphere and a Circle” on this blog.
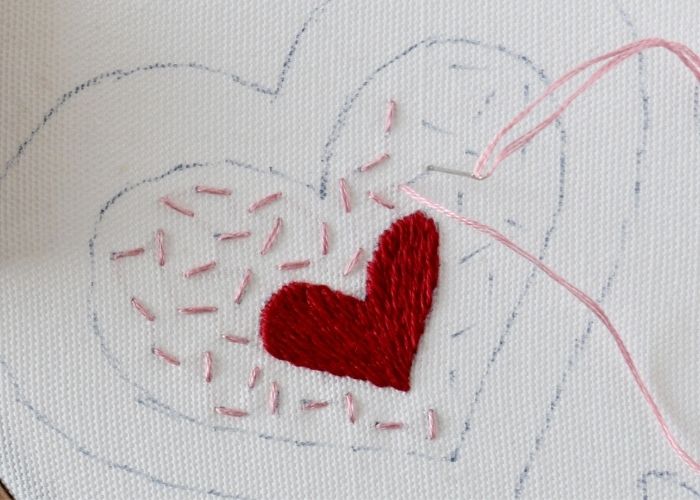
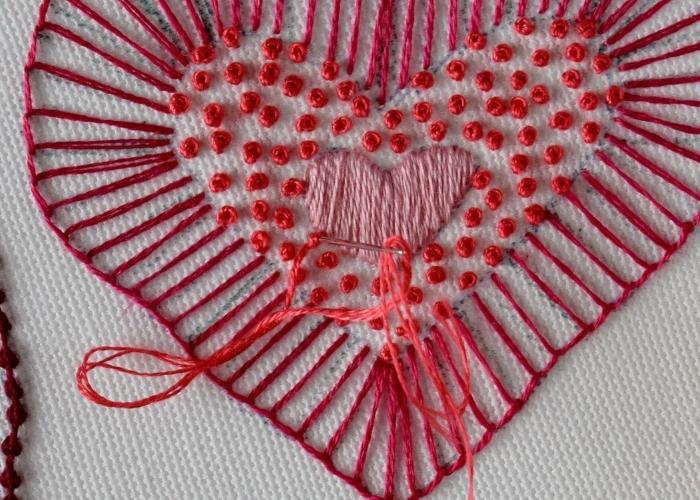
- Seed Stitch heart
Use three strands of #3354 DMC embroidery floss and embroider Seed Stitch to fill the shape of the middle heart.
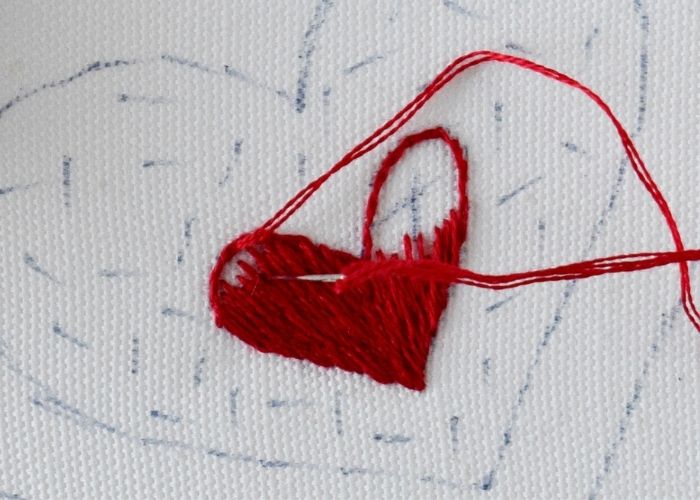
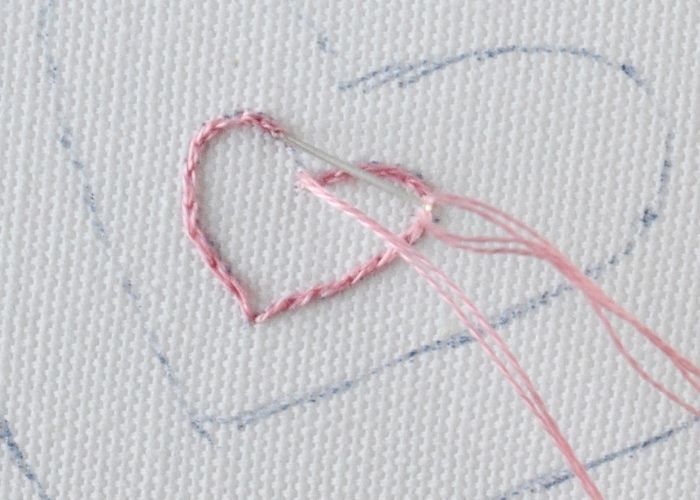
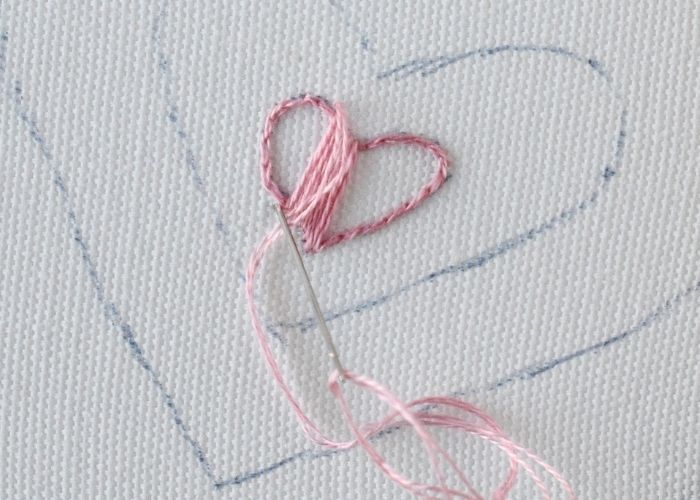
- Chain Stitch heart 1
Start at the tip of the heart shape and embroider the outline with Chain Stitch. I used three strands of #304 DMC embroidery floss.
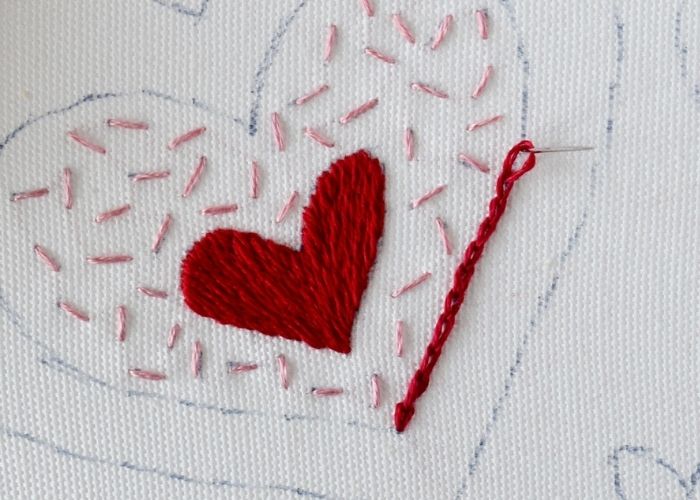
- Chain Stitch heart 2
When you reach the center of the shape, switch to the Reverse Chain Stitch. This way, the stitches on both sides of the heart shape will follow the same direction.
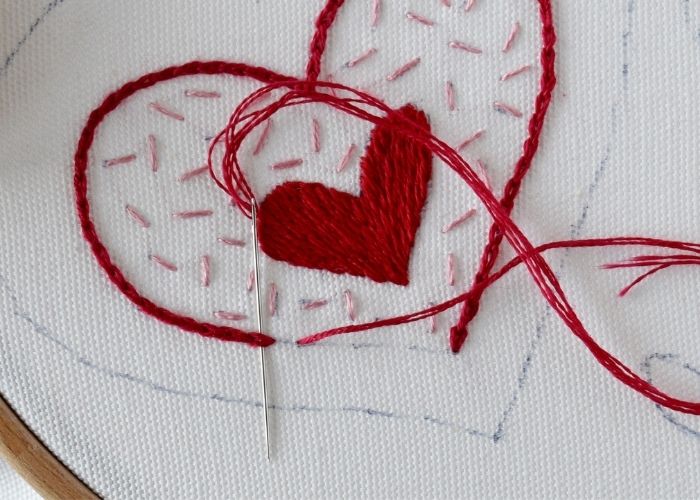
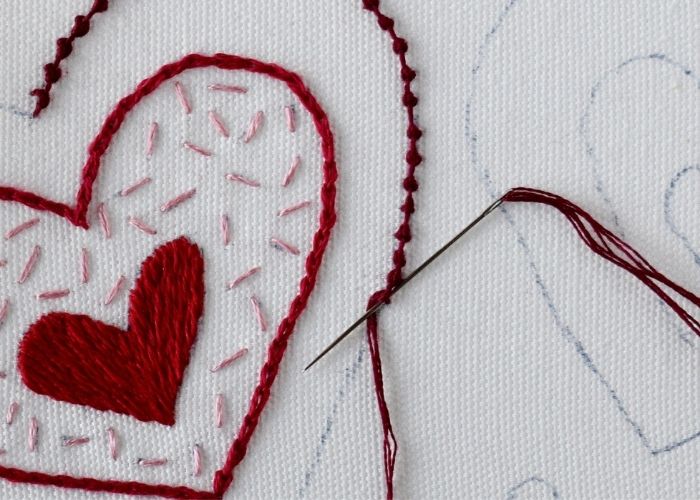
- Palestrina Stitch heart
I use three strands of #814 DMC embroidery floss to embroider the outline of the biggest heart with Palestrina Stitch.
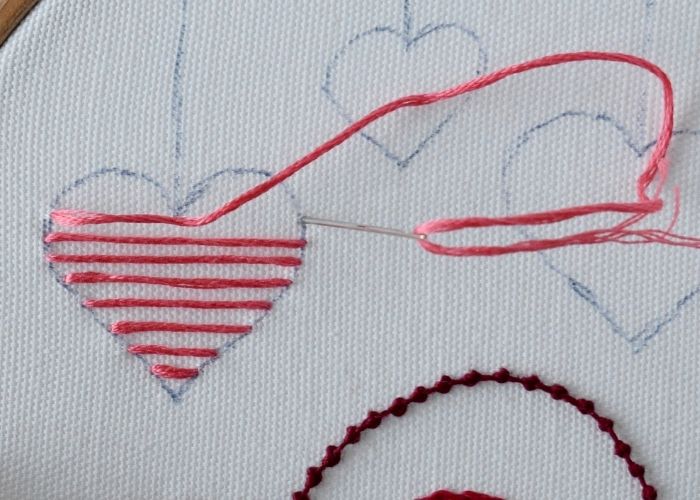
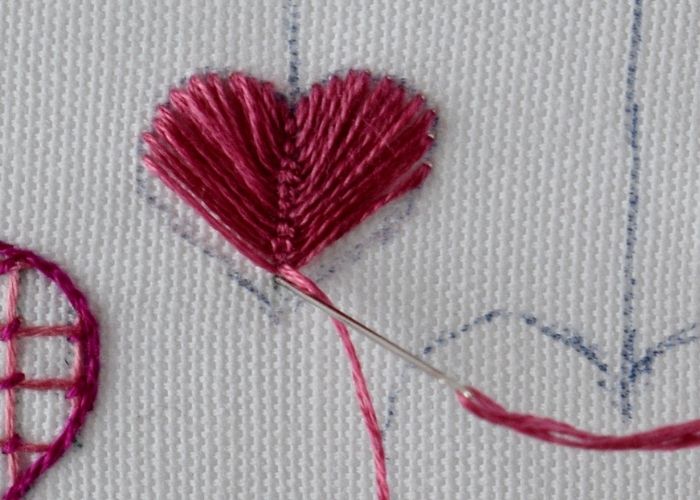
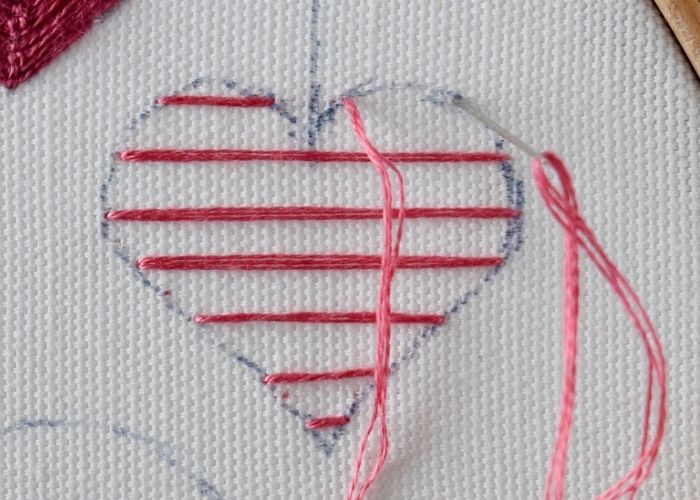
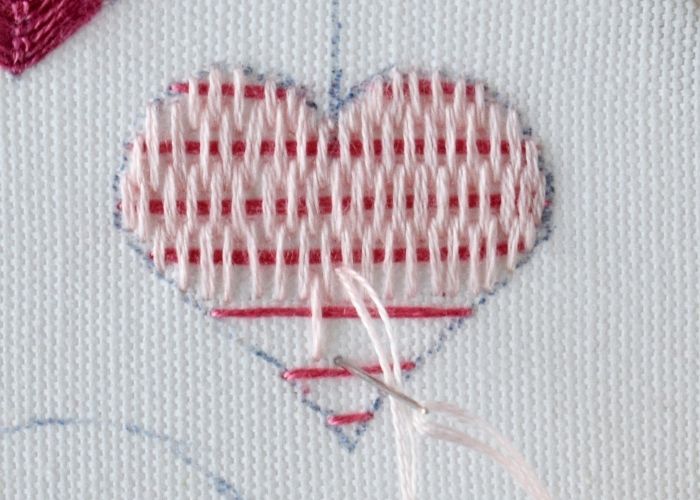
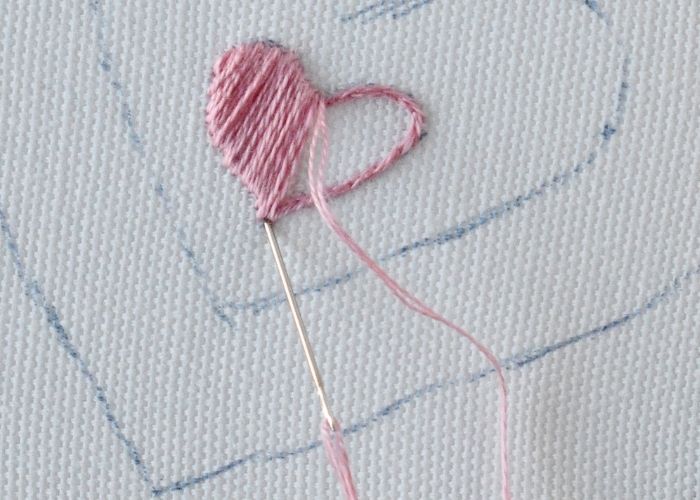
- Weave Stitch heart 1
Start with long, horizontal, equally distanced stitches that cover the entire shape of the heart. I used six strands of #818 DMC embroidery floss.
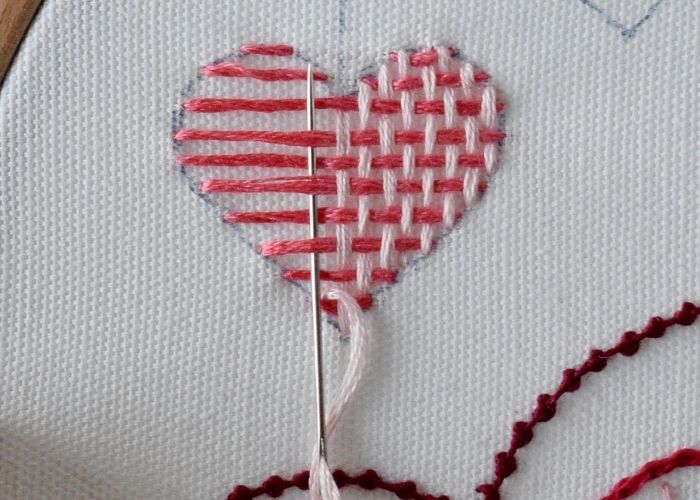
- Weave Stitch heart 2
Use a contrasting color (I chose DMC #893) to make a Weave stitch. Start at the center of the shape and make a vertical stitch. Weave the thread, passing it under and over horizontal stitches. Add more vertical stitches, weaving them with horizontal stitches to cover the entire heart shape.
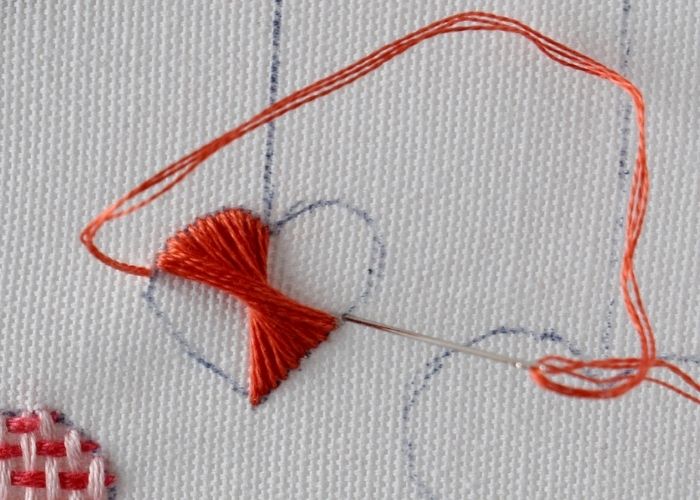
- Rhodes Stitch heart
Use three strands of #351 DMC embroidery floss to embroider Rhodes Stitch. Start on the vertical axes and add the stitches until the entire shape is covered.
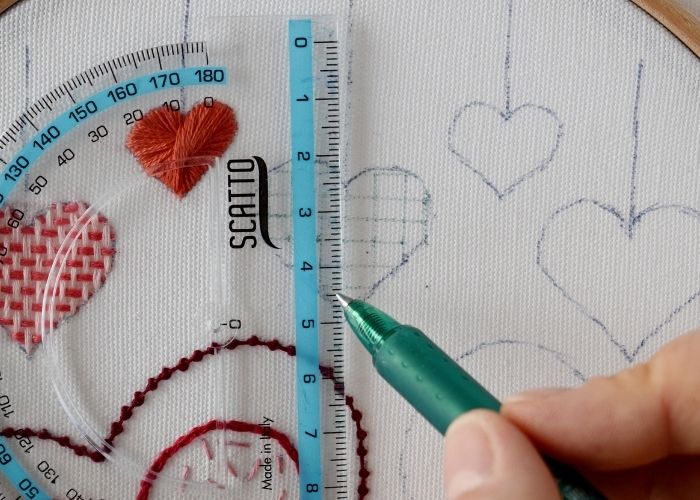
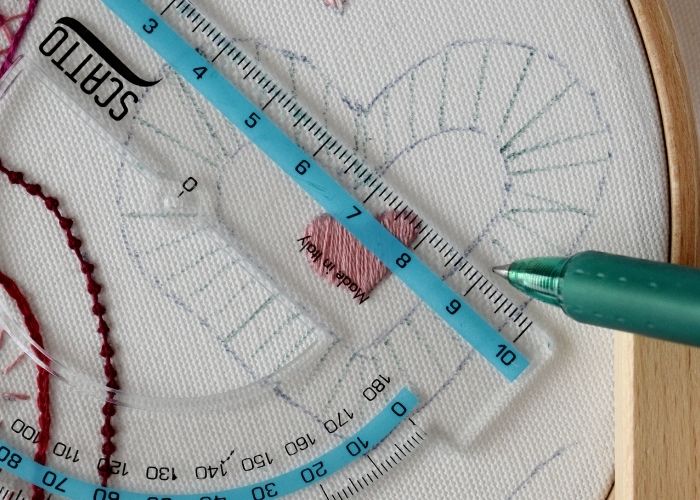
- Jacobean Couching Stitch heart 1
Use the ruler and friction pen to mark the grid covering the whole heart shape with equally sized squares.
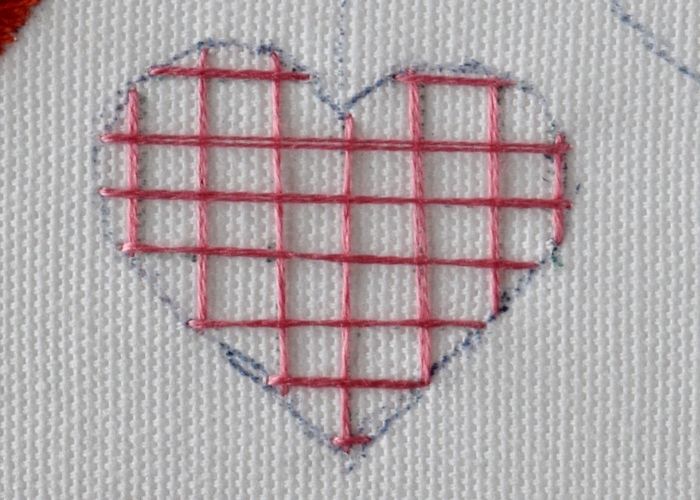
- Jacobean Couching Stitch heart 2
Use two strands of #3733 DMC embroidery floss to embroider a square grid. Make horizontal stitches first, and then – add vertical stitches.
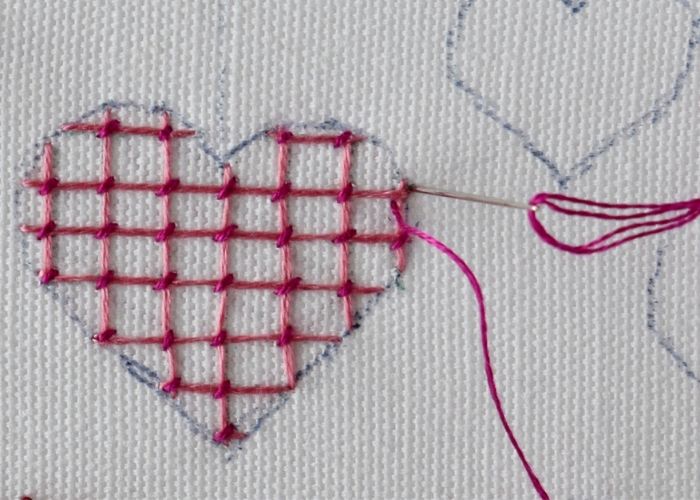
- Jacobean Couching Stitch heart 3
To finish the Jacobean Couching Stitch, use two strands of #718 DMC embroidery floss to add a diagonal couching stitch on each intersection of the laid grid.
- Jacobean Couching Stitch heart 4
Finally, outline the shape of the heart with a Split Backstitch. Use two strands of #718 DMC embroidery floss.

- Closed Fly Stitch heart
Mark the center of the heart shape. Embroider Closed Fly Stitch to fill the entire shape. Use three strands of #3687 DMC embroidery floss.
- Burden Stitch heart 1
To make a Burden Stitch, first embroider equally distanced parallel horizontal lines. Use three strands of #961 DMC embroidery floss.
- Burden Stitch heart 2
Now, add couching stitches to fill the entire shape. Use three strands of #818 DMC embroidery floss.
- Satin Stitch heart 1
Outline the shape with a Split Backstitch. Use two strands of #3354 DMC embroidery floss.
- Satin Stitch heart 2
Start filling at the center of the shape and move toward the edge. Make dense parallel Satin stitch that fully cover the fabric.
- Satin Stitch heart 3
After one side of the shape is filled, return to the center and fill the second half of the heart shape.
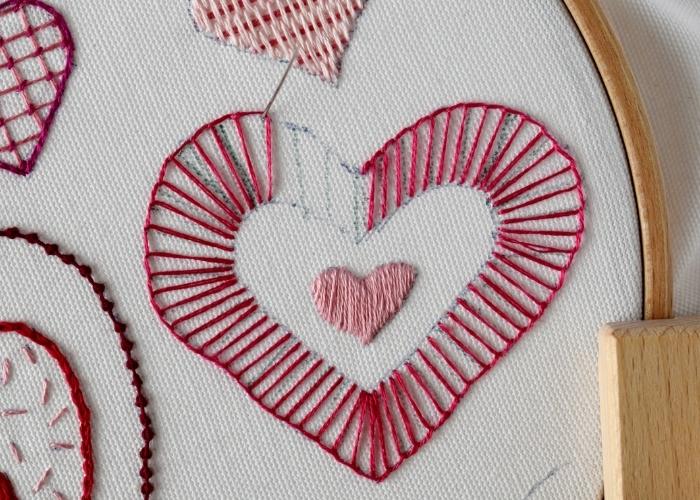
- Blanket Stitch heart 1
To make an equally spaced Blanket Stitch, mark the angle of the stitches along the entire shape of the heart. This will help you to keep equal angles and spacing when stitching.
- Blanket Stitch heart 2
Embroider the Blanket Stitch with two strands of #600 DMC embroidery floss.
- French Knots heart 1
Fill the shape with French knots. Use three strands of #891 DMC embroidery floss.
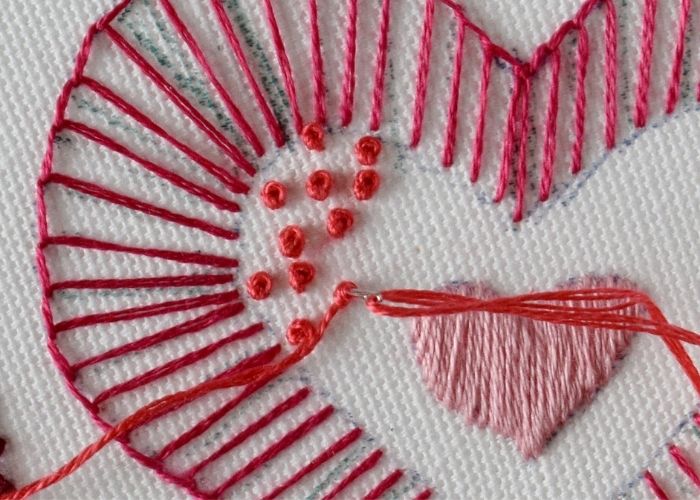
- French Knots heart 2
You can position French knots close to each other to fully cover the fabric or leave some space between them to make a semi-covering filling.
- Running Stitch heart
Embroider tiny Running Stitch stitches over the entire shape of the heart. Use two strands of #666 DMC embroidery floss.

- Running Stitch strings
Embroider the strings with Running Stitch. I used two strands of #3354 DMC embroidery floss.


Video Tutorial

Recommended Products
Disclaimer. To cover the cost of creating free embroidery patterns and video tutorials for this blog, I do sometimes link to products. Please assume these links are affiliate links. If you choose to buy through my links then THANK YOU! – it will make it possible for me to keep doing this.


How to Use the Sampler
Now that you have mastered 13 different ways to embroider a heart and learned various hand embroidery techniques, why not put them to use?

Here are some projects you can make with the heart shapes from this sampler:
- Embroider a Valentine’s Day card for your special person. This card-making tutorial will help you with the process.
- Make a hoop art to decorate your room for a romantic Valentine’s Day atmosphere. Read the article “How to Frame Embroidery in a Hoop: Six Methods of Finishing the Back of the Hoop” for ideas on how to make your hoop art stand out.
- Embroider a heart or two on your clothes. Stitches like Satin Stitch, Weave Stitch, Burden Stitch, or Long and Short stitch will work great for mending projects. Other hearts will add decorative elements to your garments.
- Add some hearts to your accessories. Embellish a baseball cap, wool hat, or a bandana with a small heart shape.
- Create a lovely tote bag with bold heart embroidery.
Over to you
You have learned how to embroider hearts! Use them to create heartfelt Valentine’s Day gifts, decorate greeting cards, or add a charming touch to your clothing and accessories. Don’t be afraid to experiment with different stitches, colors, and textures to make each piece uniquely yours. Let your creativity flow, and most importantly – have fun stitching your love messages!
More projects for Valentine’s Day

Stitch Your Heart Out: Discover Unique Valentine’s Day Embroidery Designs

Sweet Stitches: Download Your Free Candy Heart Embroidery Pattern Today!

Love Tic Tac Toe Valentine’s day card
