

Back Stitch 101: The Complete Beginner’s Guide to Flawless Outlines and Lettering
There is one foundational stitch that every embroiderer learns first, and every hand-sewer relies on most. It requires no special tools or complex movements yet produces clean, strong, and precise results: the Back Stitch.
This simple stitch is arguably the most useful stitch in needlework due to its versatility—it outlines, details, letters, seams, mends, and forms the basis for more elaborate stitches.
In this guide, you will find everything there is to know about the Back Stitch. We will cover how to work it step by step, its properties and characteristics, its many uses in embroidery and hand sewing, how it compares to similar stitches, and many variations that grow from it.
Whether you have never picked up a needle before or you have been stitching for years, there is something here for you. Simple to learn and endlessly useful, the Backstitch deserves your full attention – and this guide gives it exactly that.
What Is the Back Stitch?
It is a flat stitch worked backward in the sewing direction, creating a solid, continuous line. The technique is both decorative and structural.
On the fabric’s front, Back Stitch resembles an even, machine-sewn seam. On the reverse side, it forms longer, overlapping loops.
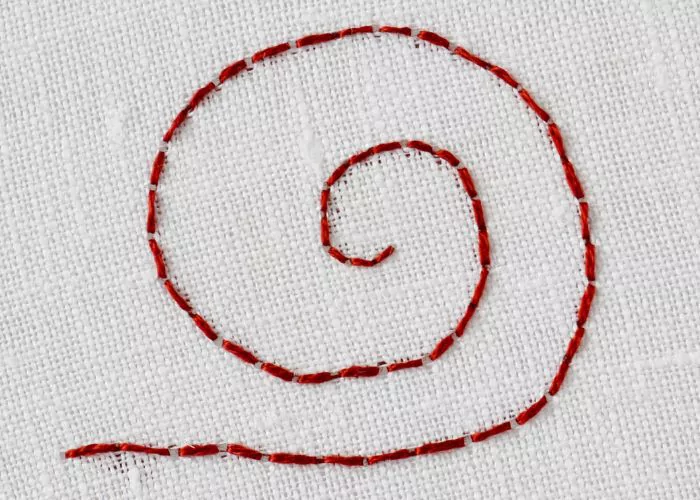

This embroidery and sewing technique is widely used across cultures and textile styles; it has various names in different languages and traditions. Also, Back Stitch and Backstitch are used interchangeably.
Here are some of the names of this technique in other languages and contexts:
- Point de sable (French),
- Punto indietro (Italian),
- Rückstich (German),
- Punto pespunte (Spanish),
- Efterstygn (Swedish)
- Linijinis dygsnis (Lithuanian)
- Stitching (in dressmaking contexts)
How to do the Back Stitch
Backstitch is worked from right to left or top down. There are two main methods: stabbing (two movements) and sewing (one movement).
- The stabbing method, when you are working in two separate movements to make the stitch.
- Sewing method, when the stitch is made in one fluid movement.
Stabbing method
It is used in surface embroidery with a hoop to stabilize the fabric. This method is precise because the needle pierces the fabric at a 90-degree angle and passes straight through. To make a stitch, first push the needle to the surface and pull it. Then push the needle up from the back, pointing it straight up. To work faster, use both hands and a hoop holder or frame to keep the fabric taut, freeing your hands for stitching.
Sewing method
The sewing method is used in hand sewing and embroidery, producing a stitch in a single continuous motion. This method requires flexible fabric and is usually done without a hoop.
How to embroider Back Stitch: Stabbing method step-by-step
1. Mark the guiding line you will follow. Decide on the stitch length; bring the needle up on the line at that distance from the start.

2. Insert the needle at the start of the line — this is the “backward” movement.

3. Bring the needle up ahead of the first stitch by one stitch length.

4. Insert the needle back into the end of the previous stitch.

5. Repeat the steps to embroider the entire length.

Video Tutorial
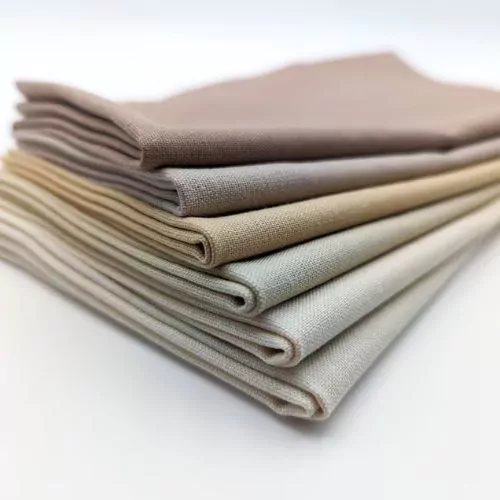
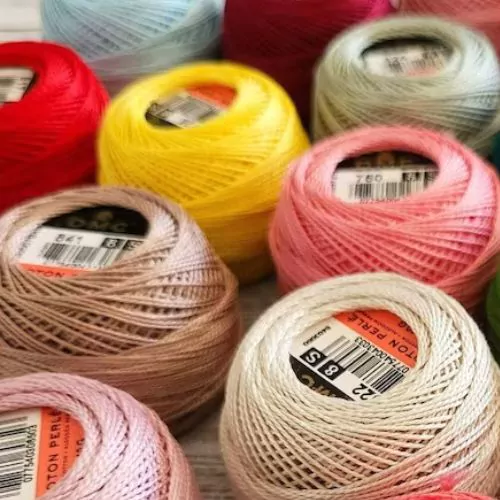
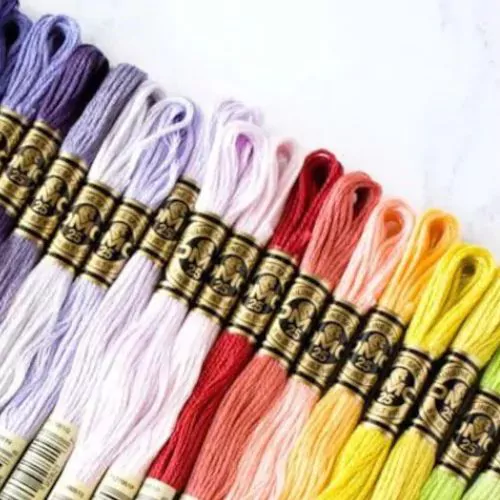
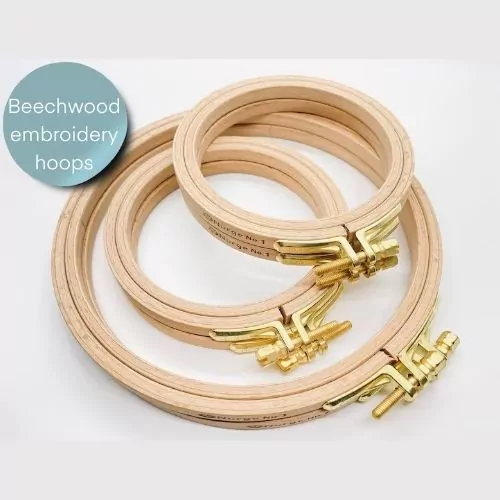
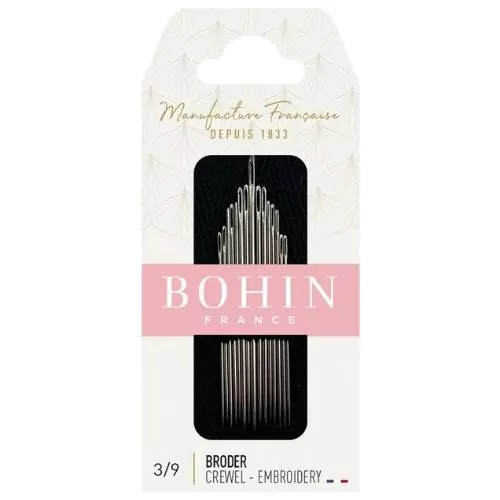
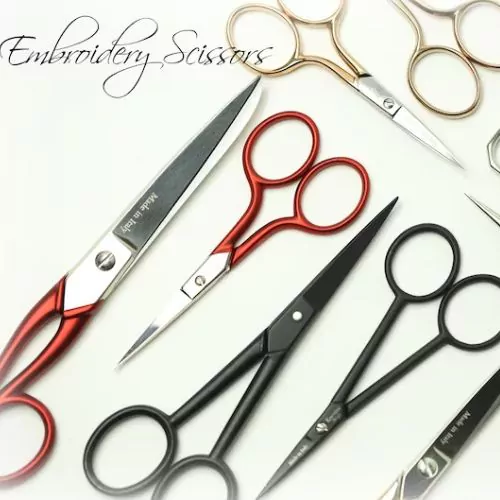
Tools and materials I used for this sampler
Disclaimer. To cover the cost of creating free embroidery patterns and video tutorials for this blog, I do sometimes link to products. Please assume these links are affiliate links. If you choose to buy through my links then THANK YOU – it will make it possible for me to keep doing this.
How to sew with Back Stitch: Sewing method step-by-step
1. Place two pieces of fabric with the front side facing inwards. Pin them together. Thread your needle and make a knot.

2. Pierce both layers of fabric at a distance of one stitch from the edge. Pull the thread through.

3. Make a stitch back, and bring the needle up one stitch ahead, with the same scooping movement. Pull the thread through to tighten the stitch.

4. Make one more Backstitch.

5. Repeat as many times as needed to sew till the end of the seam.

6. When all the stitching is done, secure the thread with a loop.

Video Tutorial
Tools and materials I used for this sampler
Disclaimer. To cover the cost of creating free embroidery patterns and video tutorials for this blog, I do sometimes link to products. Please assume these links are affiliate links. If you choose to buy through my links then THANK YOU – it will make it possible for me to keep doing this.
Tips for making a perfect Back Stitch
It is a basic and simple technique to learn, but you need practice to make your stitching clean and smooth. These tips will help you learn faster and achieve better results:
- Keep your stitches consistent in size and maintain constant tension. Watch tension, especially when using the sewing method, as it is easy to tighten stitches too much.
- When deciding on the stitch size, evaluate the entire design. Curves and wavy lines require shorter stitches, as they follow curves more smoothly.
- If the design you are stitching has angles or corners, plan ahead. The stitches on both sides of the angle should be of the same length.
- Carefully secure the starting and finishing points of your stitching. It is especially important if you are sewing by hand. The folded-thread method or a robust knot will ensure a smooth start. When you finish stitching, anchor the last stitch on the back and weave in the end of the thread.
Common mistakes and troubleshooting

Even though the Back Stitch is straightforward, common mistakes can ruin its look and the stitching experience. Here’s how to avoid them:
Uneven stitch length
The stitch made with uneven stitches of different sizes will not look smooth or neat. The secret to fluid stitching is experience and practice. To achieve neater results faster, try marking the sizing with extra dots along the design line. Another way to make stitches the same size is to count threads on even-weave fabric.
Stitches that gap or overlap
Another common defect of Backstitch is stitches that leave gaps, overlap, or stray from the line. Stitch more slowly and adjust needle insertion so one stitch ends exactly where the next begins. If this happens often, try switching methods. The stabbing method often yields more precise stitches.
Puckering fabric
If you tighten your stitches too much, you’ll get puckered fabric and distorted lines. The tension might be wrong in two places – the fabric or the stitches. When using the stabbing method, your fabric must be drum-tight in the hoop. Otherwise, you risk puckering.
If you use the sewing method without a hoop, you might pull your stitches too tight, causing puckering. When sewing, slightly pull the fabric to relax the stitch you just made. This way, the stitches will have the same tension as the fabric.
Thread twisting
Some threads tend to twist or lose their twist while embroidering, causing knots and stitch distortion. If your thread twists, untwist it every few stitches. Let your needle hang under the fabric to untwist naturally, or move it down to the fabric and pull it back up. This restores the thread’s natural twist.
Stitches are too long or too short
Back Stitch is a flexible technique. You can make stitches long or short, but it is important to adjust the stitch size to the design’s scale. Long stitches in delicate designs look clumsy and distort proportions. Conversely, stitches that are too short look too delicate in bold designs.
Properties and characteristics of the Back Stitch
Before you pick up your needle, understand what makes the Back Stitch versatile: what kind of stitch it is, how it behaves on fabric, and why it is one of the most useful stitches in hand embroidery and hand sewing.

Structure: a flat, solid-line stitch
When embroidering the Back Stitch, the thread lies flat against the fabric without looping, knotting, or raising. It is a solid-line stitch. Unlike the Running Stitch, which leaves visible gaps, it produces a continuous, unbroken line.
This results from the stitch’s defining movement: each new stitch is inserted back into the end of the previous one. The stitches sit end-to-end, touching at every junction, giving the line its solid, seamless appearance.
On the front of the fabric, the Backstitch looks remarkably like a line of machine stitching: neat, evenly spaced, precise. This is both its great visual strength and a reason it has been trusted for centuries in fine embroidery and garment construction.
The back side of the fabric tells a different story. On the reverse side, each stitch overlaps with the ones before and after it, creating a dense, double-layered line of thread.
Strength: the strongest line stitch
One of the most important properties of the Back Stitch is its considerable strength.
When embroidering Backstitch, the thread loops backward, and each stitch connects directly to the previous one with no gaps. This distributes tension along the entire line instead of concentrating it at a single point. If one stitch breaks, the rest still hold, unlike the Running Stitch, where a broken stitch creates a gap.
This is why the Back Stitch has long been the hand-sewn alternative to machine stitching when a strong, secure seam is needed. In dressmaking and tailoring, it is the go-to stitch for hand seaming, repairing machine-sewn seams, and sewing in areas where a machine cannot easily reach.
For embroidery purposes, the strength of the stitch means that lines worked in it will hold up well to use and washing — important when you are decorating a garment or household textile that will be worn and laundered.
Thread usage: more threads, more coverage
The Back Stitch is not the most economical stitch. Because the thread doubles back with every stitch, filling the fabric’s underside, it uses significantly more thread than the Running Stitch for the same length.
You use roughly three times as much thread for a back-stitched line as for the same length in Running Stitch. Keep this in mind when planning large projects with extensive back-stitched outlines and plan thread quantities generously. The extra thread is not wasted; it creates the stitch’s solid line, strength, and satisfying weight on the fabric.
Appearance: clean, precise, and versatile
From the front, a well-worked Back Stitch is beautiful. The line is clean, even, and continuous — each stitch butts neatly against the next with no visible start or end. At its best, it has a graphic quality: bold and precise with thicker thread, delicate and fine with a single strand.
Stitch length significantly affects appearance. Longer stitches create a bolder, more visible line with a relaxed look. Shorter stitches produce a finer, crisper line, ideal for small details, tight lettering, or tiny motifs. For most embroidery, small, consistent stitches are key to a professional result. The more even the length, the more polished the line.
The choice of thread matters too. Stranded cotton worked with all six strands gives a thick, bold line; two strands produce a much finer, more delicate line. Silk thread adds a subtle sheen, making the line gleam. Wool, used in crewelwork, produces a soft, rounded line with body and texture.
Flexibility: curves, corners, and everything in between
Unlike some stitches that work well in straight lines but become awkward when the design curves, the Back Stitch is remarkably adaptable. It handles curves gracefully, follows flowing lines with ease, and can navigate sharp angles and corners with the right approach.
The secret is stitch length. On a straight line, stitches can be as long as you like, depending on design and thread. On curves, shorter stitches let the line follow smoothly without angular steps. The tighter the curve, the shorter the stitches. Gentle curves use medium-length stitches. Tight curls or circles need very short stitches to keep a clean line.
Corners require a different approach. At a sharp angle, bring your needle up exactly at the corner point before inserting it back into the end of the previous stitch. This places a stitch precisely at the turn, giving you a crisp, clean angle rather than a rounded approximation.
This combination of properties — solid line, exceptional strength, consistent appearance, and the ability to follow any path you set for it — is what makes the Back Stitch one of the most dependable stitches in hand embroidery. It is simple enough for a complete beginner to learn in an afternoon, and versatile enough that experienced embroiderers continue to reach for it throughout their working lives.
Uses of the Back Stitch in Hand Embroidery
The Back Stitch suits almost any embroidery project. It is not a specialist stitch for one style or tradition; it appears everywhere, doing different jobs equally well. Understanding its full range will change how you plan projects and how often you use it.
Outlining shapes and motifs
This is the most familiar role for the technique, and the one most embroiderers learn first. When you want to define the edge of a shape — a flower petal, a leaf, an animal, a geometric form — the Back Stitch produces a clean, solid line that reads clearly against the fabric and holds its shape without wavering.
Because it produces a continuous line with no gaps, it is more effective for outlining than the Running Stitch, which leaves edges dotted rather than defined. When worked in a thread color that contrasts or harmonizes with a filled shape, a back-stitched outline adds crispness and definition.
Outline weight matters too. For a bold edge, work with more strands or a thicker thread. For a fine line, drop to one or two strands. The stitch stays the same; only the thread changes.
Adding fine detail
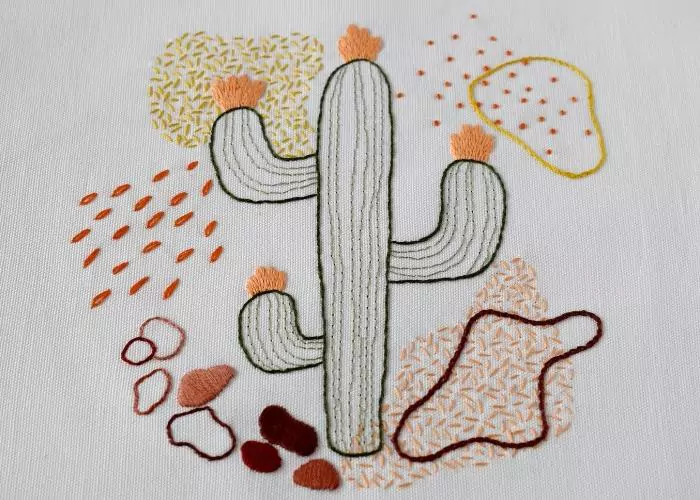
Beyond outlining whole shapes, the Back Stitch is the stitch of choice for adding precise, small-scale detail to an embroidered picture. This is where its ability to follow any line — curved, straight, angular, meandering — really comes into use.
Think of the veins on an embroidered leaf, the delicate lines of a feather, the texture of tree bark, the whiskers on an embroidered animal, the fine lines of a face. These details are too small and precise for most other stitches to handle neatly. The Back Stitch, worked with fine thread and short stitches, can follow intricate paths without losing clarity. This makes it invaluable for pictorial embroidery, botanical embroidery, and any work that depends on naturalistic detail.
Lettering and calligraphy embroidery

Of all the stitches available for embroidering text, the Back Stitch is arguably the most versatile and the most forgiving. It faithfully follows the curves of letterforms, handles tight loops and hairline strokes equally well, and produces a line that reads clearly at small sizes.
Monograms, names, quotes, or love letters stitched into cloth are natural territory for the Back Stitch. Because you can adjust stitch length freely, you can work with very fine detail, navigating curved letters or tiny serifs without difficulty. Script lettering especially benefits from this stitch’s fluidity: it follows the continuous, flowing lines of cursive writing with a naturalness hard to replicate with other stitches.
For embroidered lettering, the general rule is to keep stitches short — shorter than you might think — to ensure curves stay smooth and letterforms remain legible. A line of Back Stitch that looks laborious as you work it will resolve into crisp, readable text when you step back.
Borders and decorative lines

The Back Stitch is a natural choice for decorative lines and borders. The solid, continuous line it produces is strong enough to anchor a composition visually and flexible enough to be worked in curves, zigzags, geometric patterns, or any other configuration the design calls for.
A simple line can form the border of a sampler, the frame of an embroidered panel, or the dividing line between sections of a larger composition. In a contrasting color, it makes a confident graphic statement. In a thread that blends with the surrounding embroidery, it provides structure without dominating.
The Back Stitch also functions as the foundation for many decorative border stitches in this stitch family — the Threaded Back Stitch, Double Threaded Back Stitch, Whipped Back Stitch, and Herringbone Ladder all begin with a line of plain stitching elaborated with a second thread. The quality and evenness of that foundation line directly affect the finished stitch’s appearance, which is another reason to take time to work a clean, consistent Backstitch.
Crewelwork
In crewelwork — embroidery worked with wool thread on a linen or linen-cotton ground, with a tradition rooted in English Jacobean embroidery — the Back Stitch serves primarily as an outline and detail stitch. The bold, flowing designs of crewelwork typically feature large areas of filling worked in specialized stitches, but the edges of leaves, petals, and stems are often defined and refined with this technique.
Counted thread embroidery

In counted-thread embroidery, such as cross stitch, the Back Stitch is used both as an outlining stitch and as a detail stitch. On evenweave linen or Aida fabric, this stitch is often used to add lettering, facial features, or fine linear details to a cross stitch design.
In blackwork – the tradition of geometric and floral embroidery worked in black thread on white linen – the Back Stitch is one of the foundational stitches. It is used to outline the repeating geometric patterns, to trace the flowing tendrils and stems that connect the design, and to work the fine details of flowers, leaves, and heraldic motifs.
Blackwork demands precision and evenness, and this technique delivers both. Because many blackwork designs are worked on evenweave fabric, where individual threads can be counted, maintaining the regularity of the Back Stitch is relatively easy. The result — black thread forming crisp geometric patterns on white linen — is one of the most graphic and striking effects in the whole embroidery tradition.
Canvaswork
In canvaswork — embroidery worked on a stiff canvas ground with wool or other threads, with the stitches typically covering the entire canvas — the Back Stitch is used for outlining motifs and adding fine linear detail. Because canvas is a sturdy, structured ground, the stitching sits firmly and clearly on its surface, making it useful wherever a definite line is needed among the heavier filling stitches that dominate canvaswork designs.
The base for composite stitches
Perhaps the most underappreciated role of the Back Stitch is its offstage role as the invisible or semi-visible foundation for a group of more elaborate stitches.
The Whipped Back Stitch, Threaded Back Stitch, Double Threaded Back Stitch, Pekinese Stitch, and Herringbone Ladder all begin with a line of stitching transformed by a second thread. The Backstitch provides the structure and evenly spaced stitches that give the second thread something to wrap around, pass through, or loop beneath. Without a well-worked foundation, these composite stitches lose regularity and visual impact.
One of the most elegant things about the Back Stitch family is that a single, simple stitch, worked with care and consistency, becomes the scaffolding for an entire vocabulary of decorative possibilities. Mastering the plain basic stitch is not just a beginner exercise; it is the prerequisite for everything that grows from it.

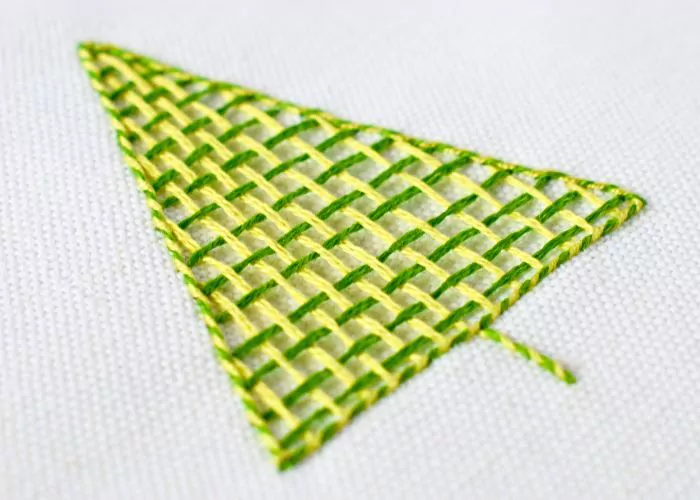

The Back Stitch as a Sewing Stitch
Most embroiderers encounter the Back Stitch as a decorative tool — a way to draw lines in thread, outline motifs, or add detail to an embroidered picture. But the Backstitch has a parallel life that predates much of its embroidery history: it is one of the oldest and most reliable stitches in hand sewing, used not to decorate fabric but to hold it together.
Understanding this side of the stitch deepens your appreciation of what it can do. It has practical value too because there are situations in garment making, mending, and repair where a needle and thread will take you places a sewing machine cannot.
The strongest hand-sewn seam stitch

When you need to sew a seam by hand that must hold, the Back Stitch is the answer. Of all basic hand-sewing stitches, it produces the strongest, most secure seam — stronger than the Double Running Stitch, Slip Stitch, or any other single-thread line stitch you are likely to use.
The reason lies in its structure. In a Running Stitch seam, each stitch is independent: a single point of thread passing through the fabric and back, with gaps on either side. If the thread breaks or a stitch pulls loose, the gap becomes visible, and the seam begins to fail. In a Backstitch seam, there are no gaps. Each stitch connects directly to the end of the previous one, and the thread doubles back on the underside, creating a dense, interlocking structure. Tension is distributed along the entire seam rather than concentrated at individual points. A single broken stitch in a back-stitched seam does not unravel the whole line — remaining stitches continue to hold.
For centuries before the sewing machine, the Back Stitch was the standard stitch for durable garment seaming. Tailors, dressmakers, and seamstresses relied on it for the same reason we rely on machine stitching today: it was the strongest, most dependable option.
Uses in garment construction and mending
In contemporary sewing practice, the Back Stitch comes into its own in several specific situations.
In garment construction, hand-sewn seams have a slight give that machine-stitched seams sometimes lack. This can be an advantage in tailored garments where ease of movement is important.
In mending, the Back Stitch is one of the most useful stitches. When a seam splits — in trousers, along a shirt side, or at a bag strap stress point — Backstitch is the right repair tool. It replicates the look and function of the original machine seam closely enough that careful repairs are barely visible. For visible mending, where repair is meant to be seen and celebrated, this stitch can be worked in contrasting thread as a design element, tracing the original seam or creating a new decorative path.
It is invaluable in situations where a sewing machine cannot reach: the lining of a jacket, the inside of a narrow cuff, or the inside corner of a bag. Wherever the garment’s geometry defeats the machine, a needle and threaded will follow.
The prick stitch: the tailor’s variation
In professional tailoring, a close relative of the Back Stitch has long been the stitch of choice for certain fine-finishing tasks: the Prick Stitch, also called the Pick Stitch.
The Prick Stitch works on the same principle — the needle goes back into the fabric behind the point where it emerged — but with one difference: the backward step is very small, just a thread or two of fabric, while the forward travel underneath is much longer. The result on the fabric’s surface is a line of tiny, evenly spaced dots rather than a continuous solid line. On the underside, the stitches are long, as with a regular Backstitch.
This restraint makes the Prick Stitch valuable in tailoring. It provides back-stitch strength — the interlocking structure and secure seam — while leaving the fabric’s visible surface almost undisturbed. The tiny surface dots read as a refined, handmade detail rather than a utilitarian seam, which is exactly what is wanted when hand-finishing a fine jacket lapel, setting in a hand-sewn zip, or attaching a facing in a tailored coat.
The Prick Stitch is one of those details that distinguish a truly hand-tailored garment from one that has merely been machine-assembled. Its small, precise surface dots are a mark of craft and care — and they are made possible by the same backward movement that defines the ordinary Back Stitch.
The Open Back Stitch: The best from two techniques


One further variation is worth a brief mention here, particularly for those interested in sewing: the Open Back Stitch, also called Half-Back Stitch.
From the front, this technique looks identical to a Running Stitch — a line of evenly spaced stitches with visible gaps. But the thread path underneath is different: the needle travels further on the back than on the front, so the stitch structure more closely resembles a Backstitch than a Running Stitch. The result is a stitch that offers more strength and stability than a true Running Stitch while maintaining the lighter, more open appearance of a surface Running Stitch.
This makes the Open Back Stitch useful when you want the visual character of a Running Stitch — its relaxed, handmade quality — combined with more security. It is a good choice for basting that needs to hold firmly or for decorative hand-sewing where durability matters.
Variations of the Backstitch

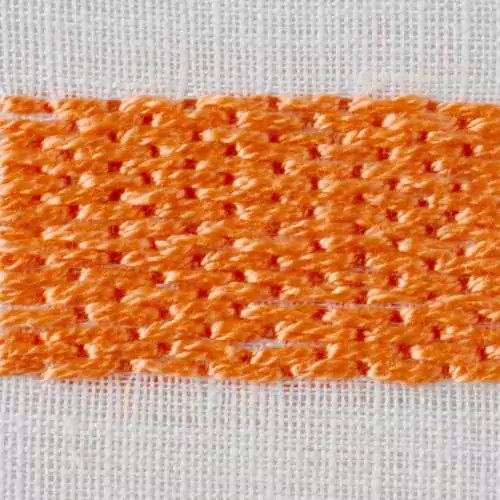


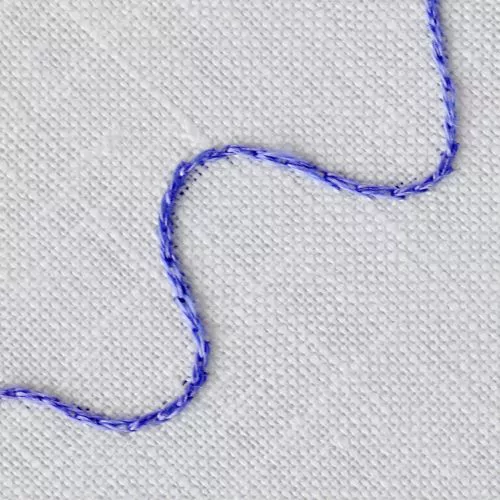


Back Stitch vs. similar stitches: Comparisons
The Back Stitch can be mistaken for similar stitches at first glance. They are all line stitches, creating a thread path that moves forward along a design line, and some look alike enough to be confused with one another. Knowing how they differ in structure, look, and best use will help you choose the right stitch for any project.
Backstitch vs. Running Stitch
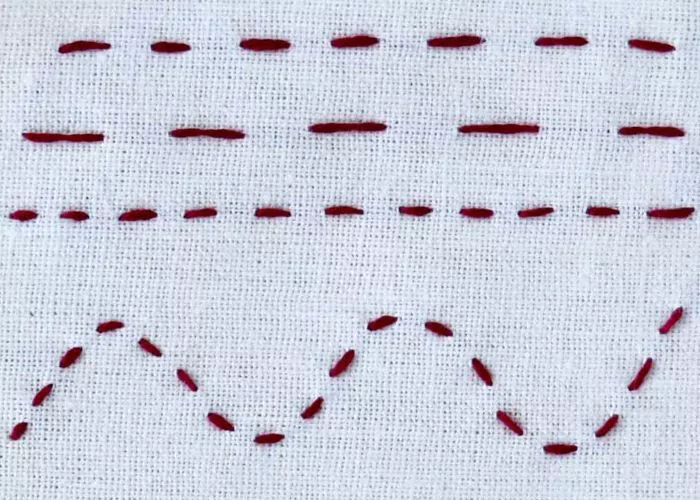
These two stitches are often introduced together as the most basic line stitches in embroidery and hand sewing, and they are worth comparing directly because the differences between them are significant despite the superficial similarity.
Appearance shows the contrast most clearly. The Back Stitch produces a solid, continuous line on the front — stitches placed end to end with no gaps. The Running Stitch produces a broken, dashed line with visible spaces. For outlining, lettering, and work requiring a clean, definite line, Backstitch wins decisively. For a lighter, more open effect, or for quilting, gathering, and basting, Running Stitch is valuable.
Strength is the other major difference. The Back Stitch is significantly stronger than the Running Stitch. Because each stitch connects directly to the one before it, the seam or line holds even if individual stitches are stressed. A Running Stitch seam is only as strong as its weakest stitch — a single broken stitch immediately creates a gap. For seams that will take strain, the Backstitch is the right choice.
Thread usage follows from the structural difference. The Back Stitch uses roughly three times as much thread as the Running Stitch for the same length because the thread doubles back on itself under the fabric with every stitch. If thread economy matters — in a large project or when working with expensive silk or hand-dyed thread — factor this into your planning.
In short, the Running Stitch is lighter, faster, and more economical. The Backstitch is stronger, cleaner, and more precise. They are not interchangeable, and knowing which to use is fundamental to developing confidence as an embroiderer and hand sewer.
Back Stitch vs. Stem Stitch

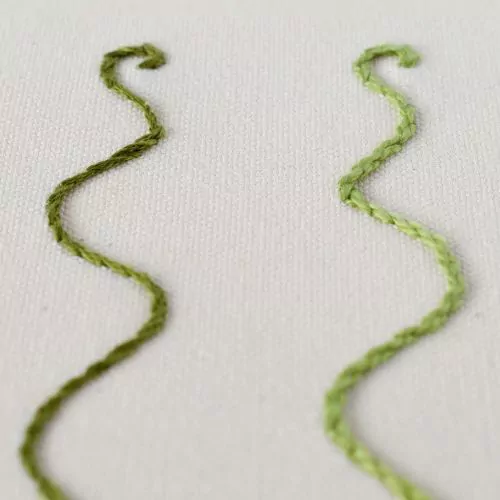
The Stem Stitch is one of the most frequently used outline stitches in embroidery, and it is often compared to the Back Stitch because both produce a solid line suitable for outlining and lettering.
Structure is where they differ. The Back Stitch moves forward by going backward — each stitch is inserted behind where the thread emerged, creating a line of stitches end to end. The Stem Stitch also moves forward, but the thread stays consistently to one side of the needle, creating stitches that overlap and spiral slightly. The result is a twisted, rope-like line rather than a flat, continuous one.
Appearance reflects this difference. Backstitch produces a flat, clean, graphic line — precise and even, like a drawn mark. Stem Stitch produces a slightly raised, twisted line with subtle texture — softer and more organic. Back Stitch has a crispness that suits geometric designs, lettering, and work where clarity and precision matter. Stem Stitch has warmth and fluidity that suit curved, naturalistic designs — flowing stems, botanical curves, soft outlines.
The direction of working also differs. Back Stitch can be worked in either direction without affecting the result. Stem Stitch must be worked consistently — always keeping the thread to the same side of the needle — and the direction affects whether the twist runs left or right. Changing direction mid-line produces a visible inconsistency.
For lettering, both stitches work well, though they give different results. Backstitch lettering is crisper and more graphic; Stem Stitch lettering has more body and a calligraphic warmth.
The choice between them ultimately comes down to the visual effect you want. If you need a clean, flat, precise line, choose Back Stitch. If you want a line with texture, movement, and a slightly raised quality, choose Stem Stitch.
Back Stitch vs. Split Stitch vs. Split Backstitch
This comparison trips up many embroiderers, including experienced ones, because the names are similar, two stitches look alike, and embroidery books are not always consistent about which is which.
Let’s untangle them.
The Split Stitch

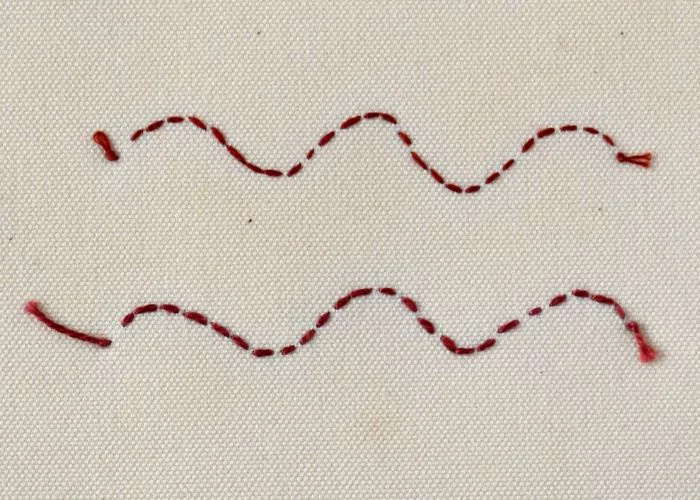
Split Stitch moves forward like a Stem Stitch — the needle travels ahead, then comes up through the middle of the previous stitch, splitting the thread from underneath. There is no backward movement involved. The result is a line that resembles a fine chain stitch, with a slightly braided texture. Split Stitch produces a beautiful, rounded line that is particularly valued as an underlay beneath Satin Stitch padding, and as a fine outline in its own right. It is a forward-moving stitch.
The Split Backstitch
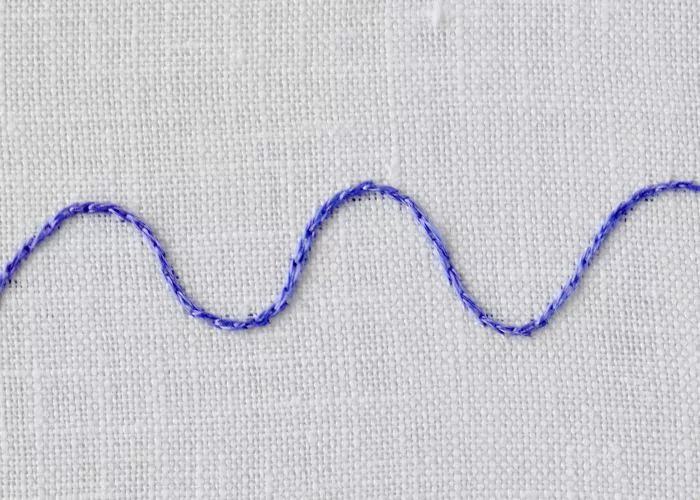

Split Backstitch technique works differently. Like the regular Back Stitch, it involves a backward movement — the needle is inserted behind the point of emergence. But instead of inserting the needle into the end of the previous stitch, it is brought up through its middle, splitting the thread from top downwards. The result looks very similar to a Split Stitch on the surface — a fine, slightly braided line — but the mechanics are those of a Backstitch, not a forward stitch.
The practical difference between the two shows up mainly in their behavior on curves and in their thread usage. The Split Backstitch, because it shares the interlocking structure, is slightly stronger and holds curves a little more firmly. The Split Stitch is often considered slightly smoother and more even on very tight curves.
The Back Stitch itself, by comparison, produces a flat, clean line in which the individual stitches are visible as distinct units placed end to end. It does not split the previous stitch and does not produce a braided appearance. The surface texture is simpler and more graphic than either of the split variants.
In summary: if you see a slightly braided, fine outline and you are not sure which of the two split stitches it is, look at the back of the fabric. A Split Stitch will have shorter stitches on the back; a Split Backstitch will have the characteristic long, overlapping stitches on the reverse that identify it as a member of this family of stitches. And if the line is flat, clean, and graphic with no braiding, it is almost certainly a plain Back Stitch.
Embroidery patterns with Back Stitch and its variations

Young Sun
embroidery PDF pattern and instructions, simple embroidery design for beginners

North Star
PDF pattern for hand embroidery

Blue Quilt
Embroidery PDF Pattern – 12 Stitches For Filling
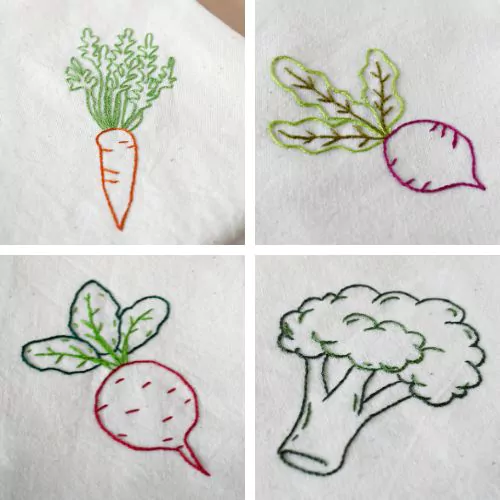
Spice Up Your Kitchen With Veggie Embroidery
Tutorial & Free PDF Pattern Download

Cactus Hand Embroidery
Beginner Embroidery Stitches + Hand Embroidery Sampler To Learn Basics

Name
How to make hand embroidered cards + Free PDF pattern for Mother’s Day or Birthday card
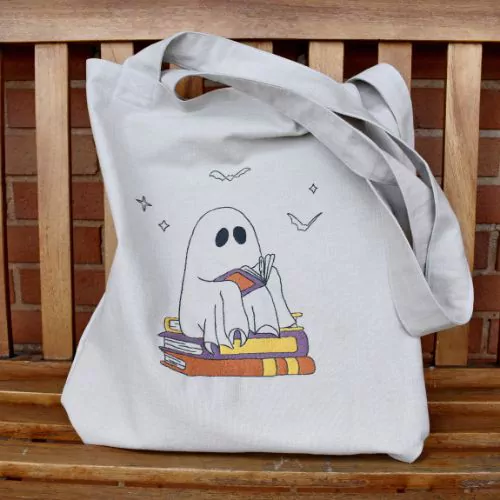
DIY Hand Embroidered Tote Bag
Complete Guide with Free PDF pattern
Further learning

How to Start Hand Embroidery: Beginner Roadmap

Hand Embroidery Stitches: Techniques for Outlines, Filling, Decoration, Edges, and More

Stitches For Script Lettering – From Basic to Fancy + Free Sampler and Hand Embroidery Tutorial
The stitch worth knowing best
Back Stitch is proof that the most useful things are often the simplest. One backward movement, repeated along a line — and from that single, unpretentious action comes a stitch that outlines, details, seams, mends, letters, borders, and forms the foundation for an entire family of variations.
It is the stitch that hand sewers trust when a seam needs to hold, the stitch embroiderers reach for when a line needs to be clean and precise. It is the stitch that appears in textile traditions on every inhabited continent, worked by hands separated by centuries and thousands of miles — all arriving independently at the same elegant solution.
If you are a beginner, the Backstitch is the best place to start. Master it well — keeping your stitches even, your tension consistent, your curves smooth — and you will have a tool that serves you in almost every project you take on.
If you are an experienced stitcher, the Back Stitch rewards a second look. Work it in silk. Try it as a foundation for whipping or threading. Use it for mending a garment you love. Let it be small and precise in a way you have never stitched before.
There is always more to discover in a stitch this fundamental.
Pick up your needle, bring the thread backward, and see where the line takes you.
