

Hand Embroidery Stitches: Techniques for Outlines, Filling, Decoration, Edges, and More
Hand embroidery is a centuries-old craft, and the reason people still pick up a needle and thread today is simple: it is one of the most satisfying ways to add beauty and intention to fabric. Whether you are decorating a garment, finishing a home textile, repairing a beloved piece of clothing, or simply exploring a new creative skill, the hand embroidery stitches you choose shape everything — the look, the feel, the time it takes, and the result you get.
But with hundreds of embroidery stitches in existence, knowing where to start — or how to expand what you already know — can feel overwhelming. That is exactly what this guide is here to solve.
On Practical Embroidery, stitches are organized into nine categories, each with a distinct purpose. Some draw lines, some build structure along an edge, others fill shapes, and some are purely decorative or do essential work behind the scenes. Certain stitches appear in multiple categories because they serve various uses.
This article introduces all nine categories — what each one does, when to use it, and how it fits into the larger picture of hand embroidery on clothes and home textiles. Each section links to the full category page, where you will find individual stitch guides, tutorials, and projects to take your practice further.
You do not need to learn everything at once. Browse the categories and choose one that fits your current project, or select a suggested project from each category to practice different techniques. These project suggestions help you apply specific stitches in context as you build your embroidery vocabulary.
Outline Stitches
The foundation of drawn designs — lines, curves, lettering, and motif contours

Outline stitches are the backbone of hand embroidery. Before you fill an area with color or texture, before you add decorative detail or structure a border, you almost always start with a line. Outline stitches are what give that line its character — whether crisp and precise, softly rounded, boldly thick, or delicately thin.
Their main job is to follow design contours: the curve of a leaf, the arc of a letter, the edge of a motif. But they also shape the embroidery’s feel. A Stem Stitch adds twist and movement. A Backstitch provides a clean, unbroken edge, like a drawn line. A Chain Stitch creates a bold, textured outline with distinctive rhythm.
When choosing an outline stitch, first consider the line you want to create. Is it sharp or more expressive? Does your design need fine, subtle work or something bold? Fabric matters too! Some stitches will look better on loosely woven linen, others – on tight cotton.
Beginner-friendly stitches
Outline stitches are also the category most beginners start with, and for good reason. They are worked in one direction along a line, they are forgiving of slight irregularities, and they produce visible, satisfying results very quickly. Learning two or three outline stitches well will take you a long way before you ever need to reach for anything more complex.
If you are just starting your hand embroidery journey, these blog posts will help you find beginner project ideas:
- Hand embroidery stitches for outlines – from the most simple to decorative ones
- Basic embroidery stitches for beginners: 18 basic hand embroidery stitches to start stitching like a pro
- Best embroidery stitches. The top 10
Recommended projects to practice outline stitches
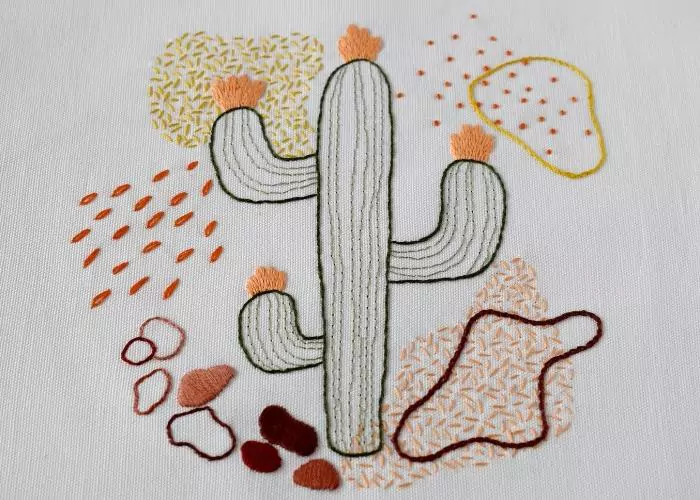
Beginner Embroidery Stitches
+ Free Cactus Hand Embroidery Sampler to Learn Basics
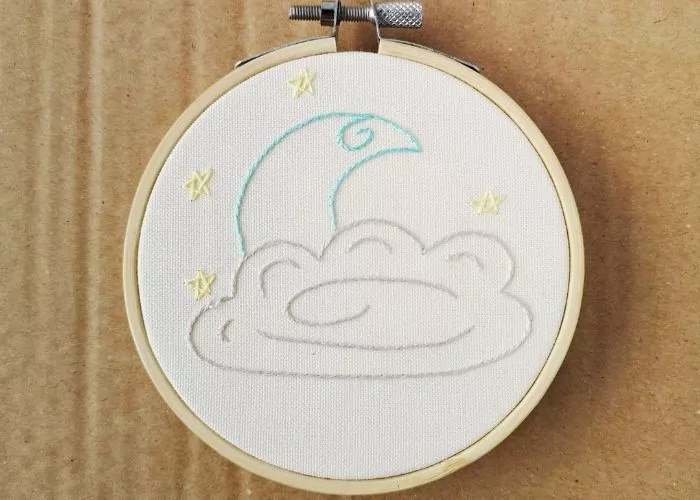
Baby Moon hand embroidery pattern
PDF design with detailed instructions for beginners
Stitches for lettering
Lettering is a natural use for outline stitches. Whether embroidering initials or a phrase, outline stitches let you follow curves and corners precisely.
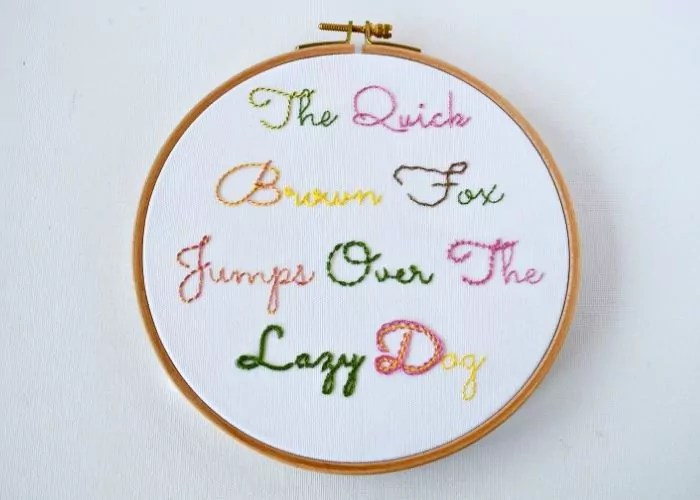
Browse all outline stitches in the Outline Stitches category, or dive deeper into variations of the stitches in these articles:
- Running stitch and its variations
- Backstitch and its variations. Hand embroidery stitches from the Backstitch family
If you’re planning a hand embroidery lettering project, use this example for inspiration and practice stitching with my free sampler – “Stitches For Script Lettering – From Basic to Fancy + Free Sampler and Hand Embroidery Tutorial.”
Border Stitches
Structured stitches that define edges and frame decorative areas

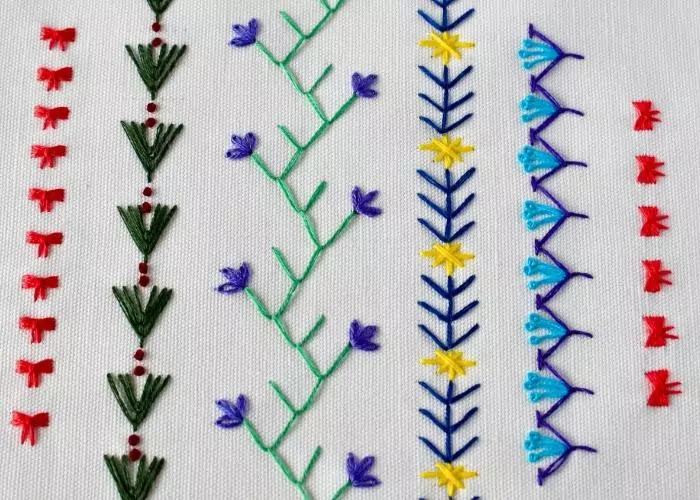
Border stitches hold a special role in hand embroidery. While outline stitches follow a motif, border stitches create their own structure—horizontal bands and patterns running along or dividing fabric edges—focused more on framing than tracing shapes.
On garments, border stitches are among the most practical and striking ones. A border stitch along the hem of a linen shirt, the cuff of a sleeve, or the collar of a jacket turns a plain edge into something intentional. The same applies to home textiles—tablecloths, napkins, pillowcases, and curtain hems. A well-chosen border stitch signals craft and care, showing the maker attended to edges as much as to the center.
Within this category, you will find a wide variety of techniques. Some border stitches create simple decorative lines; others form more complex bands with lacing and weaving.
Borders stitches in practice
You will need more patience and precision to embroider border stitches. Also, you will have to plan them and measure carefully before you begin stitching. But the results — those decorative structures running along an edge — are among the most satisfying in all of hand embroidery.
If you want to deepen your border embroidery skills, select one of these projects with downloadable samplers and practice, or browse all border stitches in the Border Stitches category to find a project that suits your interests.
- Simple Stitches For Borders: Hand Embroidery Tutorial For Beginners
- 14 Chain Stitch Variations For Borders, Outlines, and Decoration
- Blanket Stitch And Its Variations
Recommended project to practice border stitches
Filling Stitches
Covering larger areas with texture, pattern, and color

Once you have an outline, you may want to fill in the shape. Filling stitches are made for this—covering a defined area with thread, creating solid or near-solid color and texture.
The simplest filling stitch is the Satin Stitch: parallel threads laid closely together across a shape, completely covering the fabric beneath. Done well, satin stitch produces a smooth, almost silky surface with a beautiful sheen.
But filling stitches go well beyond Satin Stitch. Long and Short Stitch allows you to blend colors across a shape, moving from one shade to another in a way that mimics the gradation of light on a surface. It is the stitch behind much of the naturalistic shading in traditional crewelwork and is worth learning if you want to give depth and dimension to floral or figural designs. Brick Stitch, Romanian Couching, and Fishbone Stitch each bring their own character to a filled area — different textures, different densities, different visual rhythms.
When choosing a filling stitch, consider fabric coverage and the desired texture. Some stitches give a flat surface; others create a raised effect. Thread weight also affects texture and coverage.
Think about the scale of your shape. A small leaf and a large background often need different filling approaches, even for a solid color.
For project ideas, read the blog post “The Ultimate Guide to Embroidery Stitches for Filling: Master Texture, Coverage & Dimension” for an in-depth look, or browse the Filling Stitches category for more inspiration.
Recommended project to practice filling stitches
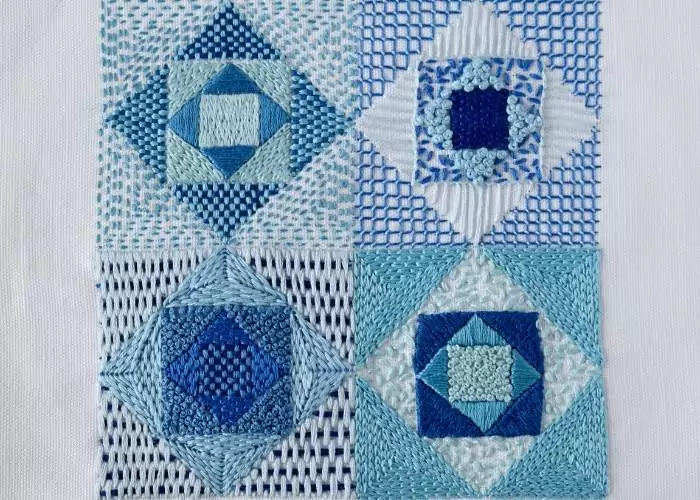
Blue Quilt – Embroidery PDF Pattern
12 Stitches For Filling
Open Filling Stitches
Airy, lattice-like stitches that let the fabric breathe

Not every shape needs to be fully filled. Open filling stitches are a distinct and beautiful category that covers an area with thread while deliberately leaving the fabric visible between the stitches. The result is lighter, airier, and often more interesting than a solid fill — a surface that plays between thread and fabric rather than covering one with the other.
The most familiar open fillings use grids or lattices. You lay down long threads—horizontal, diagonal, or crossed—and anchor them at intersections with small stitches.
Other open fillings are more irregular—scattered stitches cross a shape without a strict geometric structure, letting the fabric show in an organic way. These work well for designs that call for softness and breathing room rather than lattice-like precision.
On lighter fabrics — a fine cotton, a loosely woven linen — open fillings have a delicate, almost ethereal quality. On heavier fabrics like denim or a thicker linen, the contrast between the visible fabric and the stitched thread becomes more graphic and bold. Both effects are worth pursuing; they simply suit different projects and design sensibilities.
Open filling stitches are also useful when you want to suggest texture or pattern across a large area without committing to the considerable thread and time investment of a solid fill. They cover ground efficiently while keeping the work light and the fabric present.
For deeper learning about this category of stitches, read “Open Filling Stitches For Light and Airy Fills in Modern Hand Embroidery” or browse all the stitches in the Open Filling Stitches category.
Recommended project to practice open filling stitches
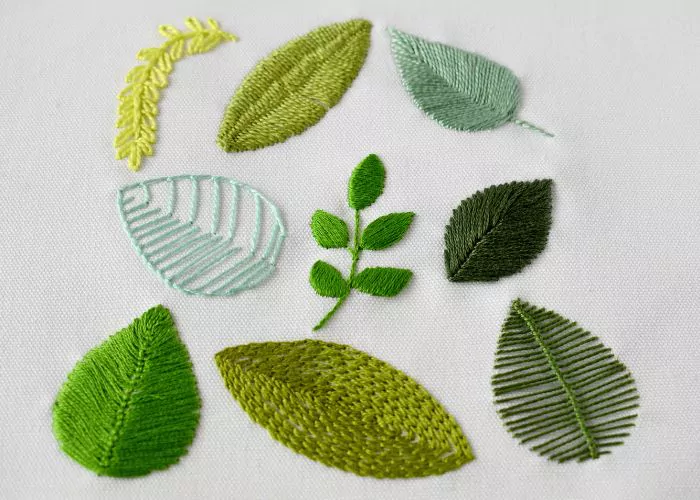
Powdered Fillings
Scattered motif stitches for subtle texture and visual rhythm

Powdered fillings are perhaps the most underappreciated category in hand embroidery. Where solid and open fillings aim to cover or partially cover a defined shape, powdered fillings take a different approach entirely: they scatter small, repeated motifs across an area to create the impression of texture and fill without ever really closing the space.
Think of a ground of tiny Seed Stitches distributed evenly across a background, or small Cross Stitches arranged in a quiet repeat over a large shape. Individually, each element is almost nothing — a few threads, a small mark. Together, they create a surface that reads as textured and considered without being heavy or dense.
The name comes from the idea of something dusted or sprinkled across the fabric, and that image is a useful guide to how powdered fillings work. The density of the scattering — how close together the individual motifs are placed — controls how light or rich the effect feels. A loosely scattered powdering feels delicate and airy; a tighter one is comparable to the density of an open filling.
The individual units in a powdered filling can be almost anything: a single seed stitch, a small Star, a tiny cross, a French Knot, a Detached Chain. Choosing the unit carefully — making sure it relates to the character of the rest of the design — is what separates a thoughtful powdered filling from a random scatter.
Browse all powdered filling stitches in the Powdered Fillings category.
Decorative Stitches
Stitches that are used for their visual impact rather than their structural purpose

Every embroidery stitch is decorative in some sense — that is rather the point. But some stitches exist primarily to be beautiful, to add surface interest, to create a visual accent that lifts a piece beyond the functional. These are what we might call decorative stitches proper: stitches chosen for what they look like rather than for their structural role.
This category includes some of the most distinctive and recognizable stitches in the embroiderer’s vocabulary. The French Knot — a tiny raised dot of thread — is one of the most versatile, great as an eye in a small animal, a center of a flower, or a part of composite stitches. The Bullion Knot takes the same principle further, wrapping the thread into a longer, tubular coil that can stand almost free of the fabric surface. Woven Picots, Cast-on stitches, Detached Buttonhole fillings — these are stitches that create three-dimensional texture and structure on the surface of the fabric.
On garments and home textiles, decorative stitches are particularly effective as finishing details: a scattering of French knots along a collar, a bullion rose on a cuff, a repeat of fly stitches down the front placket of a shirt. Decorative stitches are often combined with other categories rather than used alone.
For a deeper dive into decorative stitches, check out these tutorials or browse all decorative stitches in the Decorative Stitches category.
- Six Bullion stitch flowers. Step-by-step hand embroidery guide
- How to Embroider Stars and Sparkles: Hand Embroidery Stitches + Free Sampler Download
- Beginner Flower Embroidery: Hand Embroidery Tutorial & Free PDF Pattern Download
Recommended project to practice decorative stitches
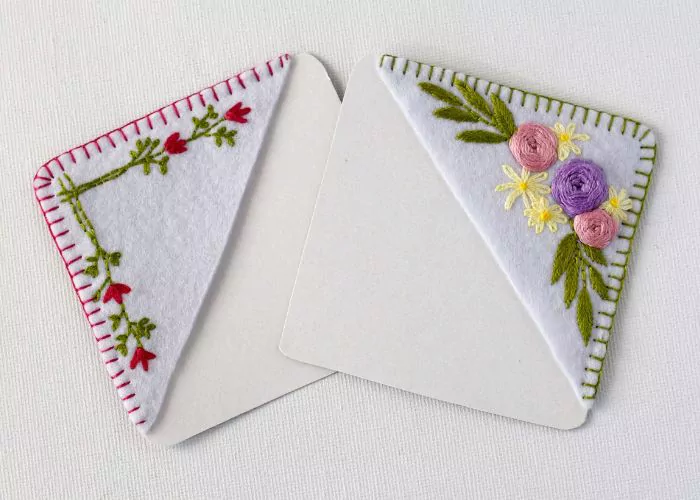
Stitches for Edging
Finishing raw edges and adding decorative borders to fabric

Edging stitches occupy the point where embroidery meets practical needlework. Their primary job is to finish the raw edge of a piece of fabric — to prevent fraying, to define the boundary of the work, and to do both in a way that is itself beautiful.
The distinction between edging and bordering is worth clarifying. Border stitches (covered earlier) run along the surface of the fabric, parallel to an edge but not necessarily at it. Edging stitches work directly along the edge, enclosing the fabric’s raw threads within the stitch structure. Buttonhole Stitch and Blanket Stitch are the most familiar examples — both loop around the edge of the fabric, binding it and decorating it simultaneously. Worked in a single color, they produce a clean, even finish; worked in multiple colors or with variations in stitch length, they become genuinely decorative.
Decorative or functional?
Edging stitches are particularly important for embroidered patches and appliqué, where a raw edge left unfinished will quickly fray in use and washing. On a patch embroidered on denim or linen, a well-worked buttonhole edge in a contrasting thread can become as much a design element as the embroidery it surrounds.
For home textiles — the edges of napkins, the border of a tray cloth, the hem of a pillowcase — edging stitches like Hem Stitch offer an alternative to hemming. Rather than folding and stitching the edge to the back, you can finish it on the front with an embroidery stitch that shows. This is a slower process than machine hemming, but it produces a genuine handmade quality.
Thread choice matters significantly for edging stitches. A thicker thread or a heavier embroidery floss will cover the raw edge more securely and produce a bolder visual effect. A finer thread requires more passes to fully cover the edge, but allows for more delicate results on lightweight fabrics.
To learn more about this category of stitches, read these articles or browse all stitches for edging in the Stitches for Edging category.
- Embroidery Stitches For Edges: From Functional To Decorative Edging
- Blanket Stitch Edging: 19 Decorative Embroidery Techniques For Securing and Decorating Edges
Stitches for Mending
Functional embroidery that repairs and reinforces fabric

Mending is one of the oldest forms of needlework, and in recent years it has found a new audience among embroiderers who see repair not as something to hide but as an opportunity to add character and intention to a well-used garment or textile. Stitches for mending sit at the intersection of function and decoration — they must work structurally to reinforce or close damaged fabric, but they can do so in a way that is openly beautiful.
The most fundamental mending stitch is the Running Stitch, worked in rows across a weakened area to reinforce the fabric before it breaks down further, or to attach a patch. This is the basis of Sashiko, the Japanese tradition of functional stitching, in which geometric patterns are worked with running stitch across fabric to both strengthen it and create surface decoration. You do not have to work in a Japanese tradition to use the same principle — reinforcing a thin elbow or a worn knee with a grid of running stitches is as practical as it is attractive.
Another popular technique for closing holes or tears is darning. Woven darning rebuilds the fabric’s structure, interlacing threads across a hole to reconstruct something close to the original weave. Done carefully and with a matching thread, a darn can be nearly invisible. Done with a contrasting thread, it becomes a visible repair.
To learn more about embroidery stitches for mending, and how to use them, browse all the stitches in the Stitches for Mending category or read these blog posts and tutorials:
- Hand embroidery stitches for mending
- Embroidery Mending Basics: Beginner’s Guide to Sustainable Wardrobe
- Visible Mending Ideas, Techniques and Inspiration to Transform Your Clothes
- Hand embroidery for mending. Decorative mending techniques and stitches
Recommended project to practice visible mending

Mending knitwear
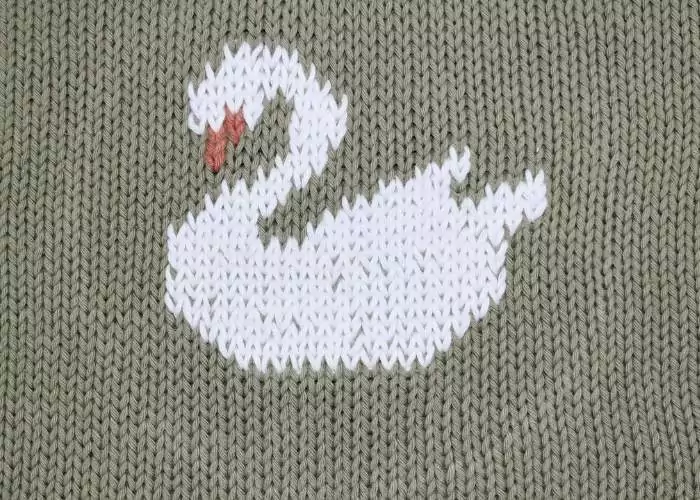
While darning works great for woven fabrics, stretchy knitwear has its own requirements for stitches. Swiss Darning, or Duplicate Stitch, works great on knits — it is used to repair knitted fabric by replicating the knit stitch structure on the surface of the textile, rebuilding the appearance of the original fabric one loop at a time.
Beyond repair, mending stitches also include reinforcement techniques: small patches secured with buttonhole or blanket stitch, embroidered reinforcements at points of stress such as pocket corners and button placements, and running stitch foundations worked before a garment shows wear.
Have a sweater to mend? Take a look at these guides and tutorials for inspiration and guidance:
- Visible Mending Knitwear: A Creative and Sustainable Approach
- How to Mend Holes in Sweaters: Four Easy Darning Stitches for Knitwear Repair
Recommended project to practice mending knitwear
Stitches for Hand Sewing
Essential needlework stitches every embroiderer should know

Hand embroidery and hand sewing are related crafts, and the line between them is often blurry. Stitches for hand sewing are the practical, structural stitches that hold fabric together, secure hems, attach fastenings, and prepare fabric for further work. They are not decorative in the way embroidery stitches are — their purpose is to function reliably and, in most cases, to remain invisible. But every embroiderer benefits from knowing them.
The Running Stitch is the most basic — a simple in-and-out stitch used for basting, gathering, and light seaming. The Backstitch is its stronger counterpart, producing a continuous line of thread on the front of the fabric that can securely hold a seam. The Slip Stitch and Ladder Stitch are used to close openings and invisibly attach folded edges. The Catch Stitch secures hems while allowing some fabric flexibility — useful on garments where a rigid hem would pull and distort.
Knowing these stitches also makes you a more versatile needleworker. Many embroidery projects involve construction as well as decoration. For example making a small embroidered pouch, attaching an embroidered panel to a cushion cover, hemming a piece of linen before working a border along its edge. The embroidery may be the visible, celebrated part of the work, but it is the hand-sewing underneath that holds the whole thing together.
Browse all stitches for hand sewing in the Stitches for Hand Sewing category.
How to Choose the Right Stitch
With nine categories and hundreds of individual stitches to choose from, the question of where to start is a real one. The good news is that you rarely need to survey the entire landscape — you just need to answer a few practical questions about the project in front of you.
Start with purpose
What does this stitch need to do? If you are tracing the outline of a motif, you need an outline stitch. For finishing a raw edge, you need an edging stitch. If you are filling a leaf or a petal, you need a filling stitch. Most projects will draw from two or three categories at most, and identifying the purpose of each area narrows your options immediately.
Consider your fabric
A loosely woven linen behaves very differently from a tight cotton or a piece of denim. Some stitches anchor cleanly on open weaves; others need a firmer ground. Drawn thread techniques require an evenweave fabric. Edging stitches on a heavy fabric require a thicker thread to secure the edge. Always let the fabric guide your stitch choice as much as the design does.
Think about the effect you want
Do you want the thread to dominate, or the fabric to show through? What texture and dimension you aim for? A solid filling stitch completely covers; an open filling shows some fabric beneath; and a powdered filling adds texture and pattern to the fabric. There is no right answer — only the answer that suits this particular piece.
Match the stitch to your time and skill level
Some stitches are genuinely quick; others demand patience and precision. If you are new to a technique, work a small sample on a scrap of the same fabric before committing to the final piece. A little practice at the beginning saves a lot of unpicking later.
And when in doubt, keep it simple. A well-executed Running Stitch or Backstitch will always look better than a more ambitious stitch worked uncertainly. Confidence comes with repetition, and the best way to build a stitch vocabulary is to use each stitch until it feels natural — then reach for the next one.
Over to you
Hand embroidery is a broad craft, but you do not need to master all of it to do beautiful work. You need the right stitch at the right moment — and the nine categories in this guide give you a map to find it.
Whether you are just beginning and looking for your first outline stitch, or a more experienced embroiderer wanting to explore border techniques or visible mending, the category pages linked throughout this article are your starting point. Each one contains individual stitch guides, tutorials, and projects designed to take you from understanding a stitch to actually using it.
If you are not sure where to begin, start with what you have in front of you: a garment that needs a decorative hem, a piece of linen waiting for a border, a worn elbow that deserves a visible repair. Recommended projects offer another starting point for learning and practicing. Let the project lead you to the stitch, not the other way around.
Browse the categories, pick a stitch, and start stitching.
