

Embroidery Stitches For Beginners: Simple Techniques To Start Embroidering Today
Hand embroidery is a fascinating craft to learn. Needlework is a calming, relaxing hobby, but it can also be productive and practical. In my biased opinion, hand embroidery is a perfectly balanced manual activity with great benefits to our mental health. And the best part? It’s really easy to start. You learn a few basic embroidery stitches for beginners, choose a simple design, and are ready to go.
Later, after some practice and gained experience, you will learn new techniques and stitches and will go deeper into complex designs, but for now, just start!
Getting started
Tools and materials
One of the great qualities of hand embroidery is that it requires really just a few inexpensive tools to start: a piece of cloth, a needle, a thread, a hoop, and a pen to draw your design.
If you do not have these materials on hand and plan on shopping for them, read these articles on my blog to learn more about the appropriate tools and materials for beginners:
- Hand Embroidery Tools — What Do You Actually Need?
- Embroidery materials for beginners. All you need to start learning hand embroidery.
- My Favorite Hand Embroidery Supplies
Or download my free PDF checklist “Embroidery Supplies to Start Stitching” below:
The first stitch

Another question many new stitchers have before they even learn a few embroidery stitches for beginners is how to make that first stitch that will hold the thread in the fabric. Should you make a knot or not? And how to make a knot that will hold?
If you researched this topic, you will know that the hand embroidery world is divided: some swear by a zero-knot policy in their stitching. Others do not care at all and use every knot in the book to start their embroidery.
In my opinion, a knot is not a pleasant sight, and it does not guarantee the security I wish for. On the other hand, it’s not a crime to use it, especially in the samplers when you are learning your first stitches.
For the starting and finishing techniques and my take on the back side of embroidery, read these articles:
The easiest embroidery stitch to start with
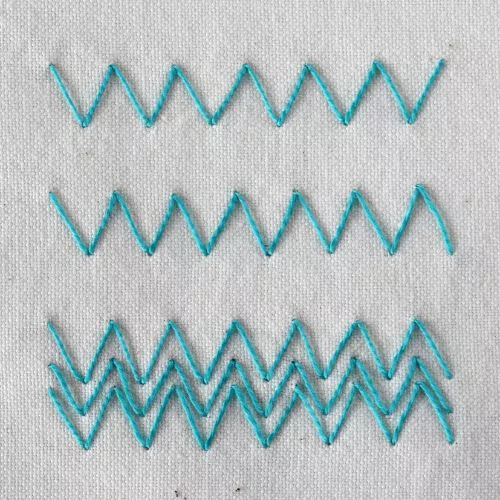
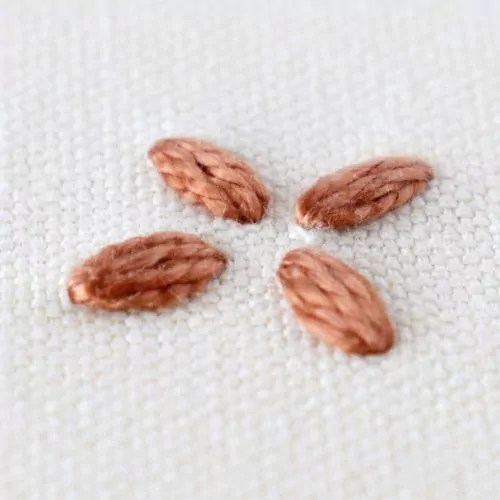
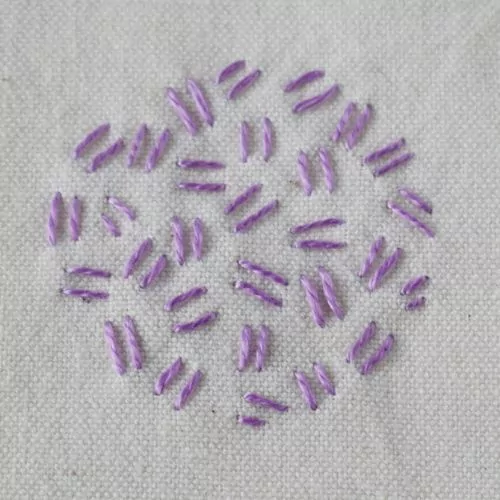
The easiest hand embroidery stitch to learn is the Straight Stitch, which every beginner should start with: hold the needle up to the surface and push it back down to the fabric a small distance away. That’s it!


If you think this stitch is useless, I assure you it’s not. This super simple technique can create wonderful geometric patterns and designs. All these stitches below are made with the same Straight Stitch technique:
Five basic embroidery stitches for beginners
The Straight Stitch is simple and versatile, but of course, just one stitch is not enough for hand embroidery designs you will want to stitch. So, I selected five more hand embroidery stitches that are beginner-friendly and versatile.
Running Stitch
The Running Stitch is the basic stitch of hand embroidery, on which all other forms of sewing are based. The stitch is worked by passing the needle in and out of the fabric in a linear direction. The needle is continuously pushed through the cloth, starting on one side and ending on the other side.
Learn this embroidery stitch suitable for beginners, and you will be able to stitch basic designs, use hand embroidery to mend and to embellish clothes, and build a strong foundation for further learning.


Back Stitch
Back Stitch (or Backstitch) is one of the first techniques to learn when you begin to embroider. It has a vital role in hand embroidery. As the name suggests, it’s made opposite to the general direction of sewing. This hand embroidery technique forms continuous lines, and we mainly use it to outline shapes and add fine detail to an embroidered picture. Besides that, this technique is also great for embroidering lettering.
You can work this embroidery technique in straight and curved lines. Stitches of different lengths will allow you to make even the most minor and most detailed curves.
Both the sewing and stabbing methods work well for this embroidery stitch. It’s often used as a base for composite patterns.


Chain Stitch
Chain Stitch is a beginner-friendly embroidery technique in which a series of looped stitches forms a chain-like pattern.
This simple hand embroidery stitch is great for outlining, filling, lettering, border designs, and as part of other composite stitches, such as the Tulip Stitch, Heart Chain Stitch, or the Wheatear Stitch. In addition, this technique is very handy when embroidering flowing, curvy lines.
Also, you can make detached stitches and embroider Lazy Daisy Stitch flowers or make Detached Chain Stitch filling.
Did you know that you can embroider Chain Stitch in two different ways? You can make regular and Reverse Chain Stitch. Try them both and choose your favorite, or use both, since it’s sometimes convenient to switch from one to the other.


Stem Stitch
The Stem Stitch forms a rope-like line and is one of the embroidery stitches for beginners I recommend learning at the beginning of your stitching journey.
This stitch is widely used in modern surface embroidery as it is decorative and versatile. Stem Stitch is handy for outlines, curves, waves, or tiny circles. Also, the stem stitch works well as an outline for the satin stitch. Besides that, you can use it for filling too.


Satin Stitch
Satin Stitch, also known as Damask stitch, is a hand embroidery technique for filling, worked in close, parallel rows. It is widely used in many hand embroidery styles and has a long history. Besides that, it is a common needlework tradition worldwide.
The stitch is worked by carrying the thread across the shape to be filled and returning it beneath the material next to the previously made stitch. The stitches may be performed in any direction, and they may vary in size, for example, when filling in a leaf shape.
I added Satin Stitch to this list of embroidery stitches for beginners because you will need it for almost every hand embroidery pattern you will choose online – so popular it is. It is considered a filler stitch, but be careful to use it only for small filling areas, as larger satin stitches tend to loosen.


Best way to learn hand embroidery: Stitch a sampler!
“Practice makes perfect.” — Benjamin Franklin
And the best way to practice hand embroidery is to stitch a sampler! You can draw a few lines on the fabric and embroider them with the stitches you would like to learn first.
If you are up to more guided hand embroidery practice, I have a couple of options:
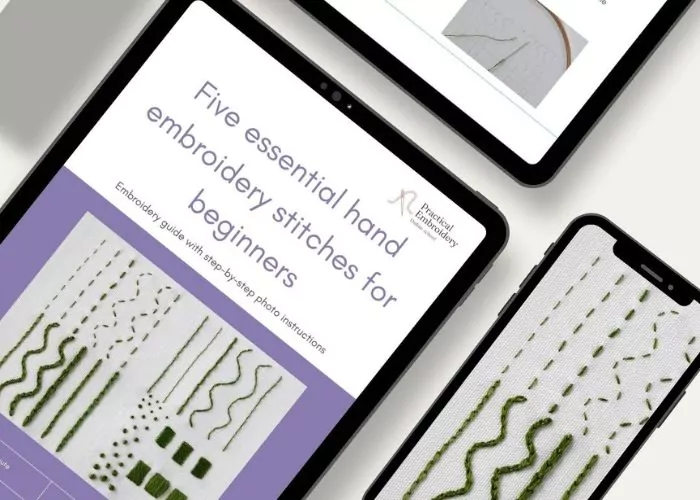
Free E-book: Five Essential Hand Embroidery Stitches For Beginners
This detailed hand embroidery guide with step-by-step photo instructions will help you make your first stitches. This way, you will be ready to stitch more complex and fun projects in the future!
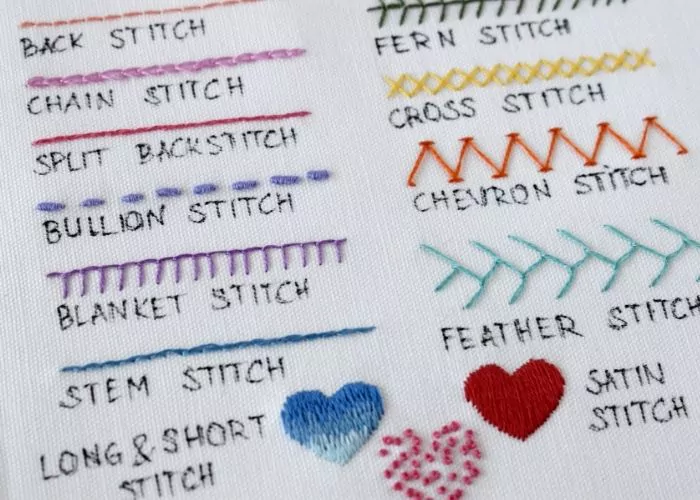
Basic embroidery stitches for beginners
This blog post will guide you through learning 18 basic hand embroidery stitches. To support your learning, I created a free sampler with all 18 stitches so you can practice at your own pace. And to make learning embroidery stitches even easier, I filmed a video tutorial. This video shows how to complete each stitch step by step, providing visual guidance as you follow along.
Want to level up?
If you already know how to make basic embroidery stitches for beginners from this list, you can level up these techniques with simple add-ons- whipping and threading.
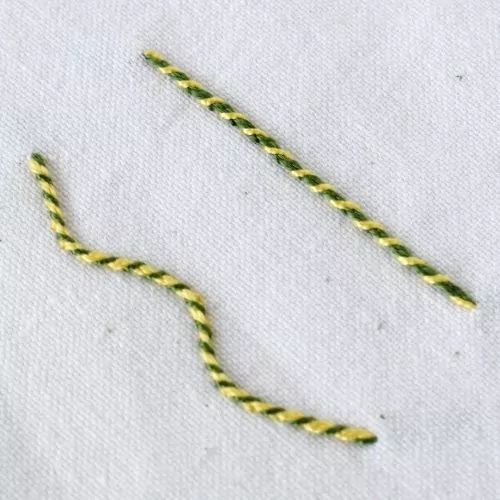
Whipped stitches
Whipping is a technique where you use the second thread to add a layer to the base stitch. The whipping does not pierce the fabric and is always wrapped in the same direction.
Whipped stitches are more raised and textural than their base stitch. Whipping is used to add texture or color to the basic stitch.
Try to add whipping to the basic stitches you just learned:
- Whipped Back Stitch
- Stem Stitch – Whipped
- Whipped Satin Stitch
- Whipped Chain Stitch
- Running Stitch – Whipped


Threaded and looped stitches
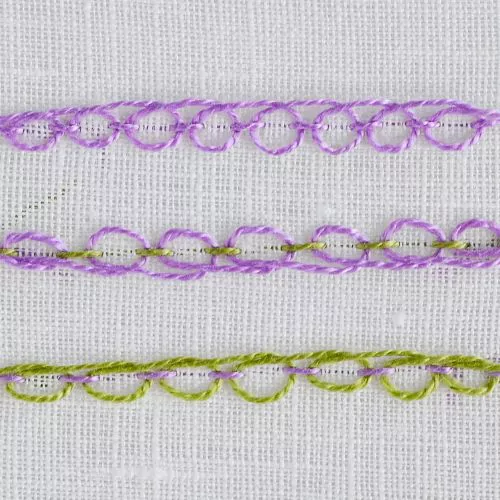
Threading and looping are other methods to level up basic embroidery techniques. This time, additional thread is used to give more horizontal volume to the stitches. To add threading, double threading, or looping to the stitch, pass the needle under the base stitch, back and forth or in loops. The threading does not pierce the fabric; it also does not wrap the stitches above them but passes under. You can try threading and looping the basic stitches you just learned:
- Threaded Running Stitch
- Threaded Back Stitch
- Double Threaded Back Stitch
- Pekinese Stitch
- Threaded Lazy Daisy Stitch
- Looped Running Stitch
- Interlaced Chain Stitch


Over to you
Getting started with hand embroidery is really simple – gather basic tools and materials and learn a few stitches. That’s it!
In this article, I listed techniques and embroidery stitches for beginners that will set you on the right learning path. I selected the list from the basic Straight Stitch, which will create a base for all the techniques, to Satin Stitch for dense fillings, with some techniques in between.
It might look too simplified, and you might think that you can’t stitch anything with just five stitches, but trust me – hand embroidery is really that simple!
More guides for beginners on this Blog

Back Stitch 101: The Complete Beginner’s Guide to Flawless Outlines and Lettering

Beginner Embroidery Stitches + Free Cactus Hand Embroidery Sampler To Learn Basics

Hand Embroidery Basics: A Beginner’s Guide to Needlework

Love it. Thank you!!
Kind regards from Argentina