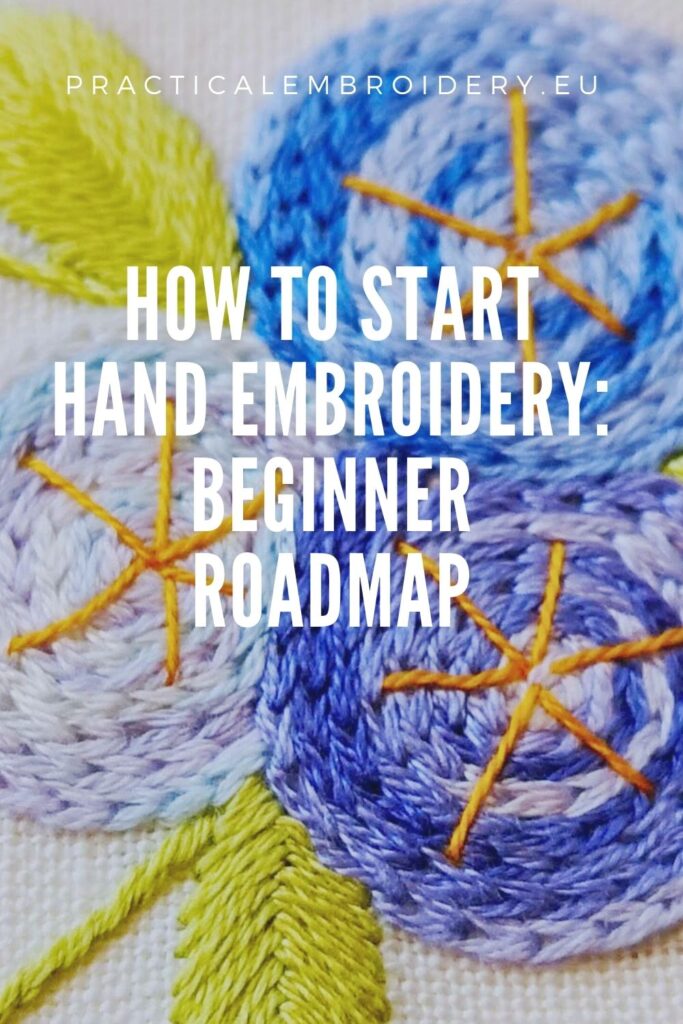
How to Start Hand Embroidery: Beginner Roadmap
A complete beginner’s guide to hand embroidery
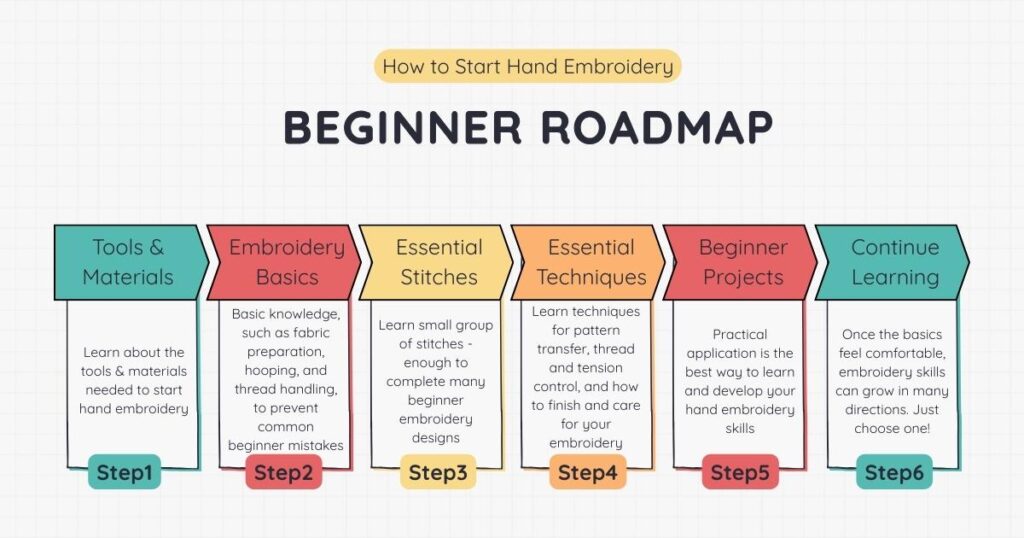
Hand embroidery is a relaxing and creative craft that can be learned at any pace. This beginner roadmap shows exactly where to start, what to learn first, and how to progress from basic stitches to finished projects — without confusion or unnecessary tools.
This page is structured as a learning path. Each step includes links to detailed tutorials and free resources available on this blog. Follow the steps in order, or return at any time to refresh specific skills.
How to use this roadmap
This roadmap is designed as a progression:
- Learn what tools and materials are needed
- Understand embroidery basics
- Practice essential stitches
- Learn useful techniques
- Apply skills in beginner projects
- Continue learning with confidence
Each section builds on the previous one.
Step 1: Tools & materials needed to start hand embroidery
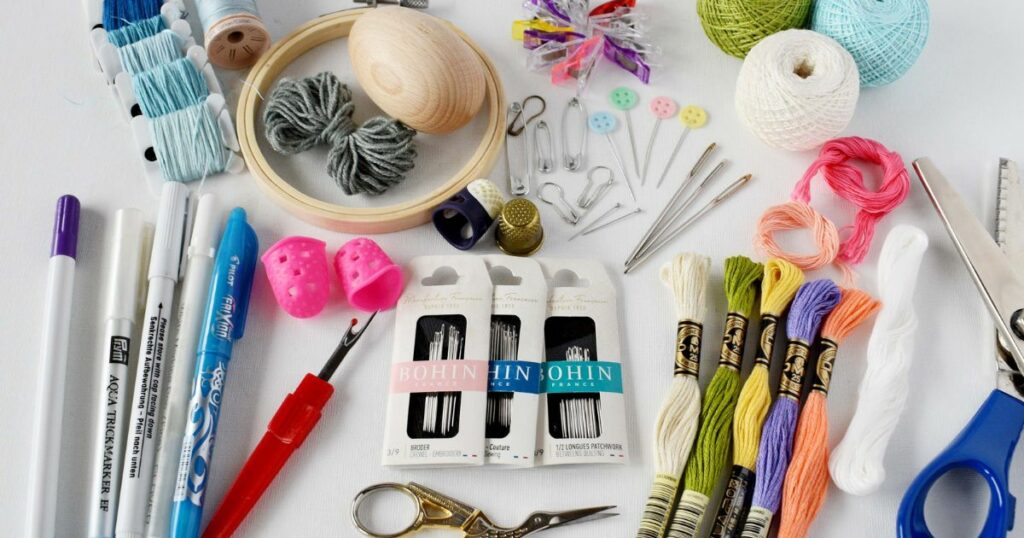
Hand embroidery requires only a few basic tools. Starting with simple, good-quality materials makes learning easier and more enjoyable.
Essential embroidery supplies:
- Fabric suitable for hand embroidery. Opt for even weave, medium-weight fabric from natural fibers, like cotton-linen blend, in light colors.
- Embroidery floss. Start with a few skeins of high-quality cotton thread designed for hand embroidery.
- Needles. Get a discovery pack of sharp crewel needles of various sizes.
- Embroidery hoop. Choose a medium-sized hoop with a tension screw that holds fabric tightly.
- Small, sharp scissors.
- Fabric marking tools. Water-soluble or heat-erasable pens are the easiest to use options for beginners.
Optional but helpful tools & accessories:
- Needle threader.
- Storage for threads. A plastic box, a small project bag, or even a plastic envelope will do for now.
- Needle storage. Pin cushion, needle book, or needle minder, to keep your needles sharp and safe.

If you wish to have a list of embroidery supplies to start stitching on hand, download a PDF checklist of embroidery tools and materials for beginners with pictures.
More about tools and materials on this blog:
- Hand Embroidery Supplies. My Favorite Tools and Materials for Hand Embroidery
- Embroidery Materials For Beginners. All You Need To Start Learning Hand Embroidery
- An In-Depth Guide to Hand Embroidery Fabrics
- Embroidery Floss and Threads: An In-Depth Guide
- Best Hand Embroidery Hoops for Modern Stitching
- Hand Embroidery Needles: The Ultimate Guide to Choosing the Right One
- Scissors For Hand Embroidery
Step 2: Learn the basics of hand embroidery
Before learning hand embroidery stitches, it helps to understand how embroidery works. Basic knowledge, such as fabric preparation, hooping, and thread handling, prevents common beginner mistakes.
How embroidery hoops work
A hand embroidery hoop is a simple tool that helps maintain fabric tension while you work.
To reap all the benefits of using the hoop, learn how to use it correctly. Constant tension of the fabric will ensure your stitches lie nicely close to the surface and do not snag or distort the fabric. Therefore, pay extra attention when you place the fabric in the hoop:
- Place the fabric between the inner and outer rings of the hoop.
- Push the outer ring on the inner ring and adjust the fabric so it stays centered in the hoop and not distorted.
- Tighten the screw to secure the fabric, while adjusting the tension as you go.
- Use a screwdriver to get the best tension. The fabric has to stay drum tight in the hoop.
TIP: Take the embroidery out of the hoop when you take a break for a few days, or leave it overnight. If you keep the fabric in the hoop for prolonged periods, it may distort the fabric and leave permanent marks.
How to prepare fabric
Check if your fabric is not stretchy or too loosely woven. In these cases, you will need a fabric stabilizer to proceed.
It is best to choose a medium-weight fabric with an even, dense weave. This will make your stitching experience much better.
Make sure that the fabric is clean and ironed. It is a good practice to wash new fabric to prevent shrinkage in the future. Also, it’s much easier to transfer the pattern onto an ironed piece of fabric. Invest a few minutes of your time upfront, and it will pay off in the future!
How to choose the thread
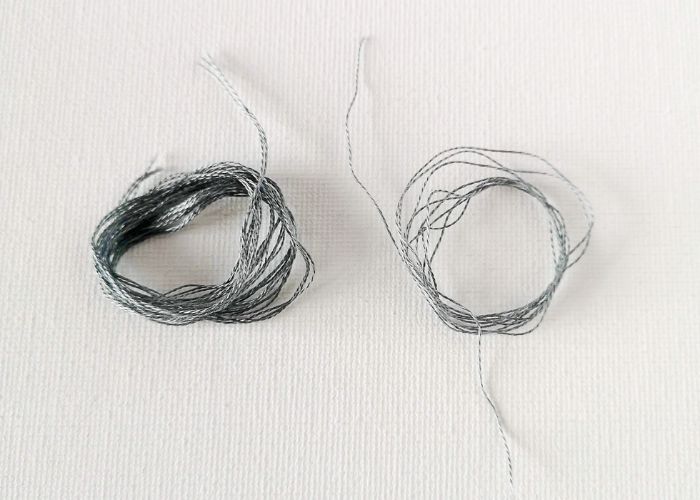
You have probably noticed that hand embroidery floss is a divisible thread made of six strands. You can use any number of strands in the needle for your project.
How to choose the number of strands?
- What does the pattern say? If you plan to follow the pattern, the designer usually indicates the number of strands used in the design.
- How thick is your fabric? The thicker the fabric, the more strands of the thread it can hold, and vice versa. Use all six strands of the fabric on thicker, sturdier materials like canvas and 2-3 strands for medium-weight fabrics. Embroidery with one strand of thread will look great on light, semi-transparent materials.
- What is your creative vision? If you aim for bold, edgy statement embroidery, opt for more strands and use thinner threads for more delicate, detailed designs.
- How detailed is the design? Embroidery designs with smaller, more elaborate details will require fewer strands of thread. It is rather difficult to achieve detailed results with bulk threads.
- What is the size of the embroidery? The smaller the design, the thinner the thread you should use.
How to thread a needle
Hand embroidery needles have a relatively large, long hole; threading the needle should not be an issue.
If you find it hard to thread your needle, try this:
- Check the size of the needle. It may be too small for your thread. For all 6 strands, I recommend using needles in sizes 1-3, size 5 for 3-4 strands, No. 7 for 2-3 strands, and No. 9 for a single strand.
- Do not wet the thread tip! Floss absorbs moisture and becomes bulkier, making it harder to put into the needle. Instead, slide the thread through your fingers to flatten it and then cut the tip at the angle with sharp scissors. This will create a sharp tip that is easy to put in the needle.
- Use a needle threader. This small accessory might be a great help if you often struggle to thread your needles.
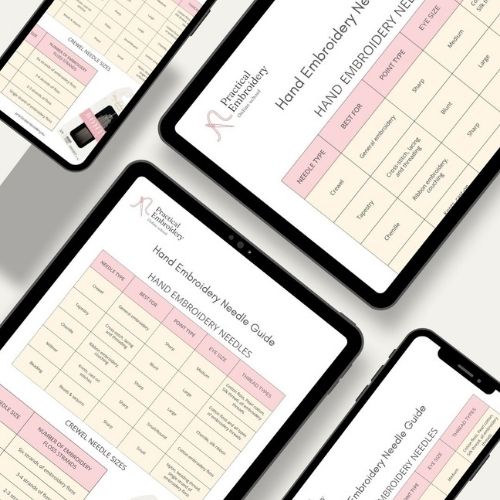
Download this free Hand embroidery Needle Guide – Types and Sizes, so you always know which size of the needle to use.
How to start and end stitches neatly
There are various methods available to start and end hand embroidery stitches – from the simple knot at the end of the thread to the holding stitches or the folded thread method.
Starting to stitch with a knot on the back of the fabric is a straightforward method that most hand embroidery beginners know. Even if the knots on the back of the material are not appreciated, one can still use them if the back side of the embroidery art will not be visible. I use this method for the stitch samplers and testing pieces. But I recommend avoiding this method of starting to stitch if you plan to embroider on garments, home textiles, or pieces that will need to be framed later.
Read a detailed guide “How to start and end embroidery stitches” or take a look at this video tutorial and choose the method you like the most!
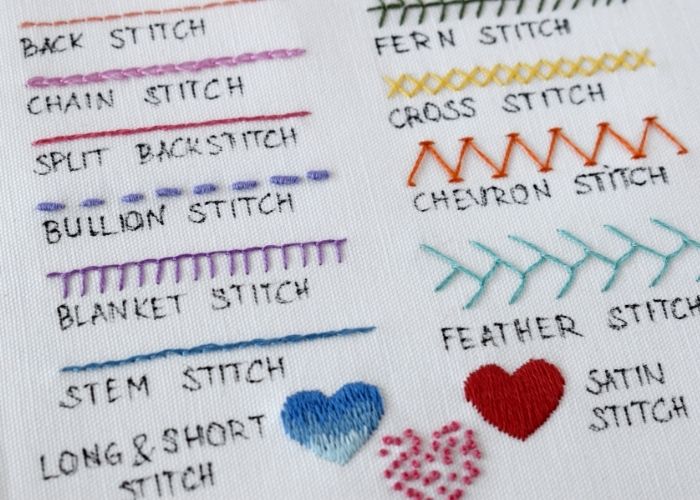
Step 3: Learn essential embroidery stitches
There are hundreds of hand embroidery stitches developed over time in various regions and used in different embroidery styles. Despite that, a small group of stitches is enough to complete many beginner embroidery designs. Mastering these stitches builds confidence and muscle memory.
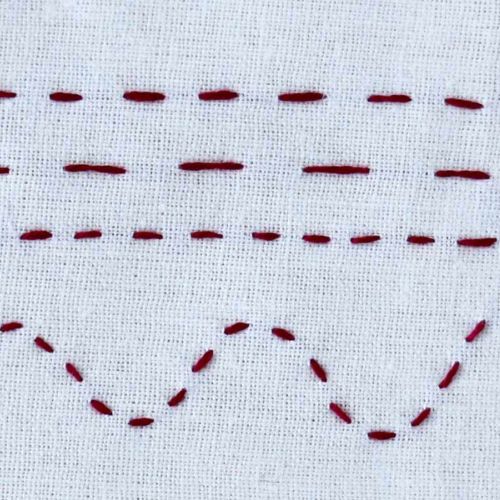
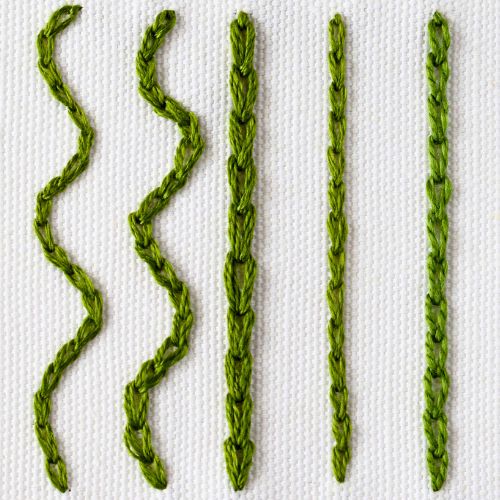
Outline stitches
Outline stitches are embroidery techniques used to define the edges of a design or to emphasize specific shapes within a motif. They create clear, continuous lines that frame an area, which can then be embellished with filling stitches or additional decorative techniques. Also, you can use the stitches from this group for embroidering letters.
Start with these three stitches:

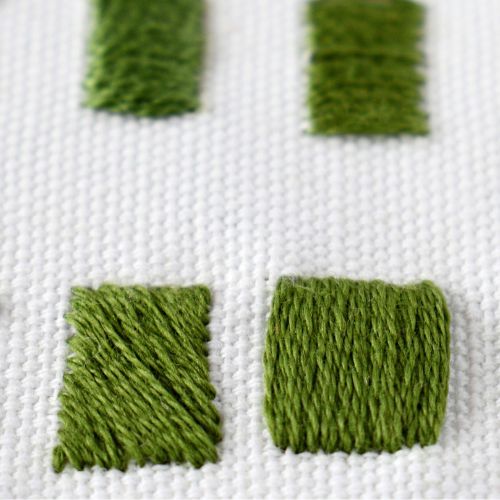
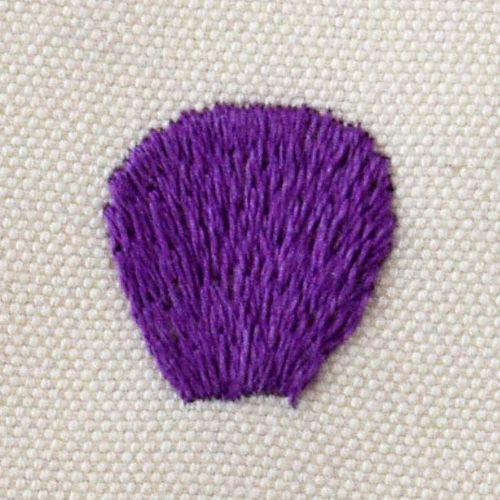
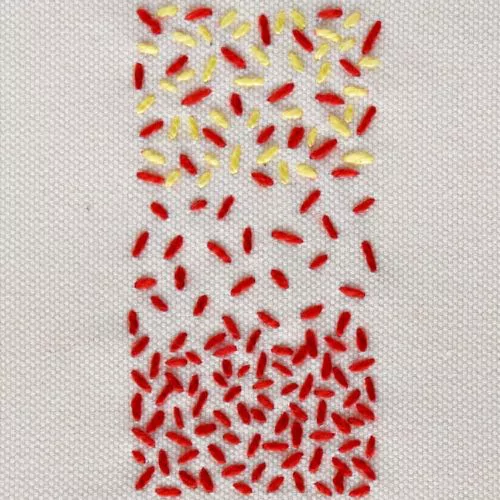
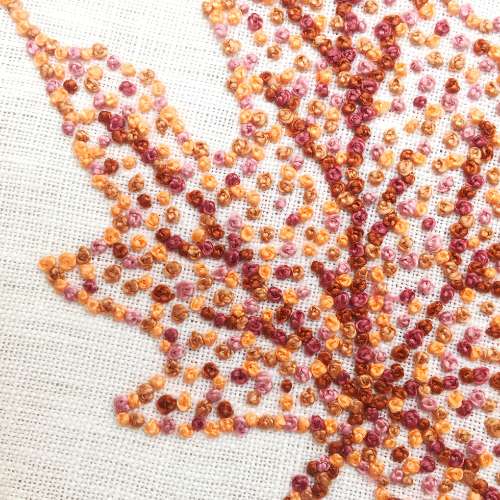
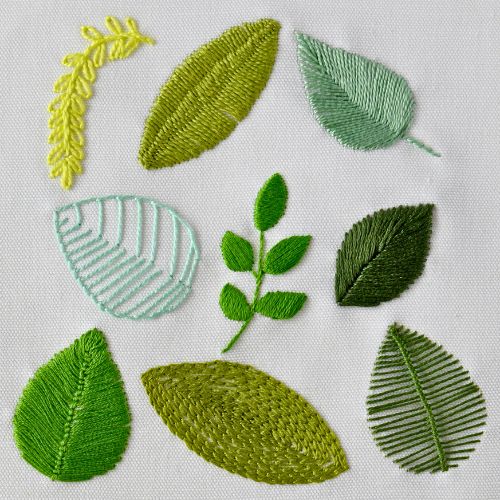
Filling stitches
Stitches for filling are hand embroidery techniques used to cover areas of a design. Filling stitches can be further classified into fully covering, open filling, and powdered fillings. Each group has its own tasks in modern surface embroidery.
To start, learn these three filling techniques:
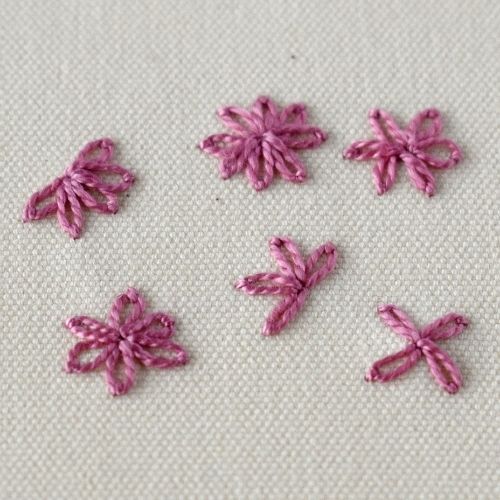
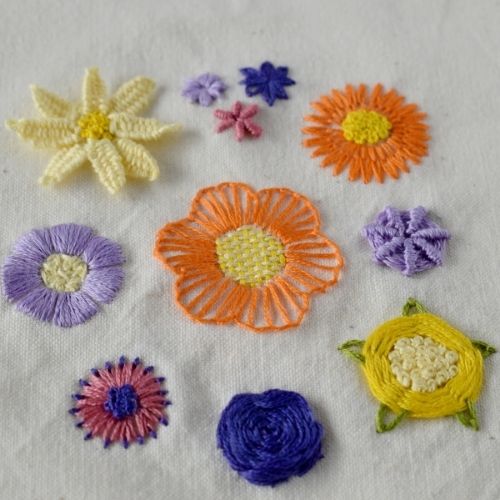
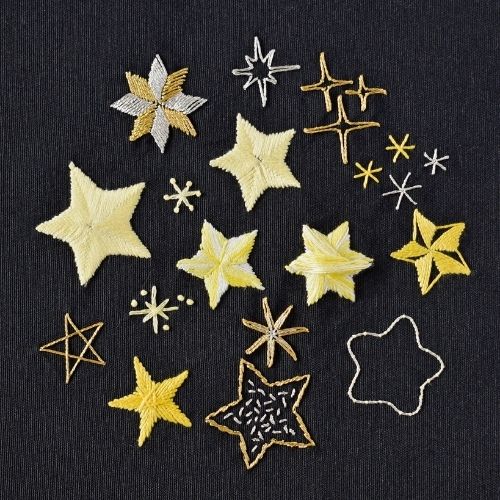
Decorative & accent stitches
Decorative stitches are embellishment hand-embroidery techniques used to add visual interest, texture, and artistic detail to a design. Some are subtle and easy to learn, others are bold and more complex.
Start with these three techniques to decorate your designs:
Practice basic hand embroidery stitches
The best way to learn hand embroidery stitches is to practice while stitching a sampler. These projects are created with beginners in mind, so you can choose your favorite way of learning and learn at your own pace.
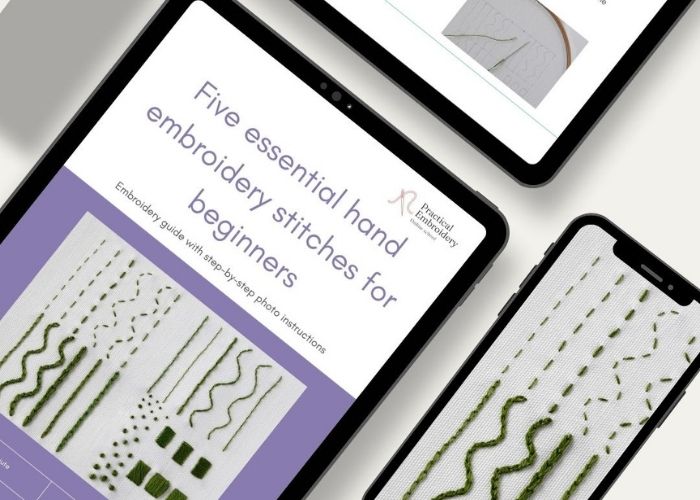
Five essential hand embroidery stitches for beginners
This free detailed hand embroidery e-book with step-by-step photo instructions will help you make your first stitches.
The top 10 hand embroidery stitches to learn
This free online course teaches the 10 essential stitches you need to start embroidering. These 10 basic hand embroidery stitches will guide you on your hand embroidery journey and lay great foundations for further learning.
Basic embroidery stitches for beginners
Sampler, video guide and tutorial to learn 18 basic hand embroidery stitches and start stitching like a pro.
Step 4: Learn essential techniques
Before you jump into the practical part of hand embroidery, you should learn some techniques that are not stitches but greatly improve results. Learning them early prevents frustration later.
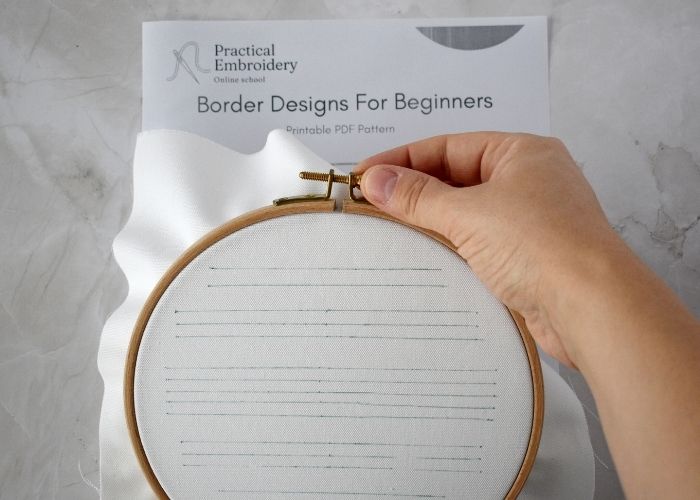
Pattern transfer methods
Before you start any embroidery project that is not freehand stitching on the fabric, you will need to mark your fabric for the stitches you want to make. It can be a straight line or two for a border or a detailed pattern. Both cases will require choosing a suitable tracing tool and pattern transfer method.
Since hand embroidery is an ancient craft widely practiced across cultures and countries, multiple methods for tracing patterns on fabric have been developed. In my hand embroidery practice, I mostly use five methods for embroidery pattern transfer:
- Pattern transfer with water-soluble stabilizer
- Iron-on design transfers
- Pattern tracing (aka lightbox method)
- Design transfer with embroidery transfer paper
- Pattern transfer with tissue paper
Each of these methods has its cons and pros:
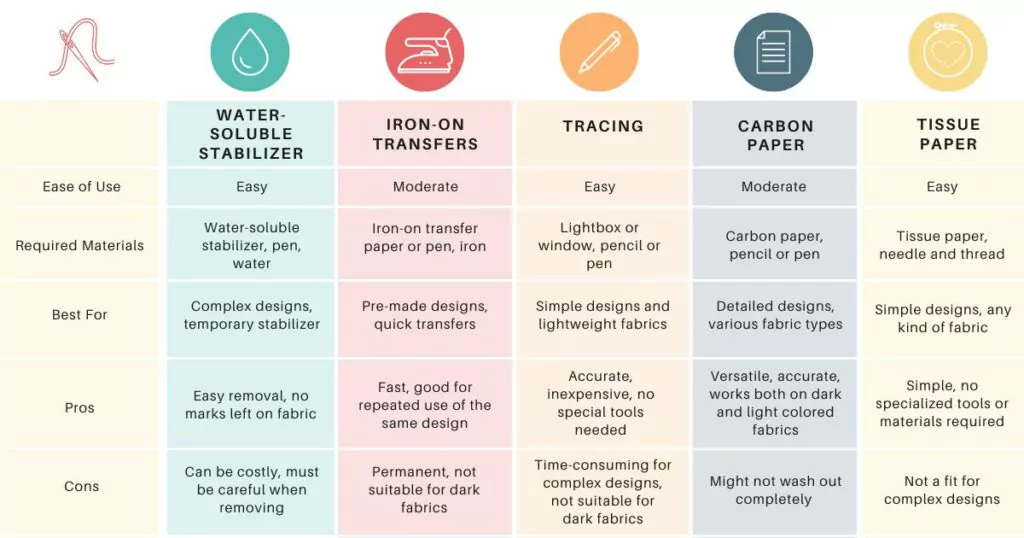
There are more than just these five methods, and a wide variety of tools for tracing patterns on fabric. But these five are the simplest and most affordable ways to transfer your design to the fabric and start stitching immediately.
The tracing tools I use most are a water-soluble pen and a heat-erasable pen. Both are widely available and affordable options.
Thread & tension control
Knotted, tangled threads and puckered fabric are common beginner issues that are rather easy to avoid. Here are some tips:
- Stretch your fabric well in the hoop before you start stitching. It has to be drum tight. If needed, adjust the fabric tension as you work, and use a screwdriver to tighten the tension screw. A well-stretched material will prevent fabric puckering and distortion of the design.
- Work with shorter threads. When the thread is pulled through the fabric, its surface is damaged, and it starts to stick to itself and tangle. So, the longer the thread, the more damage it will get while working. As a consequence, it will tangle, knot, and twist more.
- Use a bigger needle. If your thread is not too long, but still tends to tangle, try using a bigger needle. It will make a wider hole in the fabric when you stitch, and it will protect your thread from bruising. Smoother threads tangle less.
- Try thread conditioner or beeswax. These additional materials are created to make your thread smoother and prevent tangling. These tools are especially helpful when working with metallic threads.
Finishing & care
It might be an unpopular opinion, but the hand embroidery process does not end with the last stitch. There are a few steps to take before the embroidered piece is truly finished.
First, remove the pattern-tracing marks and wash your embroidery. Of course, there will be some exceptions – like embroidery on paper or other non-washable items. Hand embroidery threads are colorfast, and you can wash the embroidered piece in lukewarm water with a neutral detergent.
Then, dry your textile art. Never put the embroidery in a tumble dryer; lay it flat and let it dry naturally. You can remove most of the moisture by placing the fabric between two layers of the towel and rolling it tightly.
Finally, when the piece is almost dry, iron it. Do not use steam, and apply the hot iron to the back side of the embroidery, or layer a cotton fabric on top. This will prevent the stitches from flattening and distorting.
Finish your embroidery into a useful item or frame it for display. You can use your hoop as the frame to display your textile art.
Additional learning resources:
- Ways To Trace a Pattern on Fabric: Five Methods
- How to Transfer Embroidery Pattern to the Fabric: Tools and Materials
- How to Clean Pattern Transfer Marks From Fabric
- Frame Embroidery in a Hoop: Six Methods of finishing the back of the hoop
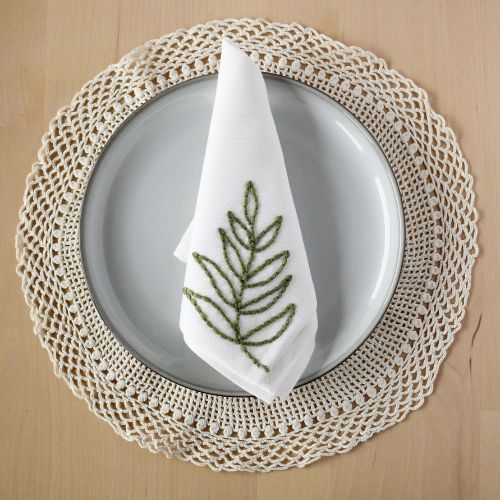
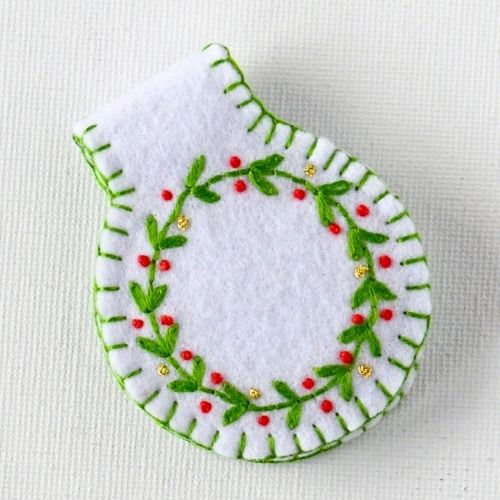
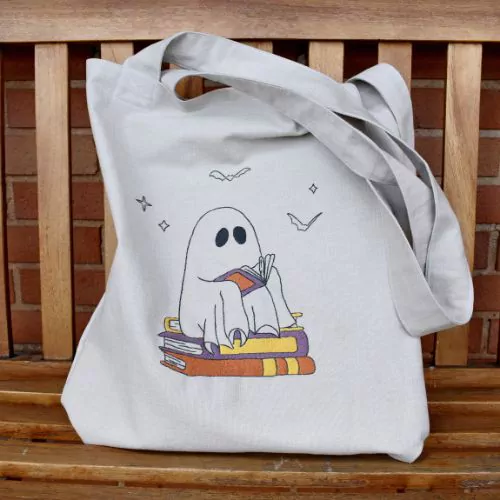
Step 5: Practice with beginner embroidery projects
After learning hand embroidery stitches with samplers, it’s time to move on to applying them in small projects, as practical application is the best way to learn and develop your skills.
These beginner projects focus on simple shapes, limited color palettes, and a small number of stitches. On the other hand, each project will teach you a new stitch, skill, or approach to hand embroidery, letting your experience grow and your skills develop gradually.
Ideal hand embroidery projects for beginners
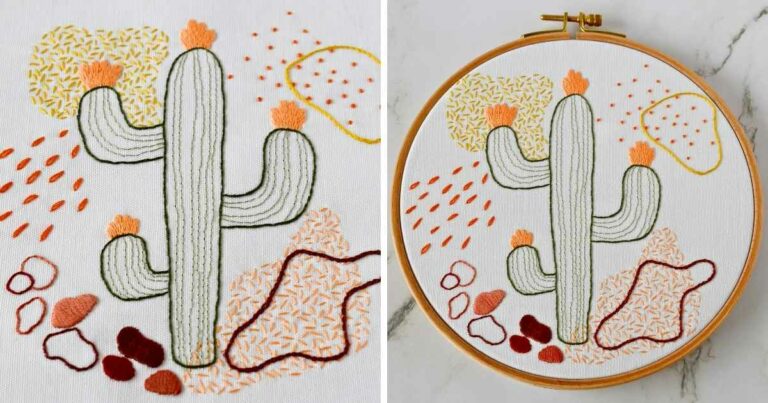
Beginner Embroidery Stitches + Free Cactus Hand Embroidery Sampler To Learn Basics
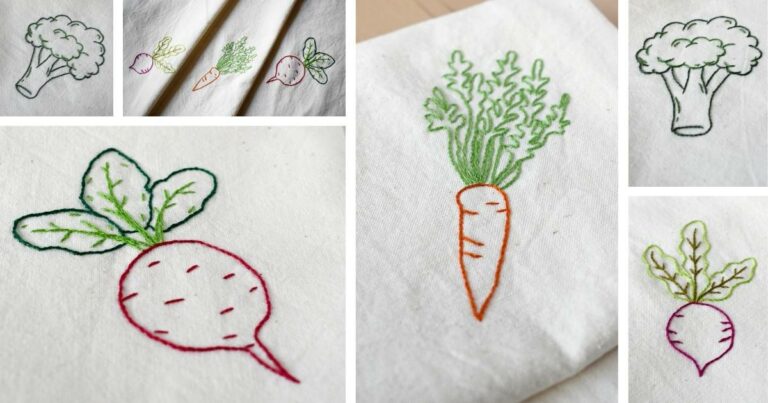
Spice Up Your Kitchen With Veggie Embroidery: Tutorial & Free PDF Pattern Download
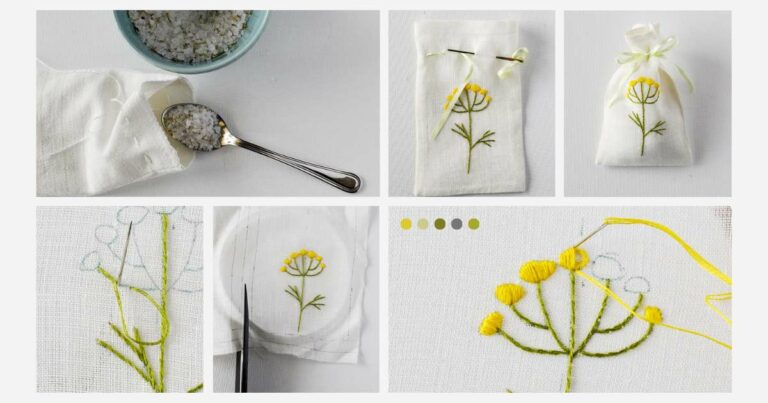
Scented sachets with a floral embroidery DIY tutorial
Step 6: What to learn next
Once the basics feel comfortable, embroidery skills can grow in many directions. For example, you can learn more complex, decorative stitches and take on more demanding embroidery projects, like these:
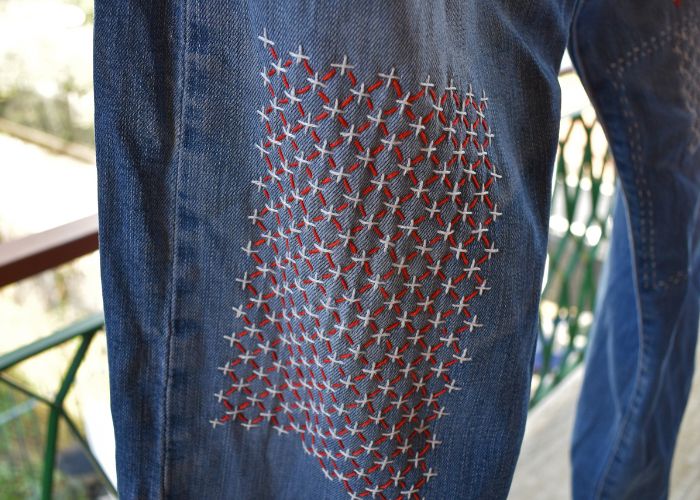
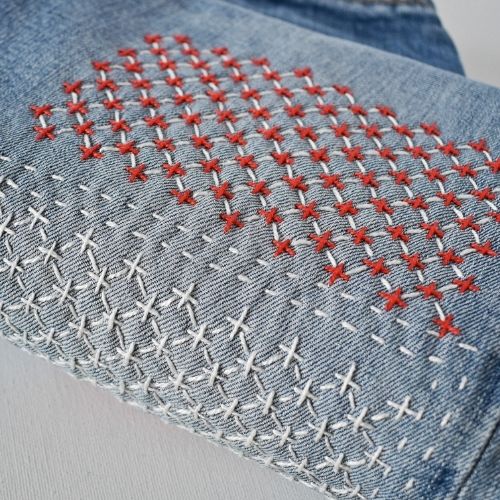
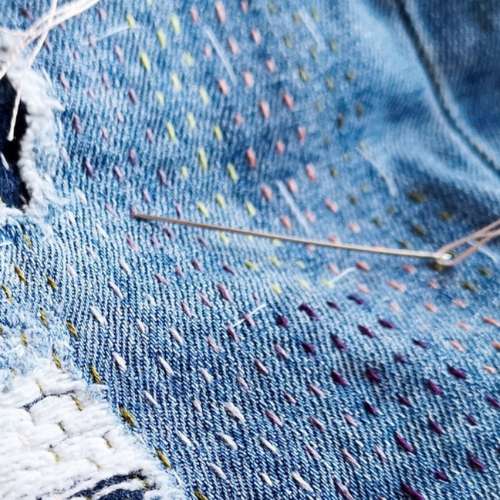
Another road you can take is visible mending, in which you apply your hand embroidery skills to mend and decorate garments. Learn some new stitches for mending and try these projects:
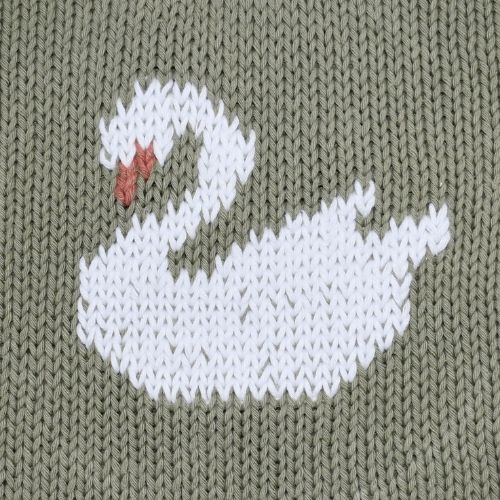
Also, you can choose to create home decor objects or embellish your garments, combining hand embroidery with sewing.
Exploring new stitches and techniques helps develop a personal style, while trying various practical projects gives you a sense of accomplishment and utility.
Resources for further learning:
- Library of hand embroidery stitches
- DIY projects and tutorials
- Practical Embroidery YouTube channel
- Embroidery patterns – Shop
Beginner hand embroidery FAQ
How long does it take to learn hand embroidery?
Basic stitches can be learned in a few hours. Confidence grows with regular practice.
What tools will I need to start embroidering?
A piece of non-stretchy fabric, a needle, thread, scissors, a tracing tool, and a hoop.
Is hand embroidery expensive to start?
Hand embroidery is one of the most affordable textile crafts, especially for beginners.
What is the best stitch for beginners?
Backstitch, Running stitch, and Satin stitch are ideal starting points.
Where can I use my skills when I learn to embroider?
Hand embroidery is highly practical. Use your skills to mend your clothes, make home decor items or handmade gifts, create textile or mixed-media art, or use it as a meditation or journaling medium.
Over to you
This beginner roadmap is designed to make learning hand embroidery simple and enjoyable. Bookmark this page, follow the steps, and return whenever a refresher is needed.
For new tutorials, free patterns, and structured embroidery guidance, explore the resources linked above or join the Practical Embroidery newsletter and get hand embroidery tips and inspiration directly into your inbox.