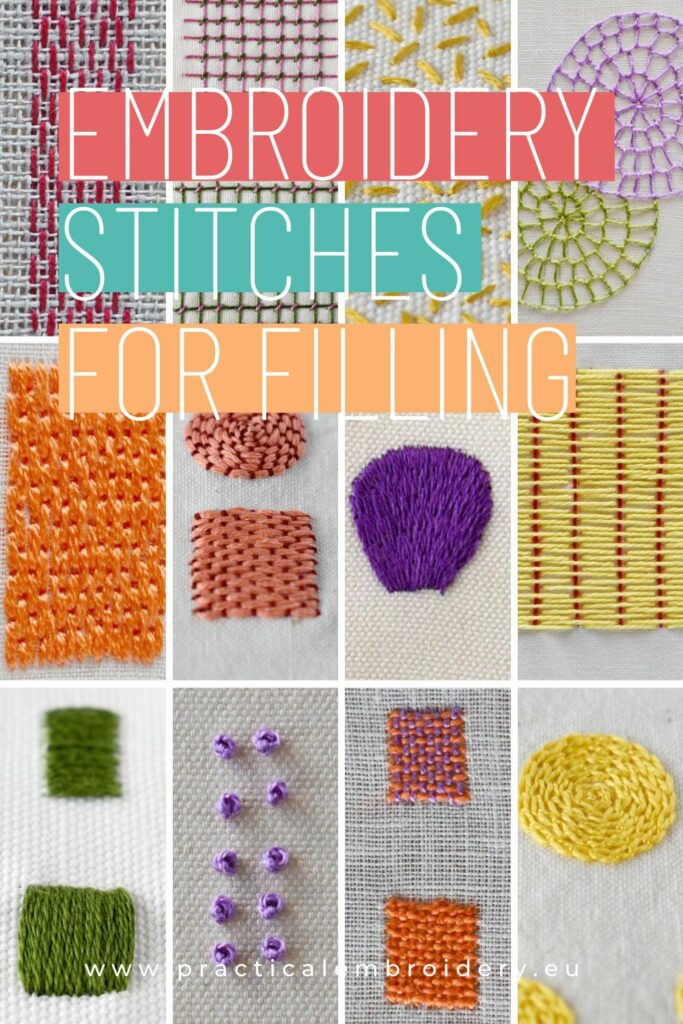
The Ultimate Guide to Embroidery Stitches for Filling: Master Texture, Coverage & Dimension
Hand embroidery transforms fabric into art, but the secret to stunning designs lies in how you fill your shapes. Whether you want silky-smooth petals, textured landscapes, or delicate geometrical effects, choosing the right embroidery stitches for filling makes all the difference.
In this comprehensive guide, you’ll discover 12 essential hand embroidery stitches for filling areas of any size or style, from photo-realistic thread painting to whimsical scattered textures.
Learn how to:
- Achieve flawless coverage with solid fills like Satin Stitch and Long & Short Stitch.
- Add depth and dimension with textured techniques like French Knots and Chain Stitch.
- Work efficiently on large areas using laid and couched stitches (hello, Jacobean Couching!).
- Create airy, lightweight effects with open fills like Seed Stitch and Running Stitch.
Plus, an extensive list of embroidery projects to practice all these stitches!
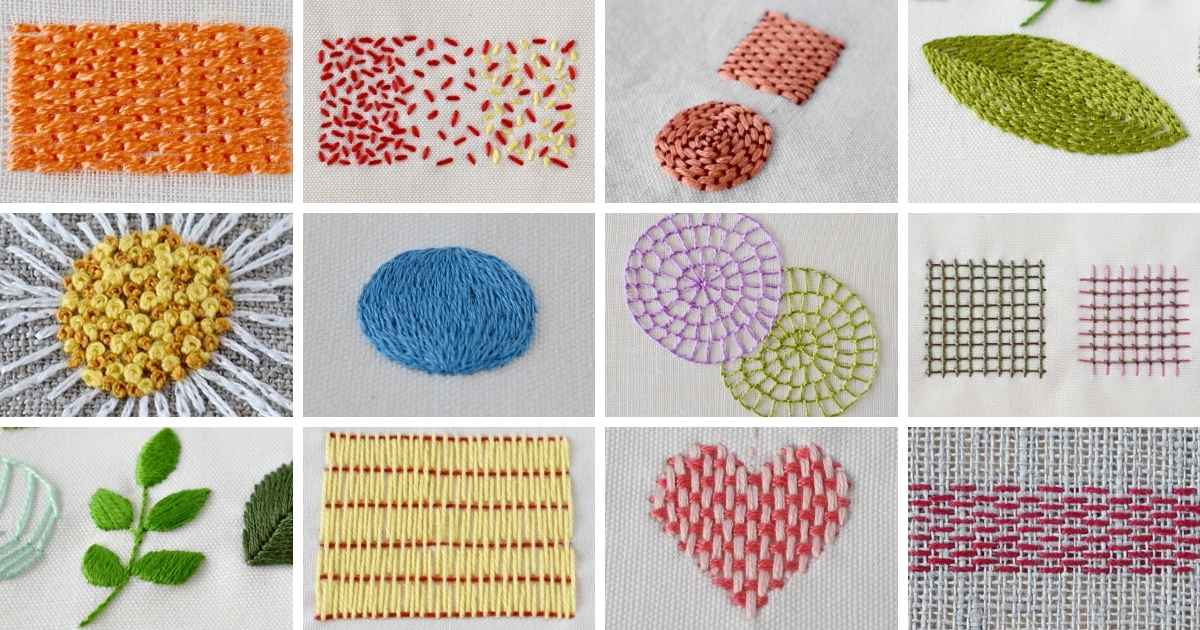
Embroidery stitches for solid fills
Solid fill stitches are the perfect choice when you need smooth, seamless coverage in your embroidery project, whether for leaves or petals, bold lettering, or detailed designs. These techniques for filling create a polished, unbroken surface by carefully placing threads side by side or in layers, ensuring no gaps or fabric shows through.
Popular filling stitches like the Satin Stitch, Long and Short Stitch, and Brick Stitch offer varying levels of control, making them ideal for both small details and larger areas. While a Satin Stitch is the best option for smaller details, Long and Short Stitch or Brick Stitch will be optimal for both small and extended areas.
Satin Stitch
Satin Stitch, also known as Damask stitch, is a hand embroidery technique, worked in close, parallel rows. It is widely used in many hand embroidery styles and has a long history.
The stitch is worked by carrying the thread across the shape to be filled and returning underneath the material next to the made stitch. The stitches may be performed in any direction and may vary in size, for example, when filling in a leaf or heart shape.
Learning variations of Satin Stitch, like Padded Satin Stitch, Leaf Stitch, or Surface Satin Stitch, will expand the scenarios in which you can apply this embroidery filling technique.
Long & Short Stitch
The Long and Short Stitch is a popular hand embroidery technique for filling. A series of straight stitches of various lengths are positioned to cover the fabric surface smoothly. The stitch is also called thread painting, silk shading, or simply shading stitch.
The thread painting technique is popular in freehand modern embroidery for shading flower petals, birds, and animals. In Jacobean crewelwork, larger botanical elements like branches and animals are depicted with Long and Short stitches.
Silk shading embroidery uses only this stitch for the entire embroidery project (only Split Stitch or Stem Stitch is added to the outlines). The stitches’ flow and the floss colors’ gradual blending create photo-real images.
After trying the basic Long and Short Stitch, read the article Long and Short Stitch for Round Shapes. Learn how to Embroider a Sphere and a Circle to make one more step in your learning journey.
Brick Stitch
Brick stitch is a variation of a Back Stitch used to fill spaces in your hand embroidery design.
The method of embroidering this filling stitch is simple. First, embroider the first line of an area you want to fill with a brick stitch with a backstitch. Then, embroider the second row of the back stitch close to the first one, but make the stitches offset from the first line. Adding rows of backstitches, one above the other, will create the visual effect of a brick wall.
This hand embroidery filling stitch best fills regular square shapes or straight lines. If you want to use it for round or oval shapes, you will need to adjust the length of the backstitches to maintain the brick pattern throughout the form.
Embroidery techniques for textured and decorative filling
Textured filling stitches are the perfect choice if you want to add depth and tactile interest to your embroidery. These stitches create dense, dimensional surfaces, but because they require more time and precision, they’re best suited for smaller areas or special accent details.
Each technique offers a unique surface effect:
- French Knots produce a raised, pebbled texture—ideal for a soft, organic feel.
- Chain Stitch Filling forms neat, interlocking rows of loops, great for a rhythmic, structured look.
- Weave Stitch mimics woven fabric, allowing you to experiment with classic weaves or custom patterns.
French Knots
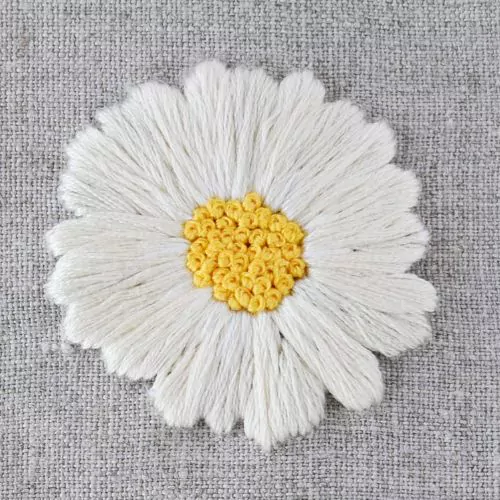
This cute stitch is a textural decorative hand embroidery technique. The French knot is an embroidery technique in which the thread is knotted around itself in a specific way. This stitch has a reputation for being one of the most difficult, but I find it very simple, and I like to use it.
Use French Knots for filling when you need to create a textural surface. This stitch is widely used in floral embroidery to fill the flowers’ centers or depict blooms. It is also excellent for imitating all soft surfaces, like a cloud or a sheep.
Weave Stitch
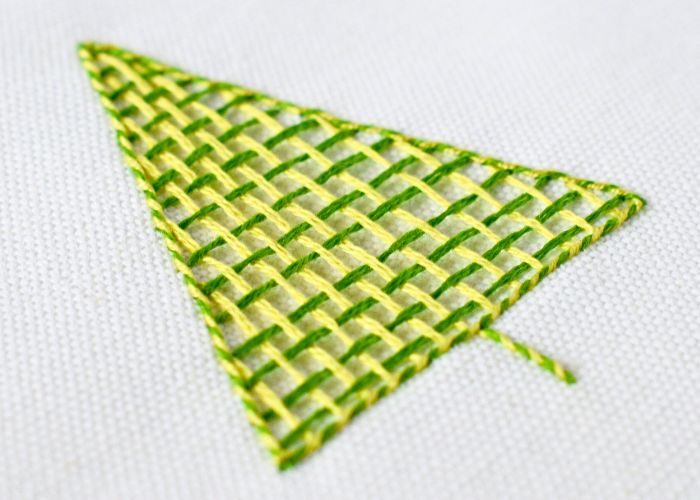
Weaving stitch is something in between embroidery and weaving. First, stitches are made in horizontal or vertical parallel lines. Then, the other stitches are made vertically or horizontally, weaving through the horizontal/vertical stitches at a straight angle.
Weave stitch is a great fill stitch for filling the background of the design or adding intricate details.
You can create very decorative designs by mixing the colors of the horizontal and vertical stitches. Also, you can change the weaving style and make twill, basket, or satin weaves instead of plain weaving.
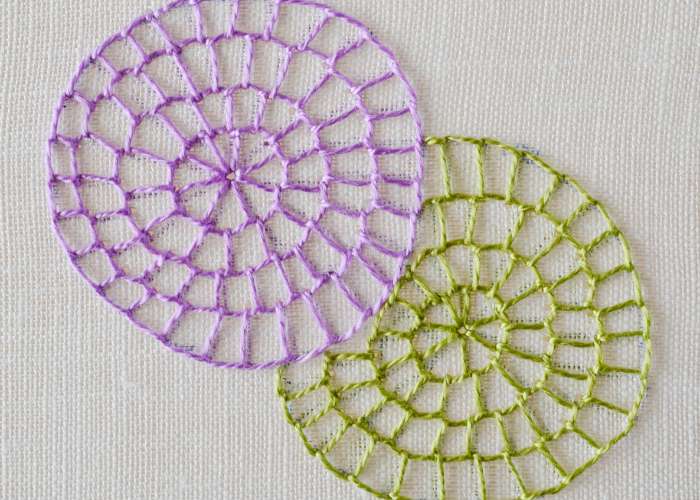
Chain Stitch Filling
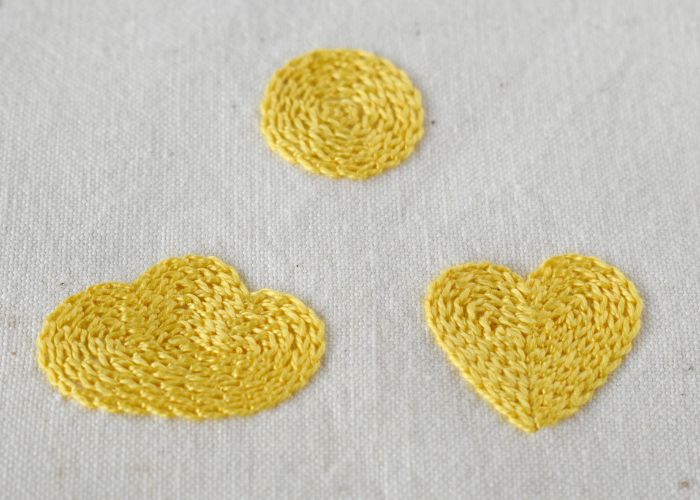
Chain Stitch filling is a hand embroidery technique where we use a regular Chain Stitch or a reverse Chain Stitch to fill large areas.
This filling technique is versatile and easy to implement. Chain Stitch is a perfect technique for filling large and small areas. This embroidery method offers so many possibilities that the final results can be very different.
Here are some options for coverage with Chain stitch:
- Fill in circles.
- Circle filling with a change of direction.
- Coverage with horizontal lines (same direction or changing directions).
- Making vertical lines to fill the shape.
- Creating swirls and waves inside the shape to add texture and depth.
You can use the Chain Stitch filling technique for any surface embroidery project and fill various objects with textural stitches, from leaves and berries to sweaters and carpets.
Embroidery stitches for laid and couched fills
For bold, elegant coverage—especially in large areas—laid and couched filling stitches are a game-changer. These techniques involve laying long threads across the fabric and securing them with small anchoring stitches, creating smooth, flowing surfaces with minimal bulk. The Couching Stitch offers versatile control, allowing you to arrange threads in straight lines or gentle curves. The Burden Stitch builds a sturdy, woven-like texture, perfect for historical or ecclesiastical embroidery. Meanwhile, Jacobean Couching adds decorative flair with intricate geometric or floral patterns, making it a standout choice for crewelwork and traditional designs. Whether you need speed, structure, or artistic detail, these stitches deliver stunning results with professional polish.
Couching Stitch Filling
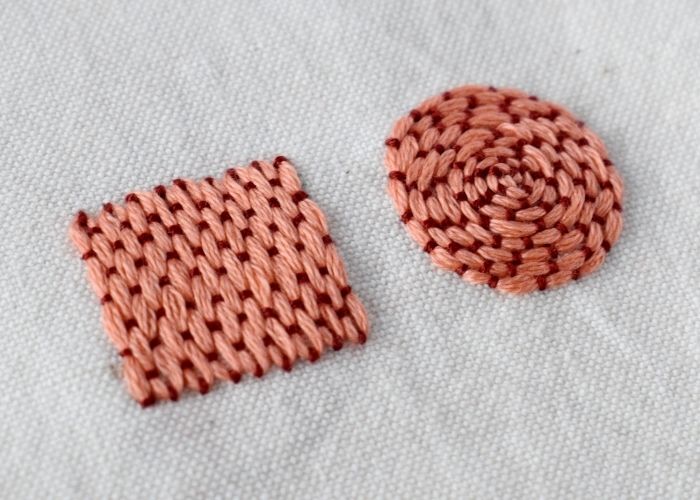
Couching Stitch Filling is an embroidery method for filling with a Couching Stitch. This technique is flexible and straightforward to make. You can fill areas of any shape or size with this stitch.
The method is the same as the Couching Stitch: a laid thread is attached to the surface with tiny couching stitches. This time, the thread is laid to cover the surface instead of forming a line.
You can position couching stitches to create a brick pattern, diagonal lines, or other shapes. For example, the Italian couching technique for goldwork creates patterns by skipping the couching stitches to develop shapes that reflect light differently.
Besides filling extensive areas with Couching Stitch Filling, you can create various shapes – circles, triangles, or squares – depicting flowers, leaves, or other objects with a woven surface.
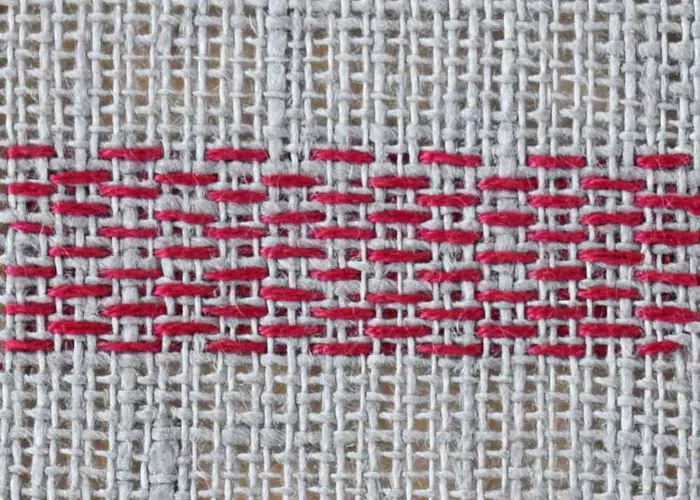
Burden Stitch
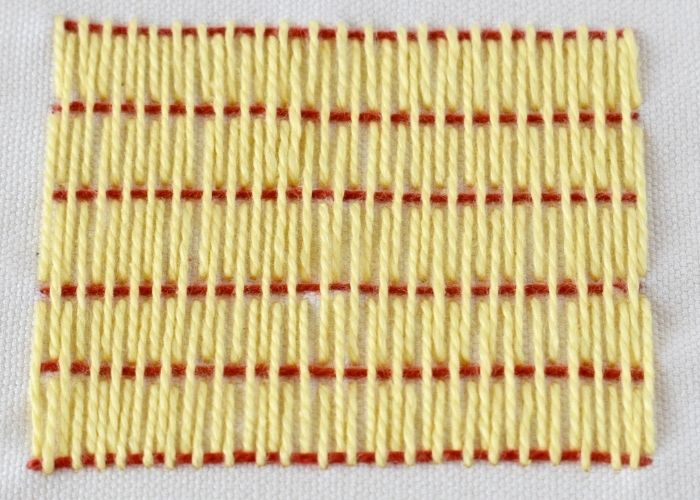
Burden Stitch is a decorative filling technique from the Couching Stitch family. Horizontal threads are couched to the surface with long vertical stitches offset between the rows.
The density of the filling varies and can range from very dense stitches that fully cover the fabric to a decorative net that shows plenty of base material.
Burden Stitch is a traditional embroidery technique for filling extensive areas of fabric. It is simple and relatively fast to make. This technique also allows for combining contrasting colors, color shading, and various densities, making it versatile in classical and modern surface embroidery.
Jacobean Couching
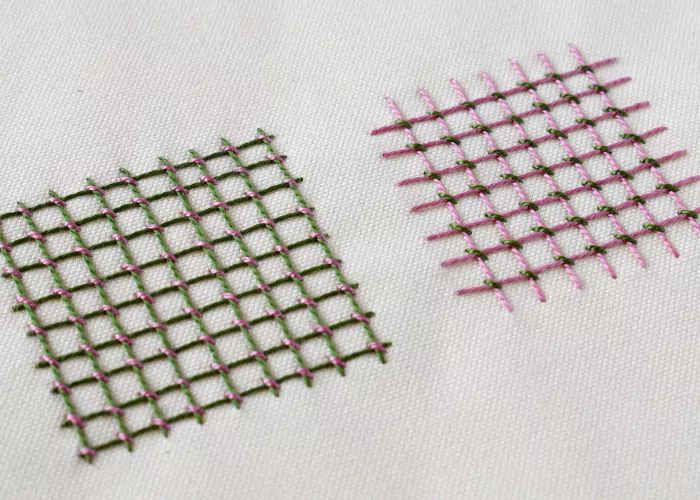
Jacobean couching, also called Trellis, is a filling stitch from Jacobean crewelwork used to fill large areas of designs.
Don’t be intimidated by the name. The technique of the Jacobean Couching stitch is surprisingly simple. A grid of long horizontal and vertical laid stitches is couched with a diagonal stitch on each intersection of the laid threads. With some practice, you’ll master this technique in no time.
The Jacobean Couching technique is not just a filling stitch; it’s a work of art. You can use one, two, or even three colors to create a decorative Trellis. This hand embroidery technique is very ornamental, adding beauty to large areas of the embroidery work, such as backgrounds, shapes like floral petals, household objects, or abstract shapes.
Embroidery techniques for light and open fills
Not every embroidery project calls for dense, solid coverage—sometimes, a delicate, airy texture is just what you need. Light and open fill stitches create subtle dimension while allowing glimpses of the fabric beneath, making them perfect for backgrounds, shading, or adding a touch of whimsy to your designs. These stitches work quickly and use less thread than dense fills, making them ideal for larger areas when you want a relaxed, effortless look.
Embroidery stitches for light filling are great because they are:
- Quick to stitch, ideal for covering large areas without heavy thread buildup.
- Create depth when layered or combined with other techniques.
- Allow fabric to show through, adding a soft, ethereal quality.
I chose three versatile stitches that offer different degrees of openness and texture:
- Running Stitch Filling – A simple, rhythmic pattern that creates a dashed-line effect, great for a minimalist or sketch-like appearance.
- Seed Stitch – Tiny, scattered stitches that add gentle speckled texture, perfect for soft shading or organic motifs like foliage.
- Blanket Stitch Filling – Looped stitches that form a playful, slightly raised border, often used for edging but equally charming as an all-over fill.
Whether you want a whisper of texture or a structured yet open design, these stitches provide beautiful, lightweight coverage with effortless charm.
If you care to learn more about open filling stitches and scroll through the extensive list of 22 light filling techniques, head to the article “Open Filling Stitches For Light and Airy Fills in Modern Hand Embroidery“.
Running Stitch Filling
Darning stitch, also called Running Stitch Filling, is created by alternating parallel rows of the running stitch to create a pattern with both negative and positive elements.
You can use the Darning stitch for decorative purposes, as a filling stitch to add depth and texture to your embroidery project. A variation of the stitch, Kogin, can also be used to create decorative pieces.
Seed Stitch
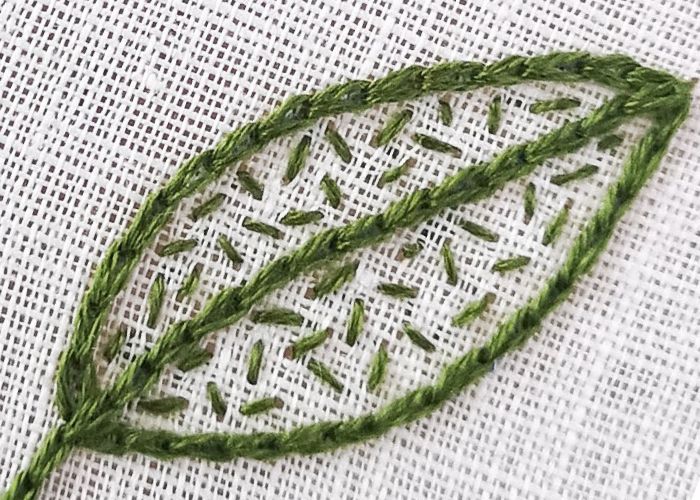
Rice Stitch, also known as Seed Stitch, is the basic filler stitch. It is a simple series of Straight stitches that are of even size and spaced apart, but go in random directions. It can also be worked in a uniform pattern when you align the stitches in the same direction.
Depending on how dense your stitches are, you can get a very light filling or a very heavy and textural one. You can also play with colors—mix colors and make a confetti filling, or use the same color as a fabric and get a simple but textural look.
Blanket Stitch Filling
Blanket stitch filling is a variation of the Blanket Stitch used to fill large or small areas of the design.
The method of this embroidery stitch is straightforward. We start with a row of blanket stitches. Then, we add one more row of stitches above the first one. The legs of the new row overlap the top part of the stitches in the previous row.
This type of filling stitch is very versatile. For example, you space the stitches further away from each other. In that case, you can create a net-like pattern to make the background material visible. If, instead, you place the stitches very close to each other, the fabric will be covered, and the stitches will look like satin stitches with additional horizontal lines.
Besides that, you can create a Blanket Stitch Filling in Circles. Start with a Buttonhole Wheel and add more rows of Blanket Stitch on top.
12 Embroidery stitches for filling – video tutorial
If you prefer watching video tutorials instead, I prepared a long and detailed video guide on all twelve hand embroidery stitches for filling listed in this guide. Watch this video tutorial below or head to the Practical Embroidery YouTube channel for the full watching experience.
Over to you
I think each of us has a go-to stitch that we use over and over again. Trying new techniques and changing things up can result in new designs, more fun stitching, or even a new favorite filling stitch!
Which hand embroidery stitch for filling is your favorite? Please share in the comments!
Don’t miss a thing!
Follow me on YouTube, Instagram, Facebook, Flipboard, Telegram and Pinterest. On the other hand, you can subscribe to the Practical Embroidery newsletter and get embroidery tips straight to your inbox every week!
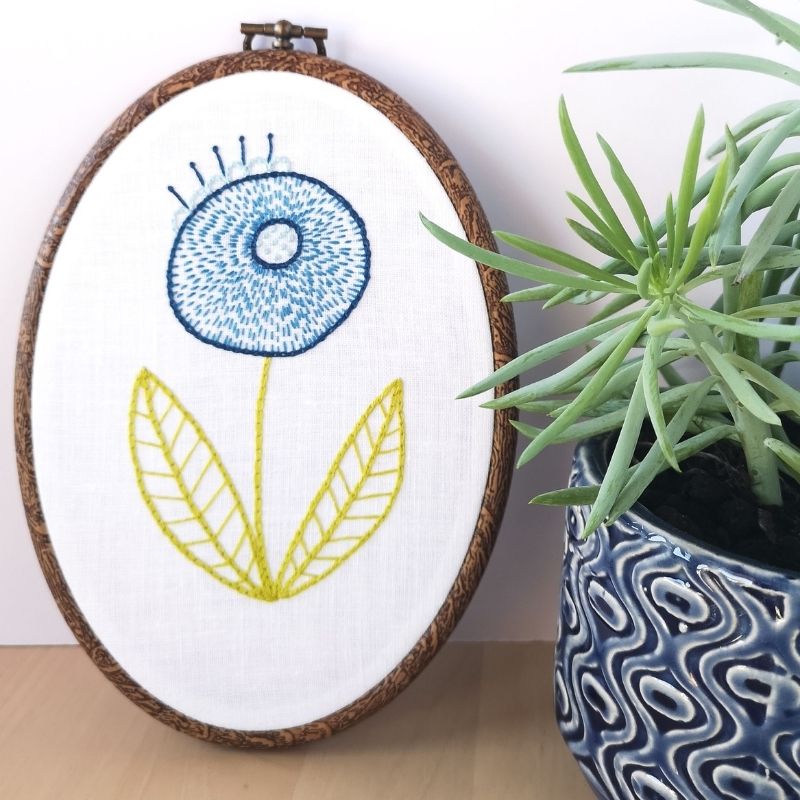
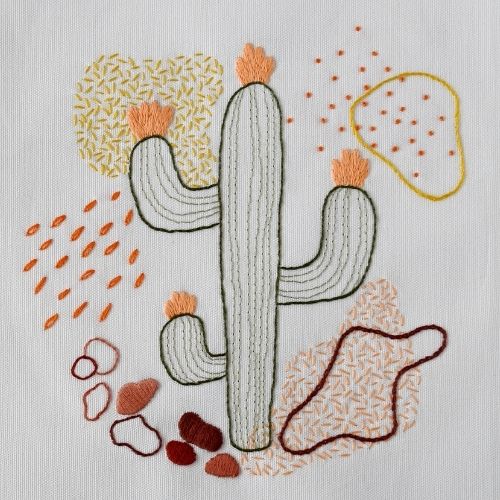
Projects to practice these filling stitches
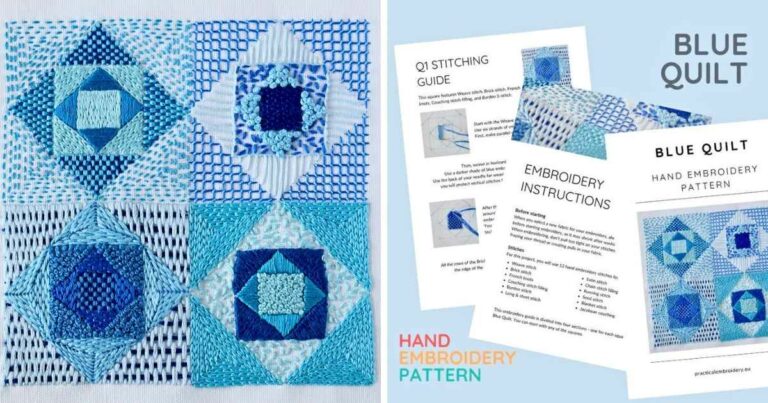
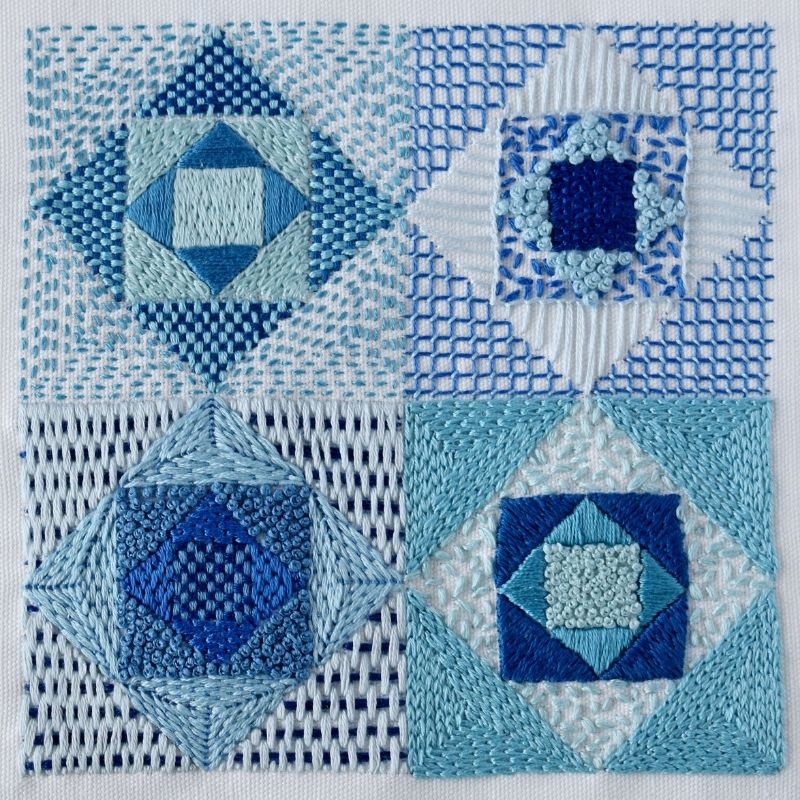
Blue Quilt – Embroidery PDF Pattern – 12 Stitches For Filling
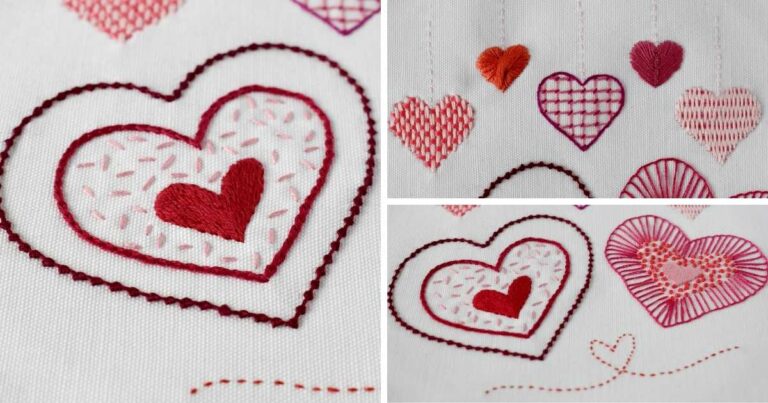
How to Embroider Hearts: 13 Ways to Stitch a Heart
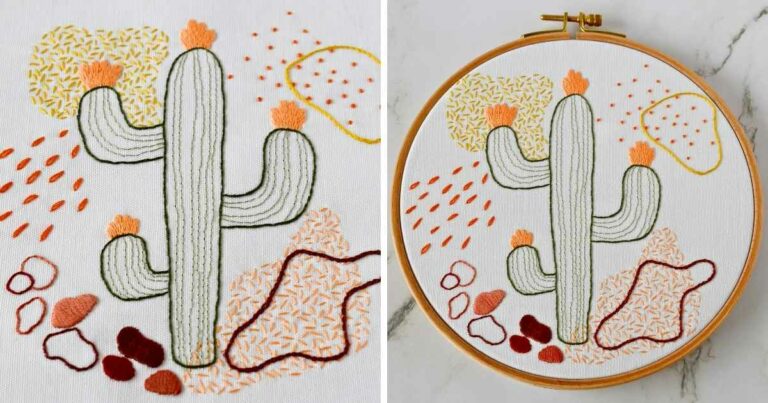
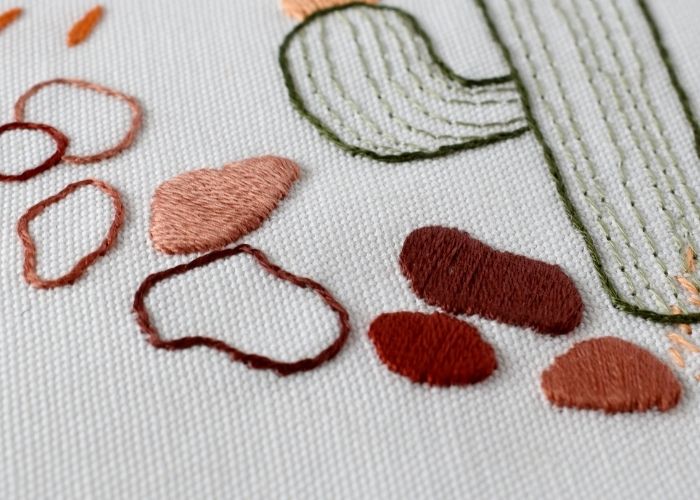
Beginner Embroidery Stitches + Free Cactus Hand Embroidery Sampler To Learn Basics
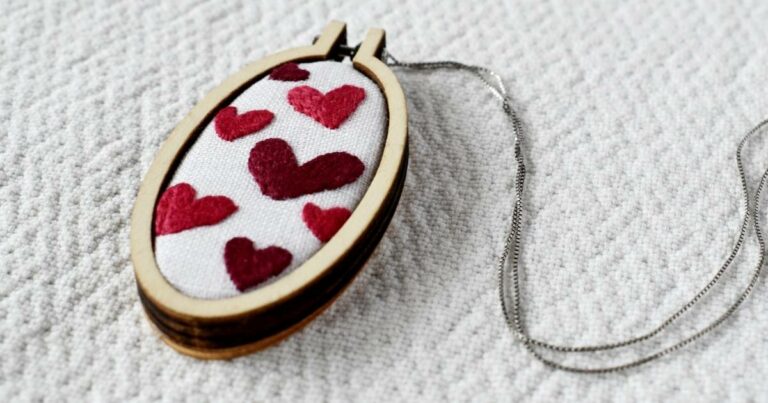
Mini Hoop Pendant Tutorial + Free Heart Embroidery Pattern: Create Stunning Gifts!
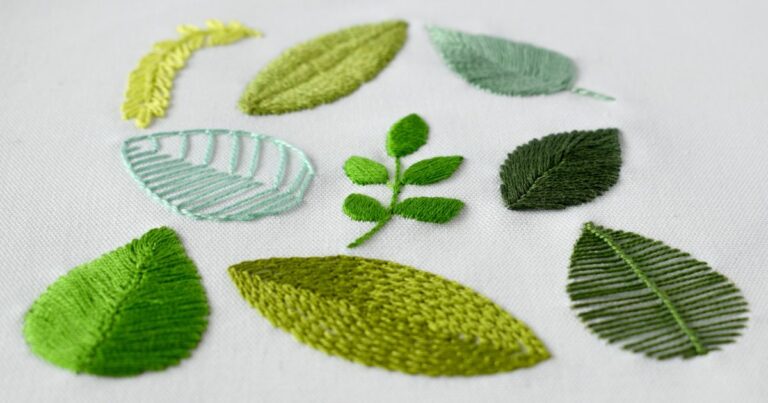
9 Ways to Embroider Leaves: Free PDF Pattern + Step-by-step Hand Embroidery Tutorial
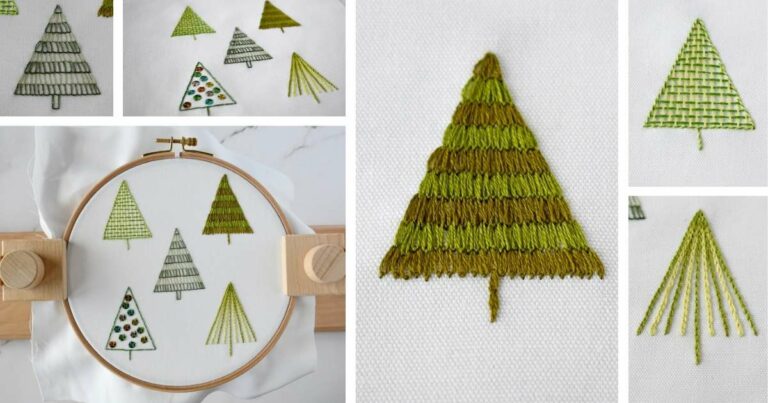
How To Embroider a Christmas Tree: 5 Simple Methods + Free PDF Pattern
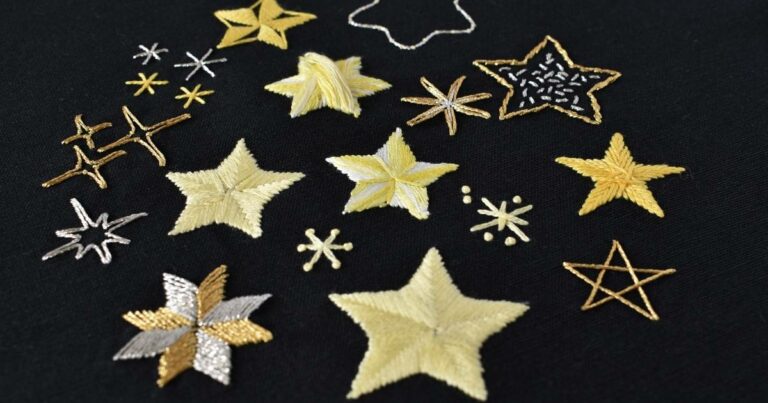
How to Embroider Stars and Sparkles: Hand Embroidery Stitches + Free Sampler Download
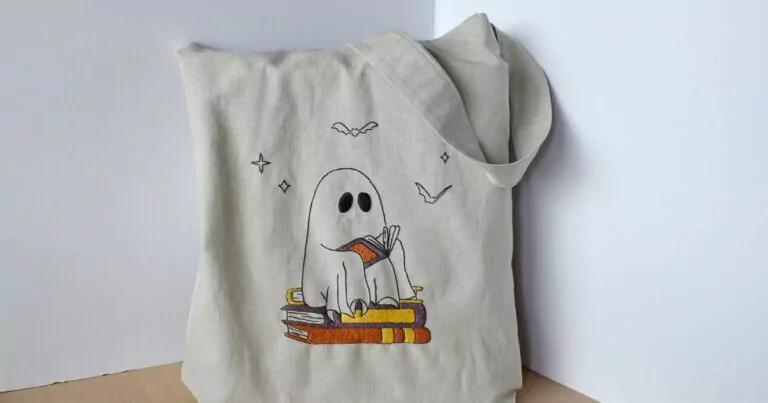
DIY Hand Embroidered Tote Bag: Complete Guide with Free PDF Pattern